Analyses
- Permissions
- Bookings
- Booking Sequence Check
- Time and Attendance
- Replacement Badges
- Change Log Persons
- Persons
- Unused Badges
- Visits
- Presence
- Absences
- Qualifications
- Alarm Scenarios
- Workflow
- Scan for Bookings
- GDPR Users
- GDPR Persons
- Security Log
- Employee Logins
- Server Log
- Zone Lists
- Quiz Report
- Device Events
- Action Protocol
Permissions
Use the Permissions menu to determine which persons are authorized to access which devices and at what times.
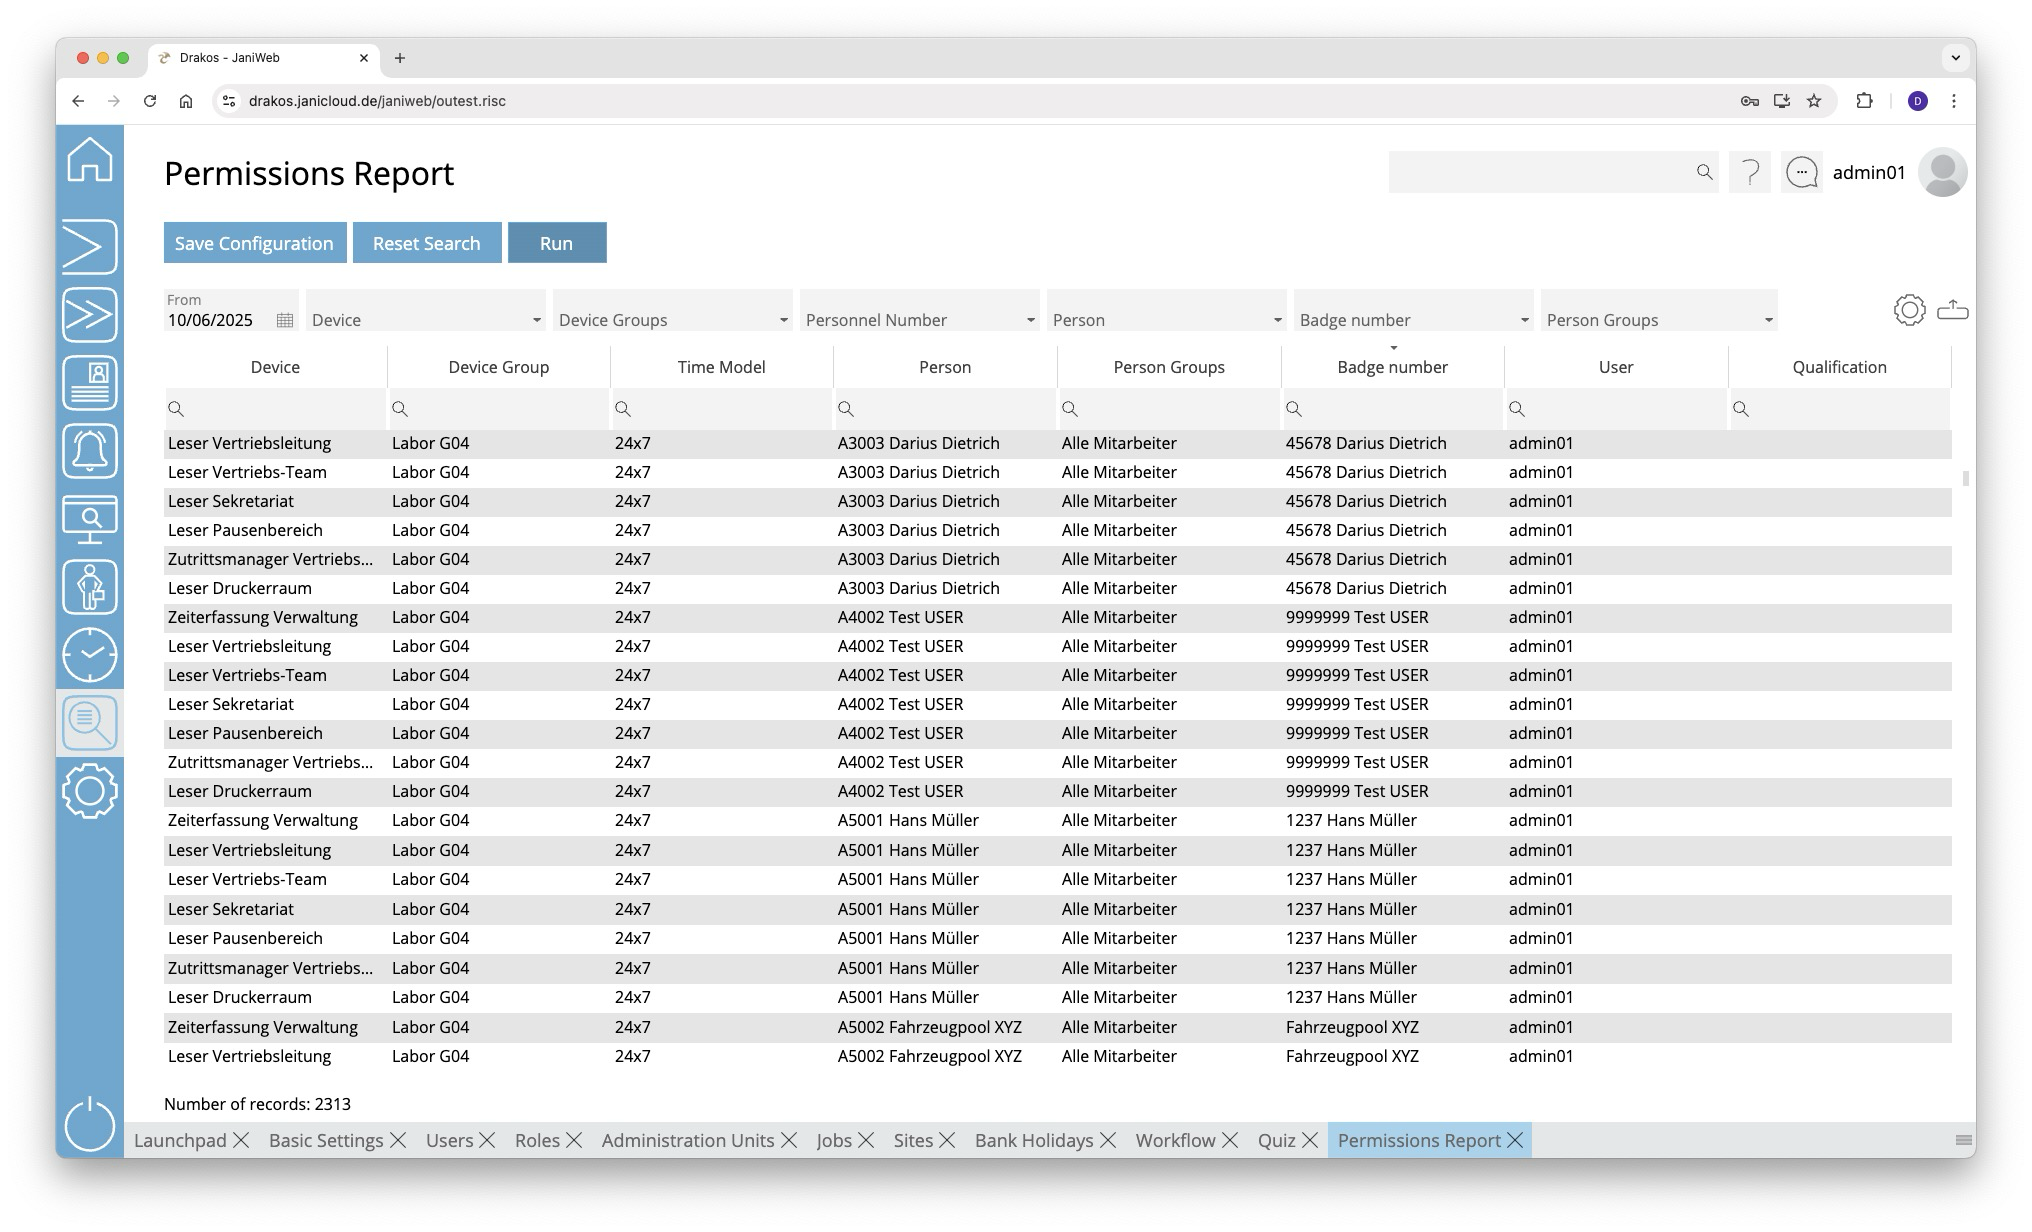
Creating the report
- Select the date for which you want to generate the report.
- (Optional) Use the additional fields to narrow the report. For example, you can find out which persons are authorized on a particular device or on which devices a particular person is authorized. You can also display permissions for a badge number or person group.
- Press Run to start the report.
Further options with the report
- Select columns to display: Press the gear icon. Select which columns you want to display and in which order. Arrange the columns using the mouse or the arrow icons. Press Apply to adopt the changes.
- Search in columns: Enter text or numbers in the search field (magnifying glass icon) of a column to search for names, personnel numbers, or other criteria. The entries take effect immediately: the list only displays hits.
- Export the entire list: Press the download icon. Select the format in which you want to export the list. The export files are downloaded or displayed depending on the browser/operating system settings. For details on the available export formats, see the General > Export Formats chapter of this manual.
- Save report: For details on saving reports, see the chapter General > Custom Reports.
Color highlighting
In the report, individual permissions can be highlighted in the following colors:
- Blue: The permission has been assigned by a third-party system (e.g. SAP (Janitor)).
Button Reset Selection
Press Reset Selection to reset all fields to their initial value.
TIPS
- The column User shows which user has assigned the permission.
- Double-click the column Time Model of a row to display a weekly plan for the corresponding time model.
- Double-click the column Device Group of a row to display the devices contained in the group.
Bookings
Use the menu item Bookings to output a booking list. This makes it possible to evaluate which person has booked on a device at a specific point in time.
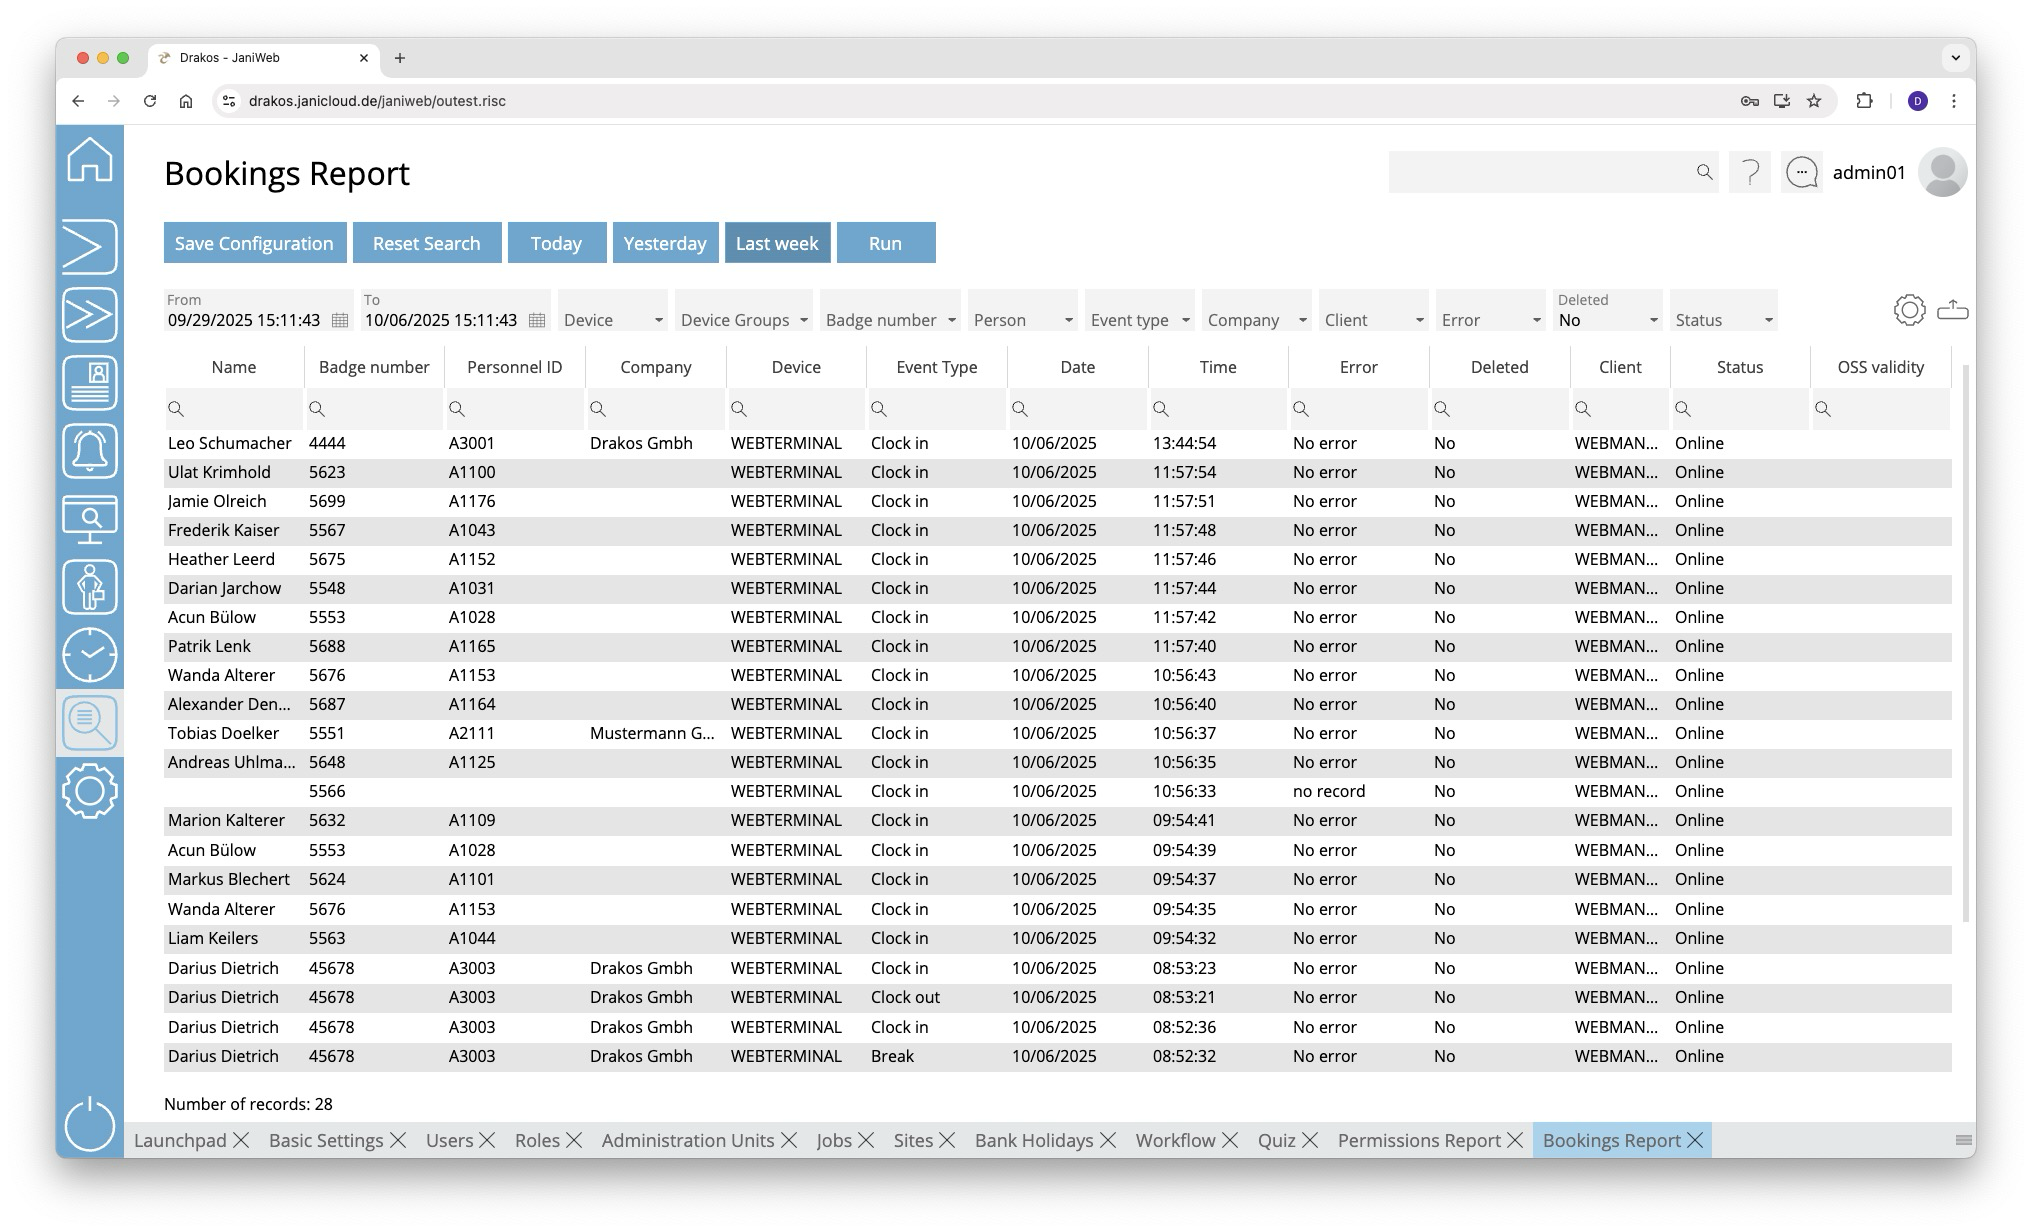
Creating the report
- Specify the time period for which you want to generate the report (From – To). Or press Today, Yesterday or Last week to quickly generate a report for the corresponding period.
- (Optional) Use the additional fields to narrow the report.
- Press Run to start the report.
Further options with the report
- Select columns to display: Press the gear icon. Select which columns you want to display and in which order. Arrange the columns using the mouse or the arrow icons. Press Apply to adopt the changes.
- Search in columns: Enter text or numbers in the search field (magnifying glass icon) of a column to search for names, personnel numbers, or other criteria. The entries take effect immediately: the list only displays hits.
- Export the entire list: Press the download icon. Select the format in which you want to export the list. The export files are downloaded or displayed depending on the browser/operating system settings. For details on the available export formats, see the General > Export Formats chapter of this manual.
- Save report: For details on saving reports, see the chapter General > Custom Reports.
Button Reset Selection
Press Reset Selection to reset all fields to their initial value.
TIPS
Double-click the column Device of a line to show details about the corresponding device.
Booking Sequence Check
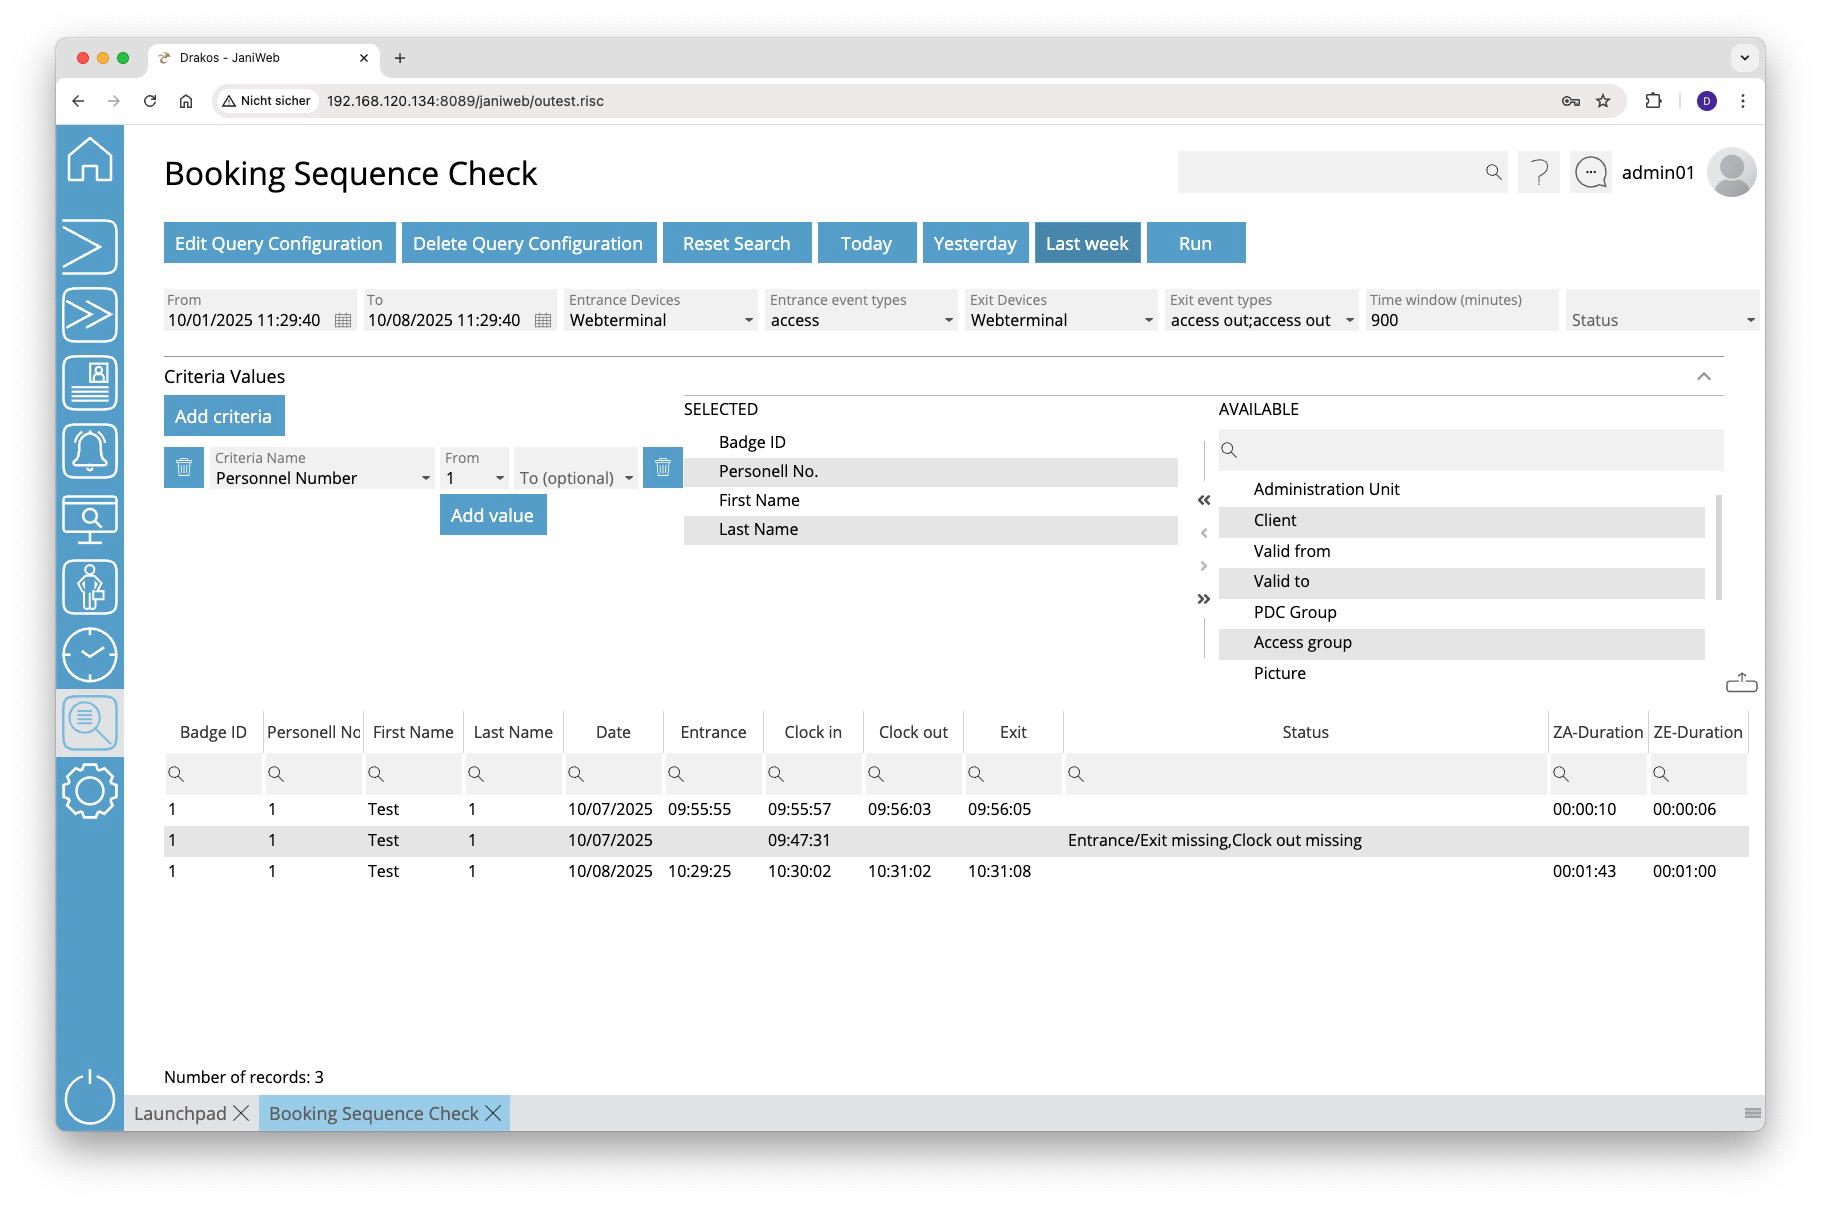
Creating the report
- Specify the time period for which you want to generate the report (From – To). Or press Today, Yesterday or Last week to quickly generate a report for the corresponding period.
- To evaluate entry bookings: Select Entrance Devices in conjunction with Entrance event types.
- To evaluate exit bookings: Select Exit Devices in conjunction with Exit event types.
- Specify a Period (minutes) to evaluate related bookings.
- (Optional) Use the additional fields to narrow the report.
- Press Run to start the report.
- Press Add criteria.
- Select the required criterion from the list field.
- Press Add value.
- In the field From, select a single value or use both fields to specify a range. You can also specify multiple values for the same criterion (Add value).
- (Optional) Add another criterion with value(s).
- Drag the data fields (columns) you want to display from the list Available to the list Selected. Or use the arrow buttons.
- Press Run to start the report.
- The values within the same criterion are linked logically by OR (one match is sufficient).
- Different criteria are linked logically by AND (all criteria must be met).
Further options with the report
- Search in columns: Enter text or numbers in the search field (magnifying glass icon) of a column to search for names, personnel numbers, or other criteria. The entries take effect immediately: the list only displays hits.
- Export the entire list: Press the download icon. Select the format in which you want to export the list. The export files are downloaded or displayed depending on the browser/operating system settings. For details on the available export formats, see the General > Export Formats chapter of this manual.
- Save report: For details on saving reports, see the chapter General > Custom Reports.
Button Reset Selection
Press Reset Selection to reset all fields to their initial value.
Time and Attendance

Creating the report
- Specify the time period for which you want to generate the report (From – To). Or press Today, Yesterday or Last week to quickly generate a report for the corresponding period.
- If you only want to evaluate bookings from certain devices/device groups, you can restrict this using the Devices/Device Groups filter.
- Specify a Period (minutes) to evaluate related clock-in and clock-out bookings.
- If you want to check whether the length of the working time has been adhered to, you can set the value Undertime (minutes)
- If the working time (difference between clock-in and clock-out bookings) is less than this value, the status Undertime is set
- (Optional) Use the additional fields to narrow the report.
- Press Run to start the report.
- Press Add criteria.
- Select the required criterion from the list field.
- Press Add value.
- In the field From, select a single value or use both fields to specify a range. You can also specify multiple values for the same criterion (Add value).
- (Optional) Add another criterion with value(s).
- Drag the data fields (columns) you want to display from the list Available to the list Selected. Or use the arrow buttons.
- Press Run to start the report.
- The values within the same criterion are linked logically by OR (one match is sufficient).
- Different criteria are linked logically by AND (all criteria must be met).
Further options with the report
- Search in columns: Enter text or numbers in the search field (magnifying glass icon) of a column to search for names, personnel numbers, or other criteria. The entries take effect immediately: the list only displays hits.
- Export the entire list: Press the download icon. Select the format in which you want to export the list. The export files are downloaded or displayed depending on the browser/operating system settings. For details on the available export formats, see the General > Export Formats chapter of this manual.
- Save report: For details on saving reports, see the chapter General > Custom Reports.
Button Reset Selection
Press Reset Selection to reset all fields to their initial value.
Replacement Badges
Use the menu item Replacement Badges to find out to which persons replacement badges have been issued. In addition, active replacement badges can be returned here.
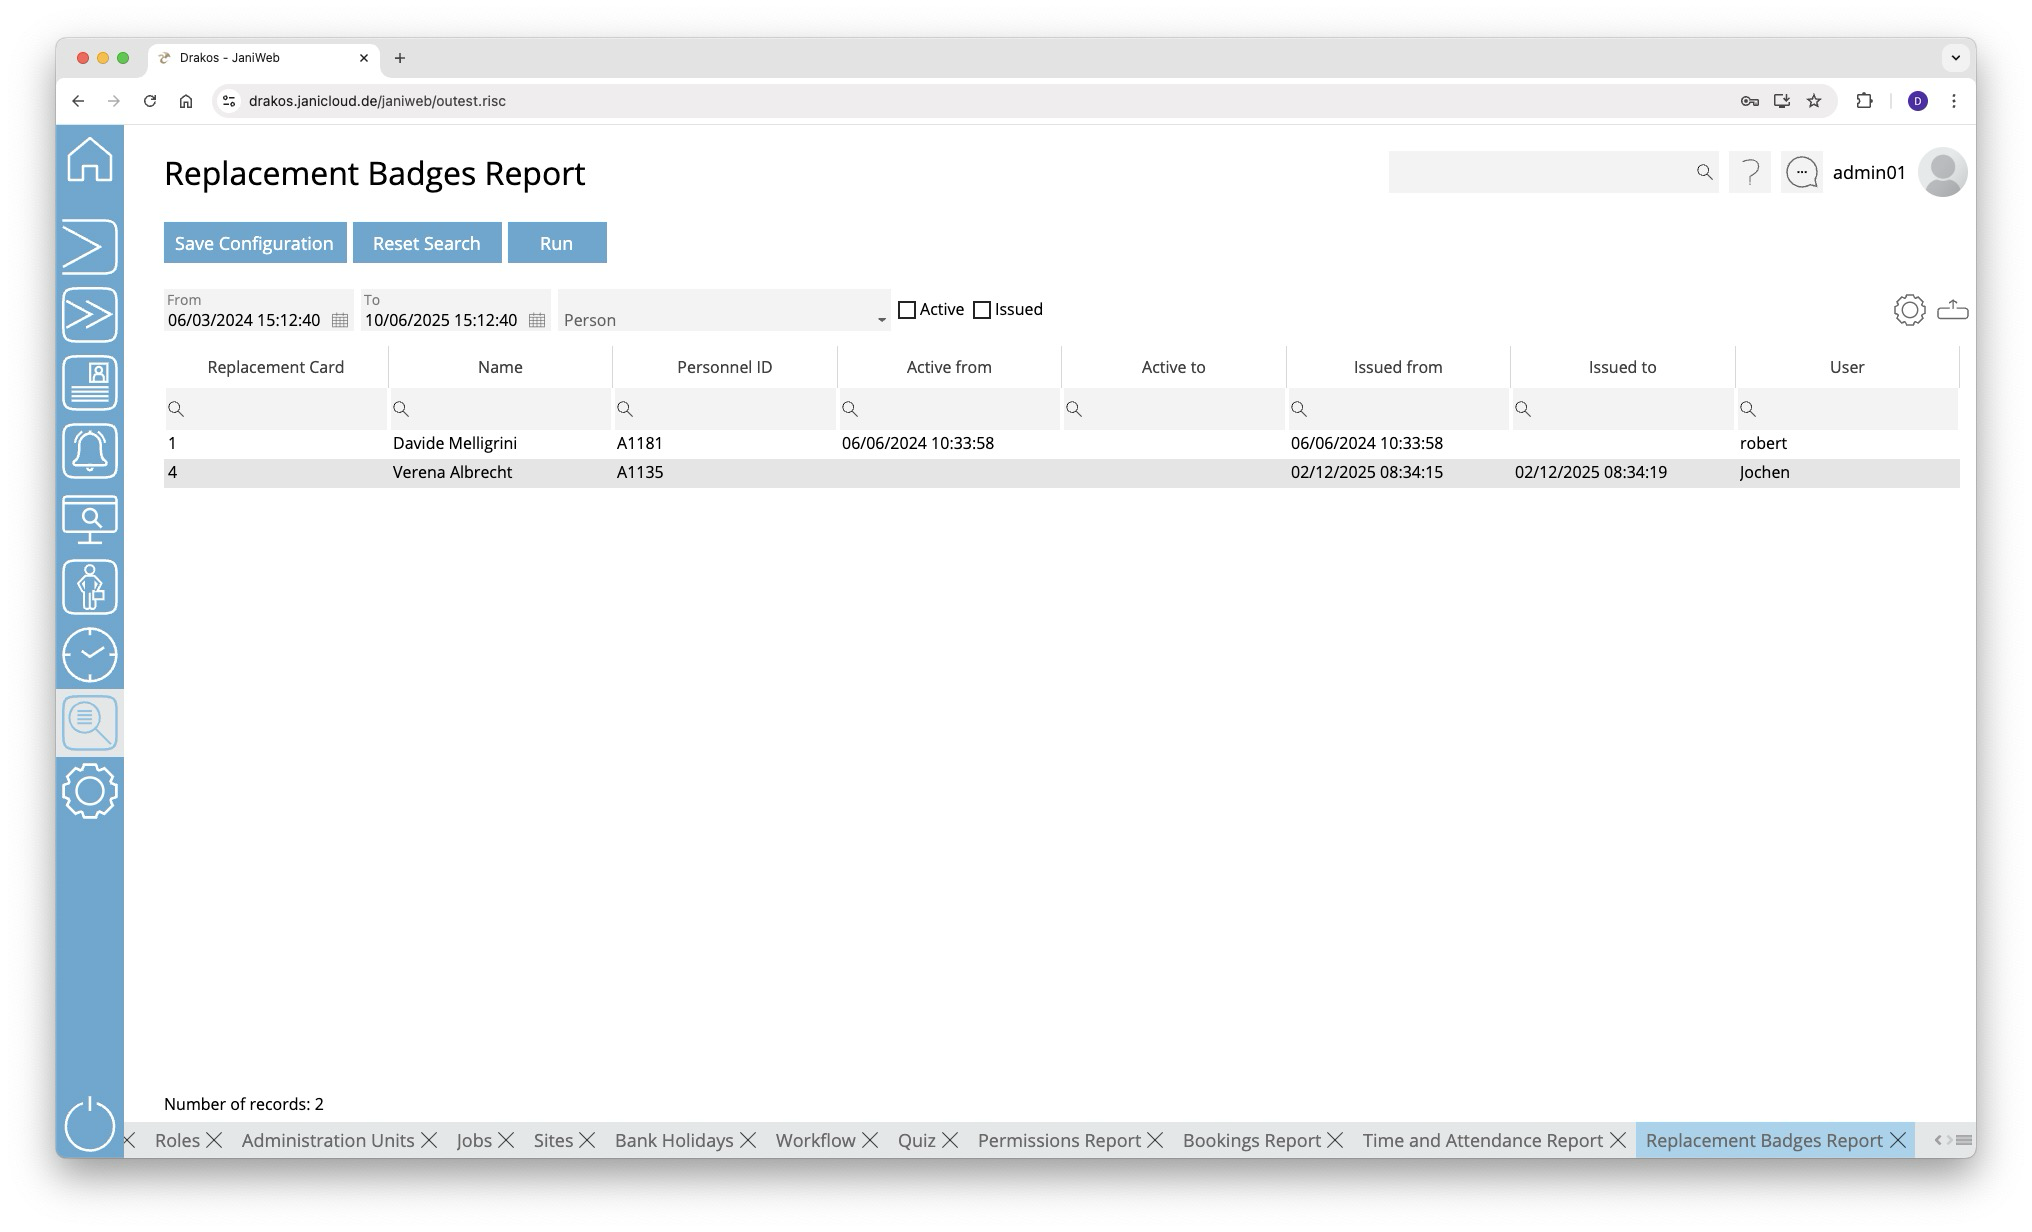
Creating the report
- Specify the time period for which you want to generate the report (From – To).
- (Optional) Select one or more Persons to narrow the report.
- (Optional) Select the options Active and/or Issued to display only active and/or issued replacement badges.
- Press Run to start the report.
Further options with the report
- Select columns to display: Press the gear icon. Select which columns you want to display and in which order. Arrange the columns using the mouse or the arrow icons. Press Apply to adopt the changes.
- Search in columns: Enter text or numbers in the search field (magnifying glass icon) of a column to search for names, personnel numbers, or other criteria. The entries take effect immediately: the list only displays hits.
- Export the entire list: Press the download icon. Select the format in which you want to export the list. The export files are downloaded or displayed depending on the browser/operating system settings. For details on the available export formats, see the General > Export Formats chapter of this manual.
- Save report: For details on saving reports, see the chapter General > Custom Reports.
Button Reset Selection
Press Reset Selection to reset all fields to their initial value.
TIPS
- Double-click on the column Replacement Badge of a row to return the corresponding replacement badge.
- Double-click on the column Name of a row to show details for the corresponding person.
Change Log Persons
Use the menu item Change Log Persons to find out who changed the master data of a person and when.
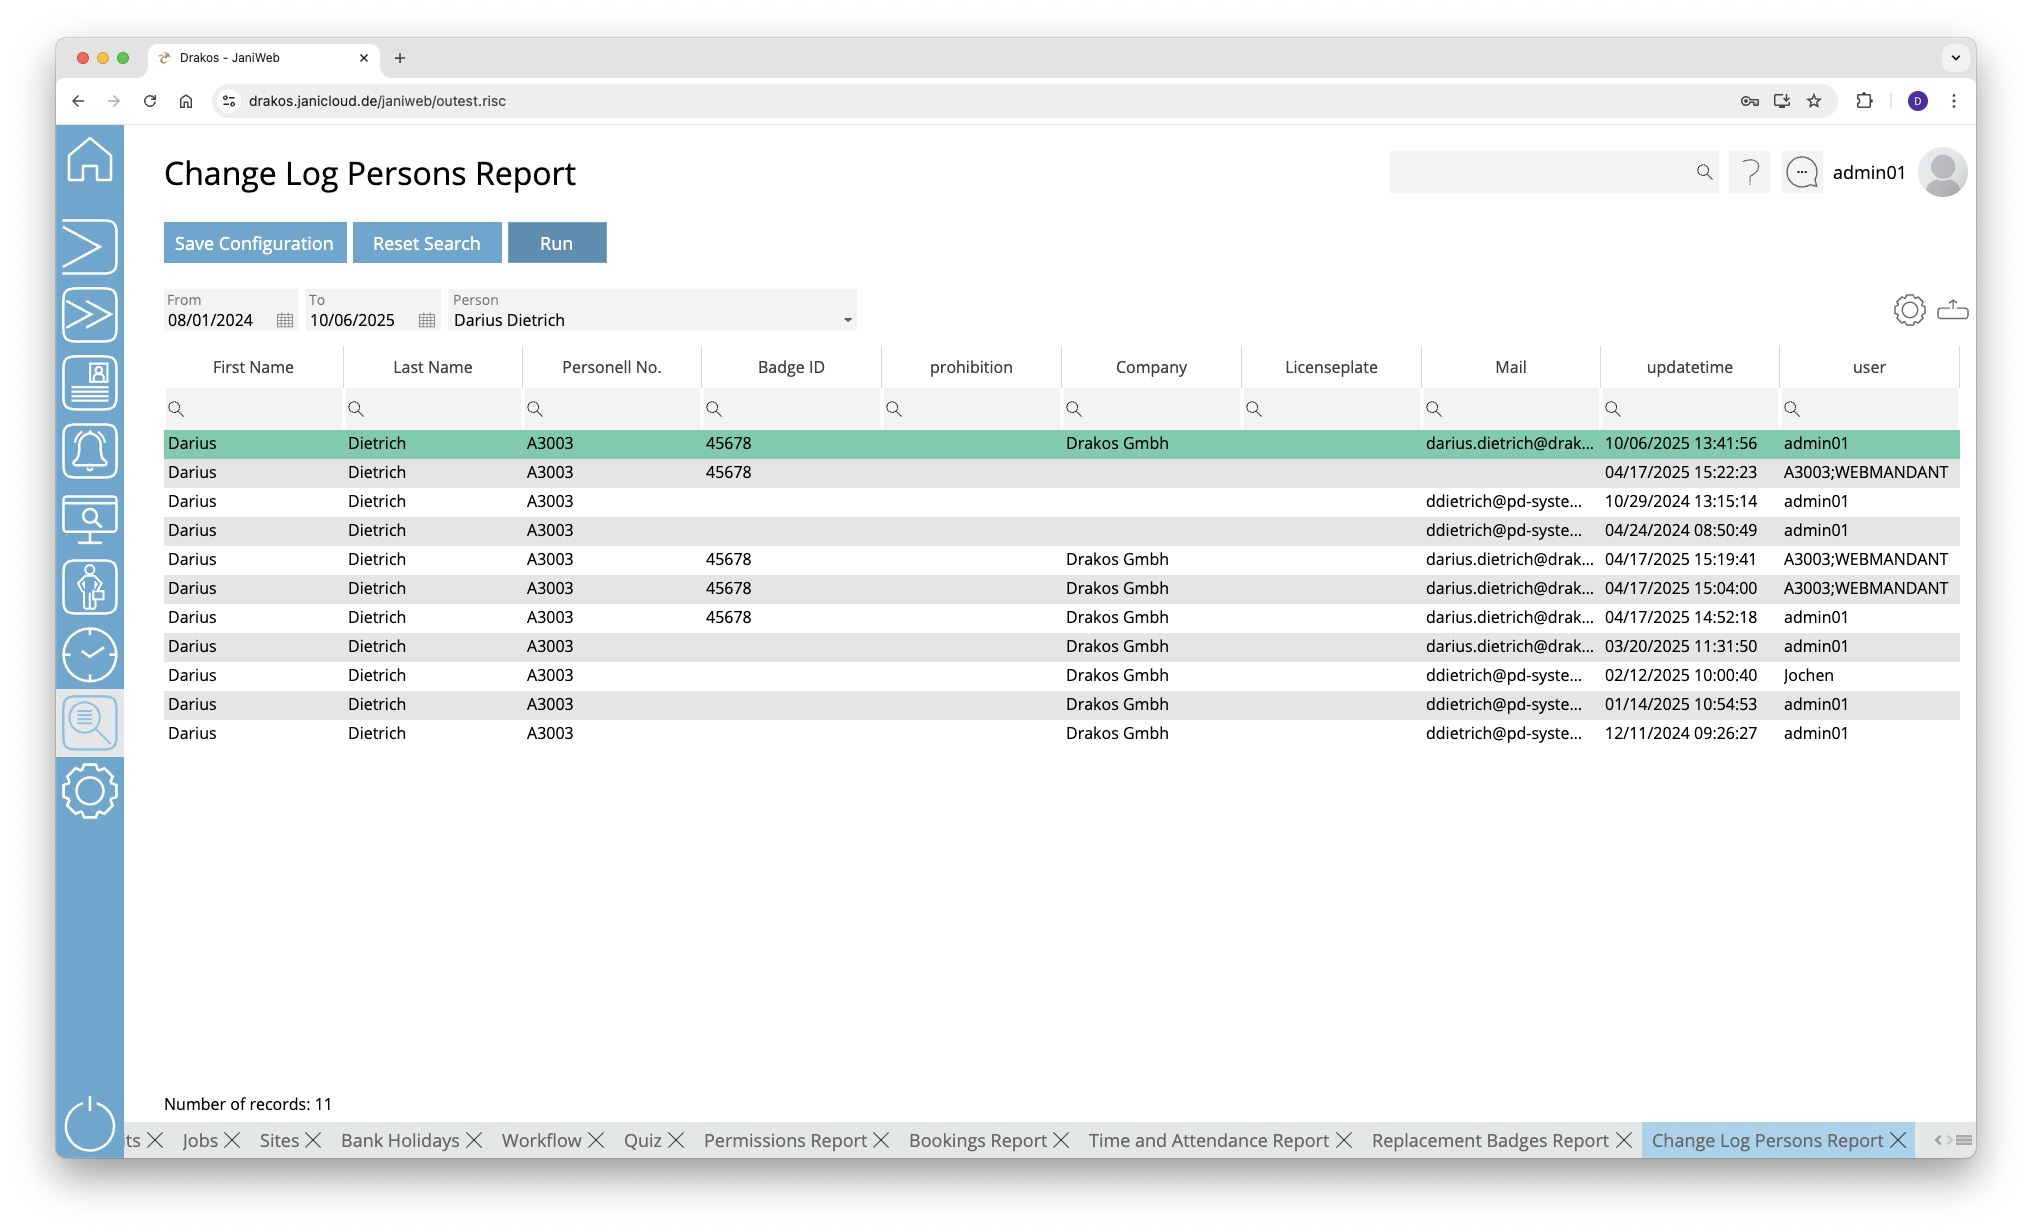
Creating the report
- Specify the time period for which you want to generate the report (From – To).
- Select the Person for whom you want to see the change log.
- Press Run to start the report.
The first line, highlighted in green, shows information about the current record of the person. The following lines show the historical changes. The column Updated shows the date and time of the change. The user who made the change appears in the column User.
Further options with the report
- Select columns to display: Press the gear icon. Select which columns you want to display and in which order. Arrange the columns using the mouse or the arrow icons. Press Apply to adopt the changes.
- Search in columns: Enter text or numbers in the search field (magnifying glass icon) of a column to search for names, personnel numbers, or other criteria. The entries take effect immediately: the list only displays hits.
- Export the entire list: Press the download icon. Select the format in which you want to export the list. The export files are downloaded or displayed depending on the browser/operating system settings. For details on the available export formats, see the General > Export Formats chapter of this manual.
- Save report: For details on saving reports, see the chapter General > Custom Reports.
Button Reset Selection
Press Reset Selection to reset all fields to their initial value.
Persons
Use the menu item Persons to output a list of the existing personnel master records. All fields that describe a person can be displayed here.
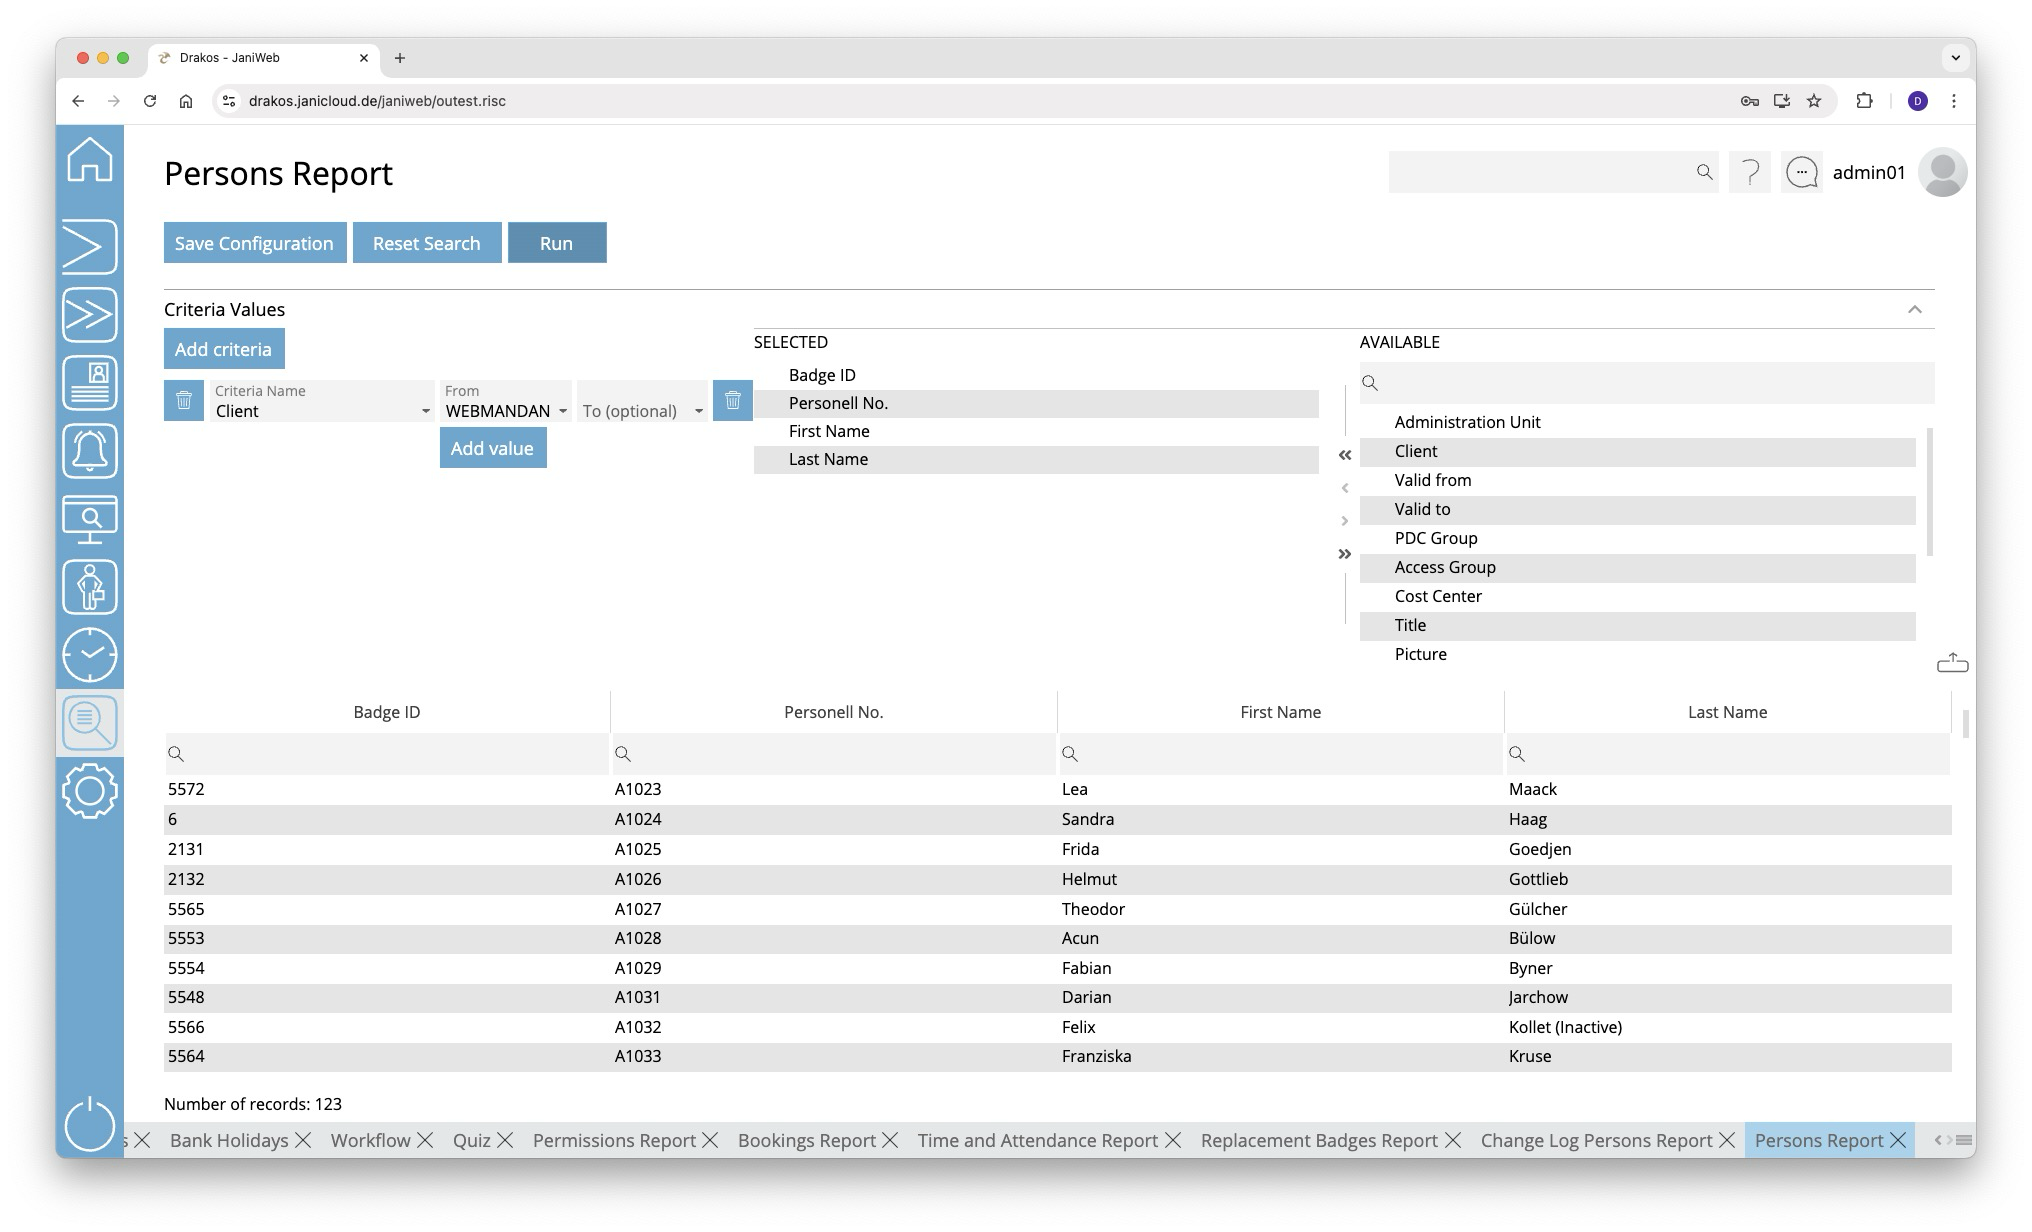
Creating the report
In this report, use criteria and values to define the group of persons to be evaluated and select the data fields to be displayed from a list. To do so, follow these steps:
- Press Add criteria.
- Select the required criterion from the list field.
- Press Add value.
- In the From field, select a single value or use both fields to specify a range.You can also specify multiple values for the same criterion (Add value).
- (Optional) Add another criterion with value(s).
- Drag the data fields (columns) you want to display from the list Available to the list Selected. Or use the arrow buttons.
- Press Run to start the report.
Logic of criteria and values
- The values within the same criterion are linked logically by OR (one match is sufficient).
- Different criteria are linked logically by AND (all criteria must be met).
Further options with the report
- Search in columns: Enter text or numbers in the search field (magnifying glass icon) of a column to search for names, personnel numbers, or other criteria. The entries take effect immediately: the list only displays hits.
- Export the entire list: Press the download icon. Select the format in which you want to export the list. The export files are downloaded or displayed depending on the browser/operating system settings. For details on the available export formats, see the General > Export Formats chapter of this manual.
- Save report: For details on saving reports, see the chapter General > Custom Reports.
Button Reset Selection
Press Reset Selection to reset all fields to their initial value.
Unused Badges
Use the menu item Unused Badges to determine which persons have not used their badge during a specific period.
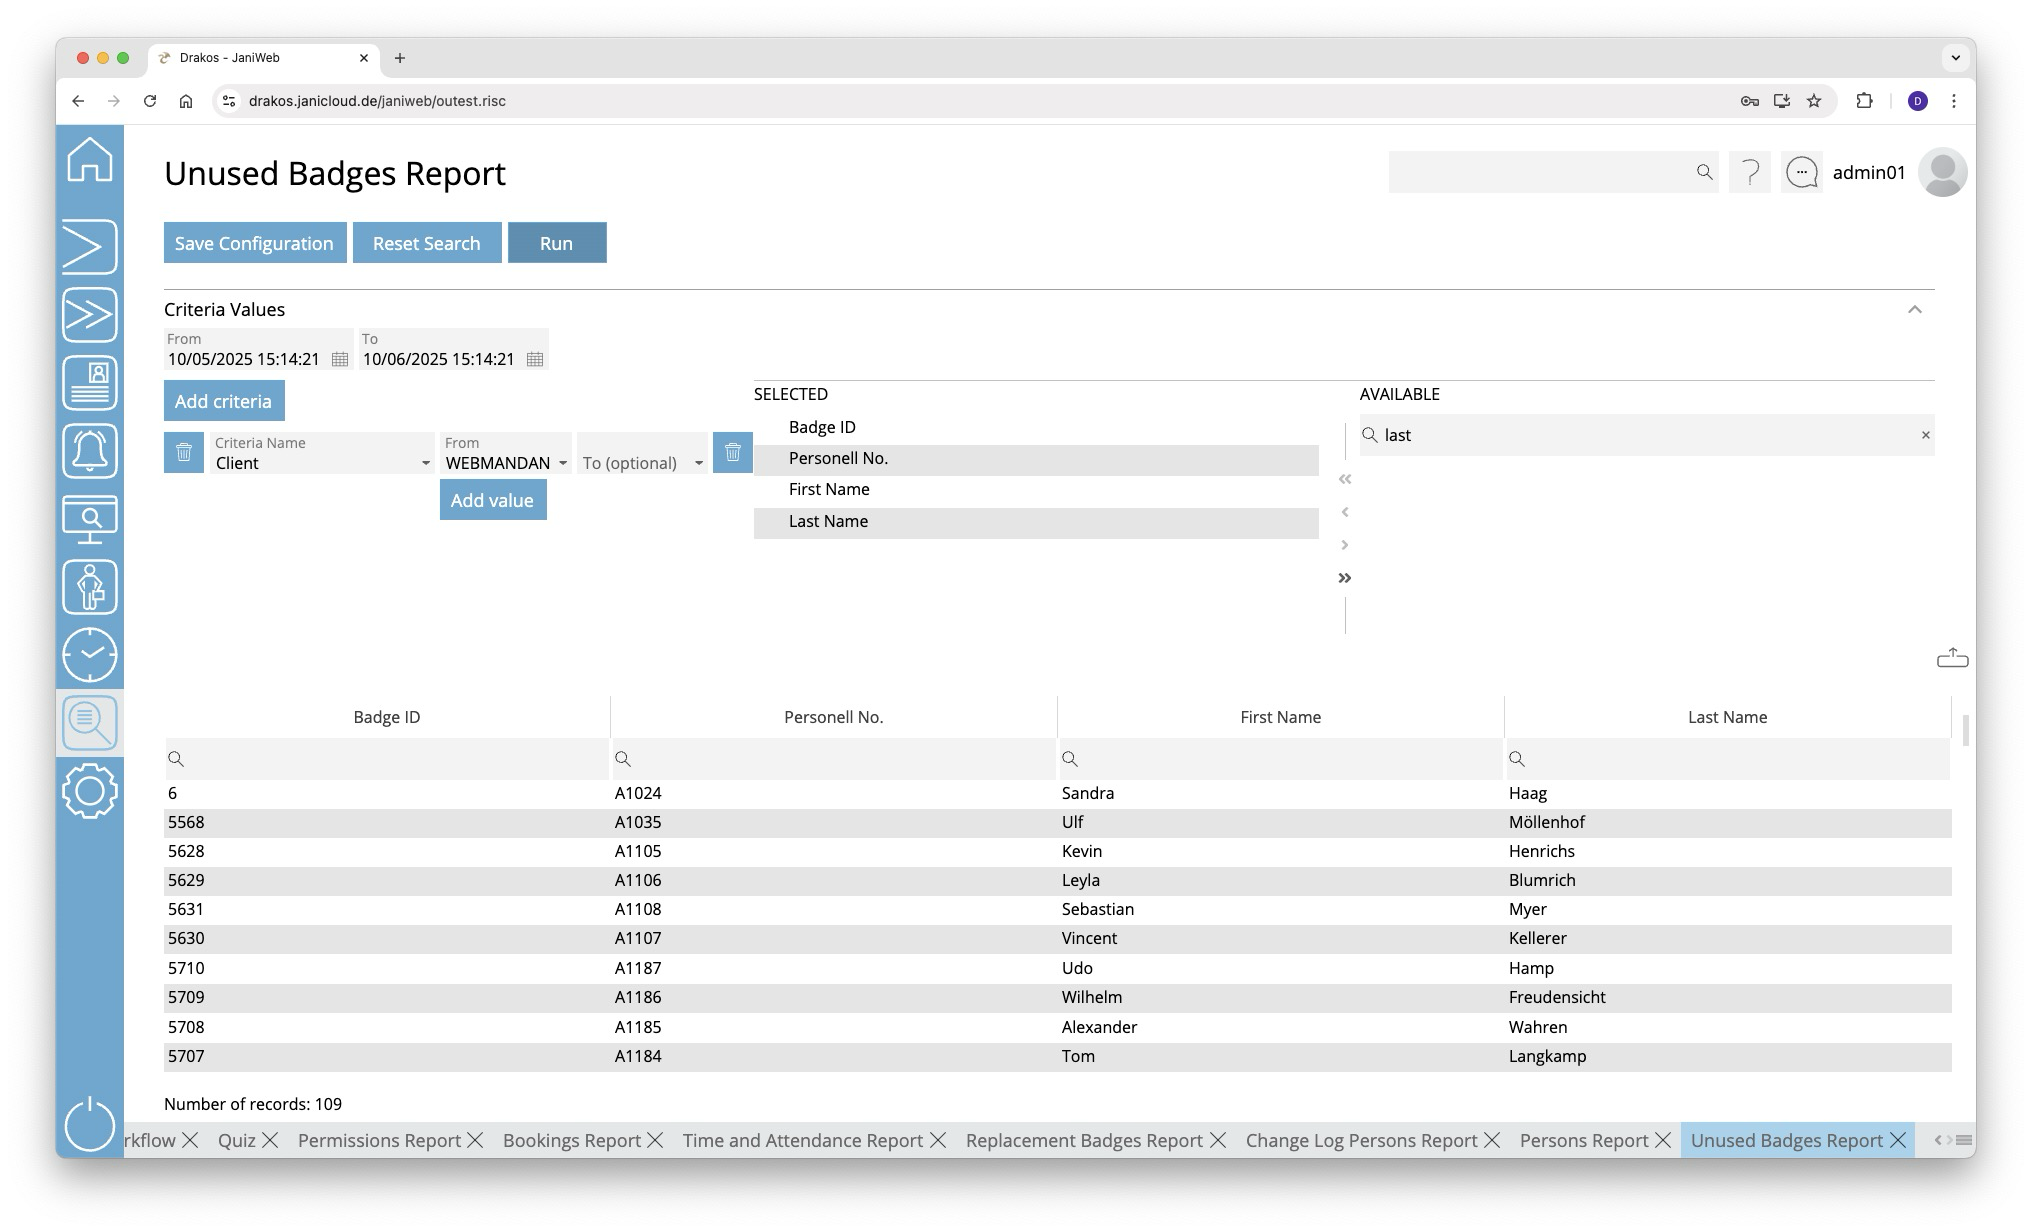
Creating the report
In this report, use criteria and values to define the group of persons to be evaluated and select the data fields to be displayed from a list. To do so, follow these steps:
- Specify the time period you want to check for unused badges (From – To).
- Press Add criteria.
- Select the required criterion from the list field.
- Press Add value.
- In the From field, select a single value or use both fields to specify a range.You can also specify multiple values for the same criterion (Add value).
- (Optional) Add another criterion with value(s).
- Drag the data fields (columns) you want to display from the list Available to the list Selected. Or use the arrow buttons.
- Press Run to start the report.
Logic of criteria and values
- The values within the same criterion are linked logically by OR (one match is sufficient).
- Different criteria are linked logically by AND (all criteria must be met).
Further options with the report
- Search in columns: Enter text or numbers in the search field (magnifying glass icon) of a column to search for names, personnel numbers, or other criteria. The entries take effect immediately: the list only displays hits.
- Export the entire list: Press the download icon. Select the format in which you want to export the list. The export files are downloaded or displayed depending on the browser/operating system settings. For details on the available export formats, see the General > Export Formats chapter of this manual.
- Save report: For details on saving reports, see the chapter General > Custom Reports.
Button Reset Selection
Press Reset Selection to reset all fields to their initial value.
Visits
Use the menu item Visits to find out which employees have received which visitors and when.
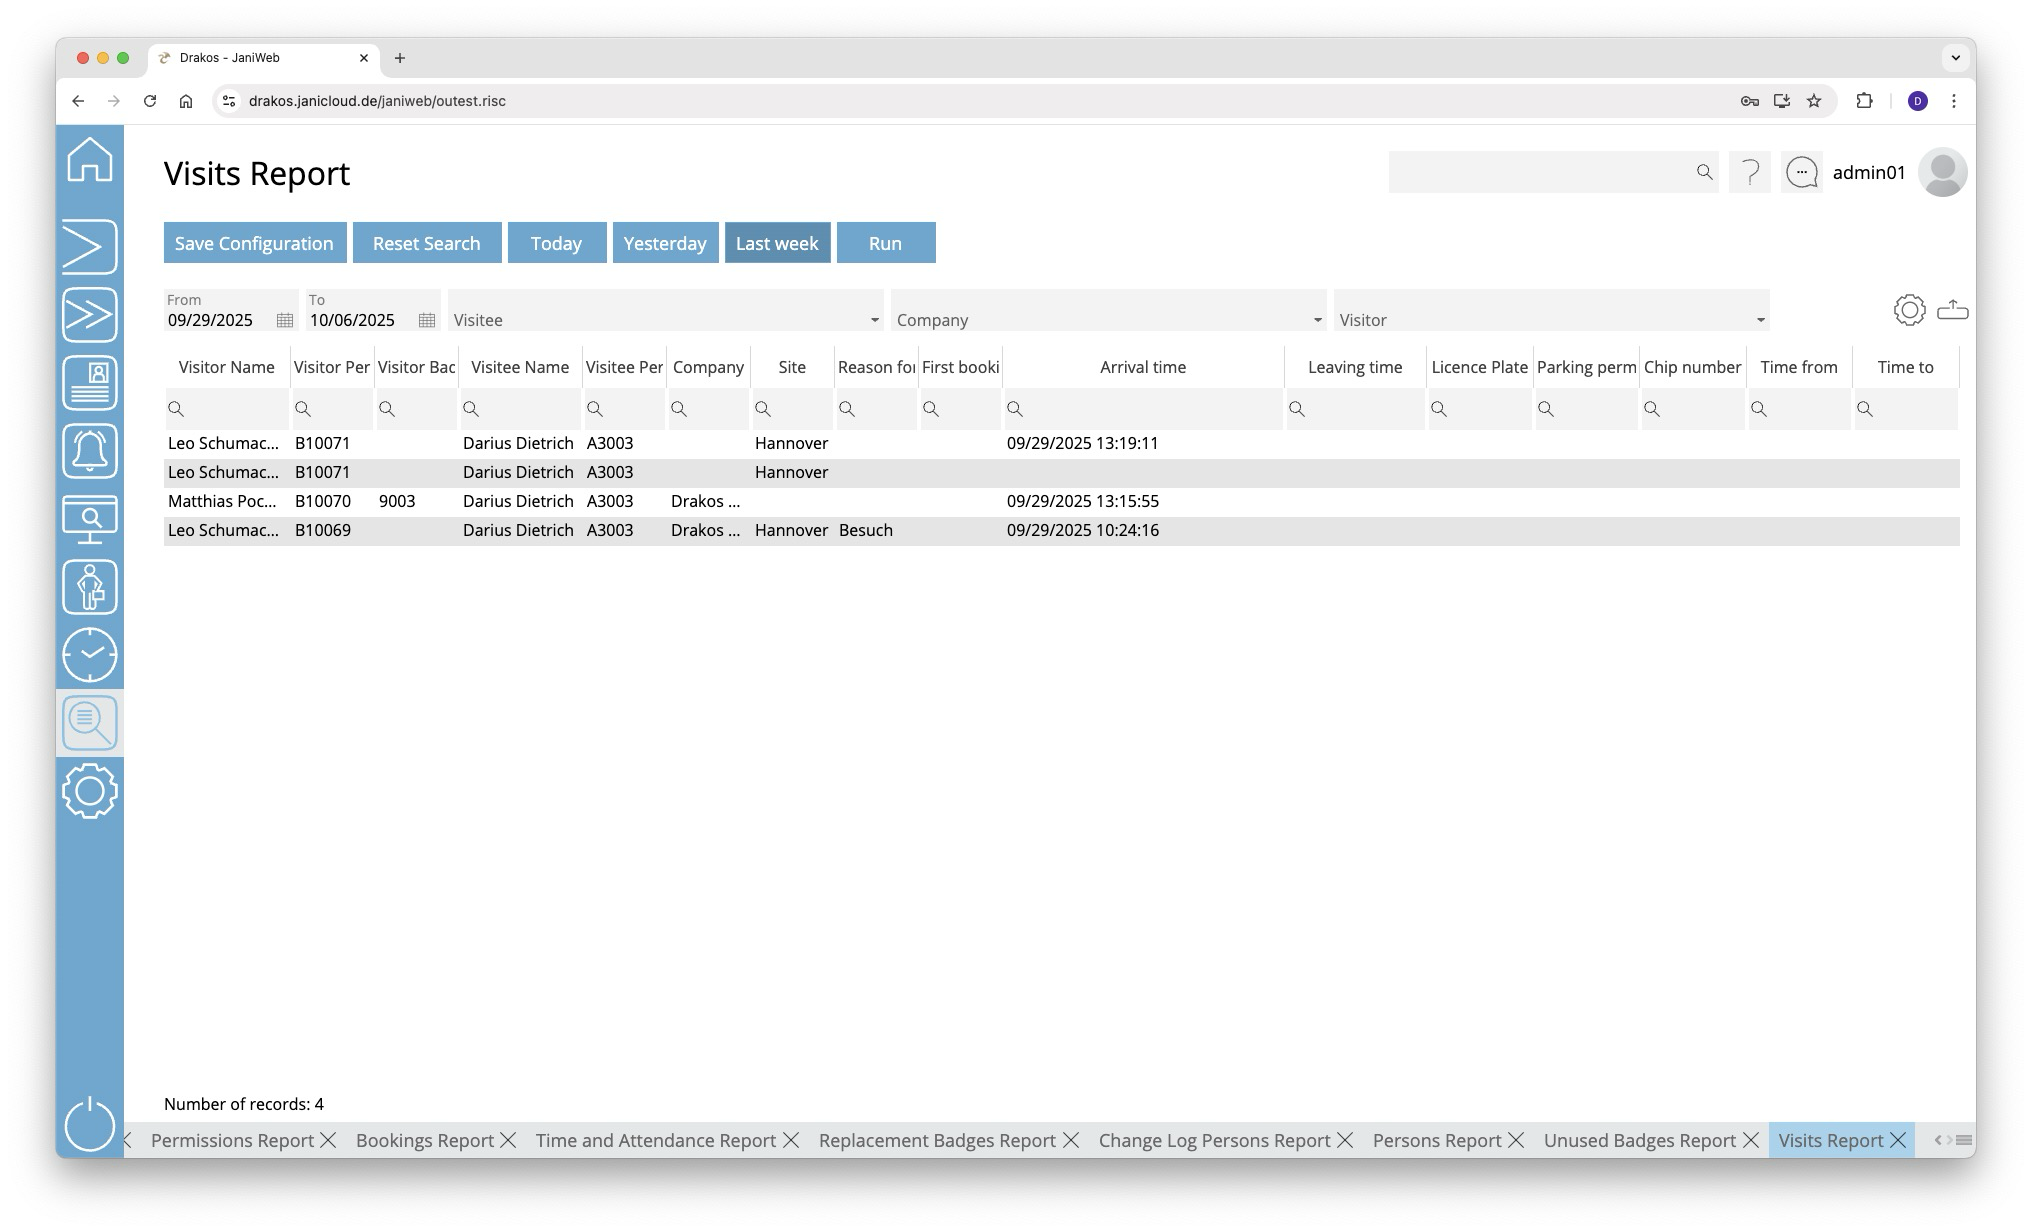
Creating the report
- Specify the time period for which you want to generate the report (From – To). Or press Today, Yesterday or Last week to quickly generate a report for the corresponding period.
- (Optional) Use the additional fields to narrow the report.
- Press Run to start the report.
Further options with the report
- Select columns to display: Press the gear icon. Select which columns you want to display and in which order. Arrange the columns using the mouse or the arrow icons. Press Apply to adopt the changes.
- Search in columns: Enter text or numbers in the search field (magnifying glass icon) of a column to search for names, personnel numbers, or other criteria. The entries take effect immediately: the list only displays hits.
- Export the entire list: Press the download icon. Select the format in which you want to export the list. The export files are downloaded or displayed depending on the browser/operating system settings. For details on the available export formats, see the General > Export Formats chapter of this manual.
- Save report: For details on saving reports, see the chapter General > Custom Reports.
Button Reset Selection
Press Reset Selection to reset all fields to their initial value.
Presence

Absences
Use the menu item Absences to display a list of all absence requests created.
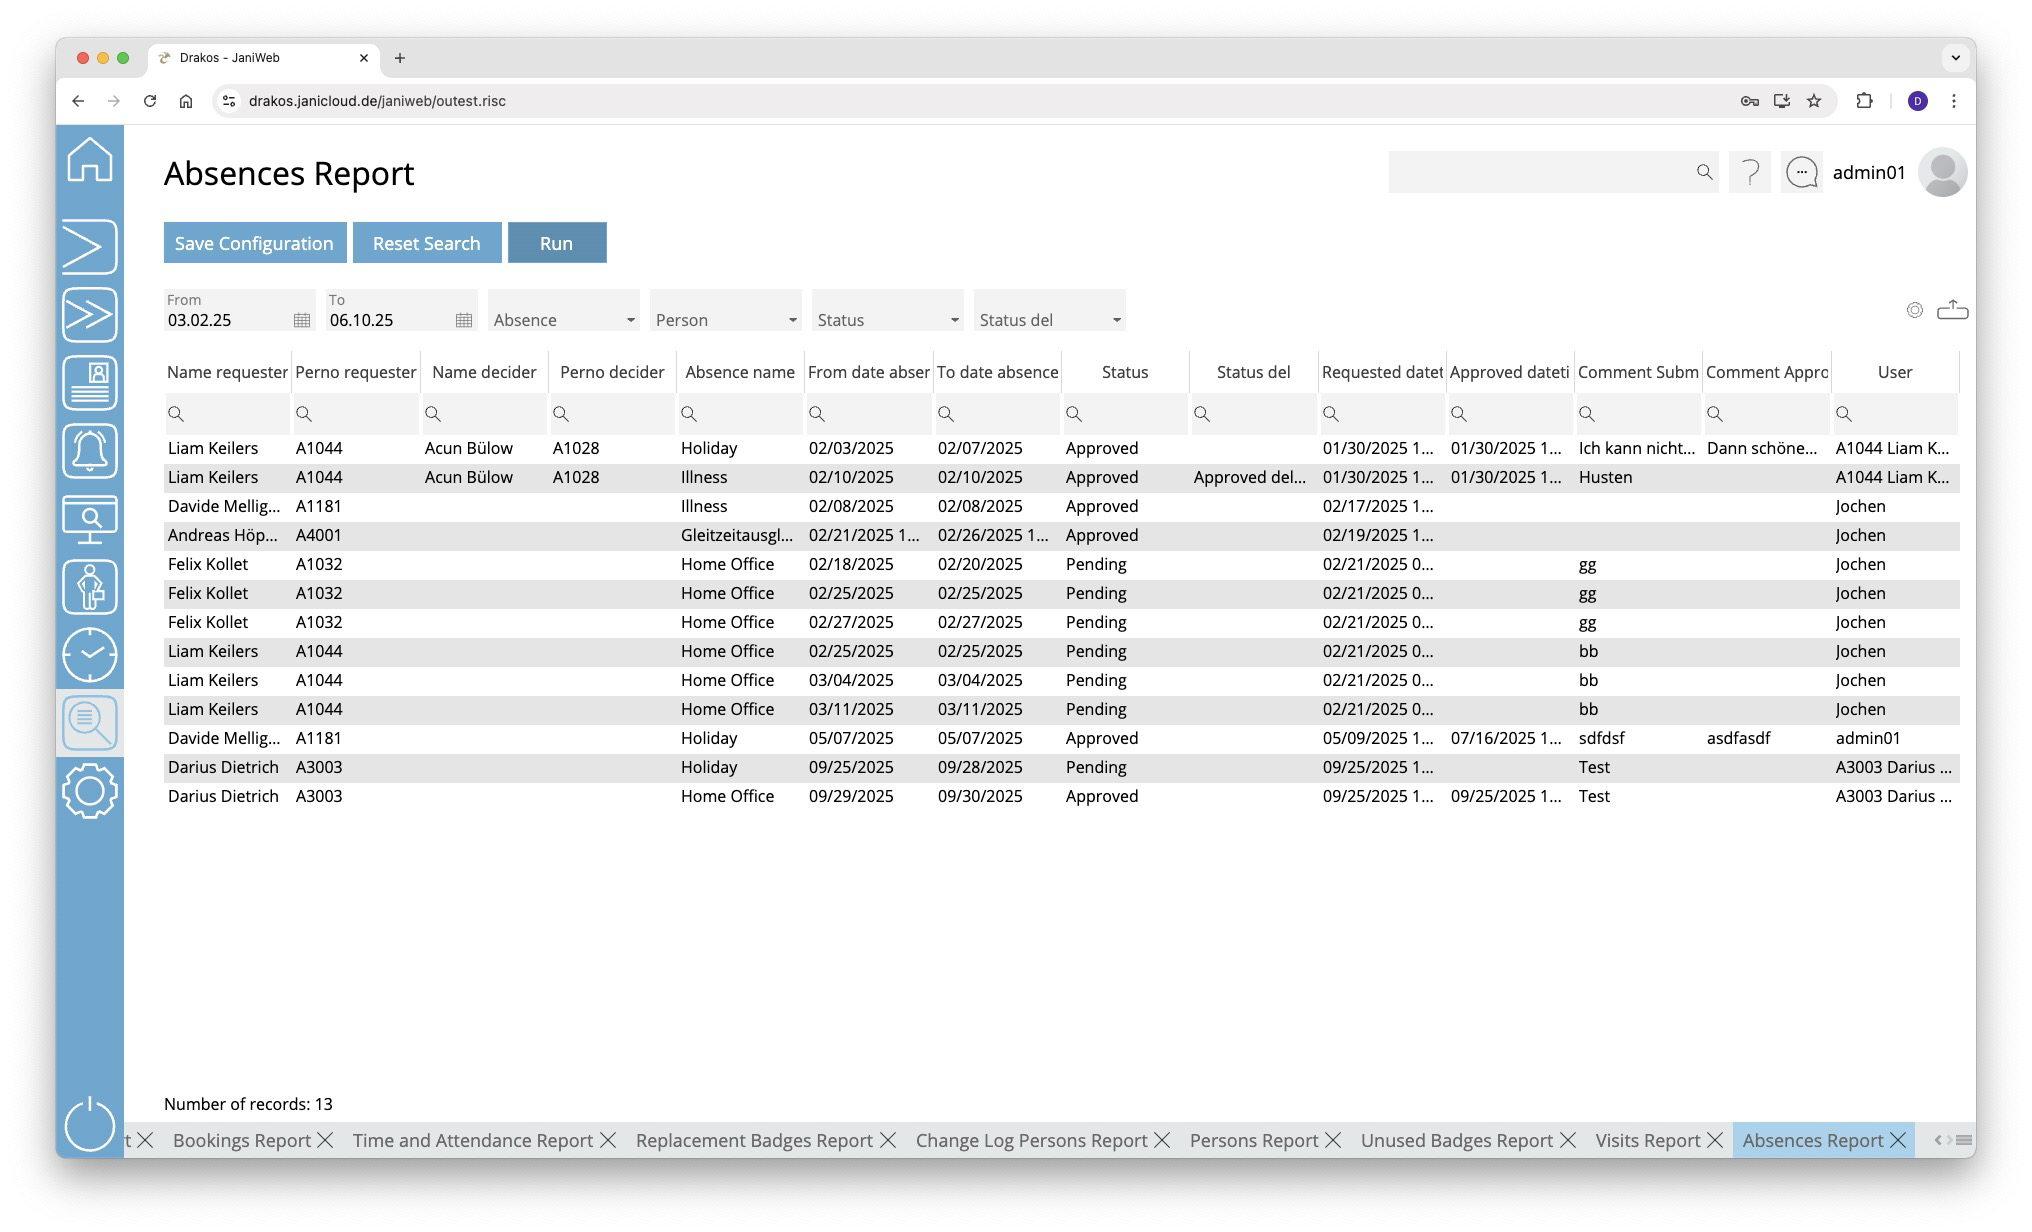
Creating the report
- Specify the time period for which you want to generate the report (From – To).
- (Optional) Use the additional fields to narrow the report.
- Press Run to start the report.
Further options with the report
- Select columns to display: Press the gear icon. Select which columns you want to display and in which order. Arrange the columns using the mouse or the arrow icons. Press Apply to adopt the changes.
- Search in columns: Enter text or numbers in the search field (magnifying glass icon) of a column to search for names, personnel numbers, or other criteria. The entries take effect immediately: the list only displays hits.
- Export the entire list: Press the download icon. Select the format in which you want to export the list. The export files are downloaded or displayed depending on the browser/operating system settings. For details on the available export formats, see the General > Export Formats chapter of this manual.
- Save report: For details on saving reports, see the chapter General > Custom Reports.
Button Reset Selection
Press Reset Selection to reset all fields to their initial value.
Qualifications
Use the menu item Qualifications to display a list of all persons with an assigned qualification, along with the qualification’s validity period.
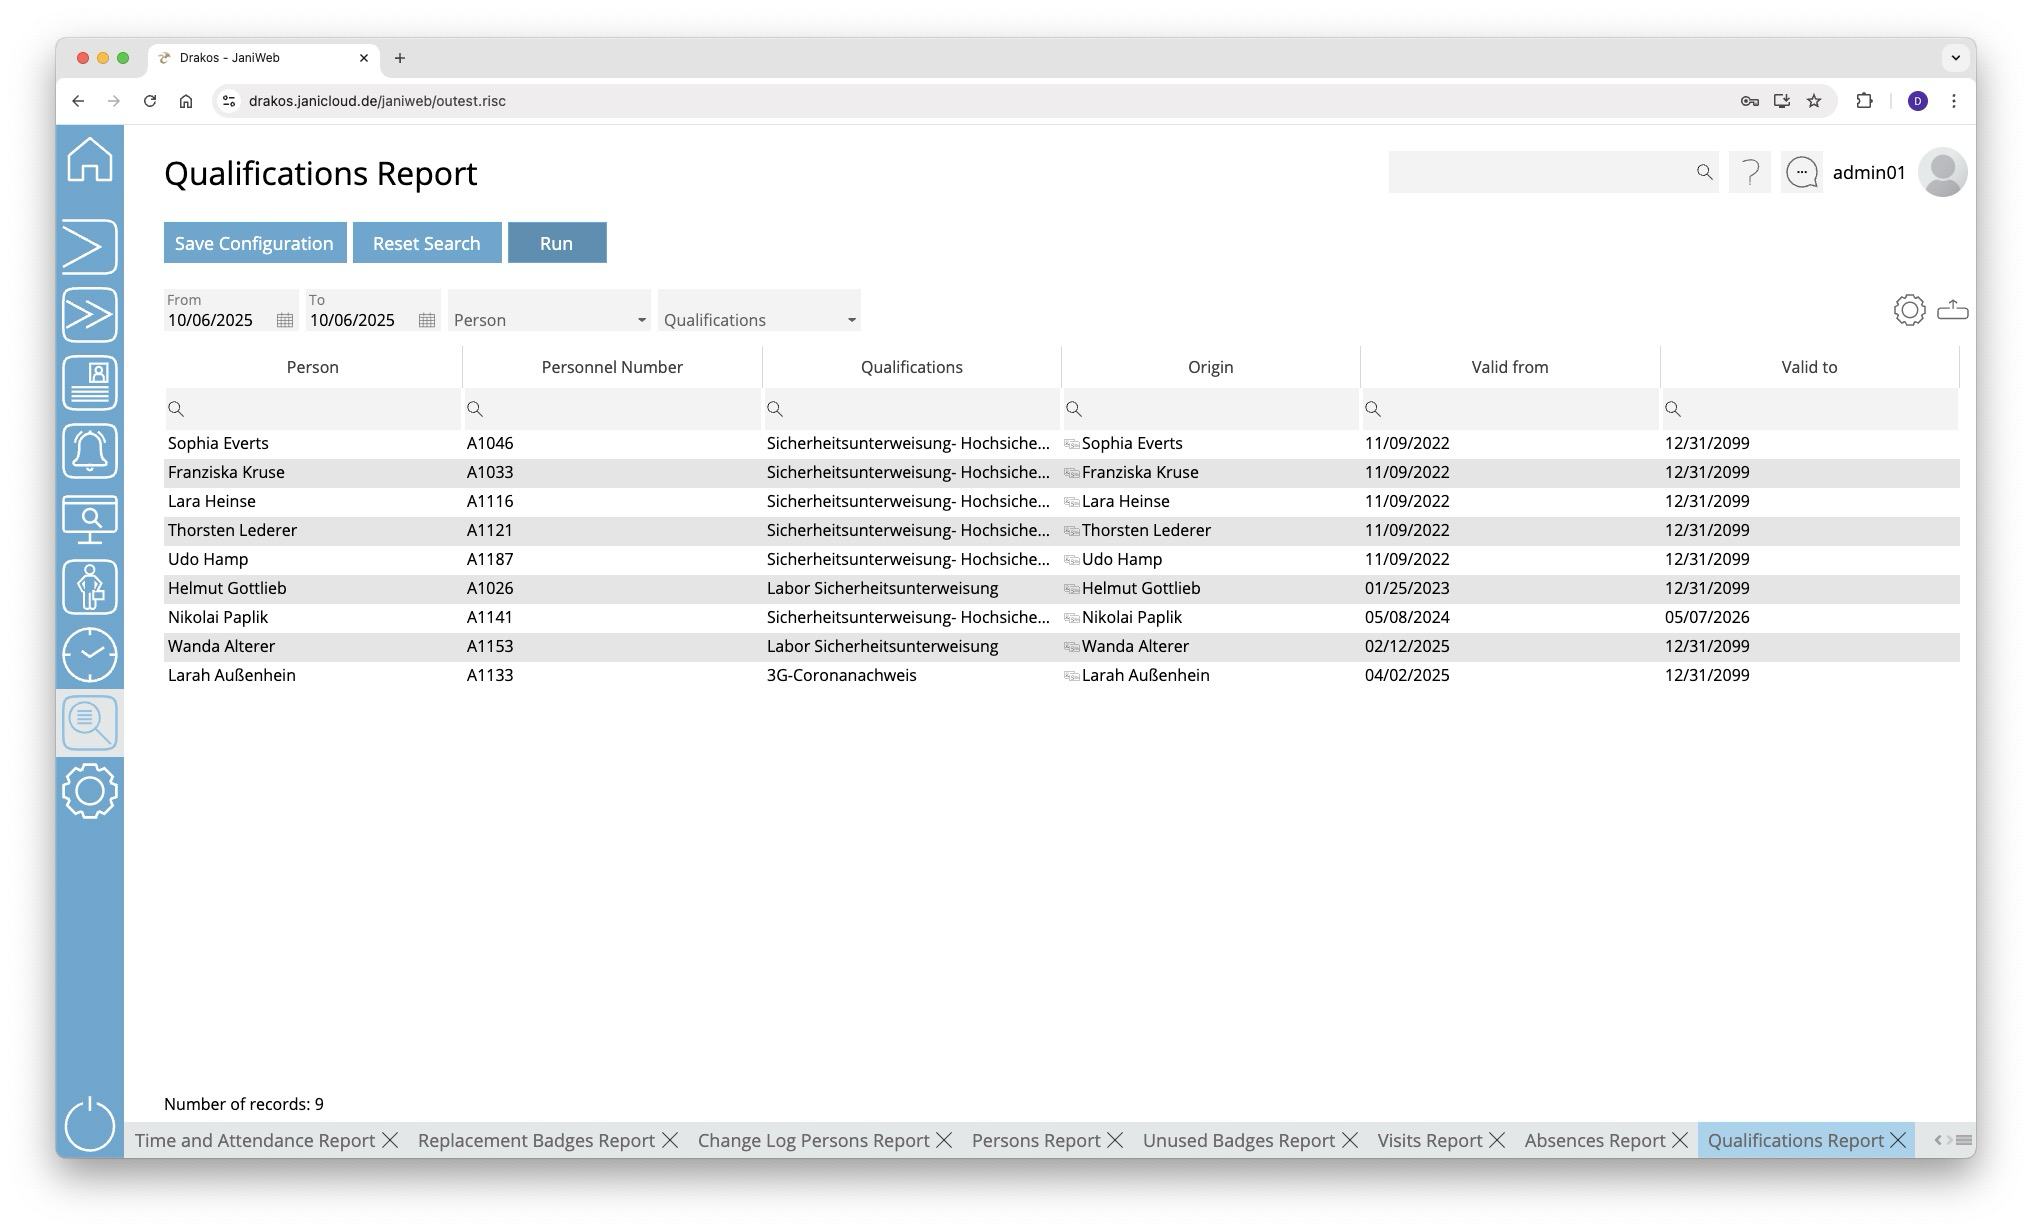
Creating the report
- Specify the time period for which you want to generate the report (From – To).
- (Optional) Use the additional fields to narrow the report.
- Press Run to start the report.
Further options with the report
- Select columns to display: Press the gear icon. Select which columns you want to display and in which order. Arrange the columns using the mouse or the arrow icons. Press Apply to adopt the changes.
- Search in columns: Enter text or numbers in the search field (magnifying glass icon) of a column to search for names, personnel numbers, or other criteria. The entries take effect immediately: the list only displays hits.
- Export the entire list: Press the download icon. Select the format in which you want to export the list. The export files are downloaded or displayed depending on the browser/operating system settings. For details on the available export formats, see the General > Export Formats chapter of this manual.
- Save report: For details on saving reports, see the chapter General > Custom Reports.
Button Reset Selection
Press Reset Selection to reset all fields to their initial value.
Alarm Scenarios
Use this menu item to output a list of events that have occurred and that are configured in alarm scenarios.
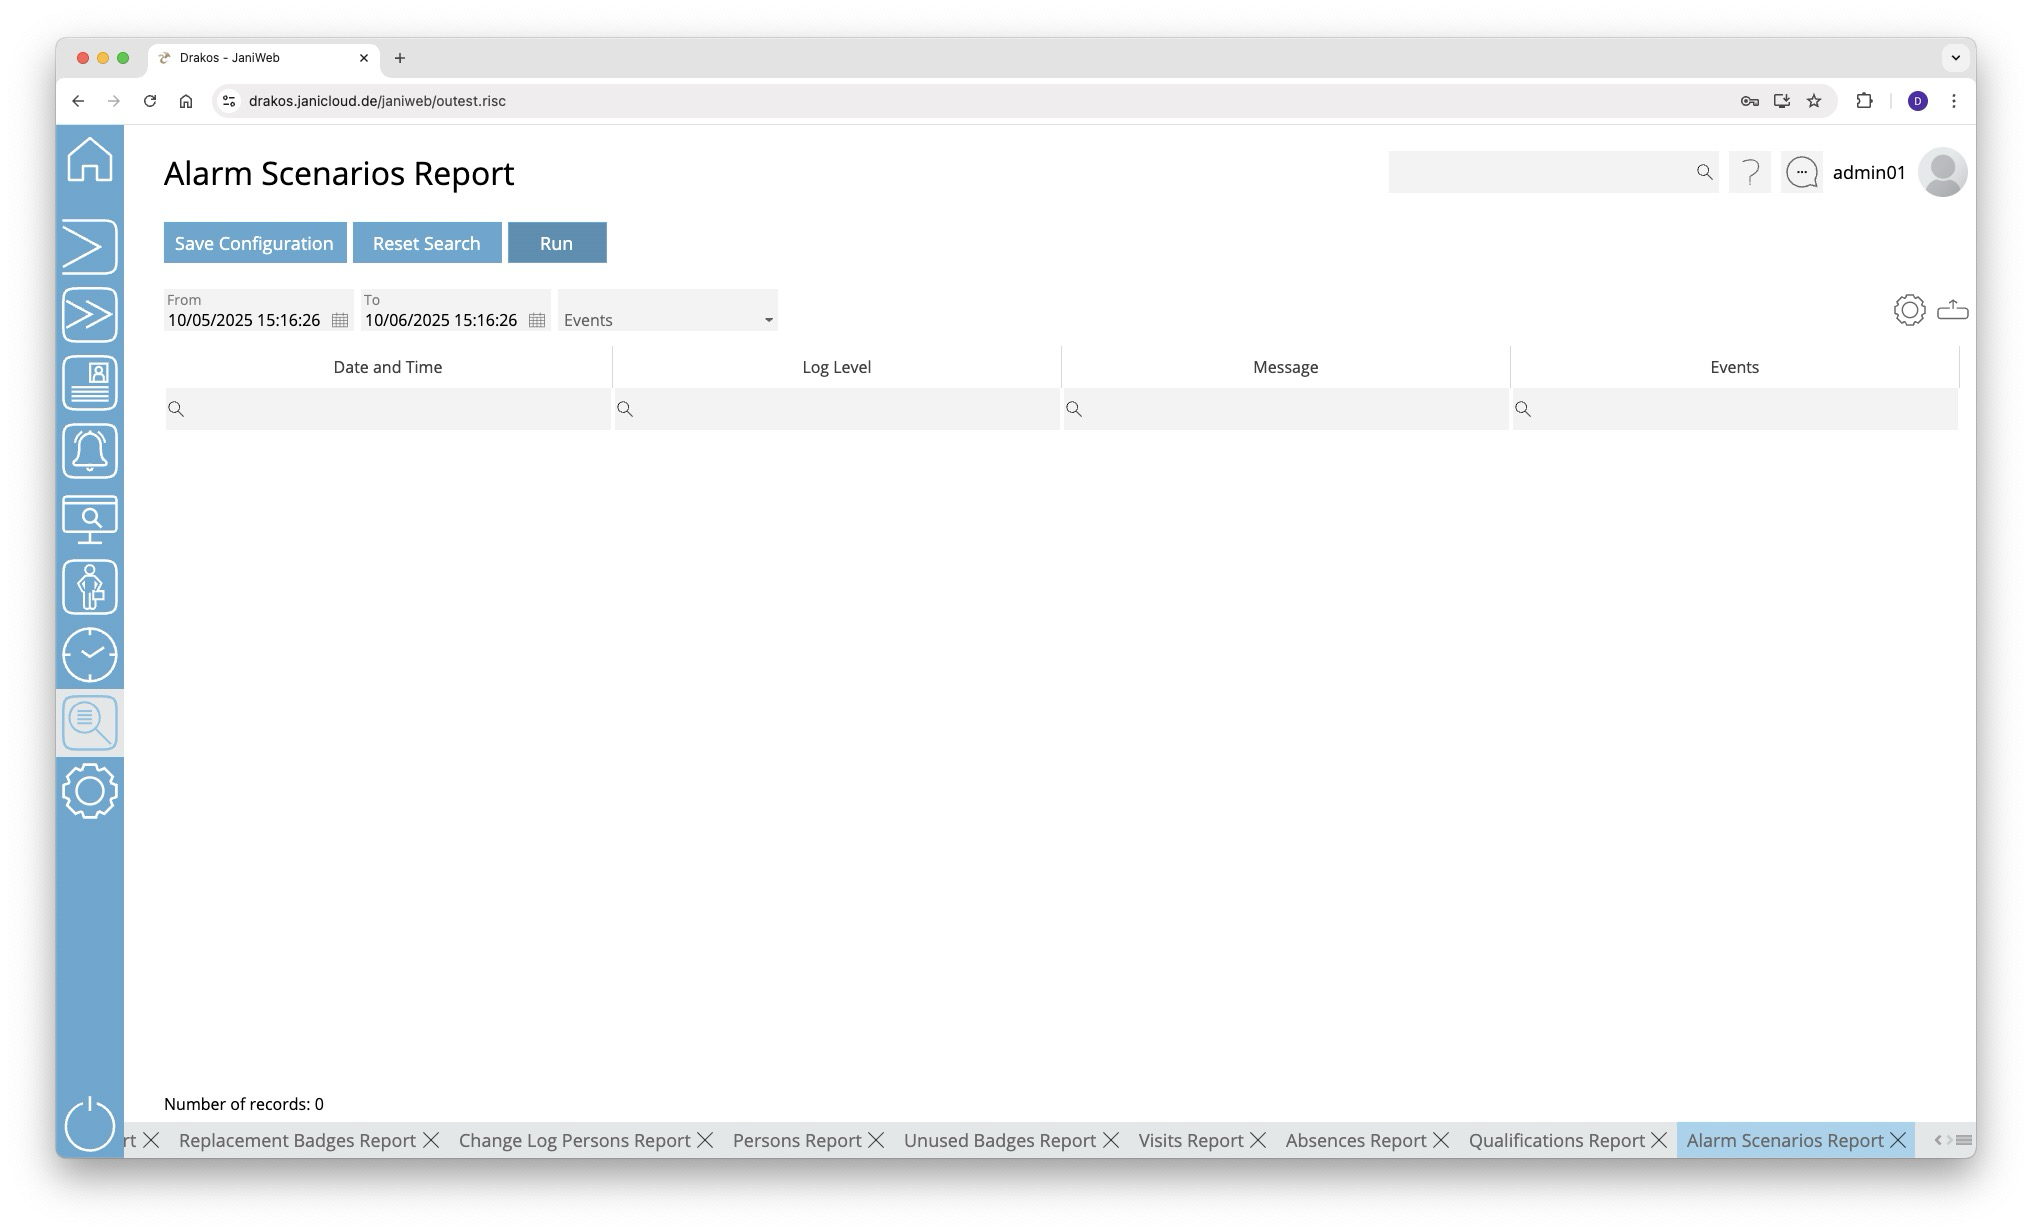
Creating the report
- Specify the time period for which you want to generate the report (From – To).
- (Optional) Use the field Events to restrict the report to specific events.
- Press Run to start the report.
Further options with the report
- Select columns to display: Press the gear icon. Select which columns you want to display and in which order. Arrange the columns using the mouse or the arrow icons. Press Apply to adopt the changes.
- Search in columns: Enter text or numbers in the search field (magnifying glass icon) of a column to search for names, personnel numbers, or other criteria. The entries take effect immediately: the list only displays hits.
- Export the entire list: Press the download icon. Select the format in which you want to export the list. The export files are downloaded or displayed depending on the browser/operating system settings. For details on the available export formats, see the General > Export Formats chapter of this manual.
- Save report: For details on saving reports, see the chapter General > Custom Reports.
Button Reset Selection
Press Reset Selection to reset all fields to their initial value.
Workflow
Scan for Bookings
Use this report, for example, to show a person a remaining time (e.g. for a smoke break) based on a booking.
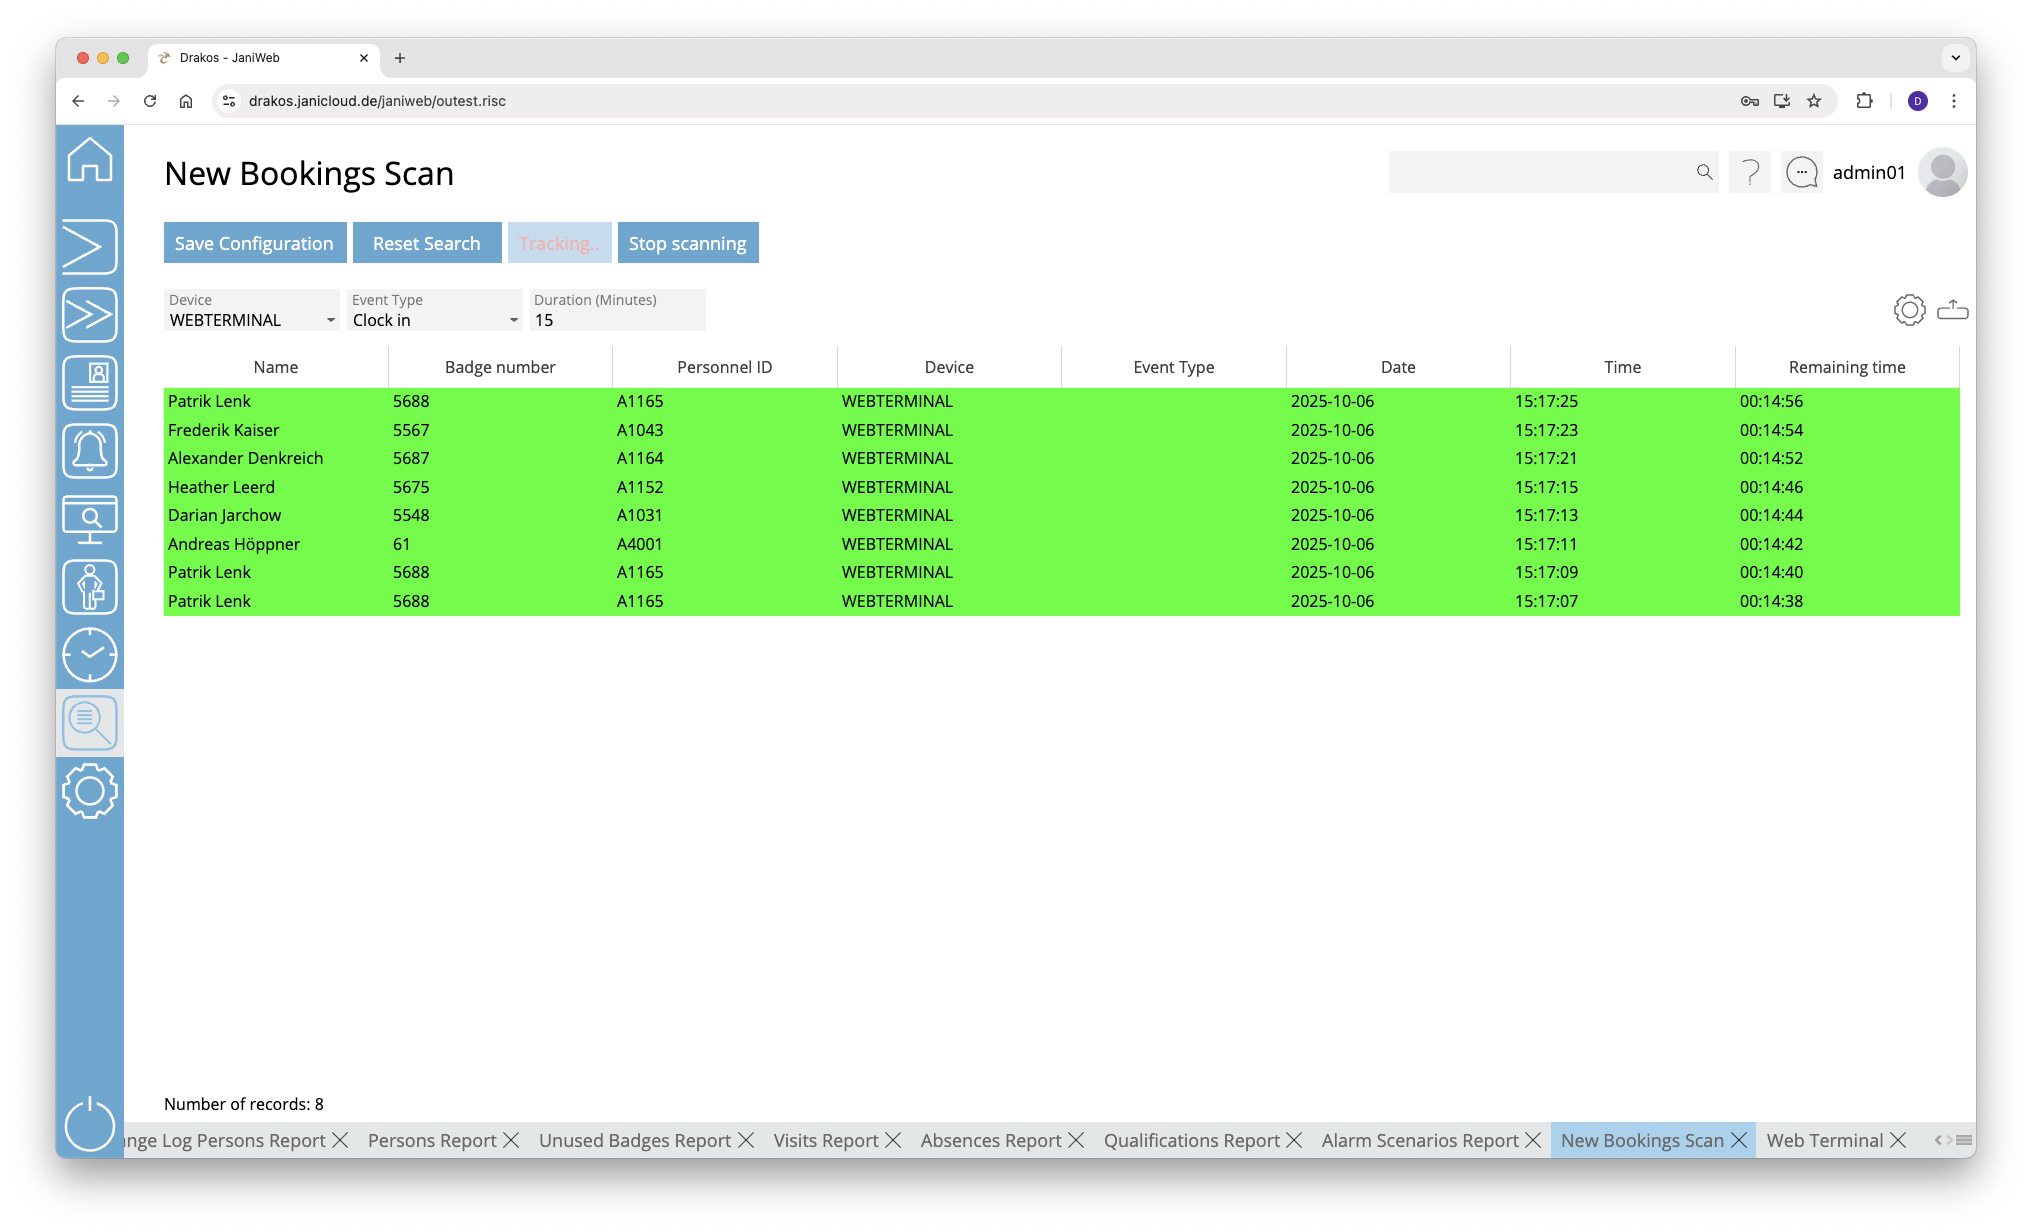
Starting a bookings scan
- Select the Device and the Event Type to be monitored.
- Enter a Duration (Minutes).
- Press Start scanning to begin monitoring bookings.
The column Remaining time shows the time remaining.
To cancel the scan, press Stop scanning.
Color-coding of bookings
- Green: The booking is within the specified time period.
- Red: The booking has exceeded the specified time period.
GDPR Users
Use this menu item to create a list of all actions that a specific user has performed in JaniWeb and to send it to one or more email addresses.

Creating the report
- Select the person for whom the report is to be created.
- Select whether the report is to be created in PDF and/or Excel format.
- Enter the email address to which the report is to be sent. Press the plus icon to enter additional email addresses.
- Press Run to send the report.
GDPR Persons
Use this menu item to create a list of all the data entered for a particular person in JaniWeb and send it to one or more email addresses.
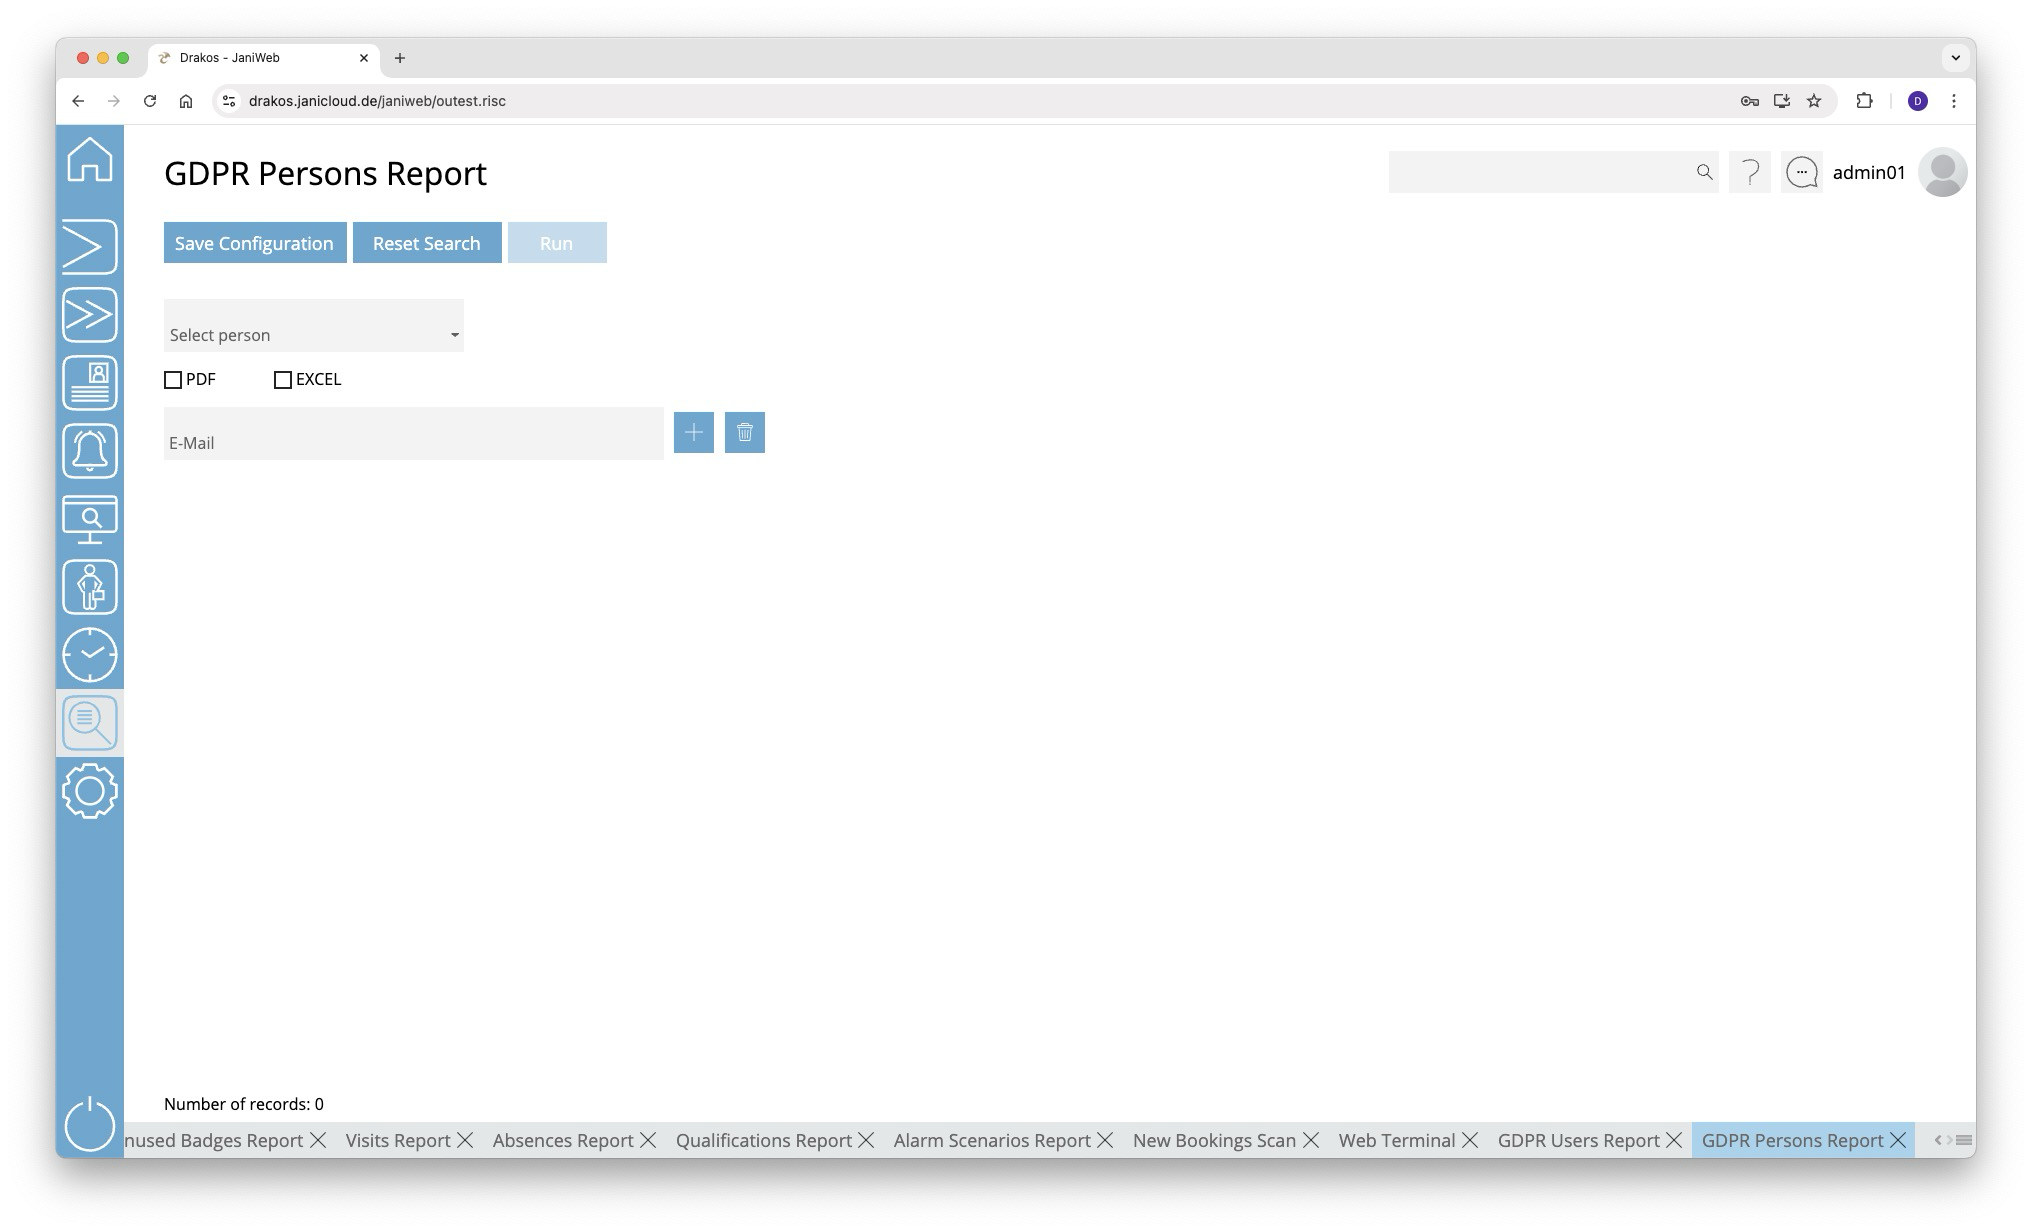
Creating the report
- Select the person for whom the report is to be created.
- Select whether the report is to be created in PDF and/or Excel format.
- Enter the email address to which the report is to be sent. Press the plus icon to enter additional email recipients.
- Press Run to send the report.
Security Log
Use the menu item Security Log to display a list of logins to JaniWeb. Failed attempts are also logged.
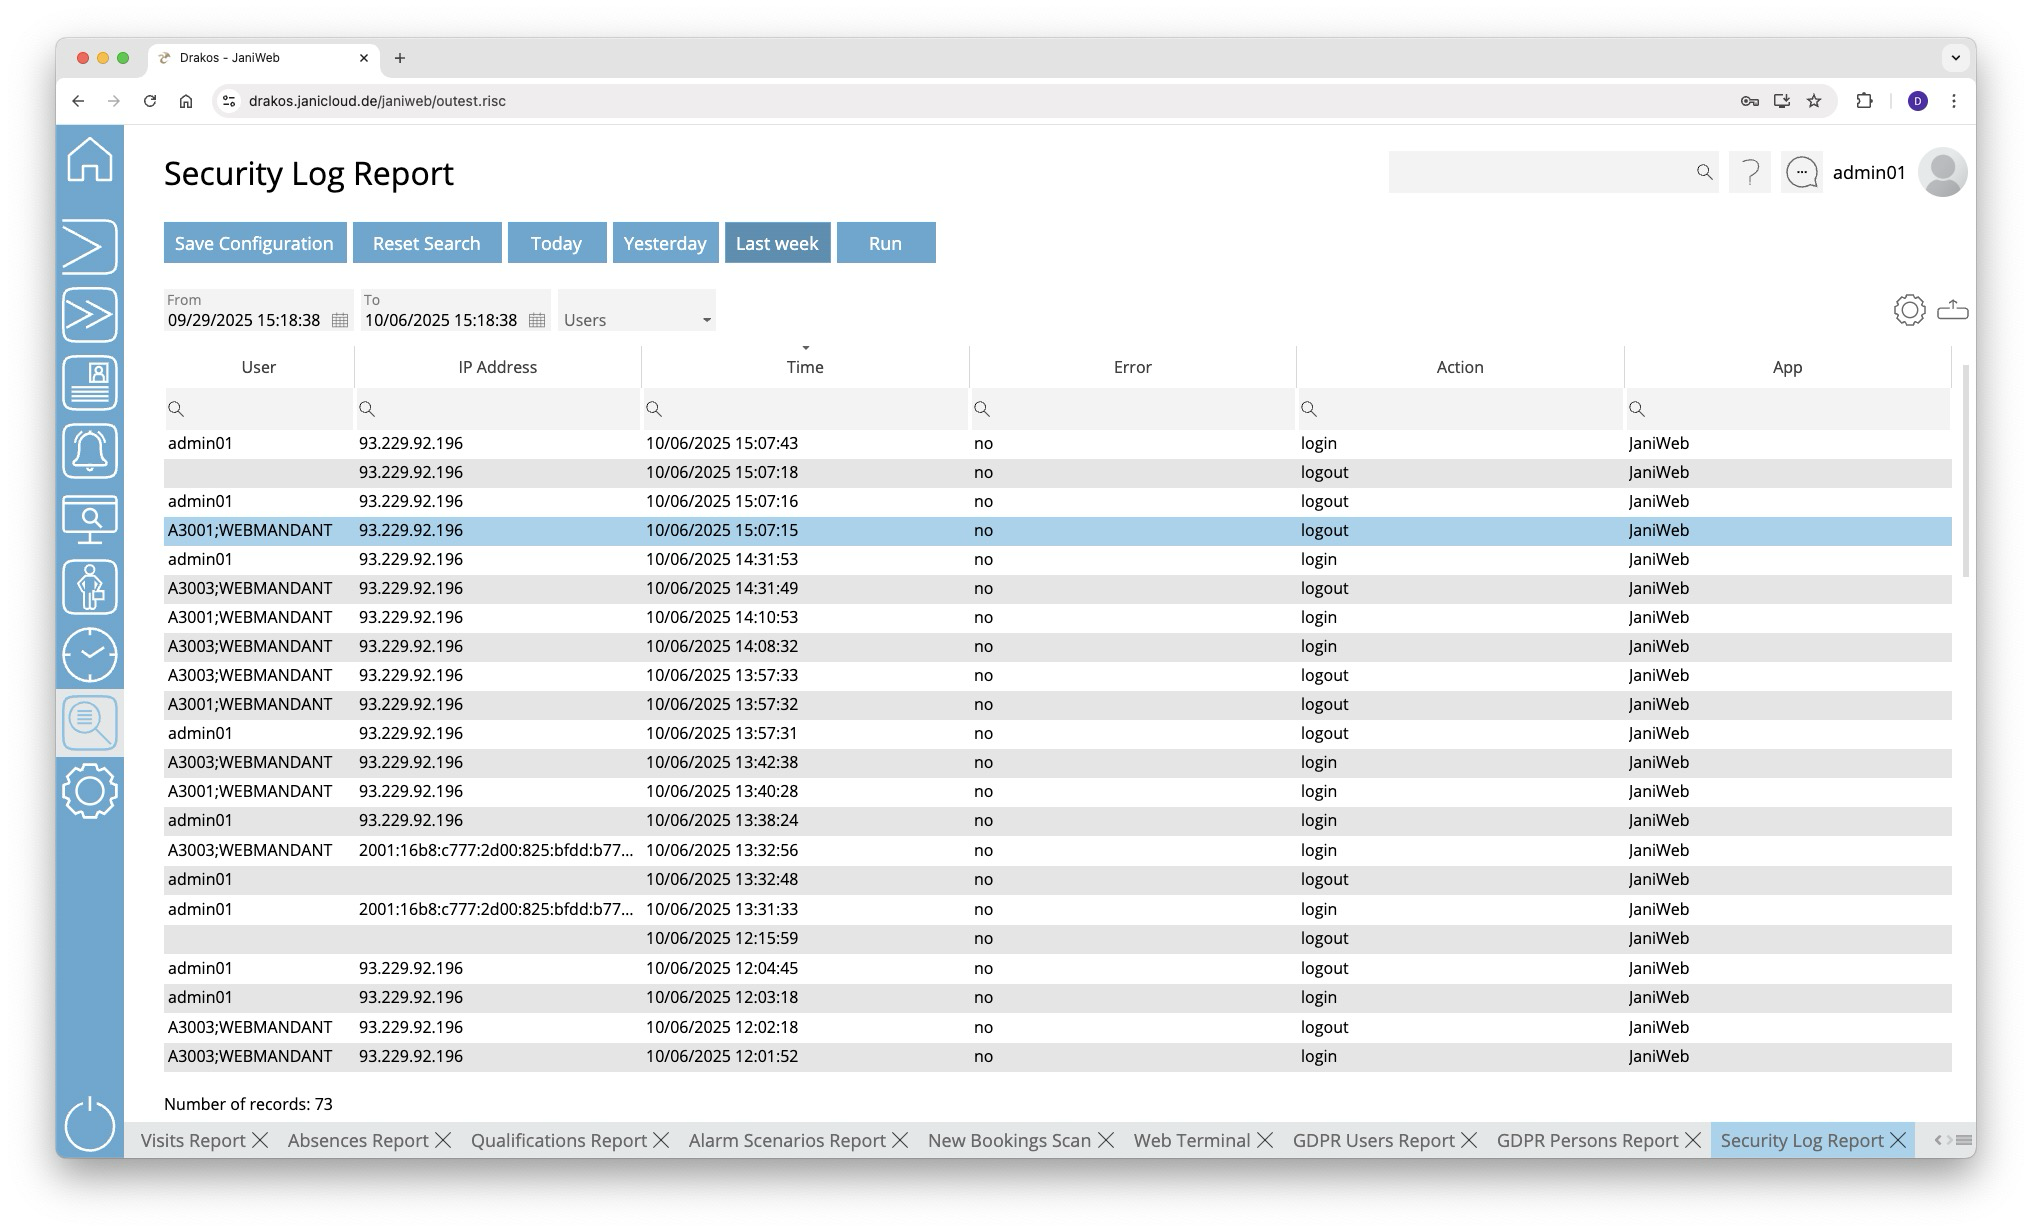
Creating the report
- Specify the time period for which you want to generate the report (From – To). Or press Today, Yesterday or Last week to quickly generate a report for the corresponding period.
- (Optional) Select the User for whom you want to generate the report.
- Press Run to start the report.
Further options with the report
- Select columns to display: Press the gear icon. Select which columns you want to display and in which order. Arrange the columns using the mouse or the arrow icons. Press Apply to adopt the changes.
- Search in columns: Enter text or numbers in the search field (magnifying glass icon) of a column to search for names, personnel numbers, or other criteria. The entries take effect immediately: the list only displays hits.
- Export the entire list: Press the download icon. Select the format in which you want to export the list. The export files are downloaded or displayed depending on the browser/operating system settings. For details on the available export formats, see the General > Export Formats chapter of this manual.
- Save report: For details on saving reports, see the chapter General > Custom Reports.
Button Reset Selection
Press Reset Selection to reset all fields to their initial value.
Employee Logins
Use this menu item to determine which persons were logged into JaniWeb during a specific period and which were not.
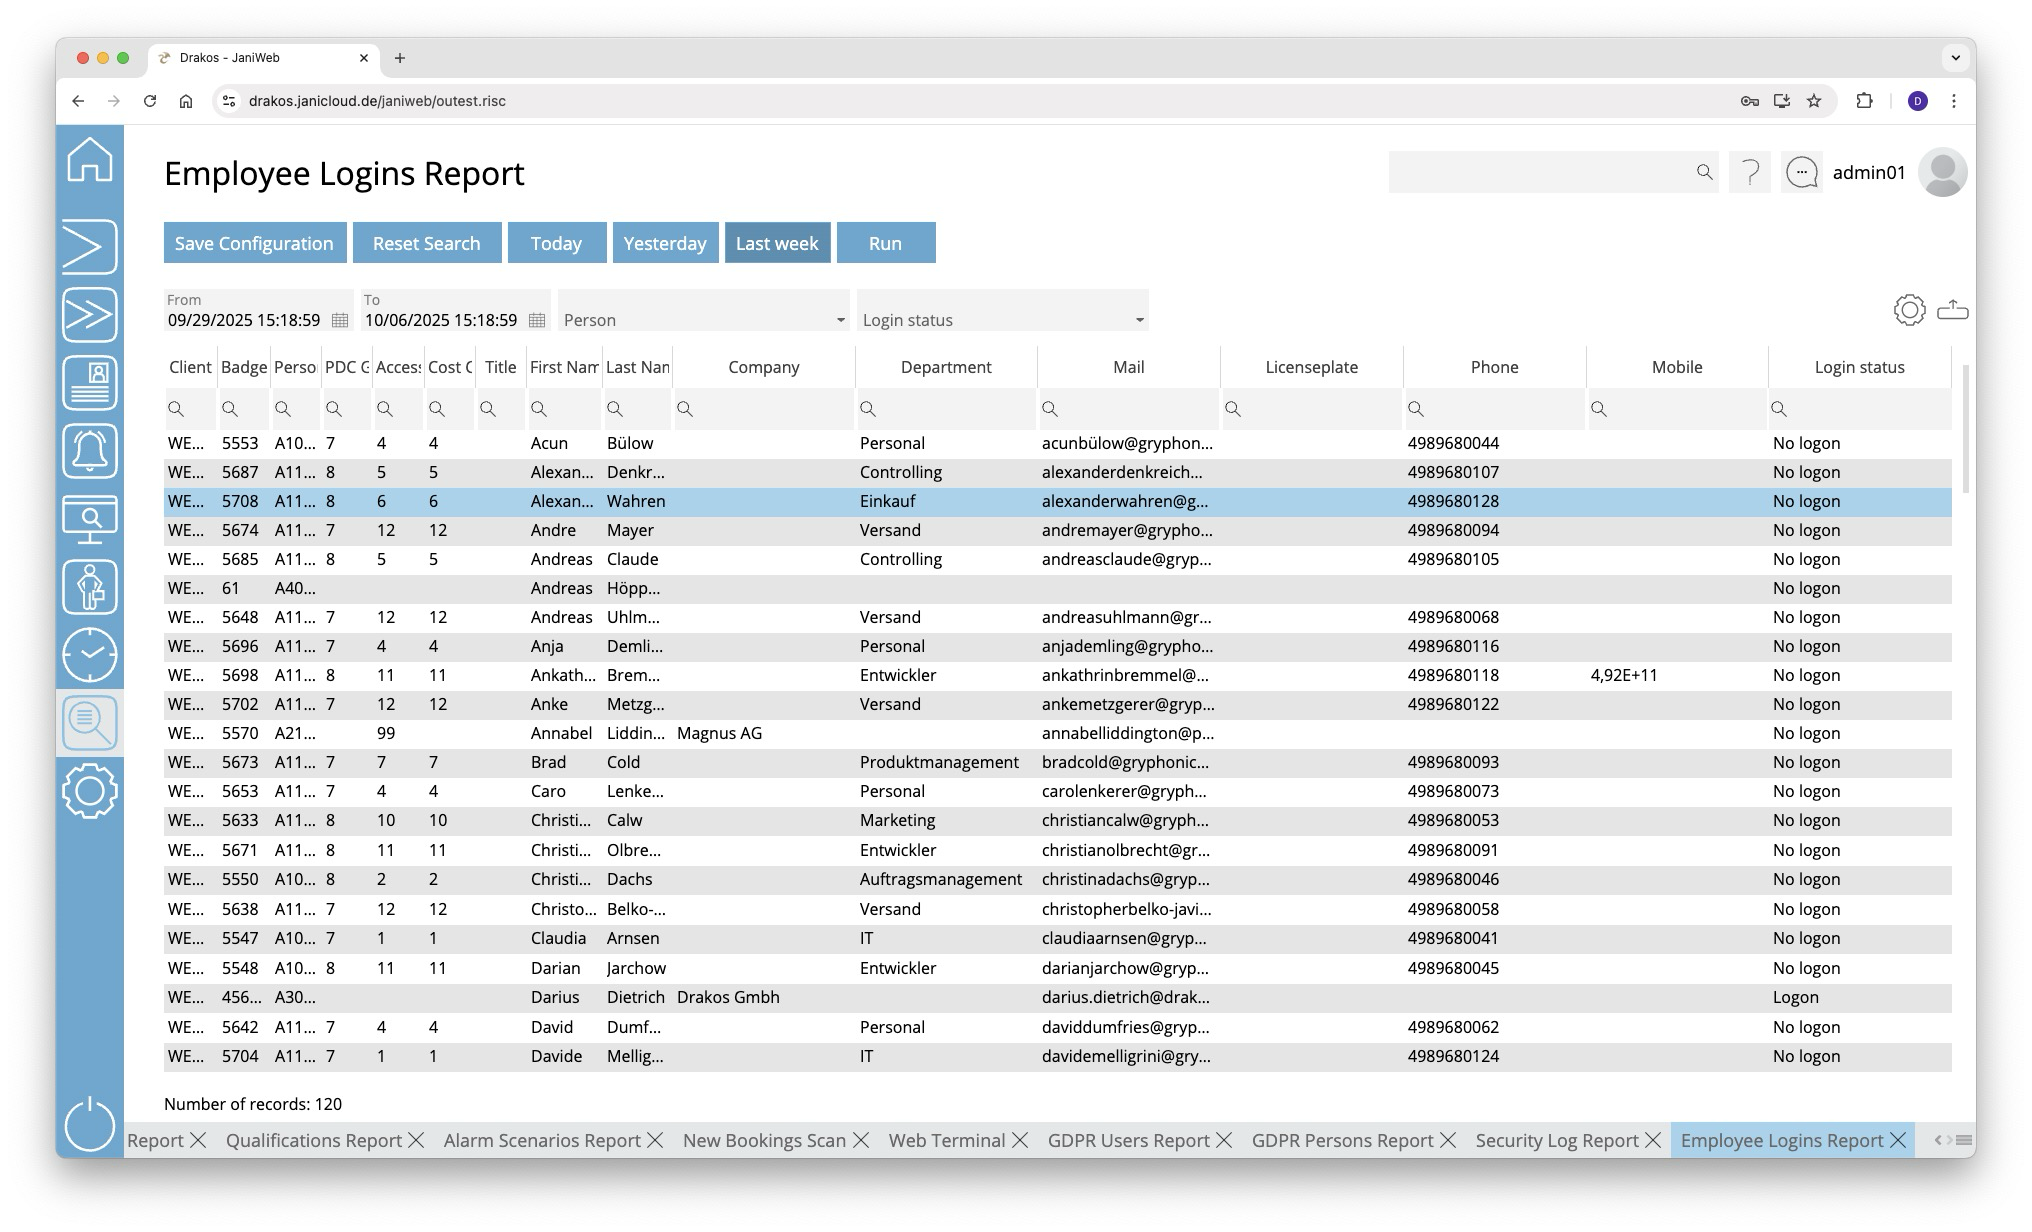
Creating the report
- Specify the time period for which you want to generate the report (From – To). Or press Today, Yesterday or Last week to quickly generate a report for the corresponding period.
- (Optional) Select a Person and/or a Login status to narrow the report.
- Press Run to start the report.
Further options with the report
- Select columns to display: Press the gear icon. Select which columns you want to display and in which order. Arrange the columns using the mouse or the arrow icons. Press Apply to adopt the changes.
- Search in columns: Enter text or numbers in the search field (magnifying glass icon) of a column to search for names, personnel numbers, or other criteria. The entries take effect immediately: the list only displays hits.
- Export the entire list: Press the download icon. Select the format in which you want to export the list. The export files are downloaded or displayed depending on the browser/operating system settings.For details on the available export formats, see the General > Export Formats chapter of this manual.
- Save report: For details on saving reports, see the chapter General > Custom Reports.
Button Reset Selection
Press Reset Selection to reset all fields to their initial value.
Server Log
Use the menu item Server Log to display a list of all system events.
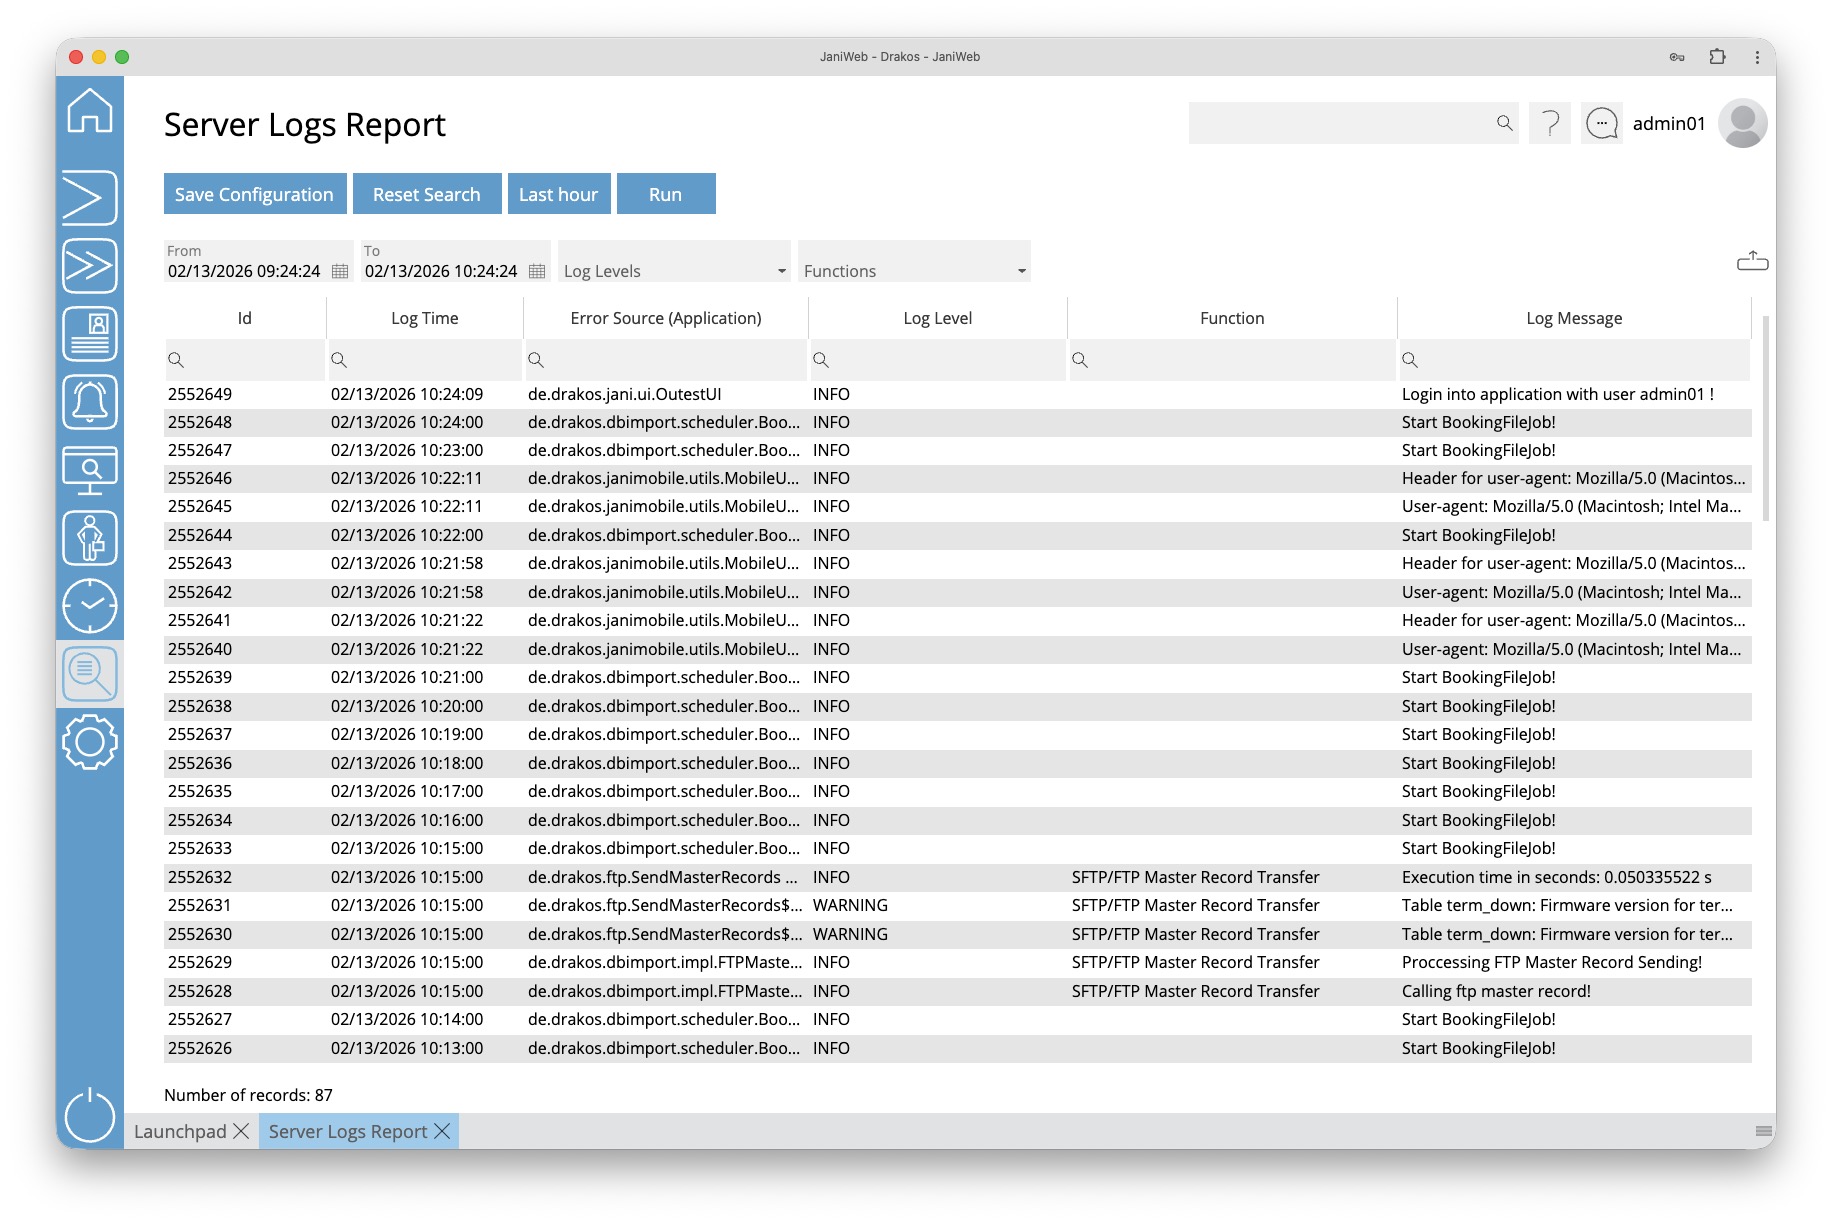
Creating the report
- Specify the time period for which you want to generate the report (From – To). Or press Last hour to quickly generate a report for the last hour.
- (Optional) Select one or more Log Levels to narrow the report.
- (Optional) Select one or more Functions to narrow the report.
- Press Run to start the report.
Further options with the report
- Search in columns: Enter text or numbers in the search field (magnifying glass icon) of a column to search for names, personnel numbers, or other criteria. The entries take effect immediately: the list only displays hits.
- Export the entire list: Press the download icon. Select the format in which you want to export the list. The export files are downloaded or displayed depending on the browser/operating system settings. For details on the available export formats, see the General > Export Formats chapter of this manual.
- Save report: For details on saving reports, see the chapter General > Custom Reports.
Button Reset Selection
Press Reset Selection to reset all fields to their initial value.
Zone Lists
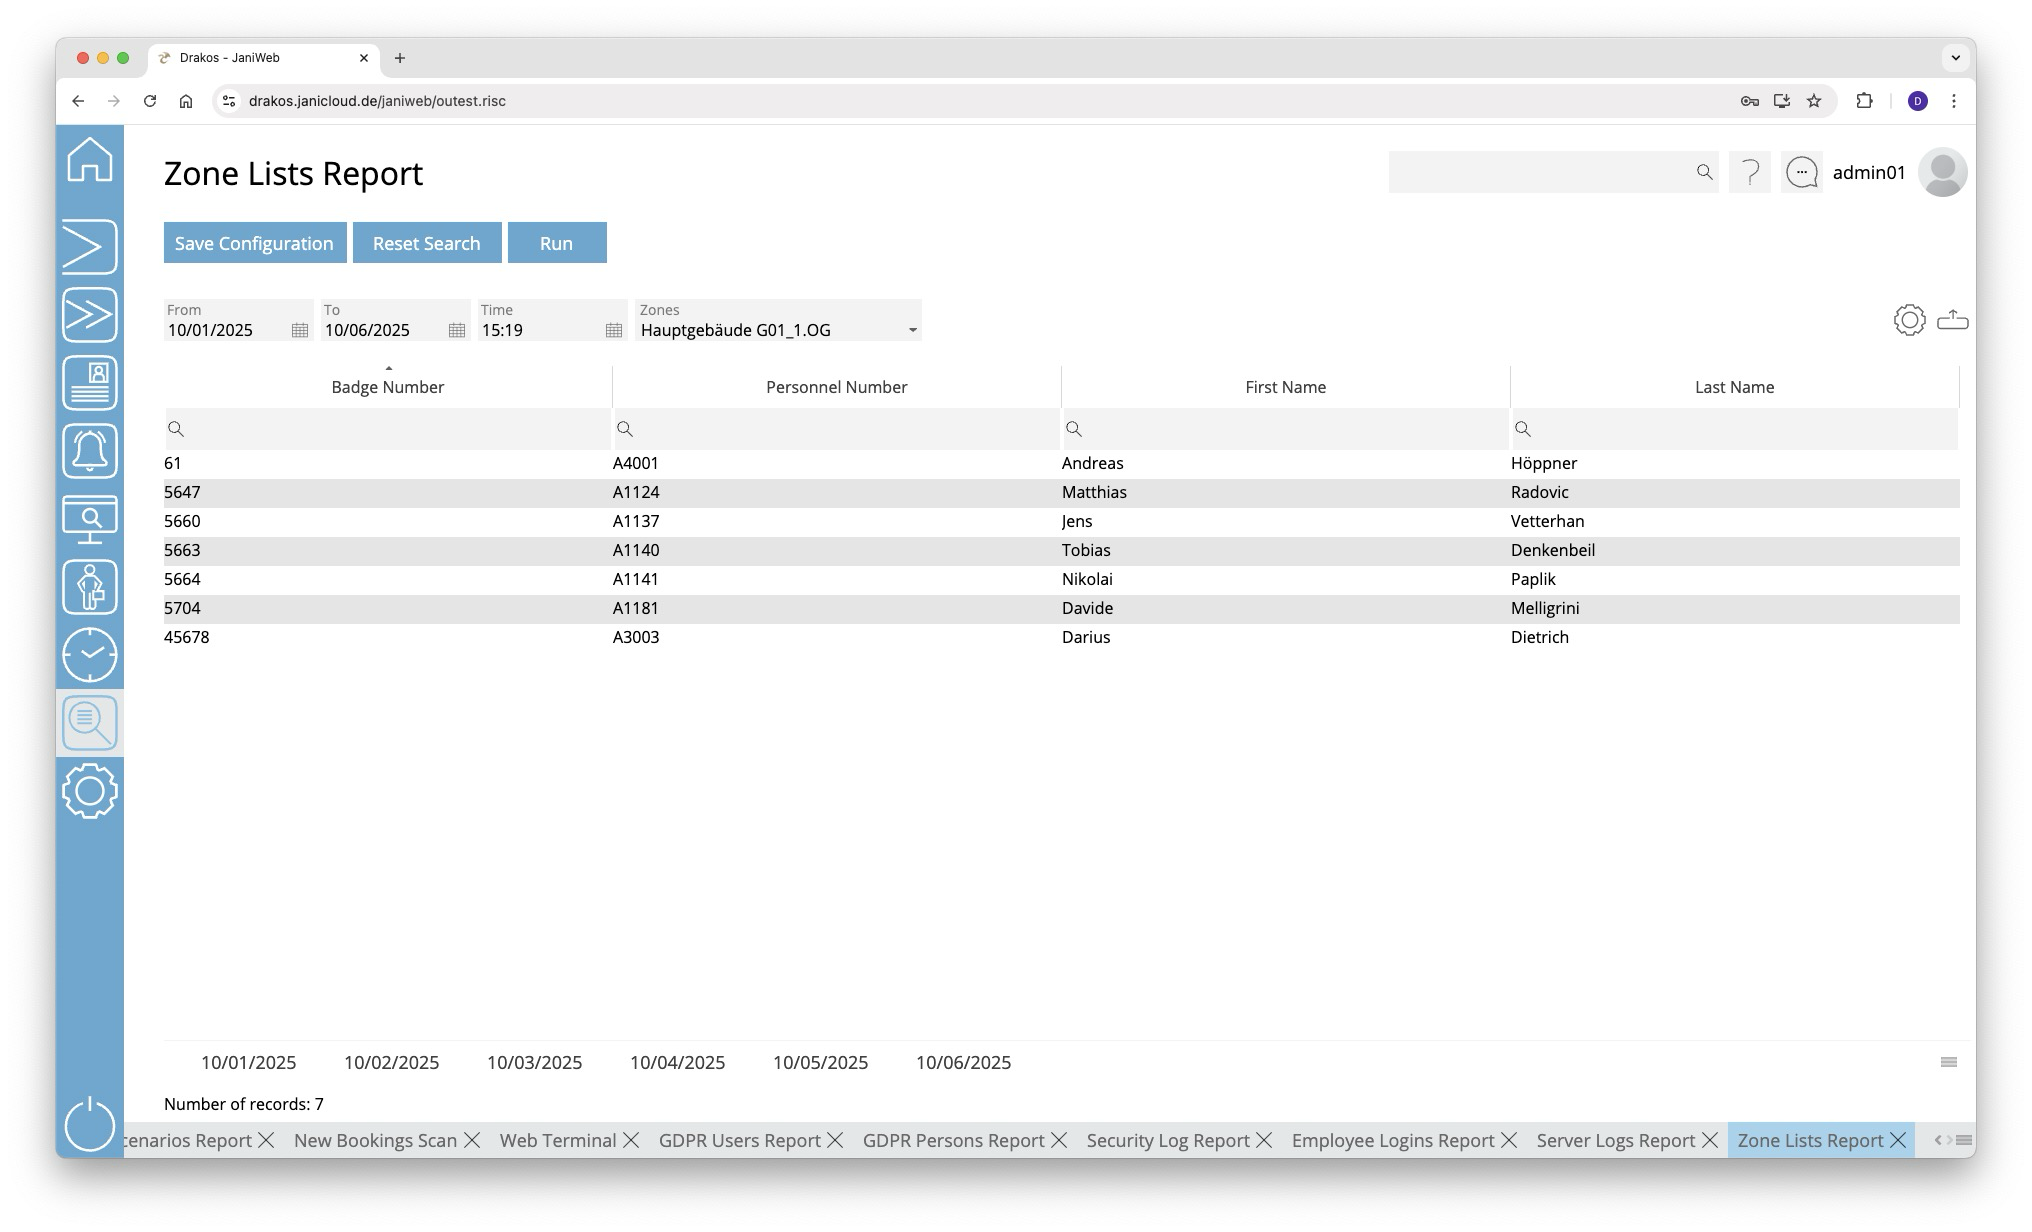
Creating the report
-
Enter the period for which you want to generate the report using the From and To fields.
-
Then, specify the time in the Time field for which you want to generate the report.
- Select the zone for which you want to generate the report.
- Click Run to start the report generation.
- Below the report results, a tab is displayed for each day within the selected period. Each tab shows the status of the zone for the corresponding date.
Further options with the report
- Select columns to display: Press the gear icon. Select which columns you want to display and in which order. Arrange the columns using the mouse or the arrow icons. Press Apply to adopt the changes.
- Search in columns: Enter text or numbers in the search field (magnifying glass icon) of a column to search for names, personnel numbers, or other criteria. The entries take effect immediately: the list only displays hits.
- Export the entire list: Press the download icon. Select the format in which you want to export the list. The export files are downloaded or displayed depending on the browser/operating system settings. For details on the available export formats, see the General > Export Formats chapter of this manual.
- Save report: For details on saving reports, see the chapter General > Custom Reports.
Would you like to automatically receive regular updates about which individuals are present in a specific zone? Then you can use the Periodic Sending feature. You can find instructions on how to set it up here: General > Custom Reports.
Button Reset Selection
Press Reset Selection to reset all fields to their initial value.
Quiz Report
You can use the Quiz Report menu item to evaluate which individuals passed or failed which quizzes.
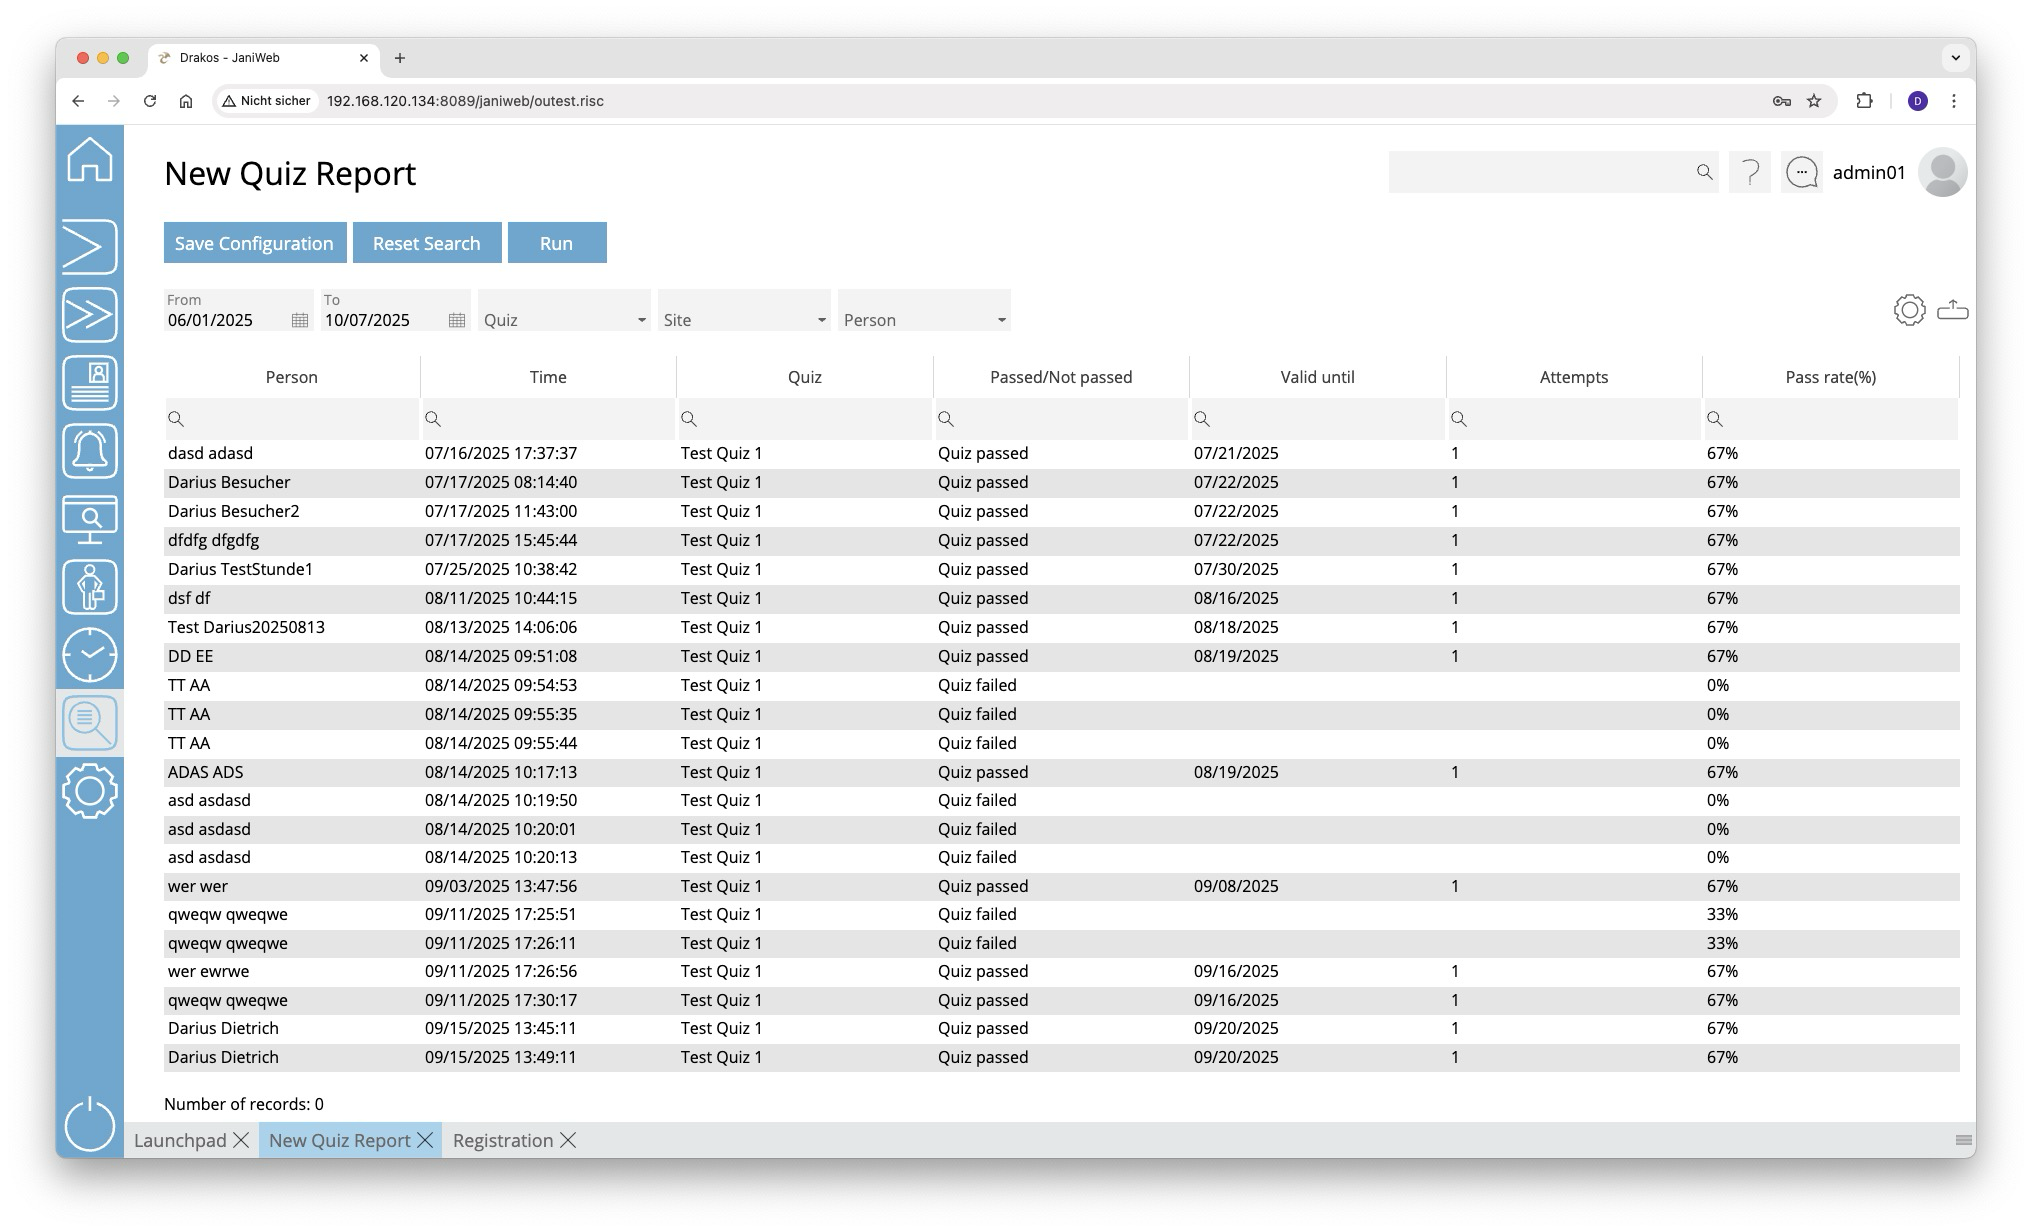
Creating the report
- Specify the time period for which you want to generate the report (From – To).
- (Optional) Use the additional fields to narrow the report.
- Press Run to start the report.
Further options with the report
- Select columns to display: Press the gear icon. Select which columns you want to display and in which order. Arrange the columns using the mouse or the arrow icons. Press Apply to adopt the changes.
- Search in columns: Enter text or numbers in the search field (magnifying glass icon) of a column to search for names, personnel numbers, or other criteria. The entries take effect immediately: the list only displays hits.
- Export the entire list: Press the download icon. Select the format in which you want to export the list. The export files are downloaded or displayed depending on the browser/operating system settings. For details on the available export formats, see the General > Export Formats chapter of this manual.
- Save report: For details on saving reports, see the chapter General > Custom Reports.
Button Reset Selection
Press Reset Selection to reset all fields to their initial value.
Device Events
You can view a list of device events via the Device Events menu option. This allows you to determine which device sent a message at a specific time.
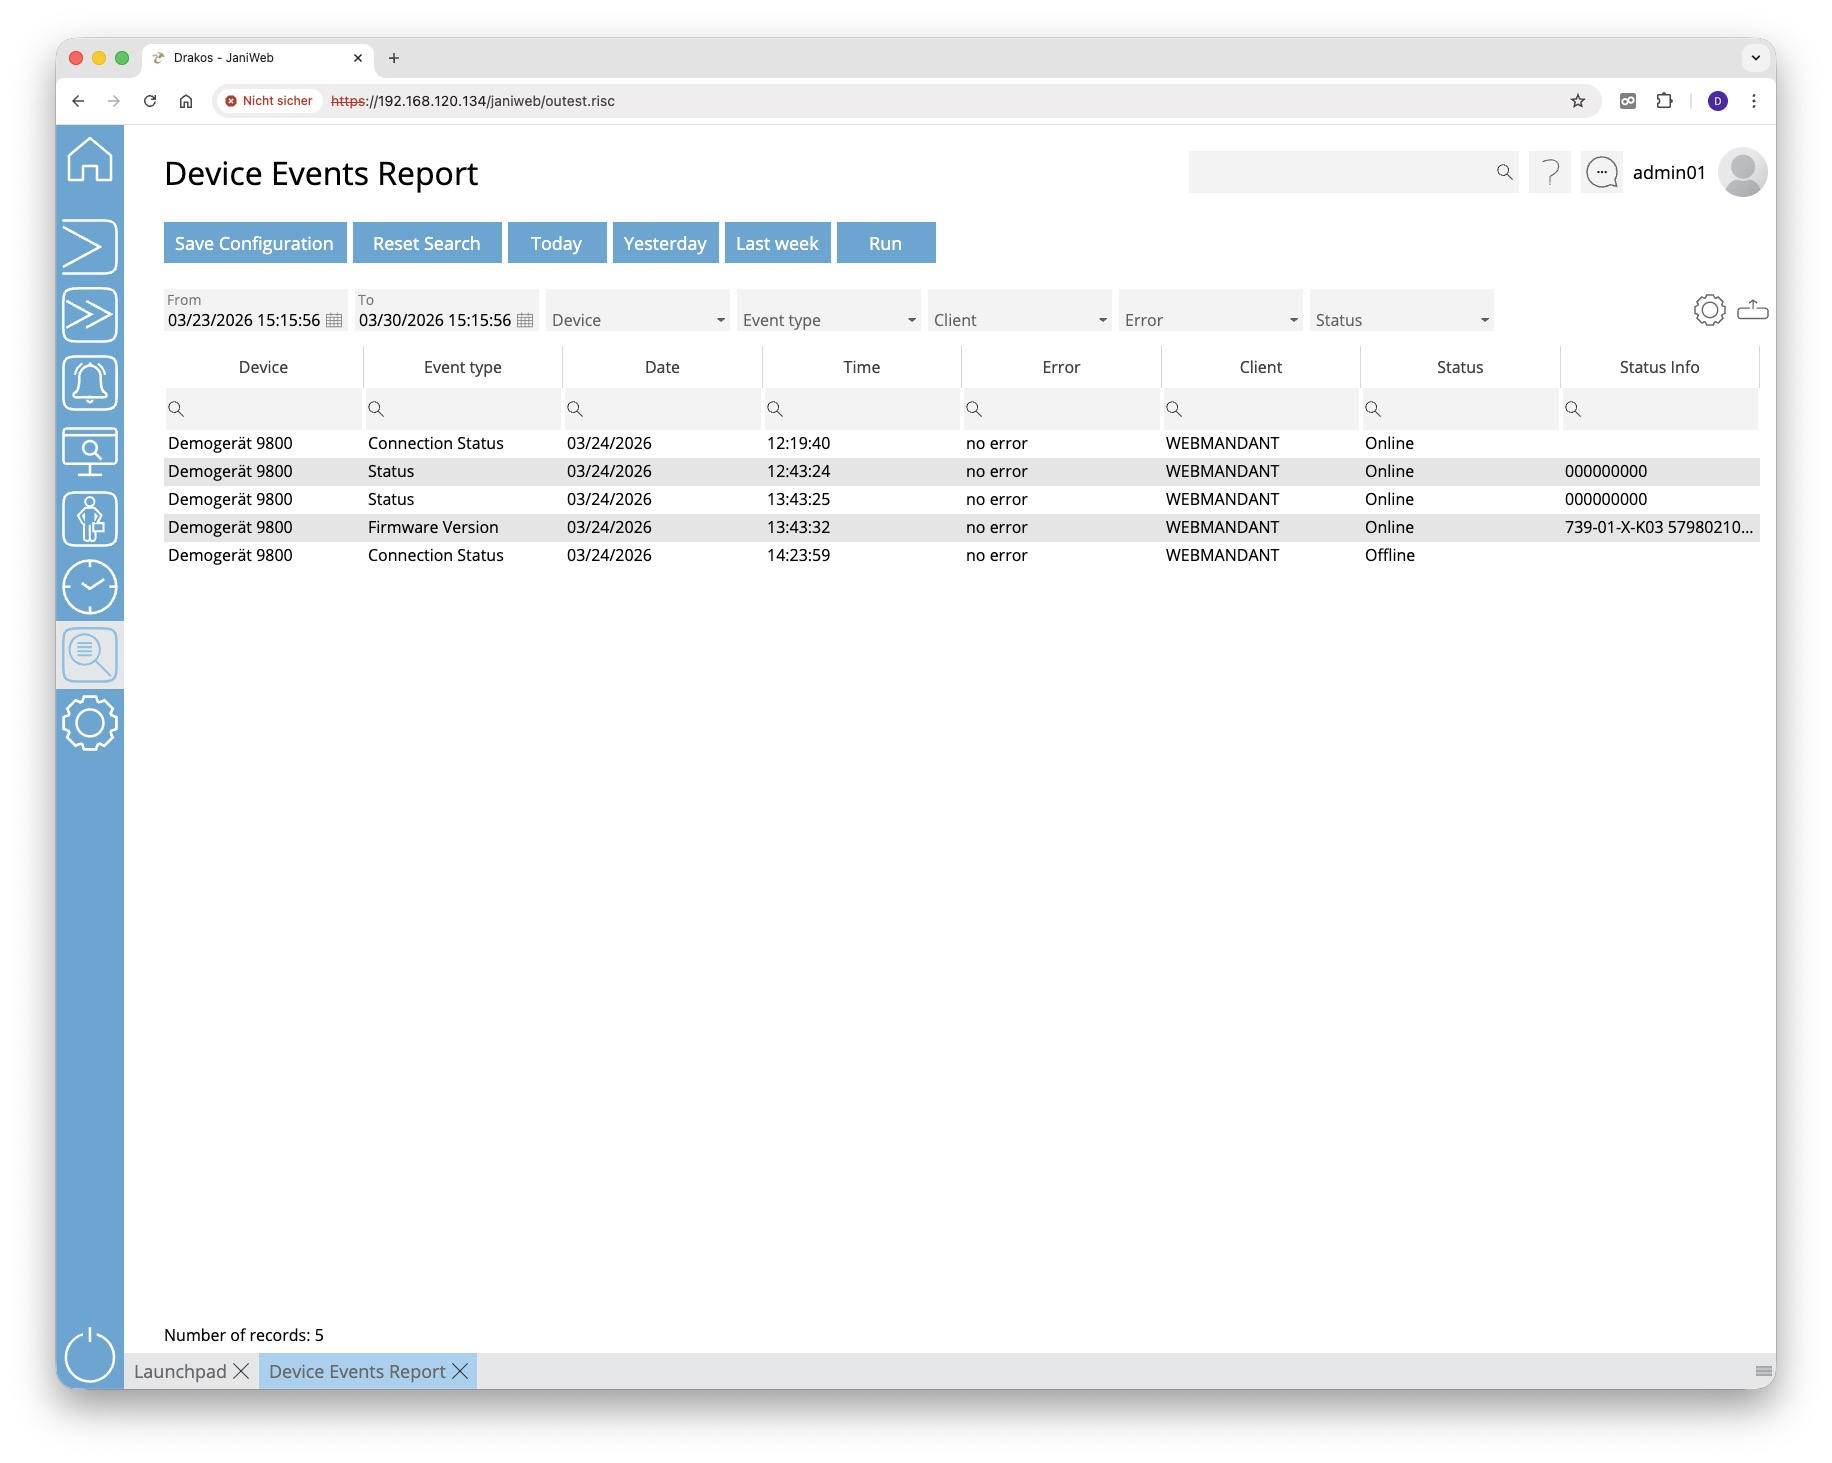
Creating the report
- Specify the time period for which you want to generate the report (From – To). Or press Today, Yesterday or Last week to quickly generate a report for the corresponding period.
- (Optional) Use the additional fields to narrow the report.
- Press Run to start the report.
Further options with the report
- Select columns to display: Press the gear icon. Select which columns you want to display and in which order. Arrange the columns using the mouse or the arrow icons. Press Apply to adopt the changes.
- Search in columns: Enter text or numbers in the search field (magnifying glass icon) of a column to search for names, personnel numbers, or other criteria. The entries take effect immediately: the list only displays hits.
- Export the entire list: Press the download icon. Select the format in which you want to export the list. The export files are downloaded or displayed depending on the browser/operating system settings. For details on the available export formats, see the General > Export Formats chapter of this manual.
- Save report: For details on saving reports, see the chapter General > Custom Reports.
Button Reset Selection
Press Reset Selection to reset all fields to their initial value.
Action Protocol
Via the Action Protocol menu item, you can generate a list of actions carried out by users in JaniWeb. This allows you to analyse which user performed which action (e.g. an analysis, a change to an object).
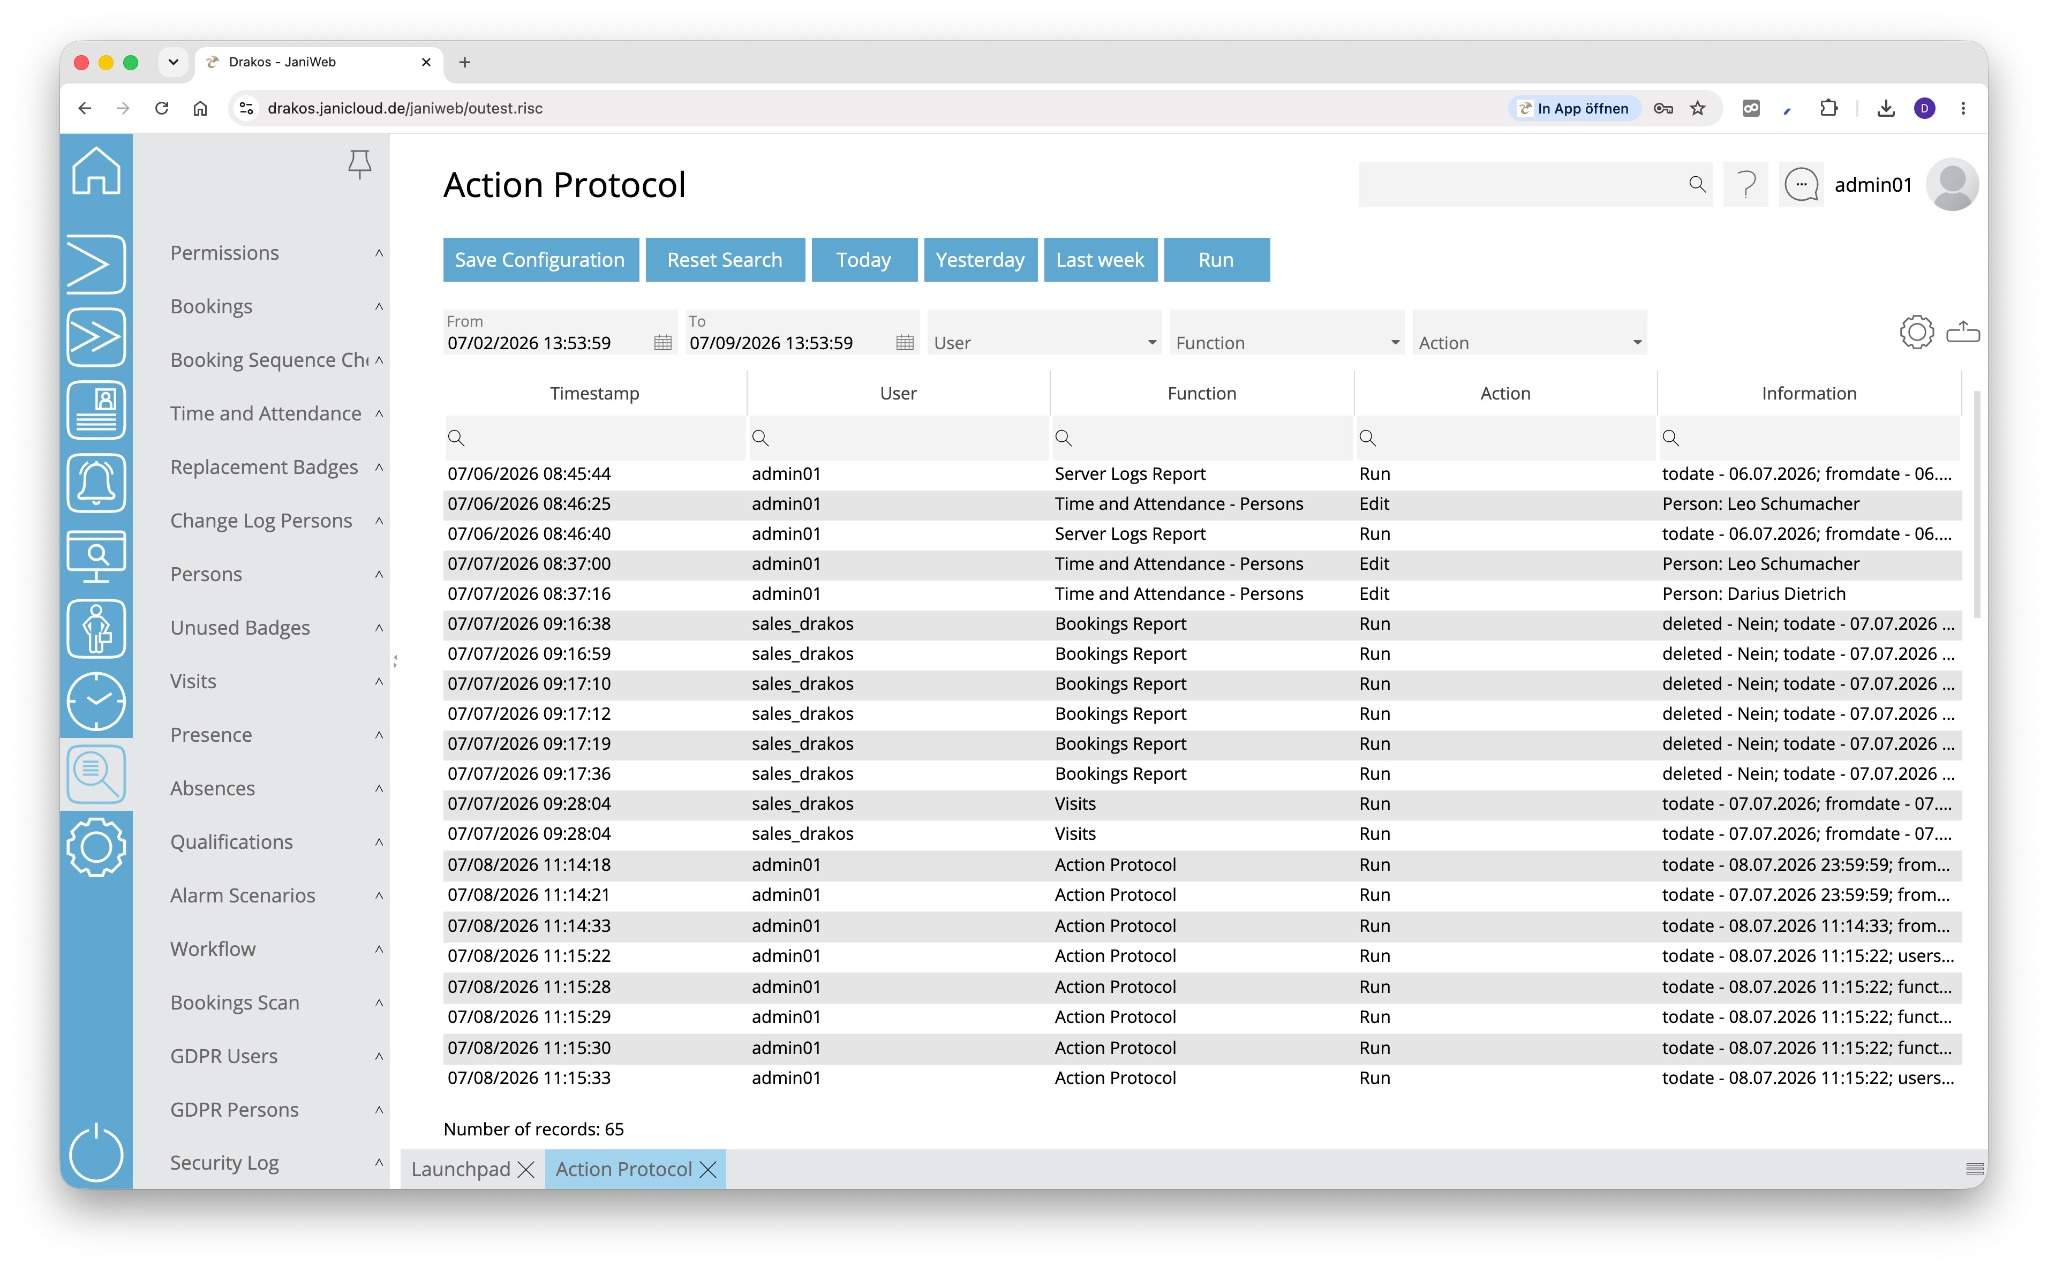
Creating the report
- Specify the time period for which you want to generate the report (From – To). Or press Today, Yesterday or Last week to quickly generate a report for the corresponding period.
- (Optional) Use the additional fields to narrow the report.
- Press Run to start the report.
Further options with the report
- Select columns to display: Press the gear icon. Select which columns you want to display and in which order. Arrange the columns using the mouse or the arrow icons. Press Apply to adopt the changes.
- Search in columns: Enter text or numbers in the search field (magnifying glass icon) of a column to search for names, personnel numbers, or other criteria. The entries take effect immediately: the list only displays hits.
- Export the entire list: Press the download icon. Select the format in which you want to export the list. The export files are downloaded or displayed depending on the browser/operating system settings. For details on the available export formats, see the General > Export Formats chapter of this manual.
- Save report: For details on saving reports, see the chapter General > Custom Reports.
Button Reset Selection
Press Reset Selection to reset all fields to their initial value.