General
Login
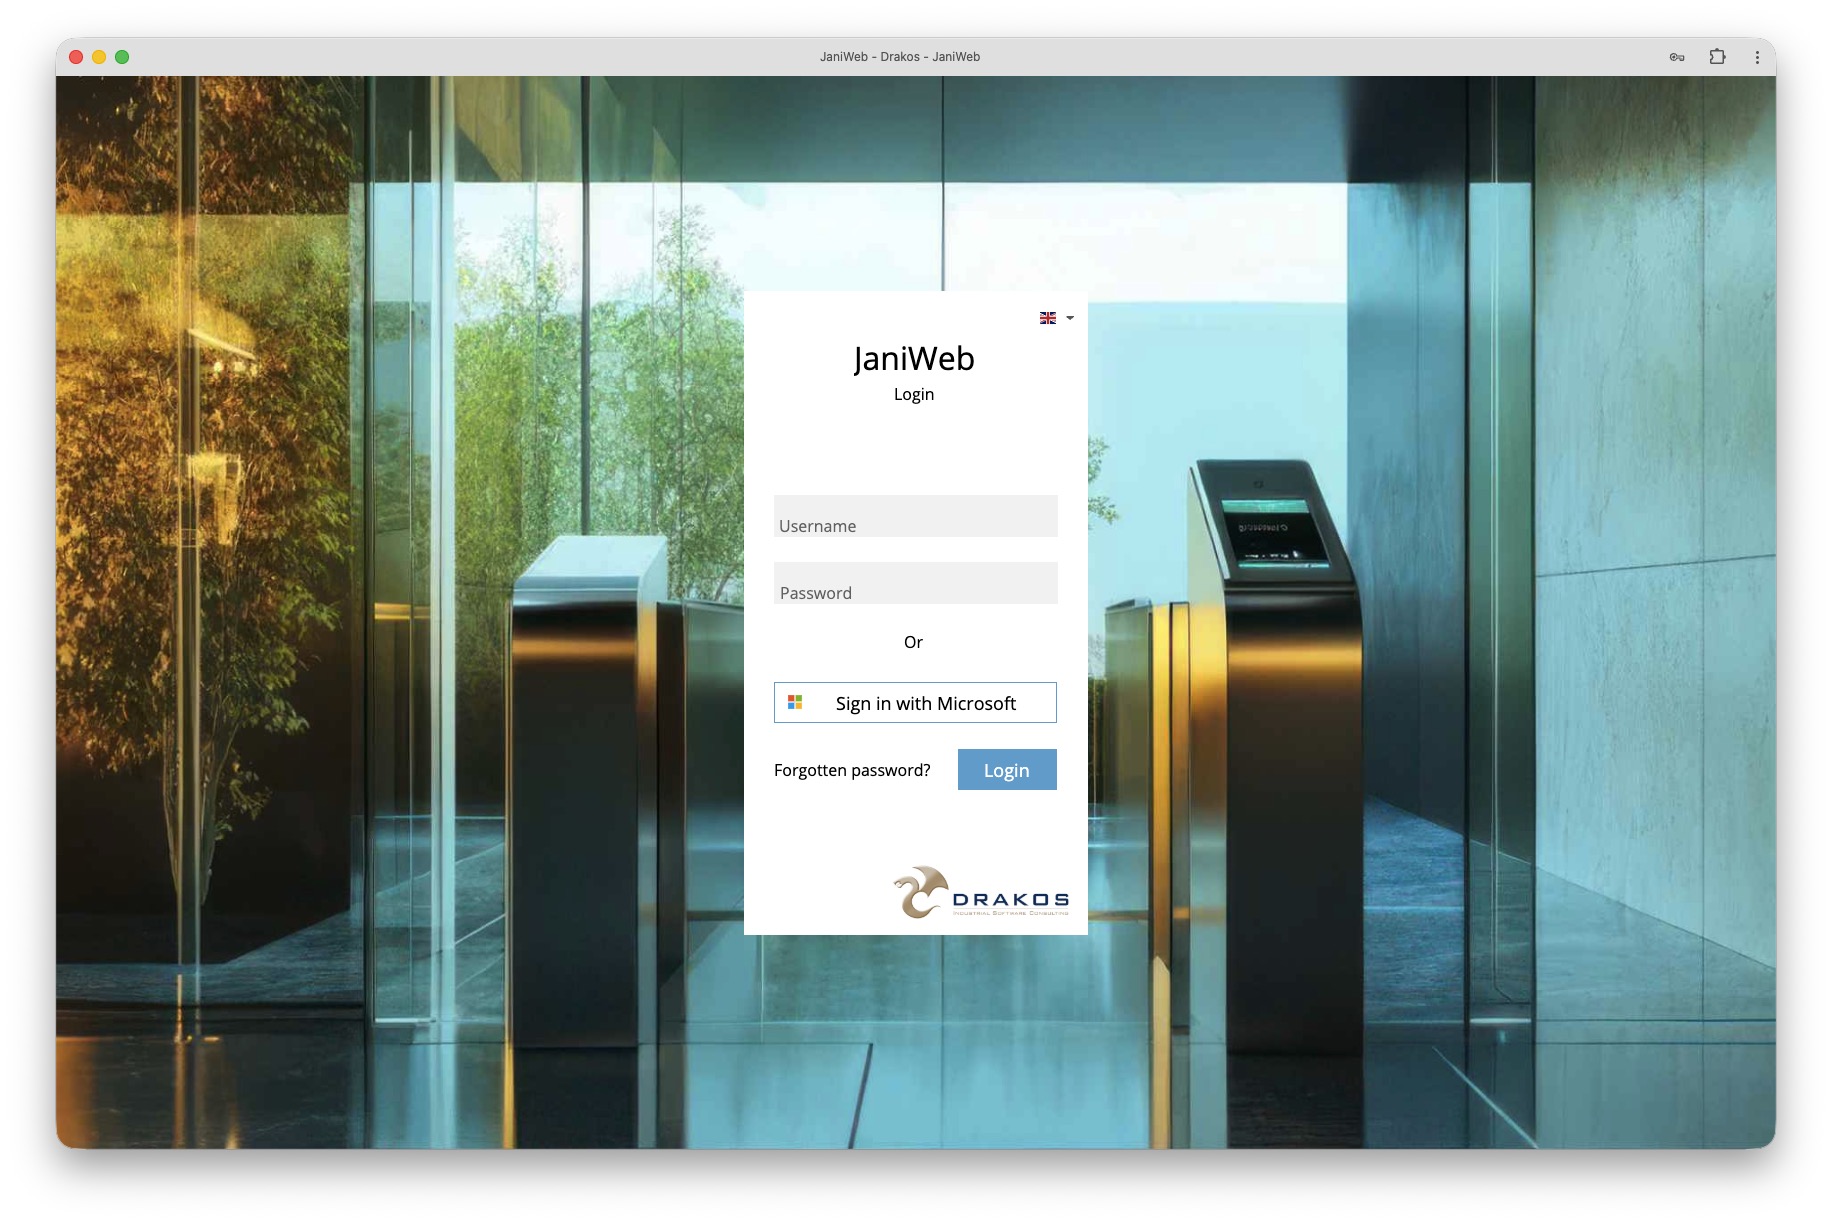
Log in
- Enter your username and your password.
- Press Login.
- Use the Sign in with Microsoft button to sign in via Single-Sign-On.
Forgot password
- If you have forgotten your password, press Forgot password.
- Enter the email address that is linked to your user account.
- You will then receive an email with instructions on how to reset your password.
Change language
To change the language of the user interface, press the flag in the top right-hand corner and select the desired language.
General Structure
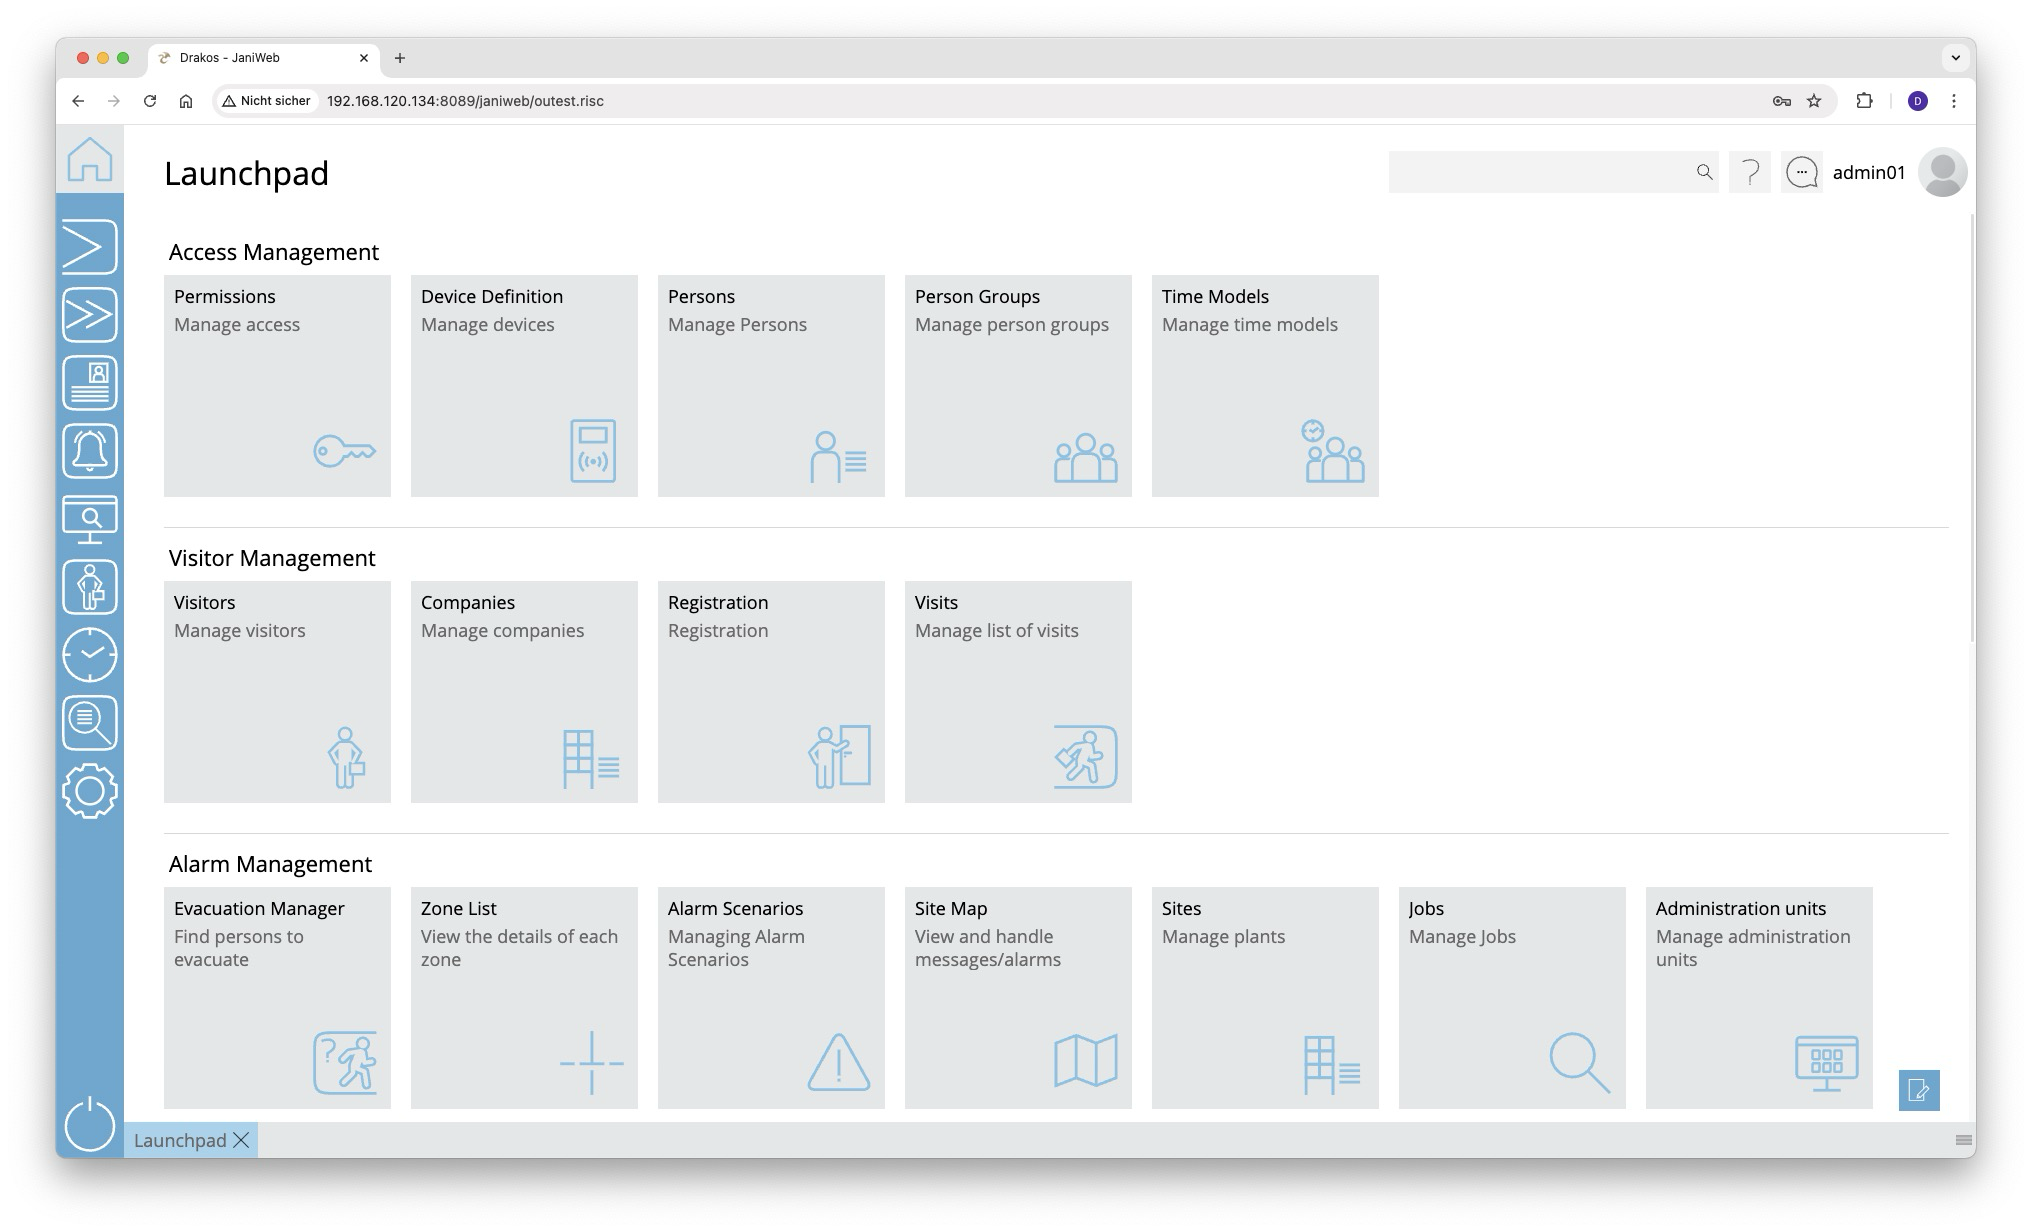
Navigation
The main menu is located on the left-hand side of the application. Here you can switch between the different modules. The Home button in the top left-hand corner takes you back to the Launchpad at any time. When you select a module, the corresponding submenu opens to the right of the main menu. Select a menu item to display the corresponding area of the application on the right-hand side.
At the bottom you will find a tab bar that displays your most recently opened menu items. From here you can:
- Bring menus back to the foreground by clicking on the corresponding tab.
- Close menus by clicking on the X in the respective tab.
It is also possible to open several menu items at the same time:
- To do this, drag a tab to the top half of the application.
- A red area indicates where you can place the menu item.
In this way, you can edit several menu items at the same time and switch between them flexibly.
You will find the Logout icon in the bottom left-hand corner. Press it to log out of the application.
Search
Use the search bar at the top right of the application to search for specific devices or persons. You can also find entire menus and jump directly to them.
Online help
The question mark icon takes you directly to the application’s online help.
User menu
The user menu is also located in the top right-hand corner. Here you will find
- Info: Shows you the current version of the application, the database and the Tomcat.
- Settings: Opens your user-specific settings.
- Change language: You can change the language of the application via the flag button by selecting a language from the list field.
- Log out: Use this item to log out of the application.
Launchpad
After logging in, you will be taken directly to the Launchpad, which can be customized. Here you can save your most frequently used menus as favorites, sort them into different sections and access them directly from the Launchpad.

Customizing your Launchpad
- Start editing: Press the pencil icon in the bottom right corner.
- Create sections: Press New Section, name it as you like in order to structure your favorites.
- Add favorites: Open the desired submenu and drag a menu item to a section on the Launchpad. The menu items appear there as tiles.
- Save: Press Save to save your changes.
Your personalized Launchpad will now load every time you log in.
Tips
- You can customize the areas and favorites entirely according to your preferences. Here are two ideas:
- Create areas for software modules (e.g. Devices, Reports).
- Divide menus into functions and settings.
- It’s worth adding frequently used Reports as favorites.
- Since favorites can be changed at any time, you can try out different variants to find the best way to organize them.
User Menu
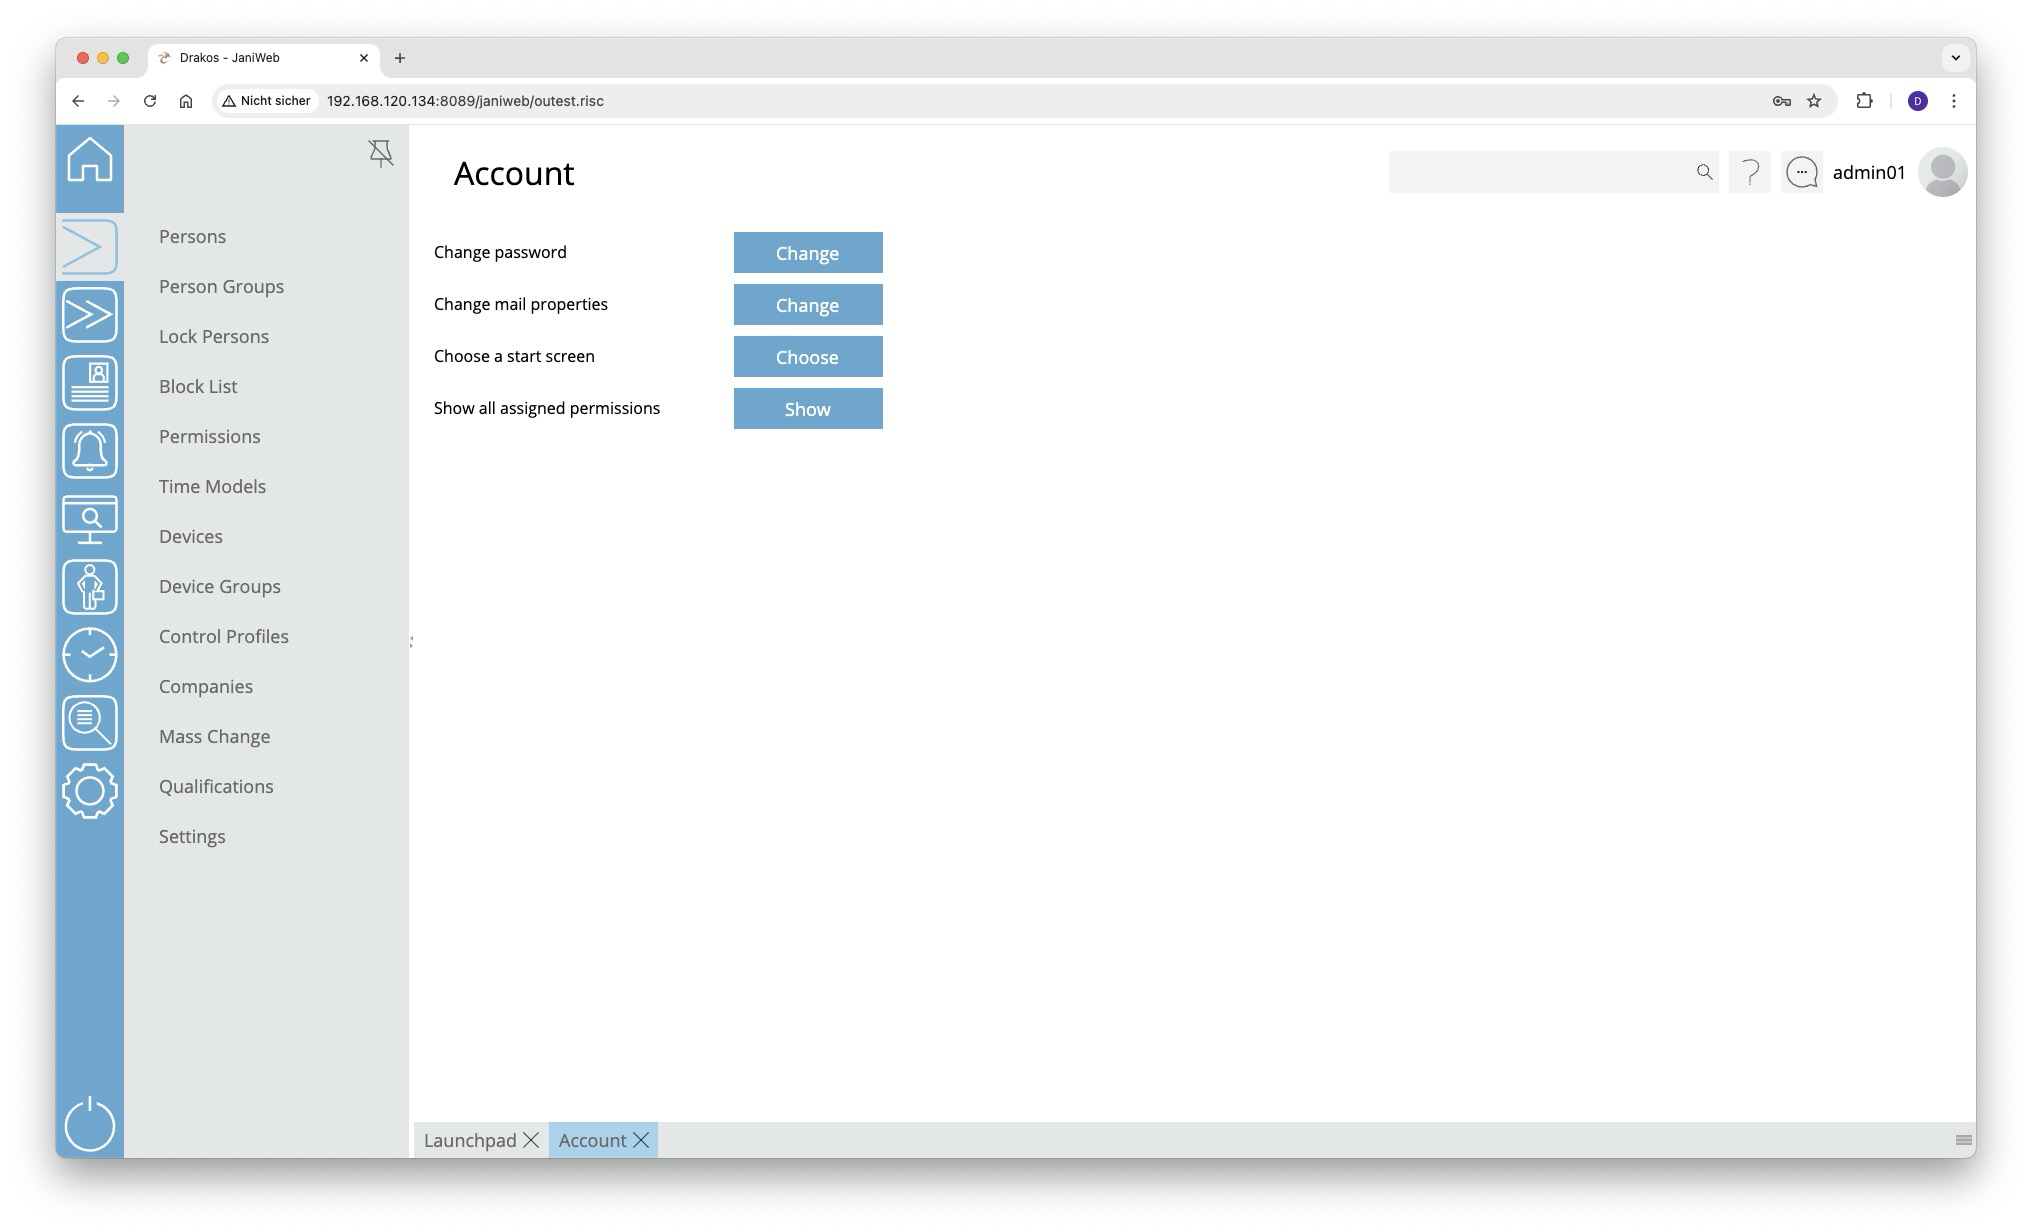
Change password
- Press Change next to Change password.
- Set your new password and save the change.
Change email address
- Press Change next to Change mail properties.
- Enter your new email address and save the change.
Specify start menu
You can select a menu that opens automatically after logging in:
- Press Choose next to Choose a start screen.
- Select the desired menu item.
If nothing is selected here, the Launchpad opens by default after logging in.
Show permissions
To view your permissions within the application, press Show next to Show all assigned permissions.
Set deputy
As a supervisor, choose up to three deputies for yourself. During the substitution period, all workflow requests are also forwarded to the supervisor’s deputy.
This option is only available if you have logged in as an employee and are a supervisor.
Disable team calendar limitation
The team display can be limited by further criteria in the settings. Enable this option to remove such restrictions.
This option is only available if you have logged in as an employee.
Show only direct employees
If this option is activated, you as a supervisor will only see the persons from the team for which you are the supervisor. Furthermore, you cannot see members of the team you are a member of yourself.
This option is only available if you have logged in as an employee and are a supervisor.
Incognito mode
If this option is activated, you will not be visible to other members of your team in the team calendar, and you will not see members of your team in the team calendar.
This option is only available if you have logged in as an employee.
Export Formats
Export lists
Lists in JaniWeb for which a download icon is displayed can be exported in various formats. The export files are downloaded or displayed depending on the settings of the browser / operating system. The following formats are available:
Creates a document in PDF format.
Tip: To print the pages, select the options “Automatically rotate pages” and “Fit into print area” in your PDF viewer.
CSV
Creates a file in CSV format (comma-separated values). The individual columns are enclosed in inverted commas and separated by semicolons.
XML
Creates a file in XML format. Rows are enclosed in <row> tags, columns in <cell> tags.
HTML
Creates a file in HTML format. The list is formatted as a simple table without styles.
Excel
Creates a file in Microsoft Excel format. This format can also be opened with many other spreadsheet programmes.
Clipboard
Copies the list to the computer clipboard. The individual columns are separated by tabs. Use this format to paste the list directly into an application such as Excel.
Custom Reports
You can freely configure each of the Analyses available in JaniWeb and save them under a custom name. This means that you do not have to redefine the parameters each time.
Saved reports
- appear in the menu and can be accessed directly from there,
- can be placed as a tile on the Lauchpad.
The following elements are available for each report:
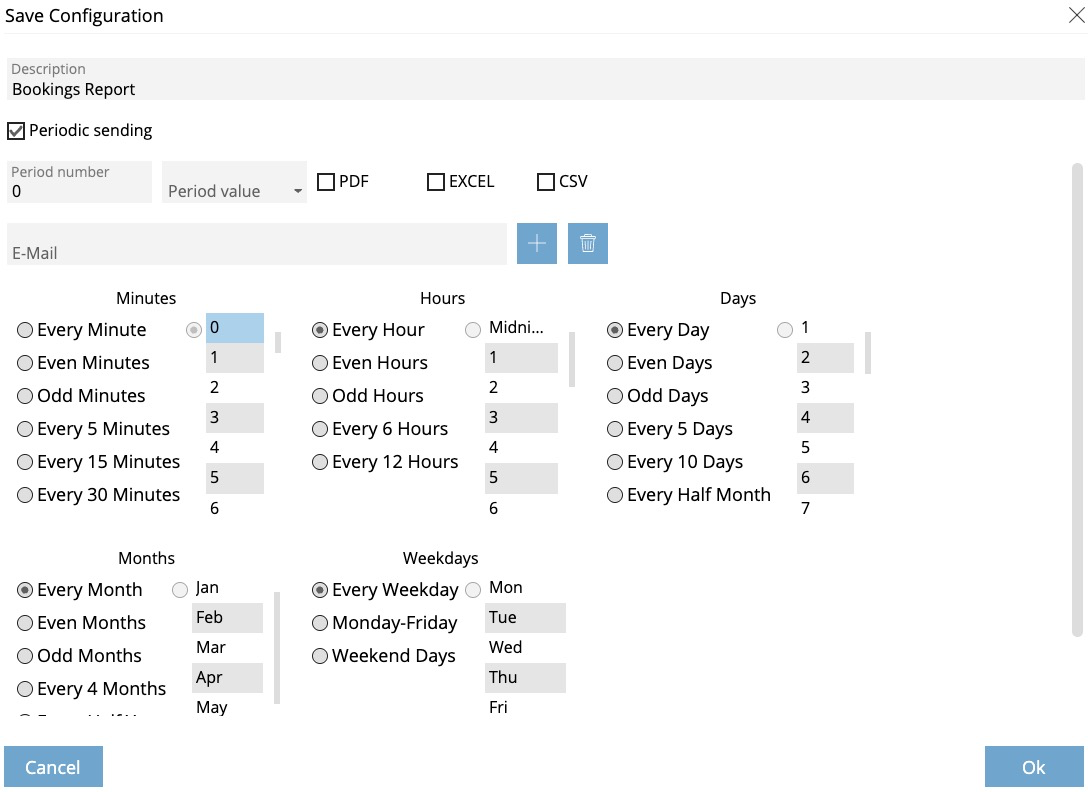
Button Save Query Configuration
Press Save Query Configuration to save the report under a name of your choice.
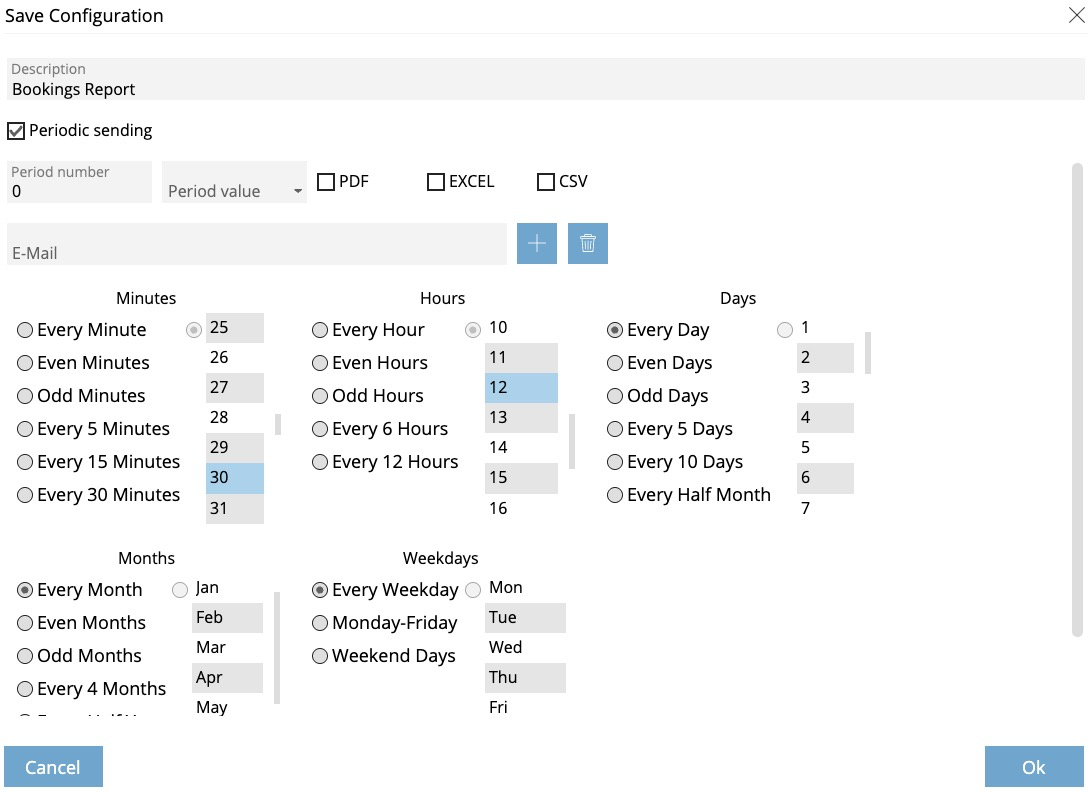
Option Periodic sending
Select the option Periodic sending to send the report regularly by email.
- Enter one or more email recipients.
- Select the desired file format for the analysis (PDF, Excel or CSV).
- Set the time interval for automatic sending.
- e.g. every hour

- e.g every day 12:30 o'clock

- e.g. every Monday 8:00 AM o'clock

- e.g. every hour

Button Delete Query Configuration
Press Delete Query Configuration to delete the saved report.
Button Edit Query Configuration
Press Edit Query Configuration to save the report under a different name. You can also change the settings for periodic sending by email. Press Ok to apply the changes.