Instructions
- Create Visits
- Create Absences
- Create bookings via Web Terminal
- Add bookings via the Overview Bookings
- JaniAccess – Access Control Basics
Create Visits
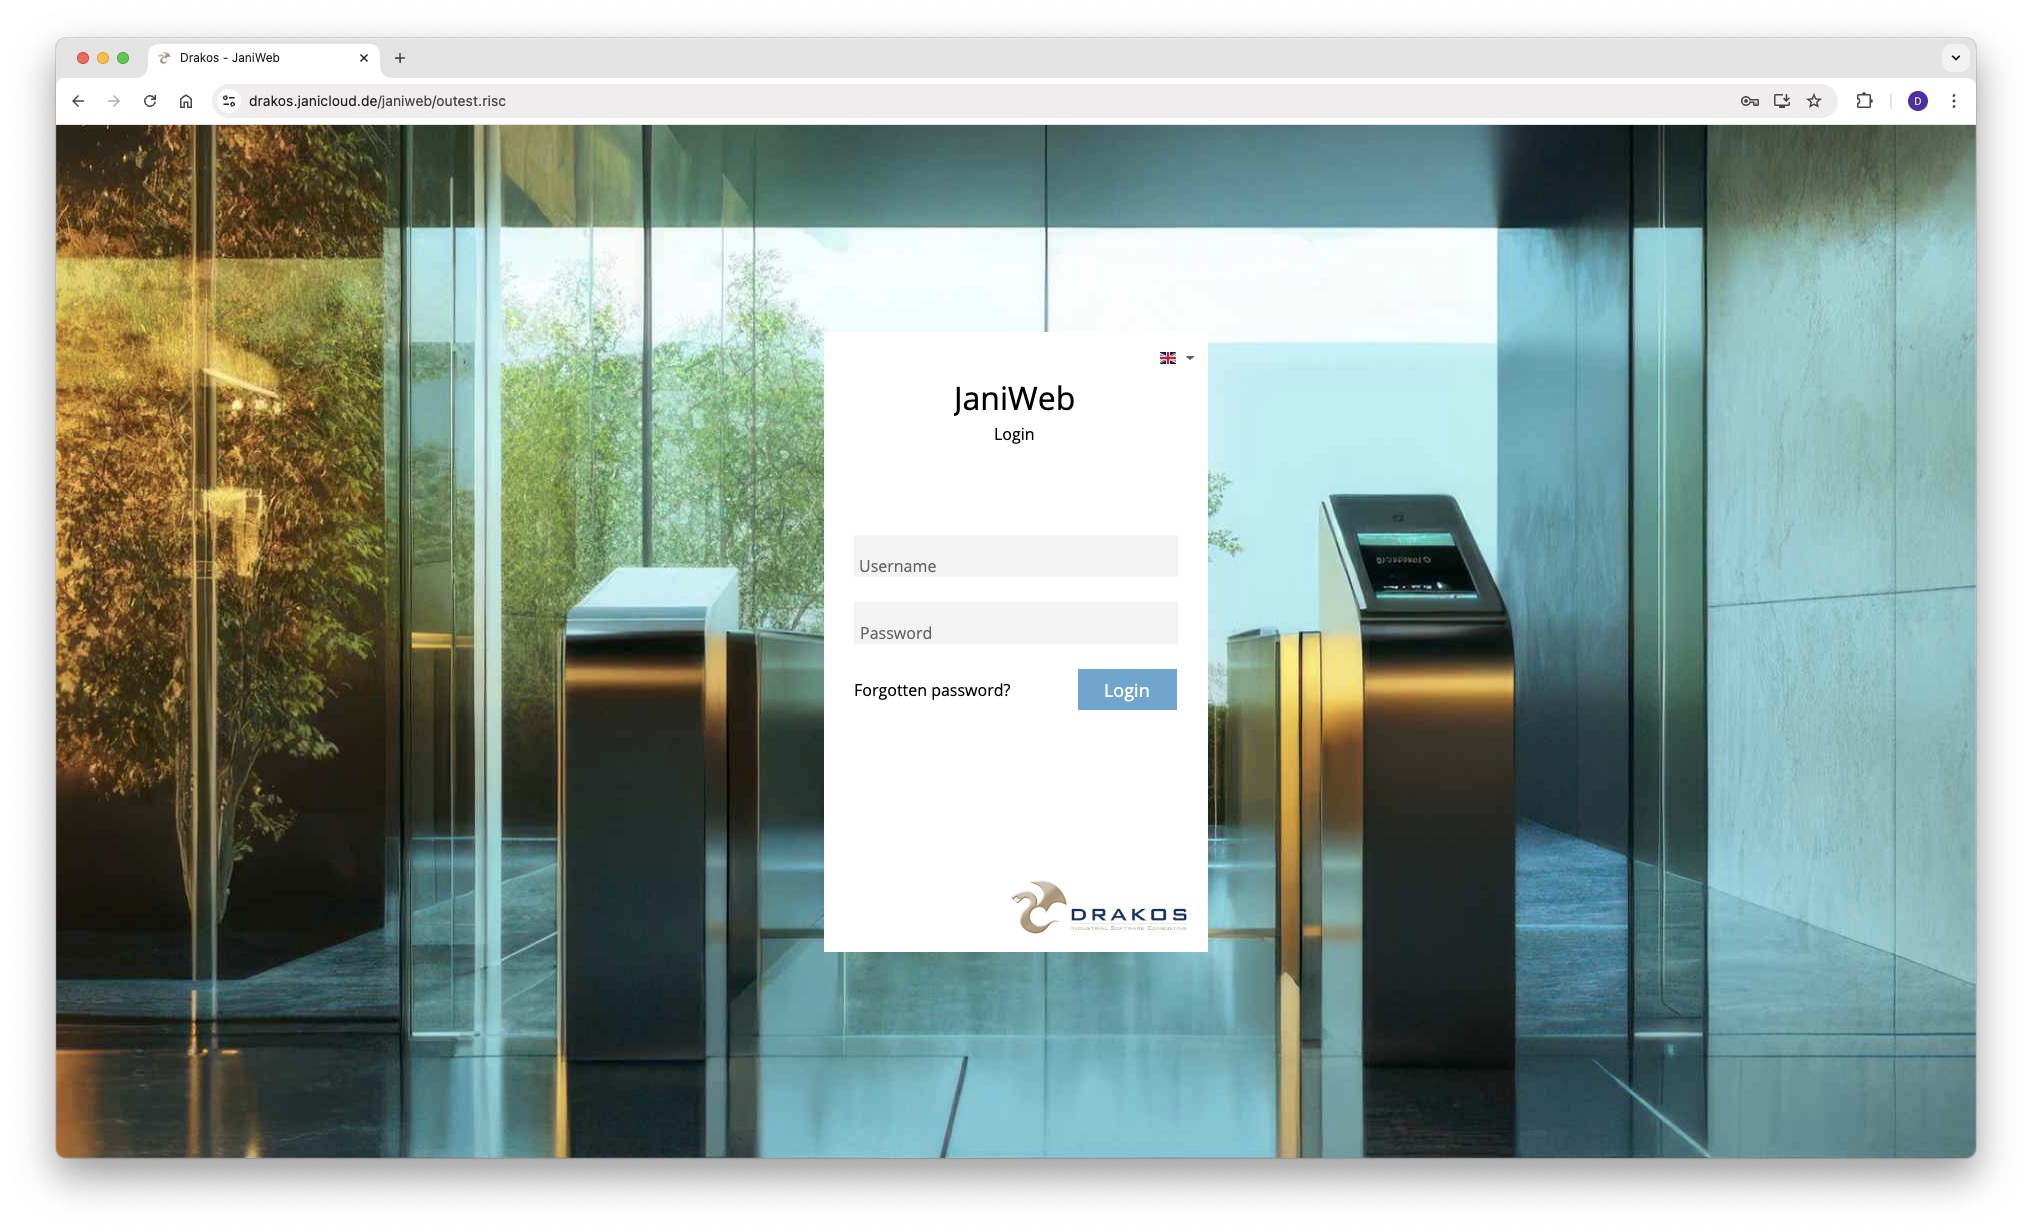
- Log in to the application

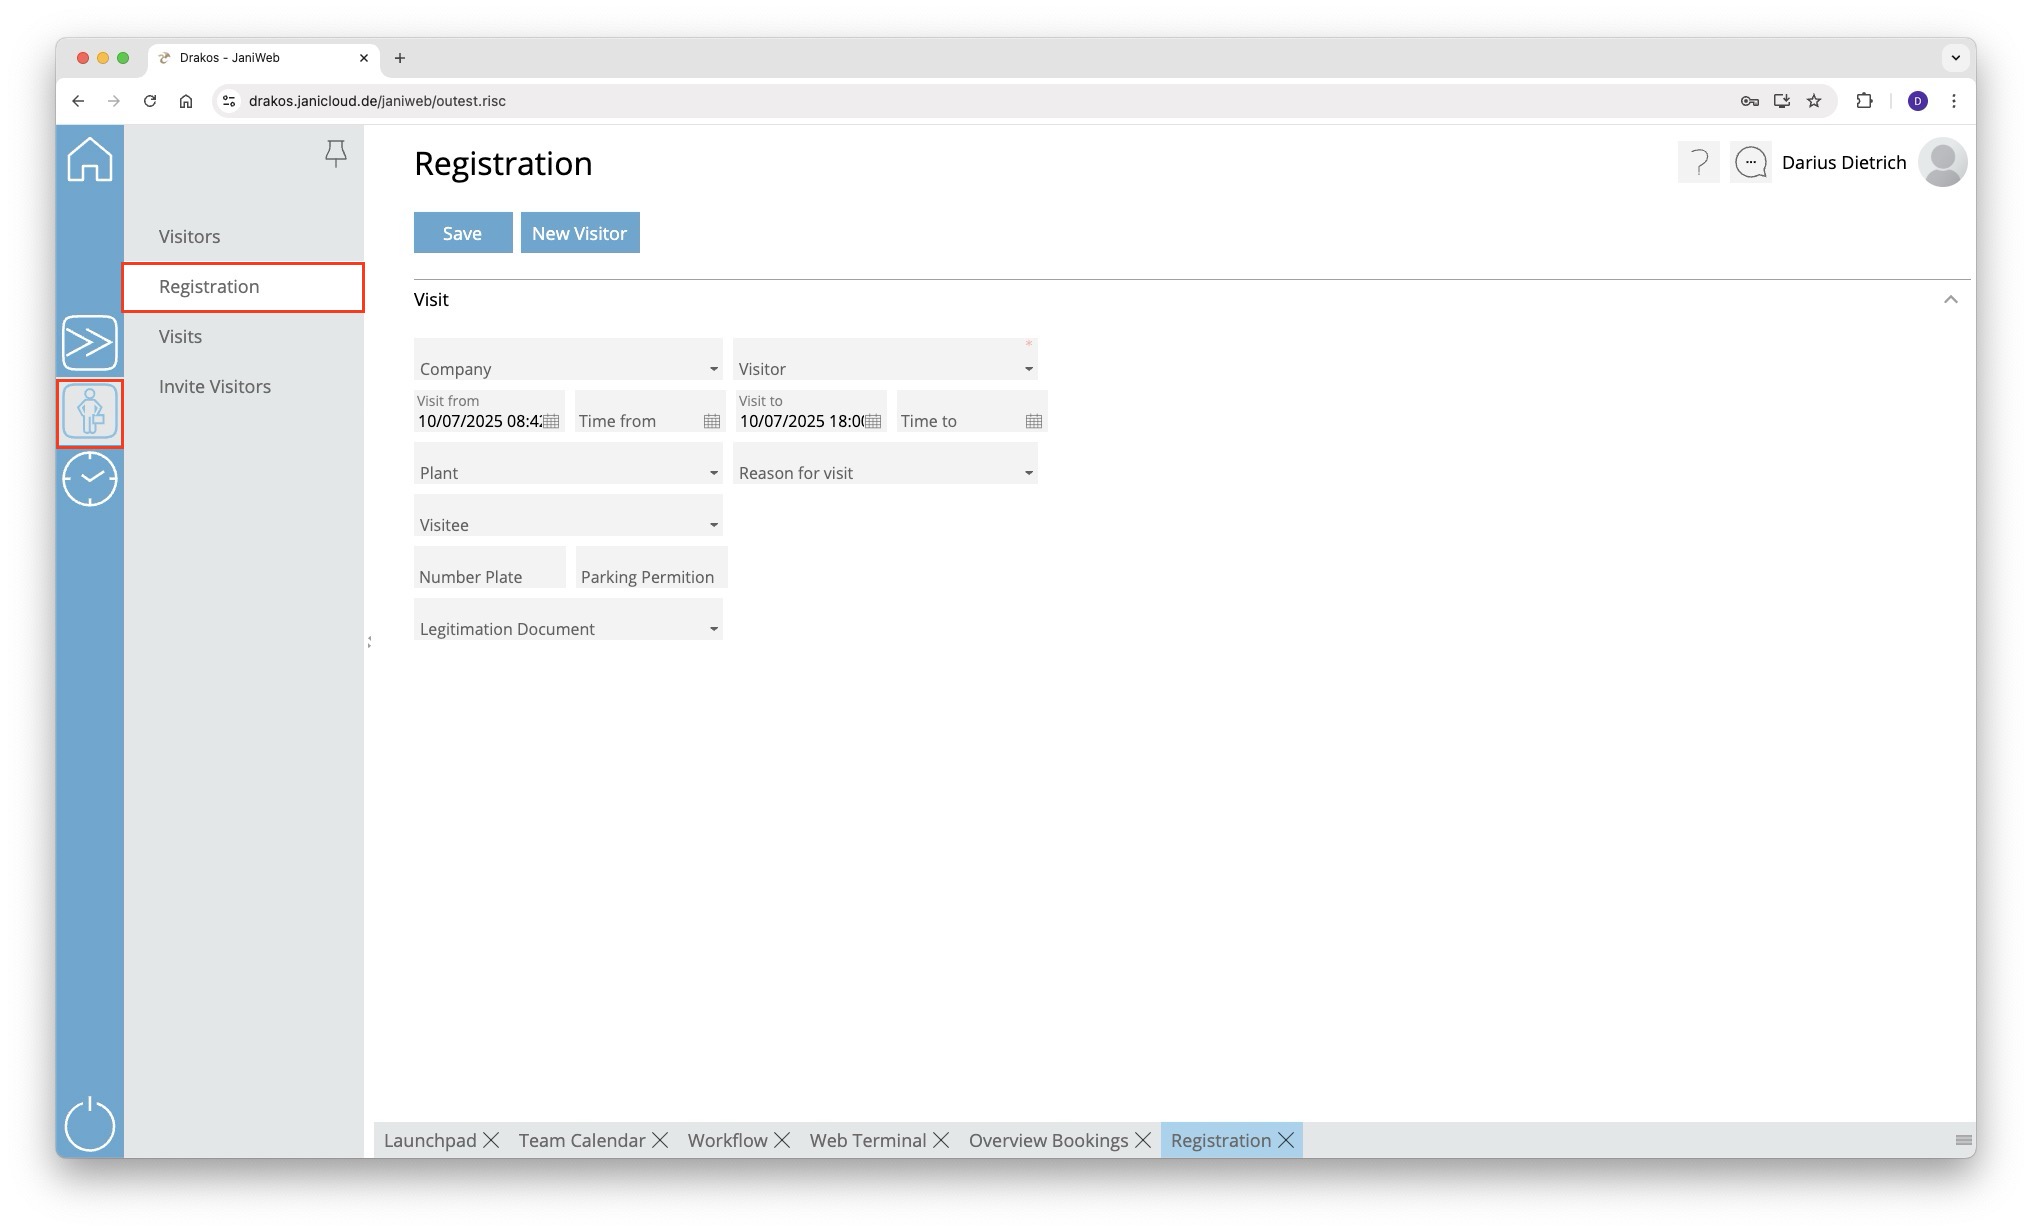
- Navigate to Registration in the menu

- Fill in the fields and confirm with Save

- If the visitor does not yet exist in the system, they can be created using the New Visitor button

- If the visitor does not yet exist in the system, they can be created using the New Visitor button
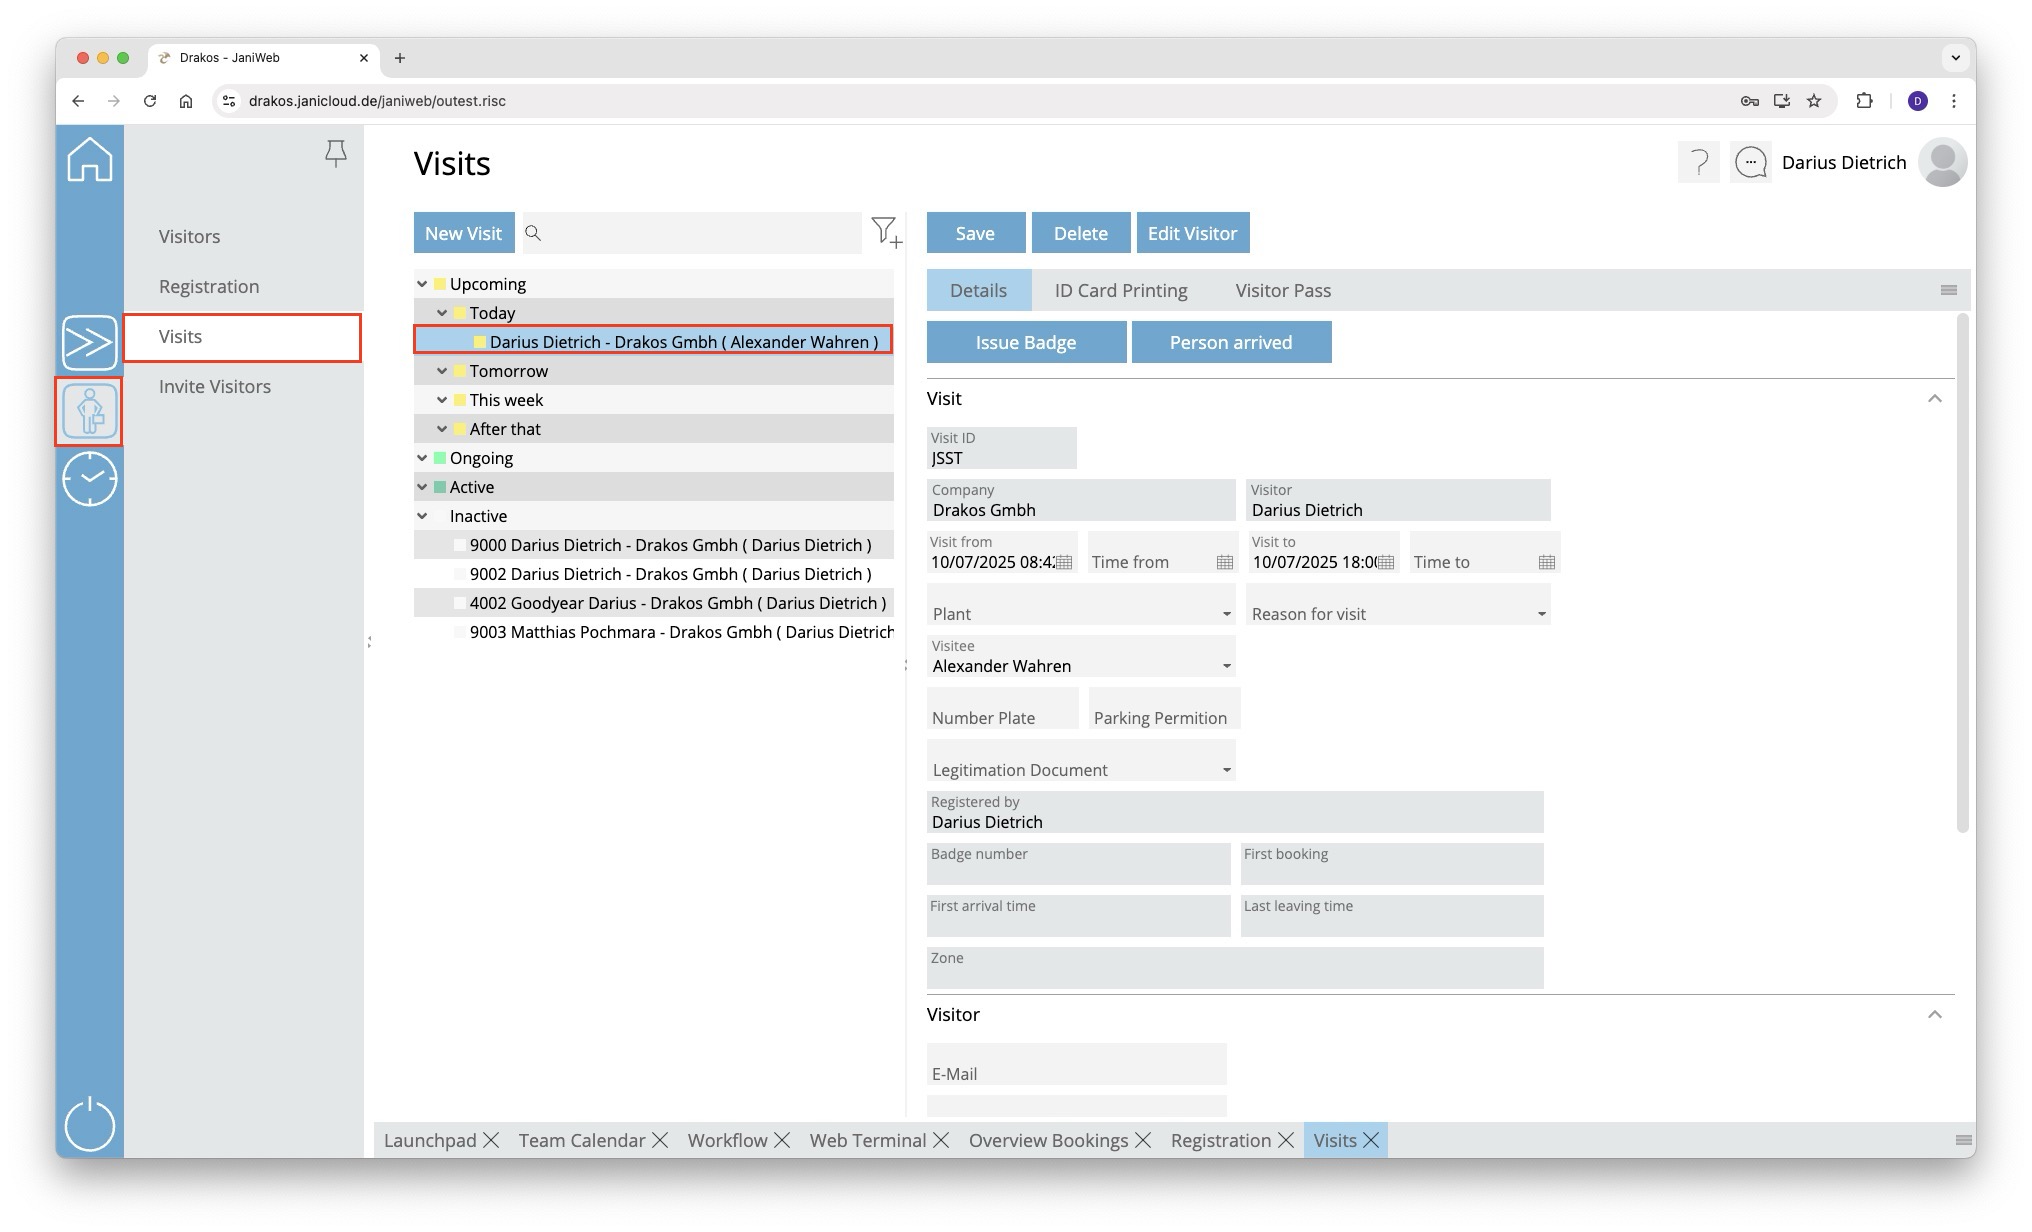
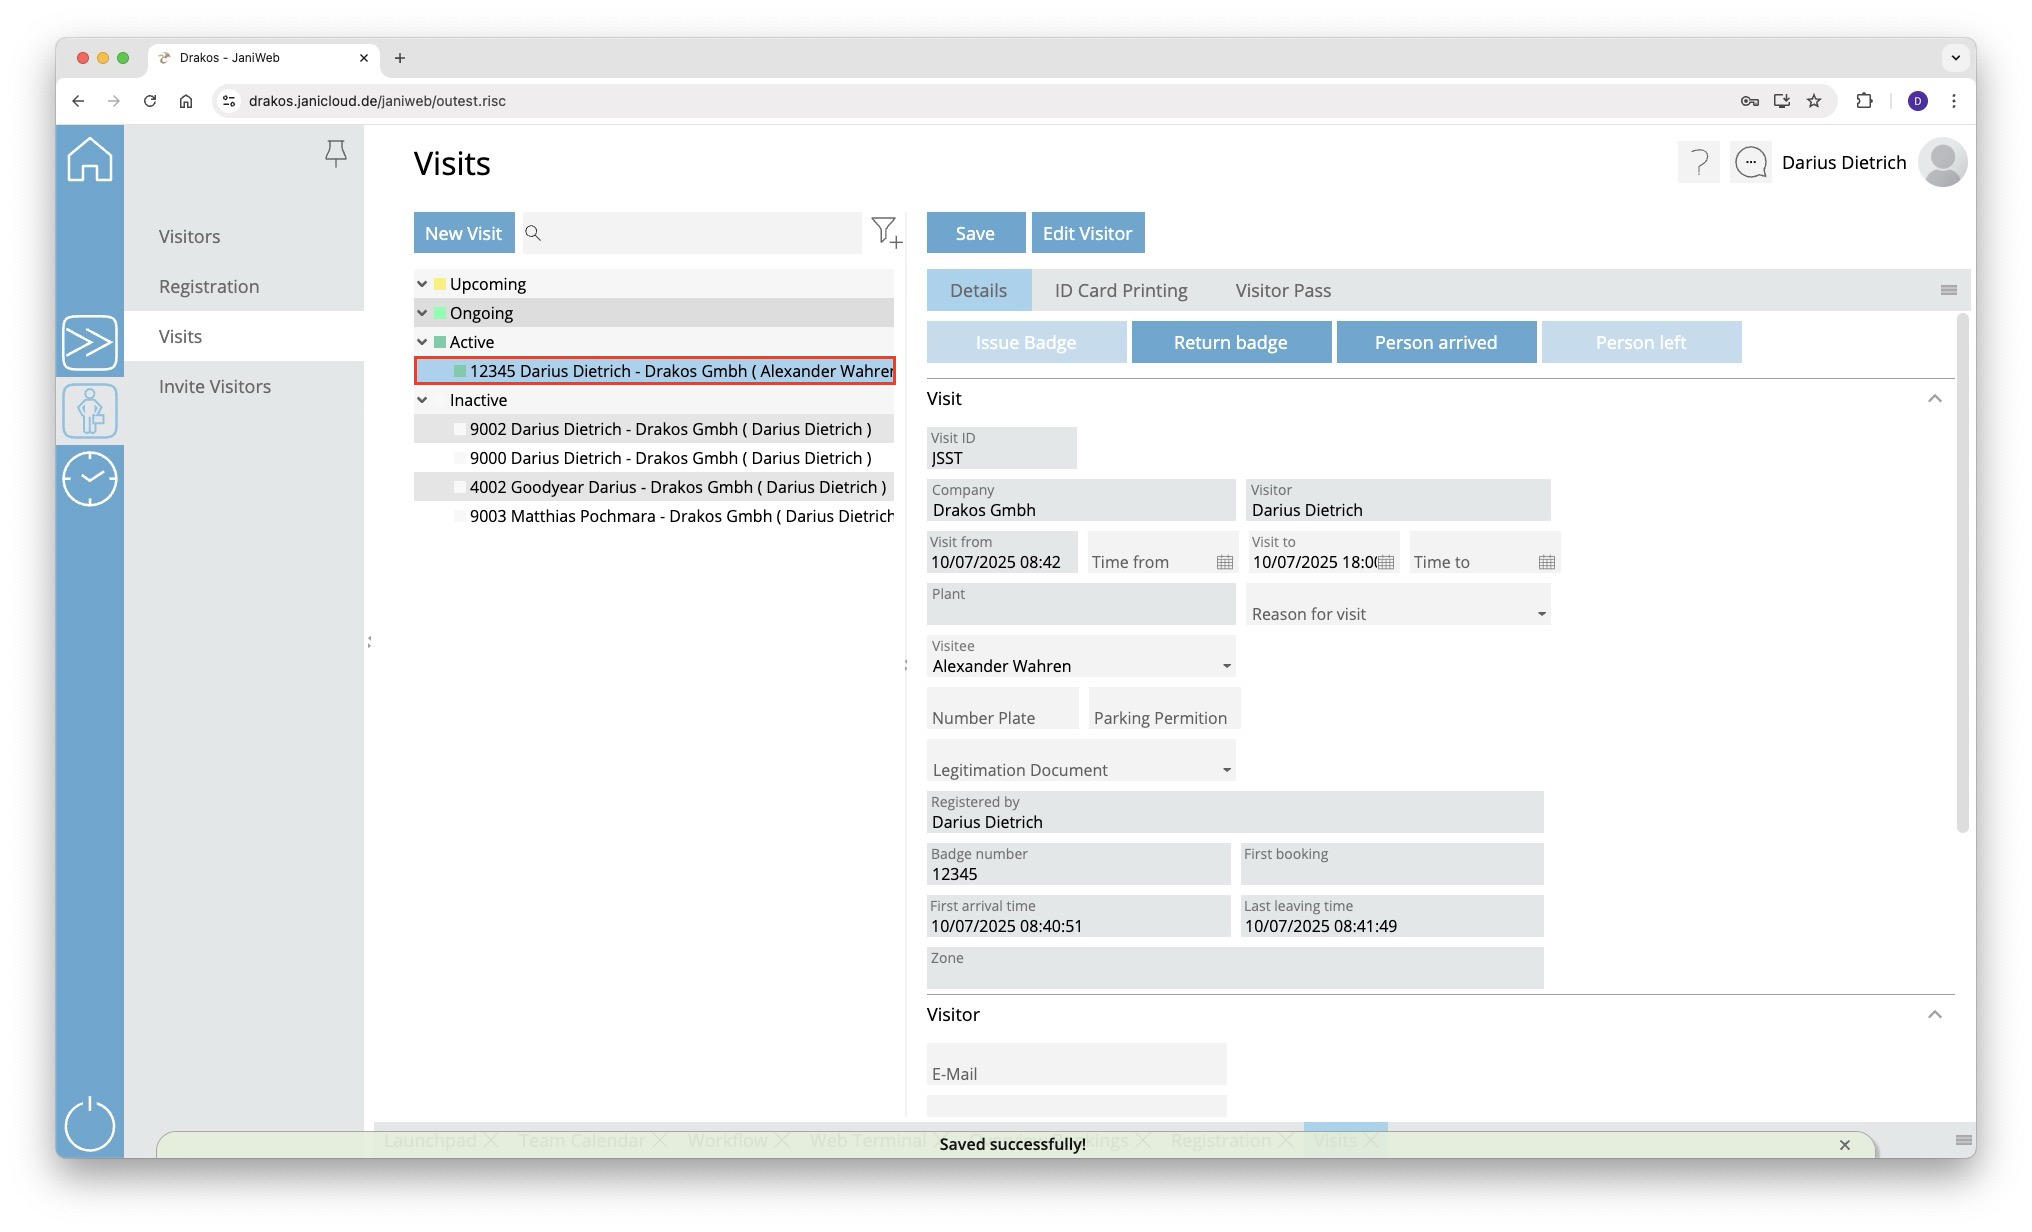
- The visit now appears under the menu item Visits below the Upcoming section

- A badge can now be issued here via the Issue Badge button
- or the visit can be marked as present via the Person arrived button
- A badge can now be issued here via the Issue Badge button
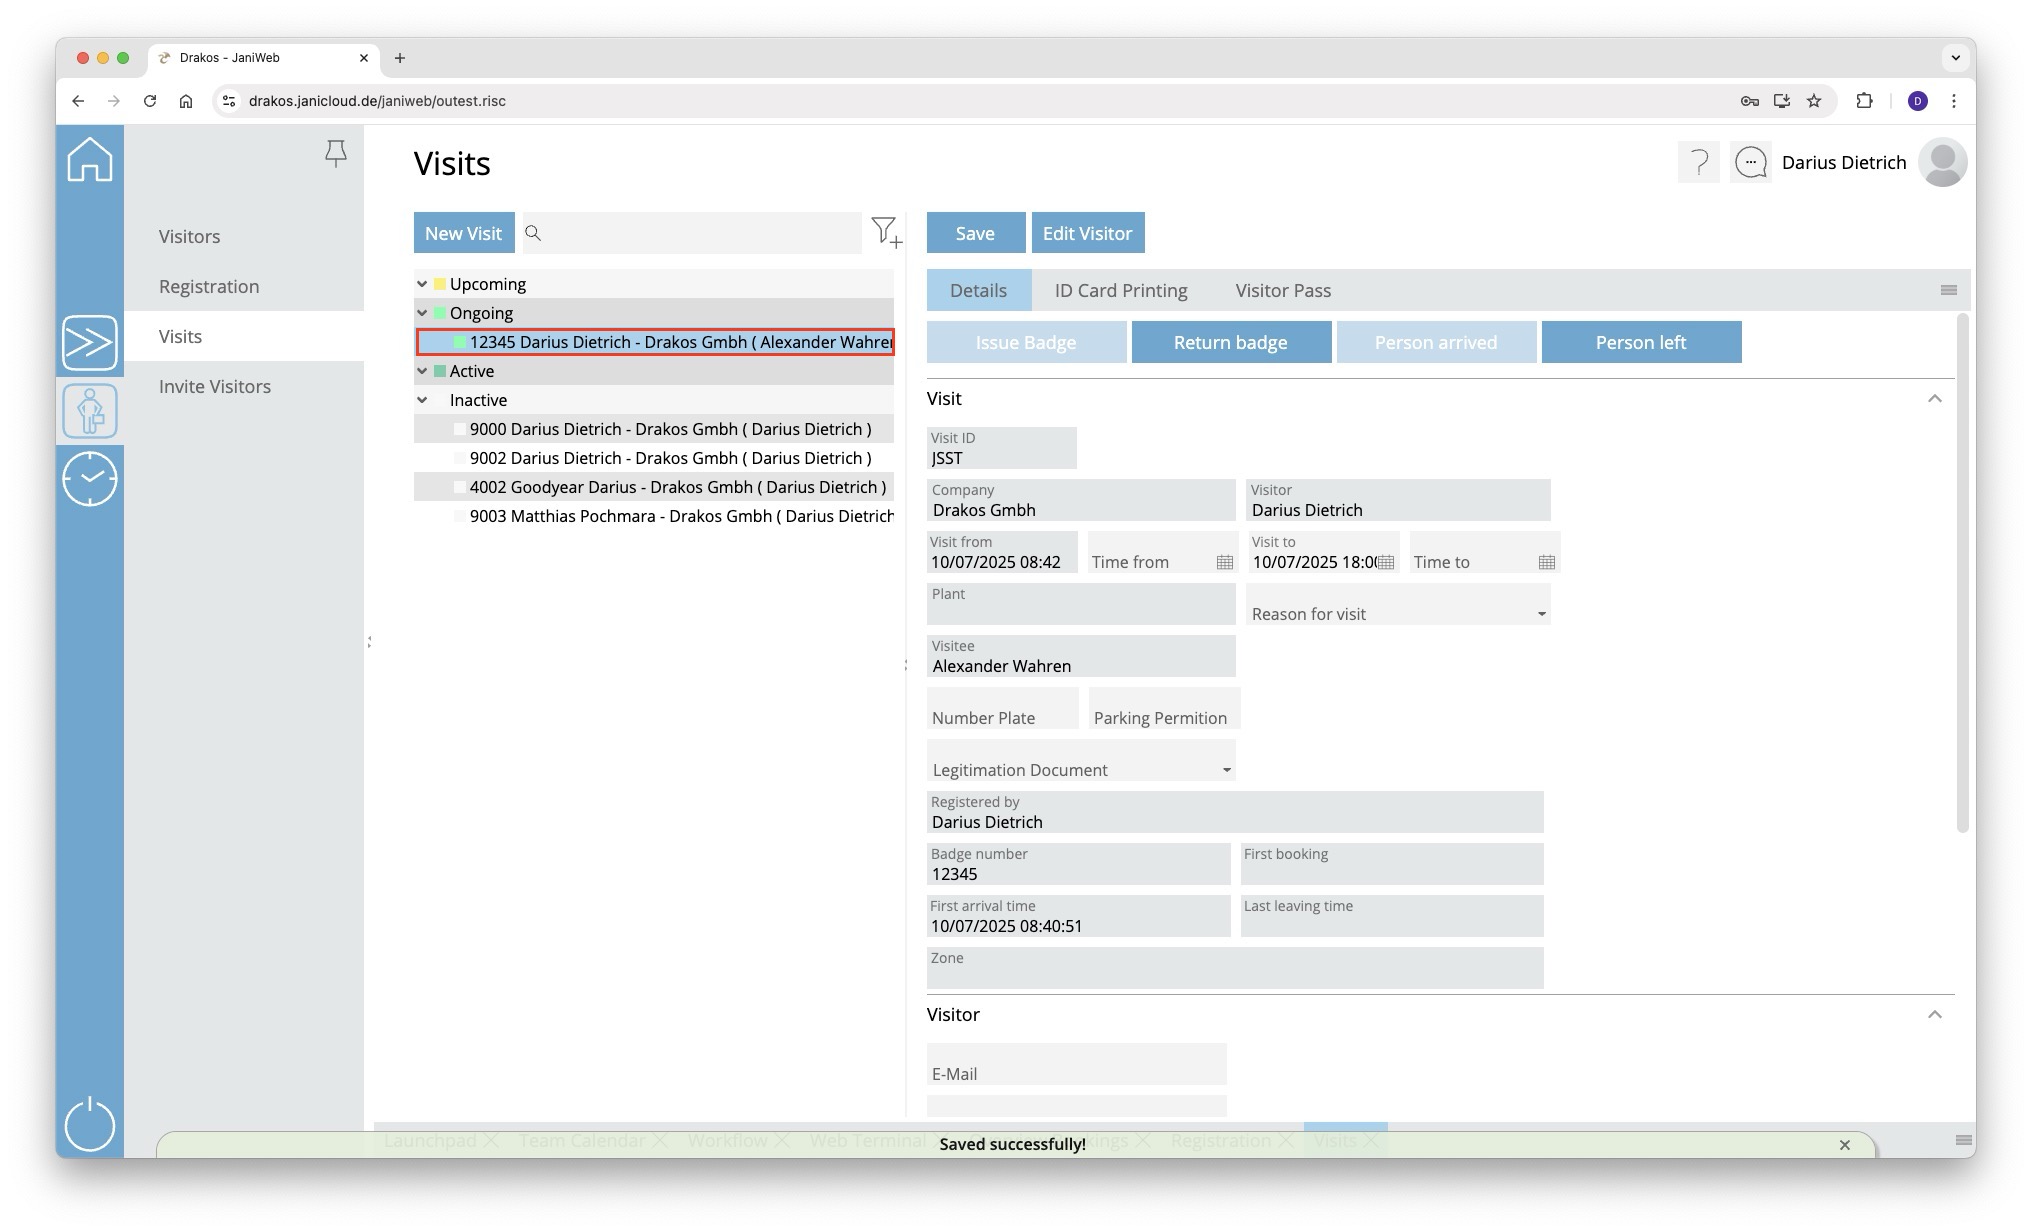
- The visit now appears in the Ongoing section

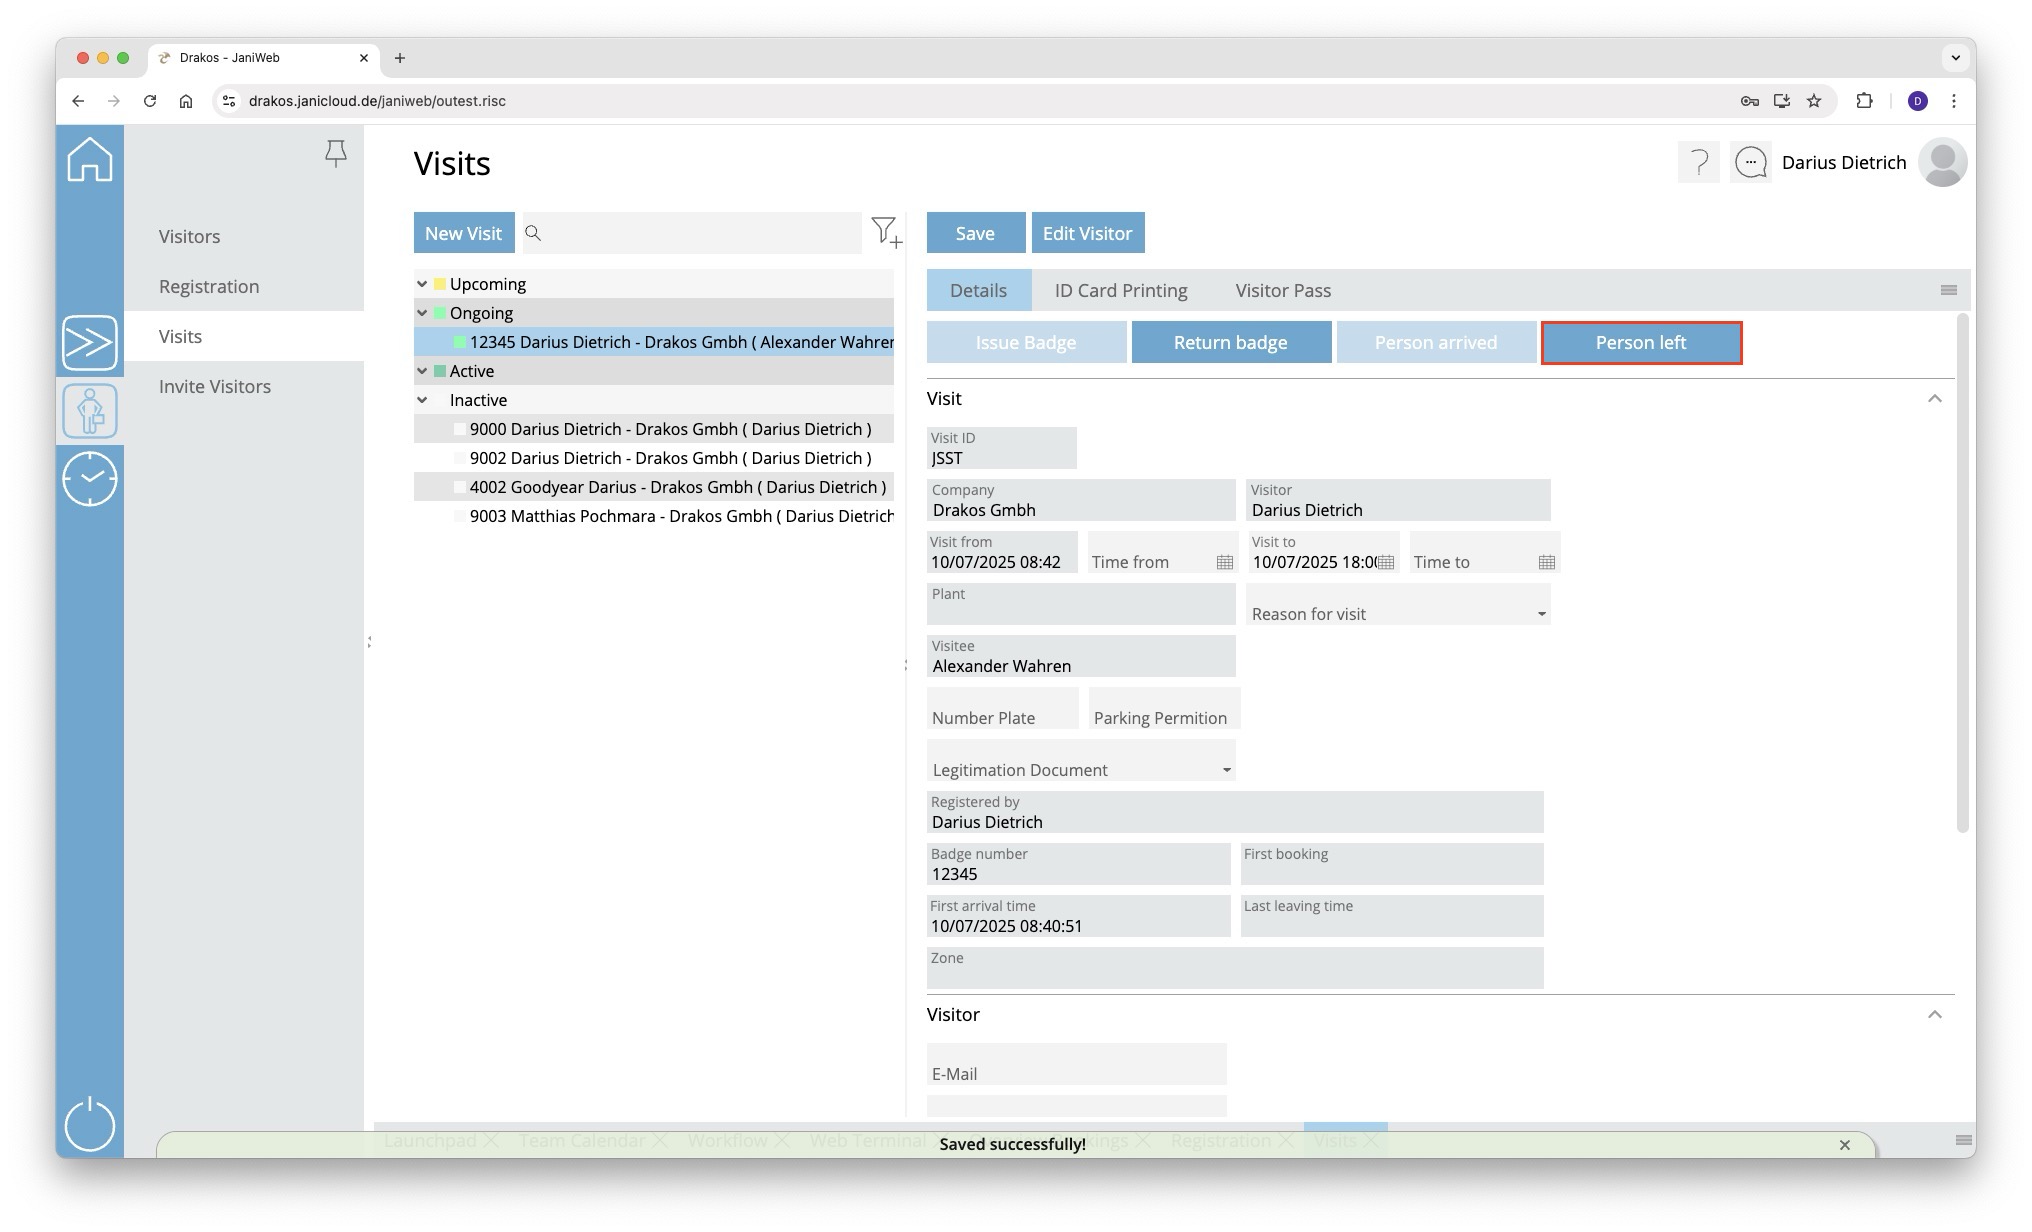
- The visitor can be logged out via the Person left button

- As long as the visit period has not yet expired, the visit appears below the Active section


Create Absences
- Log in to the application.
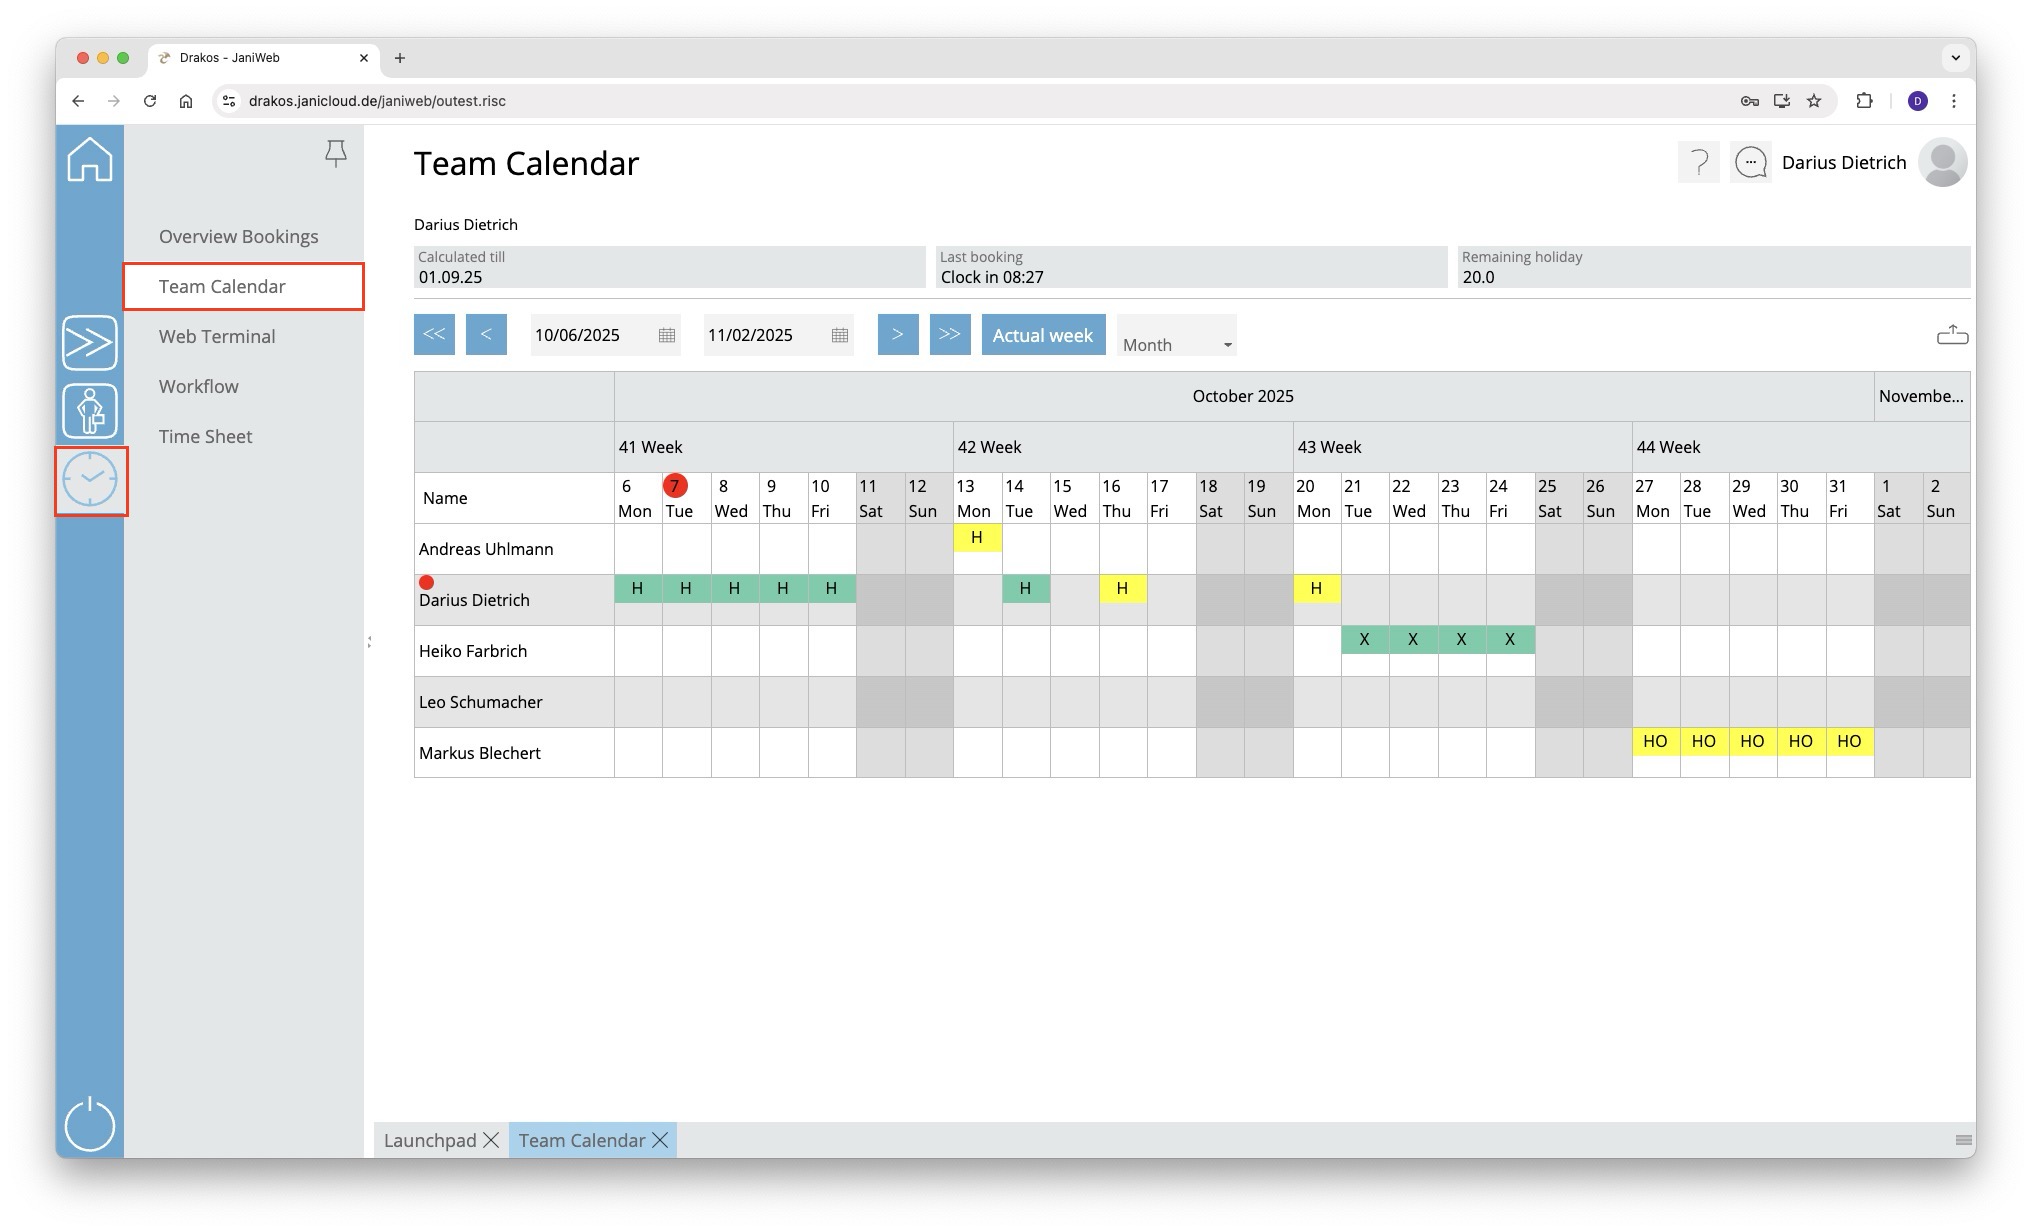
- Navigate to the Team Calendar item in the menu.

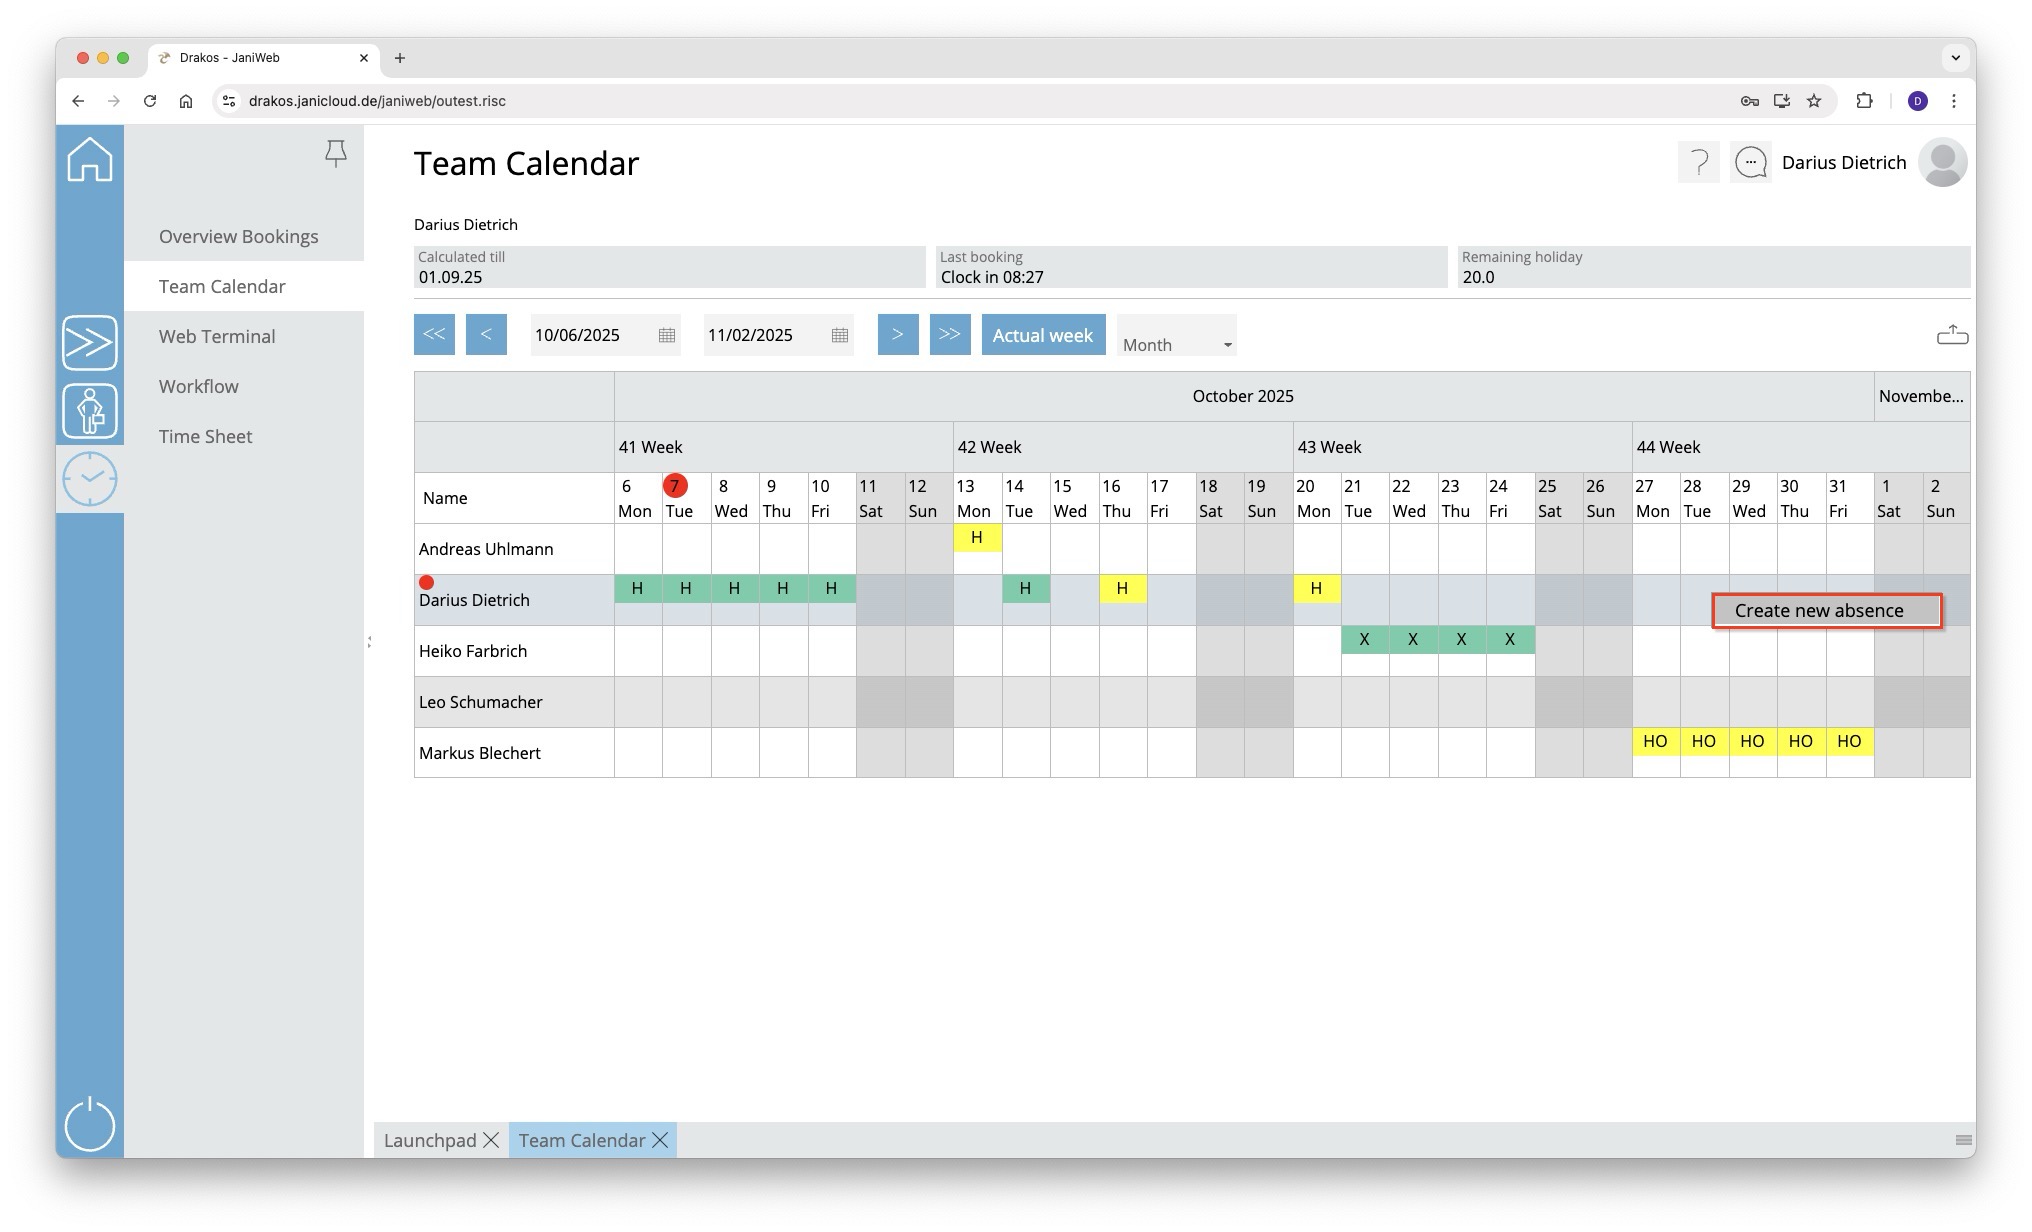
- Right-click in the field for the desired date of absence > Select Create new absence

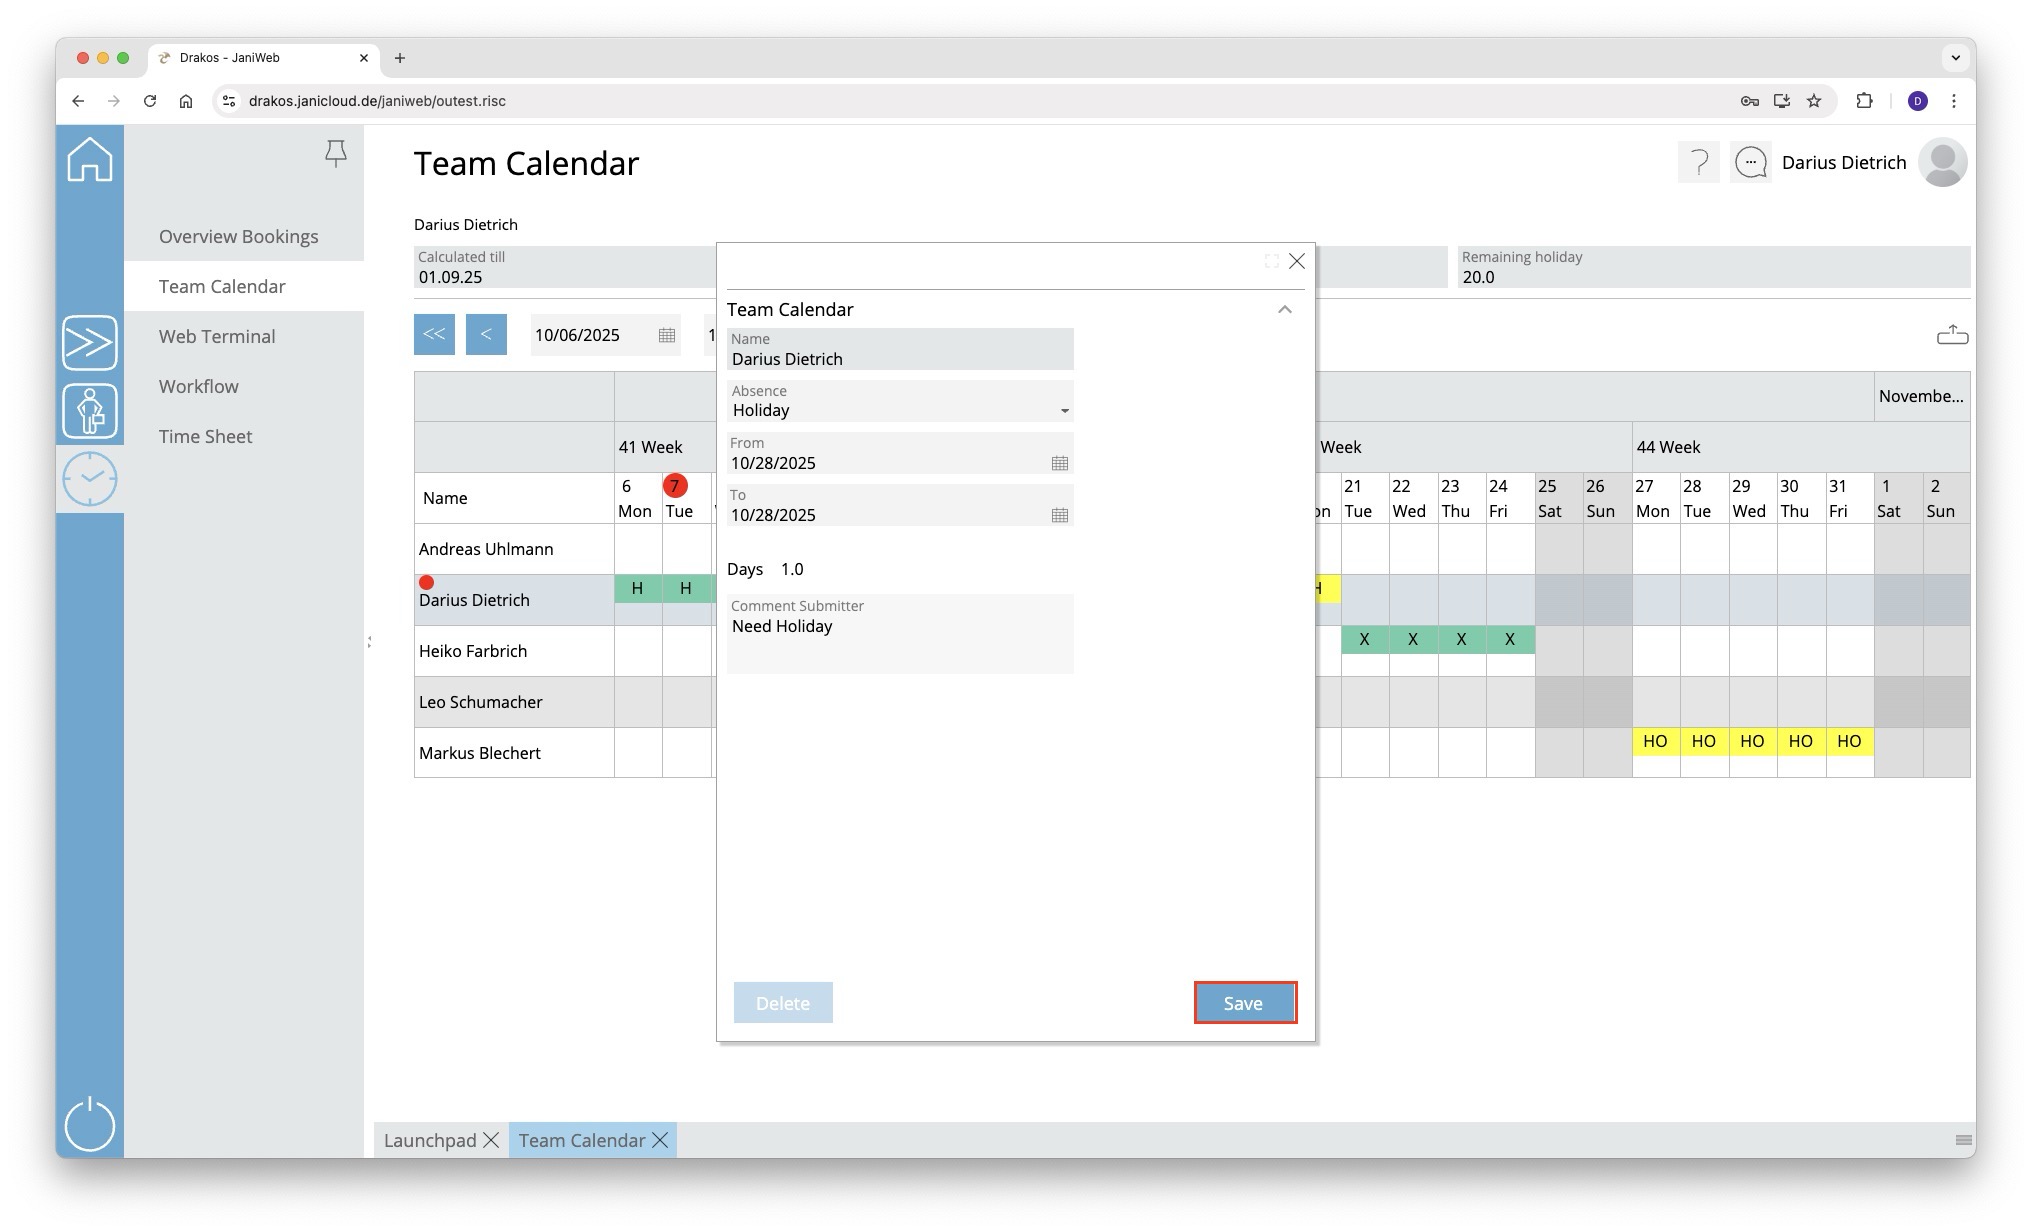
- Enter dates for From and To. Set comment for supervisor if necessary. Confirm with Save.

- Legend colored representation of absences

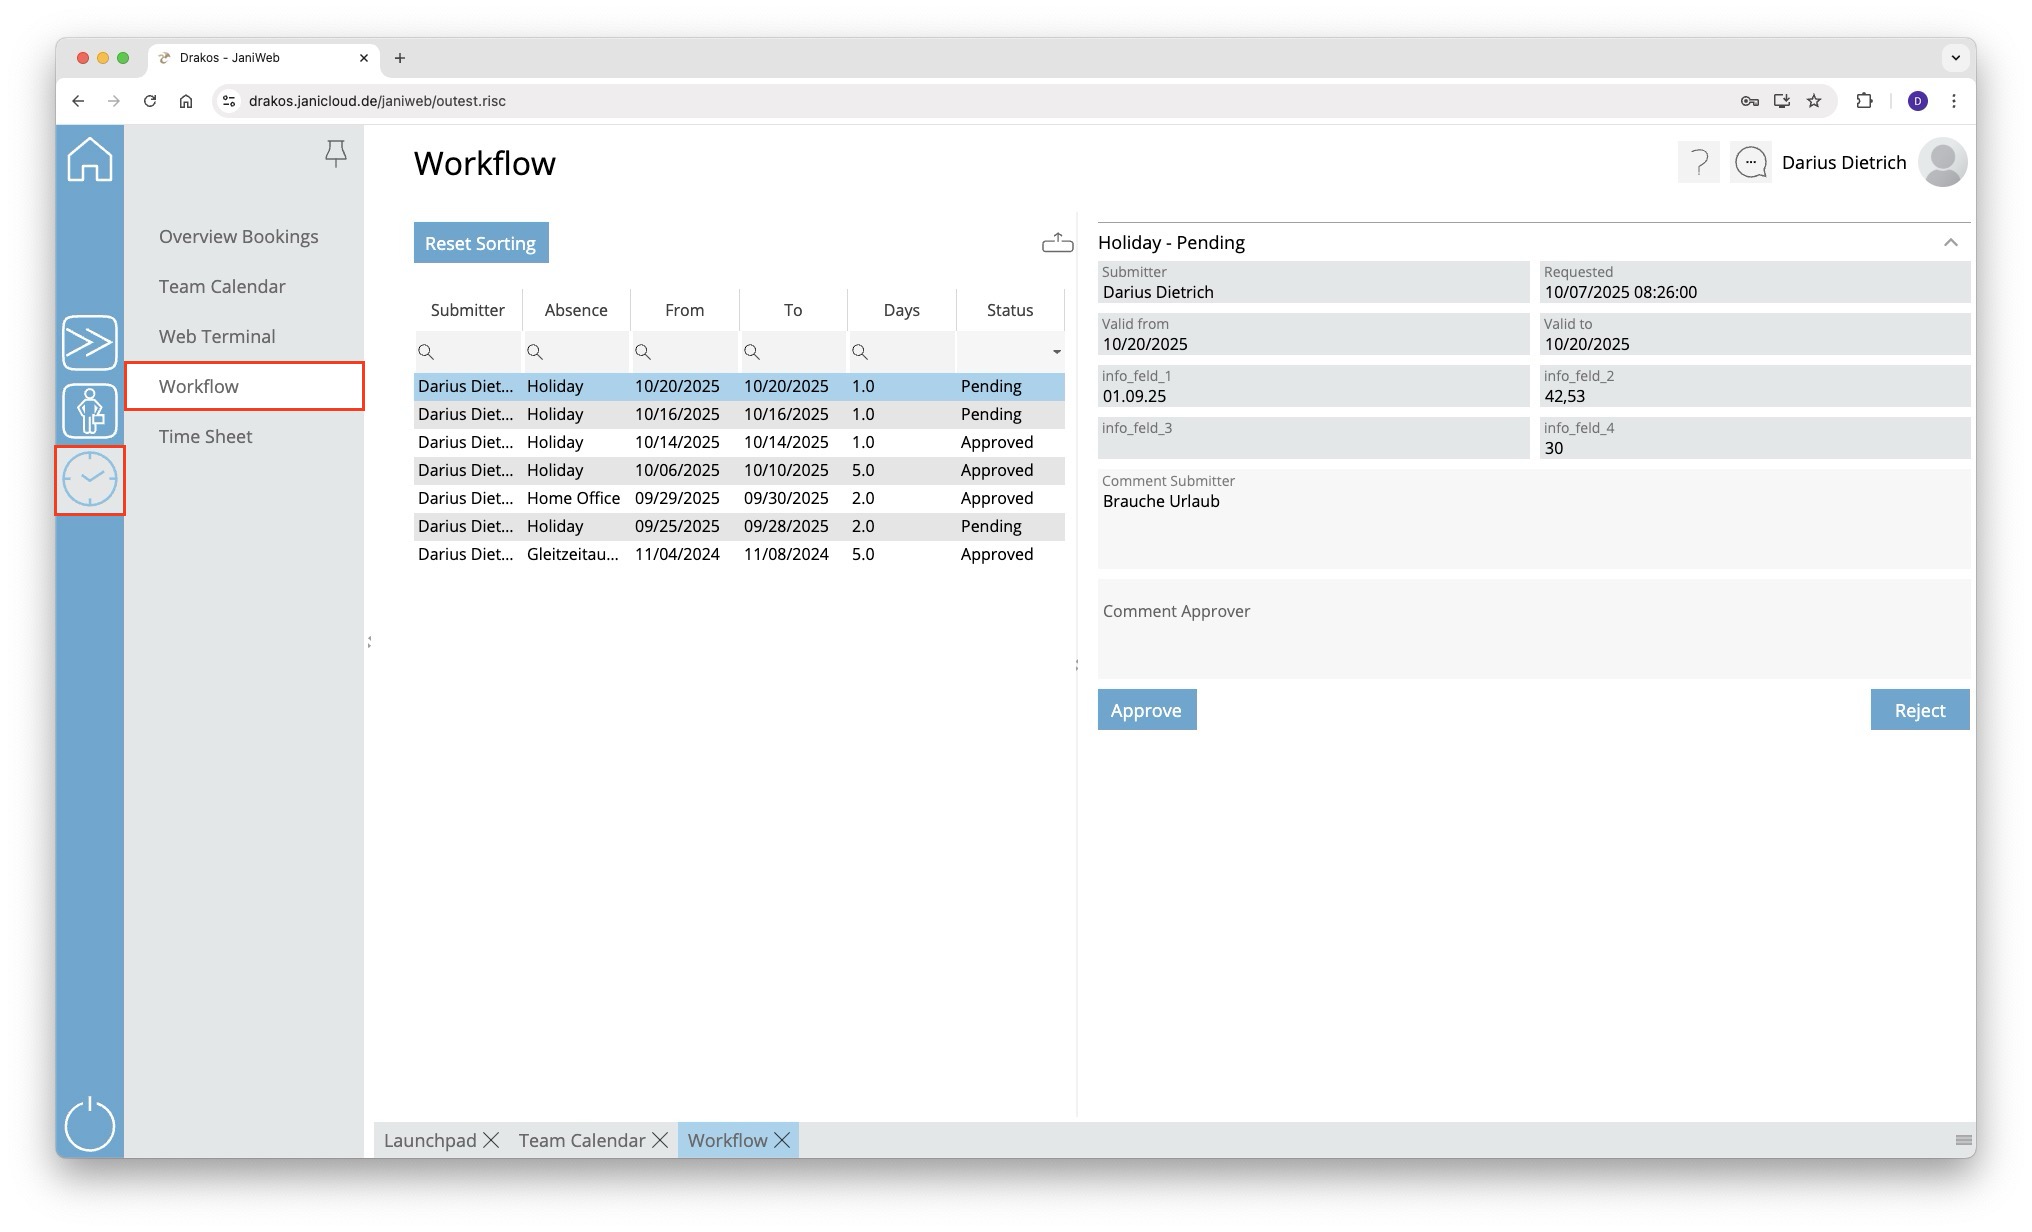
- In the Workflow menu, you will find past absence requests and their status.


Create bookings via Web Terminal
- Log in to the application.
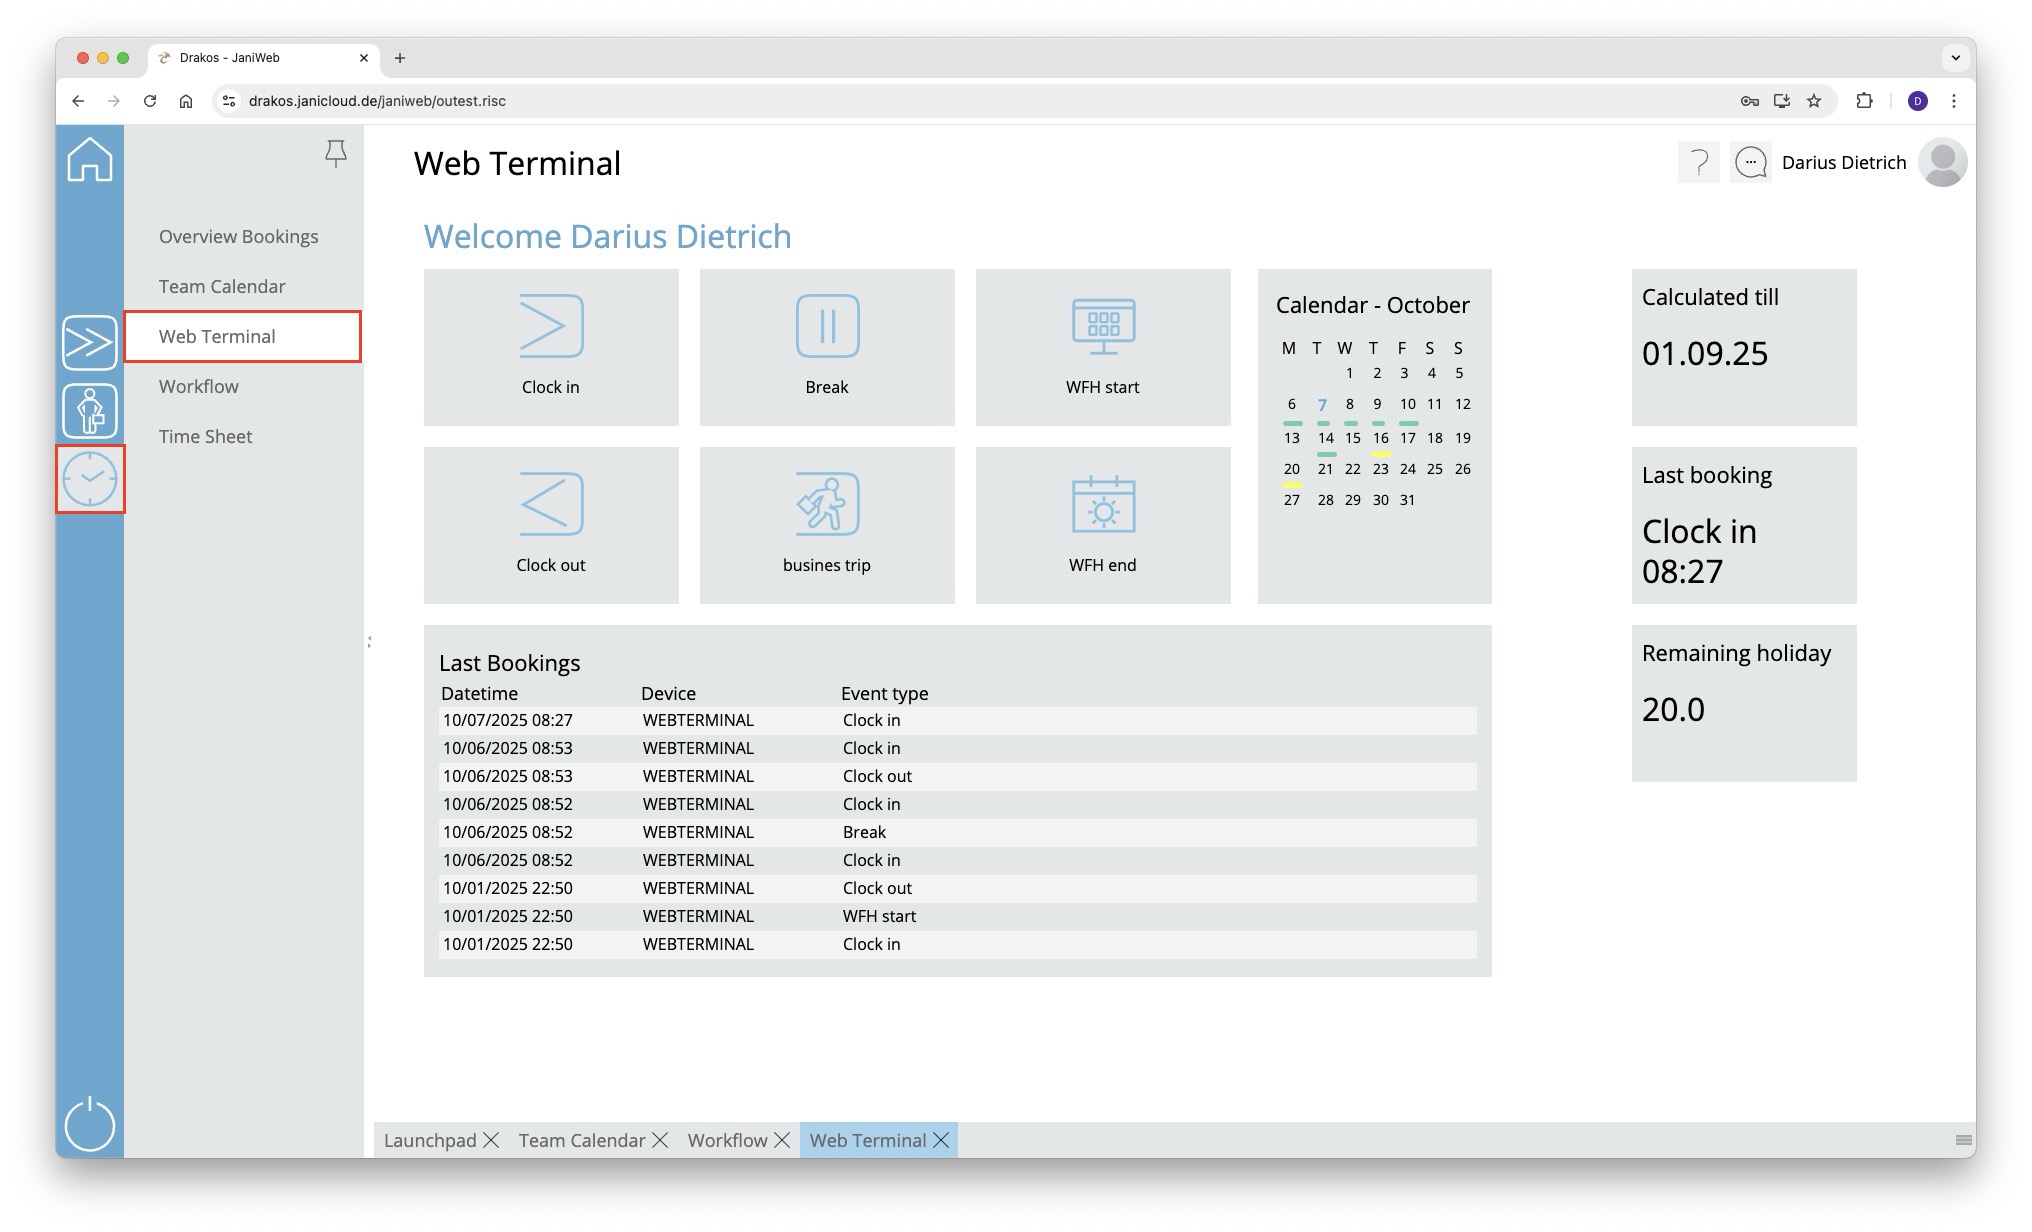
- Navigate to Web Terminal in the menu

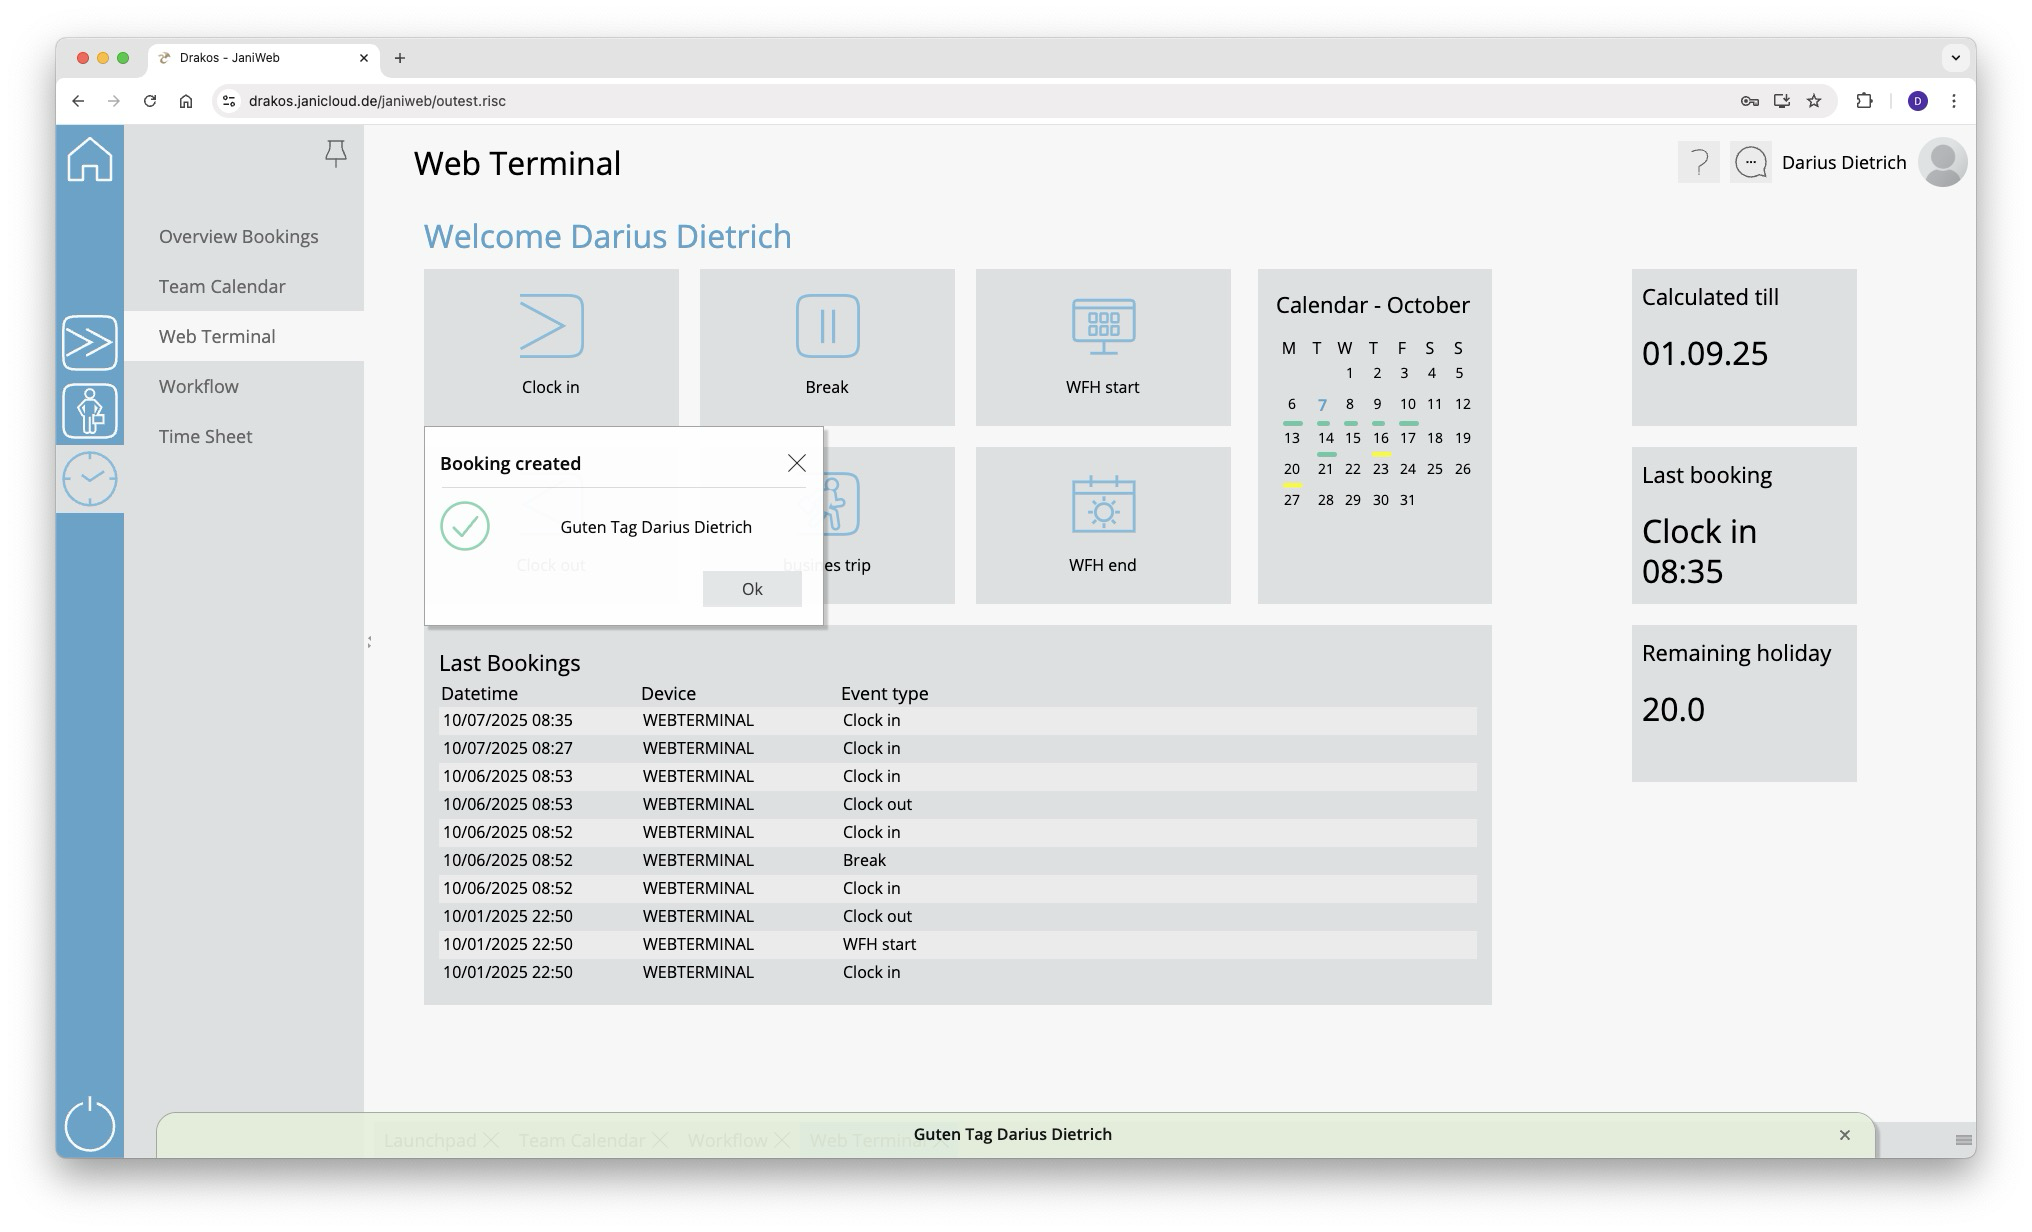
- Submit the desired booking by pressing the corresponding button

- Bookings can be viewed via the Overview Bookings menu


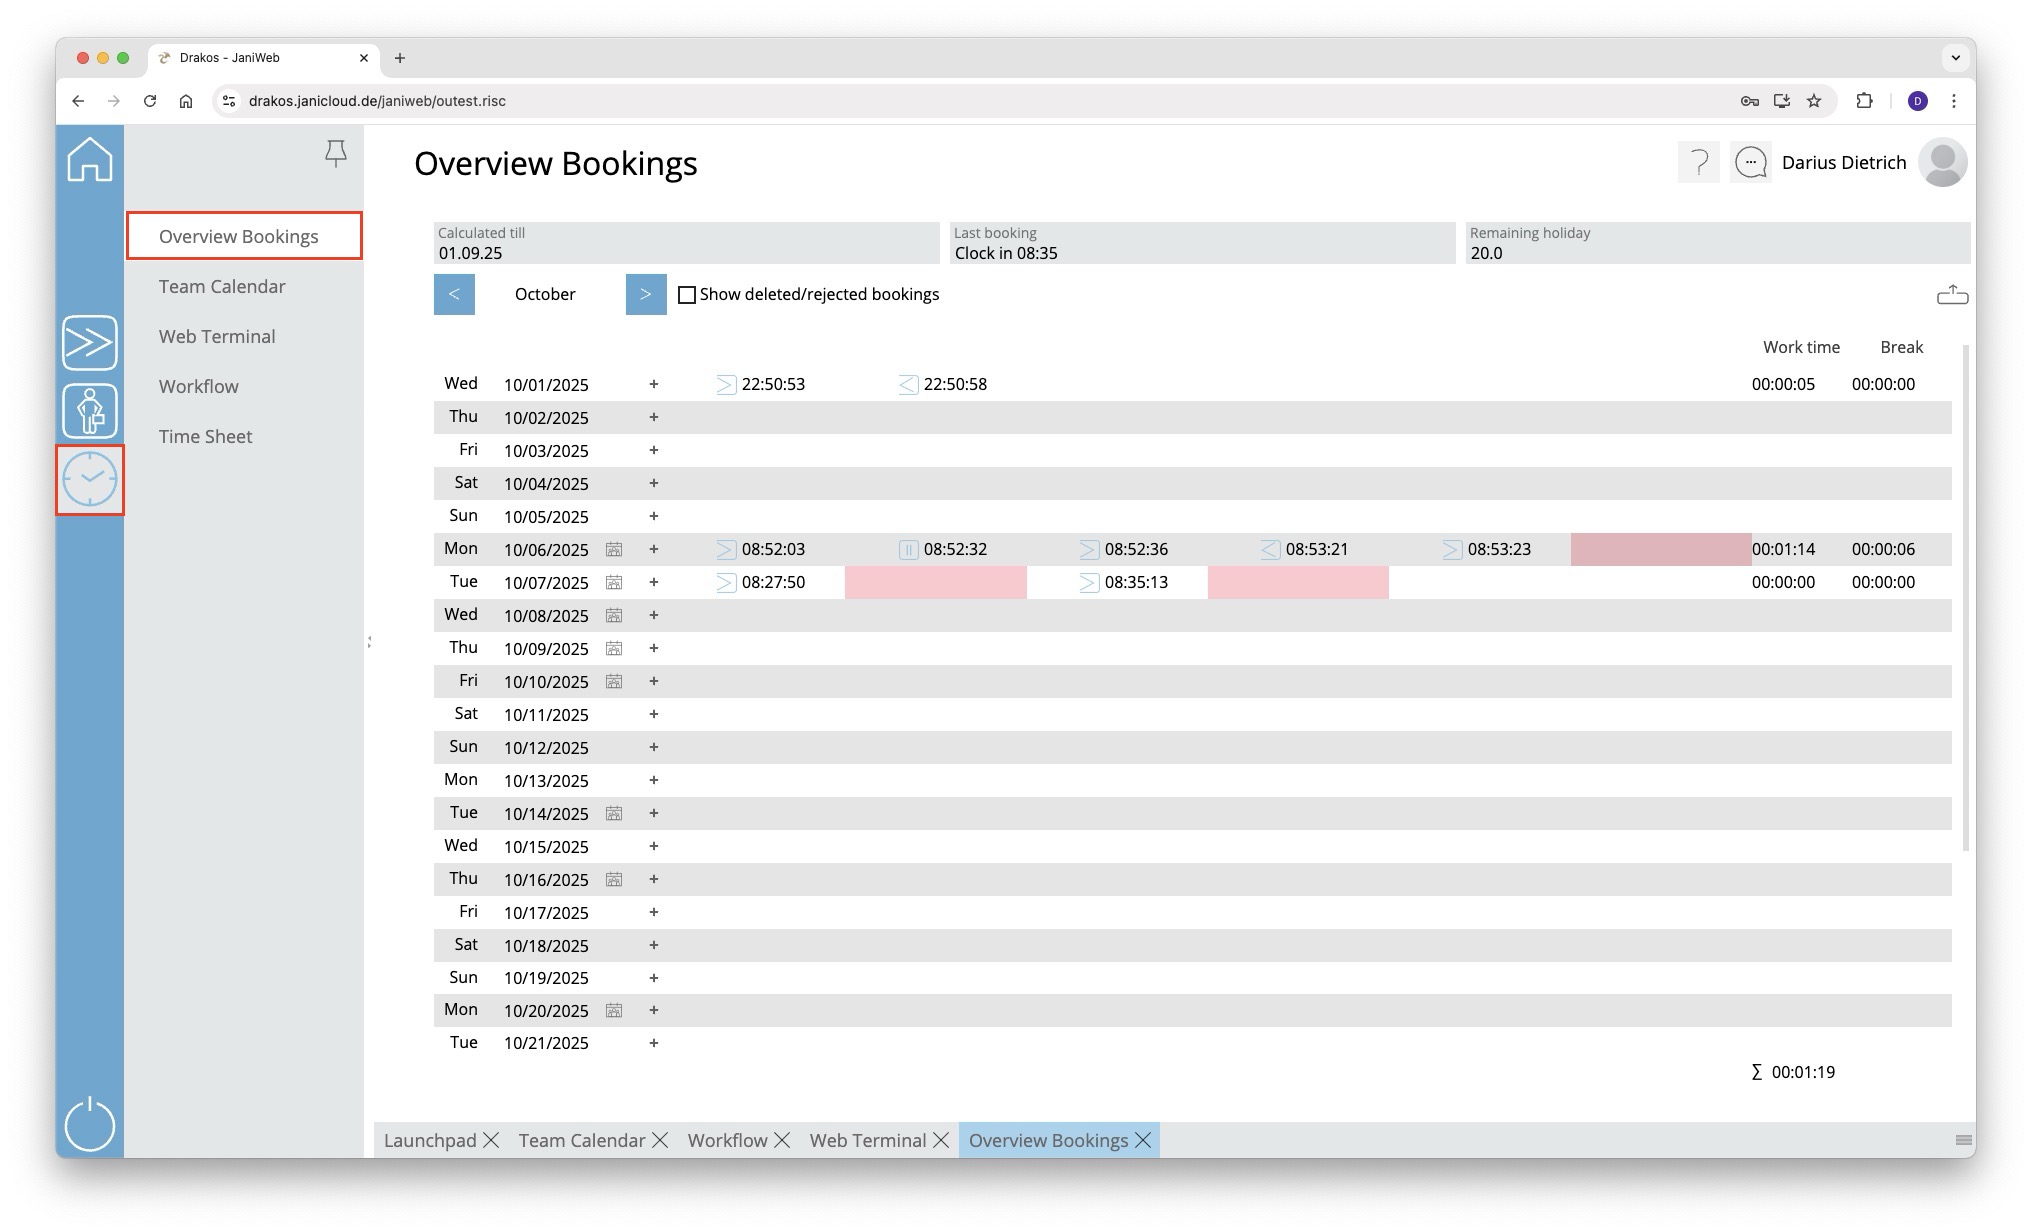
Add bookings via the Overview Bookings
- Log in to the application.
- Navigate to Overview Bookings in the menu
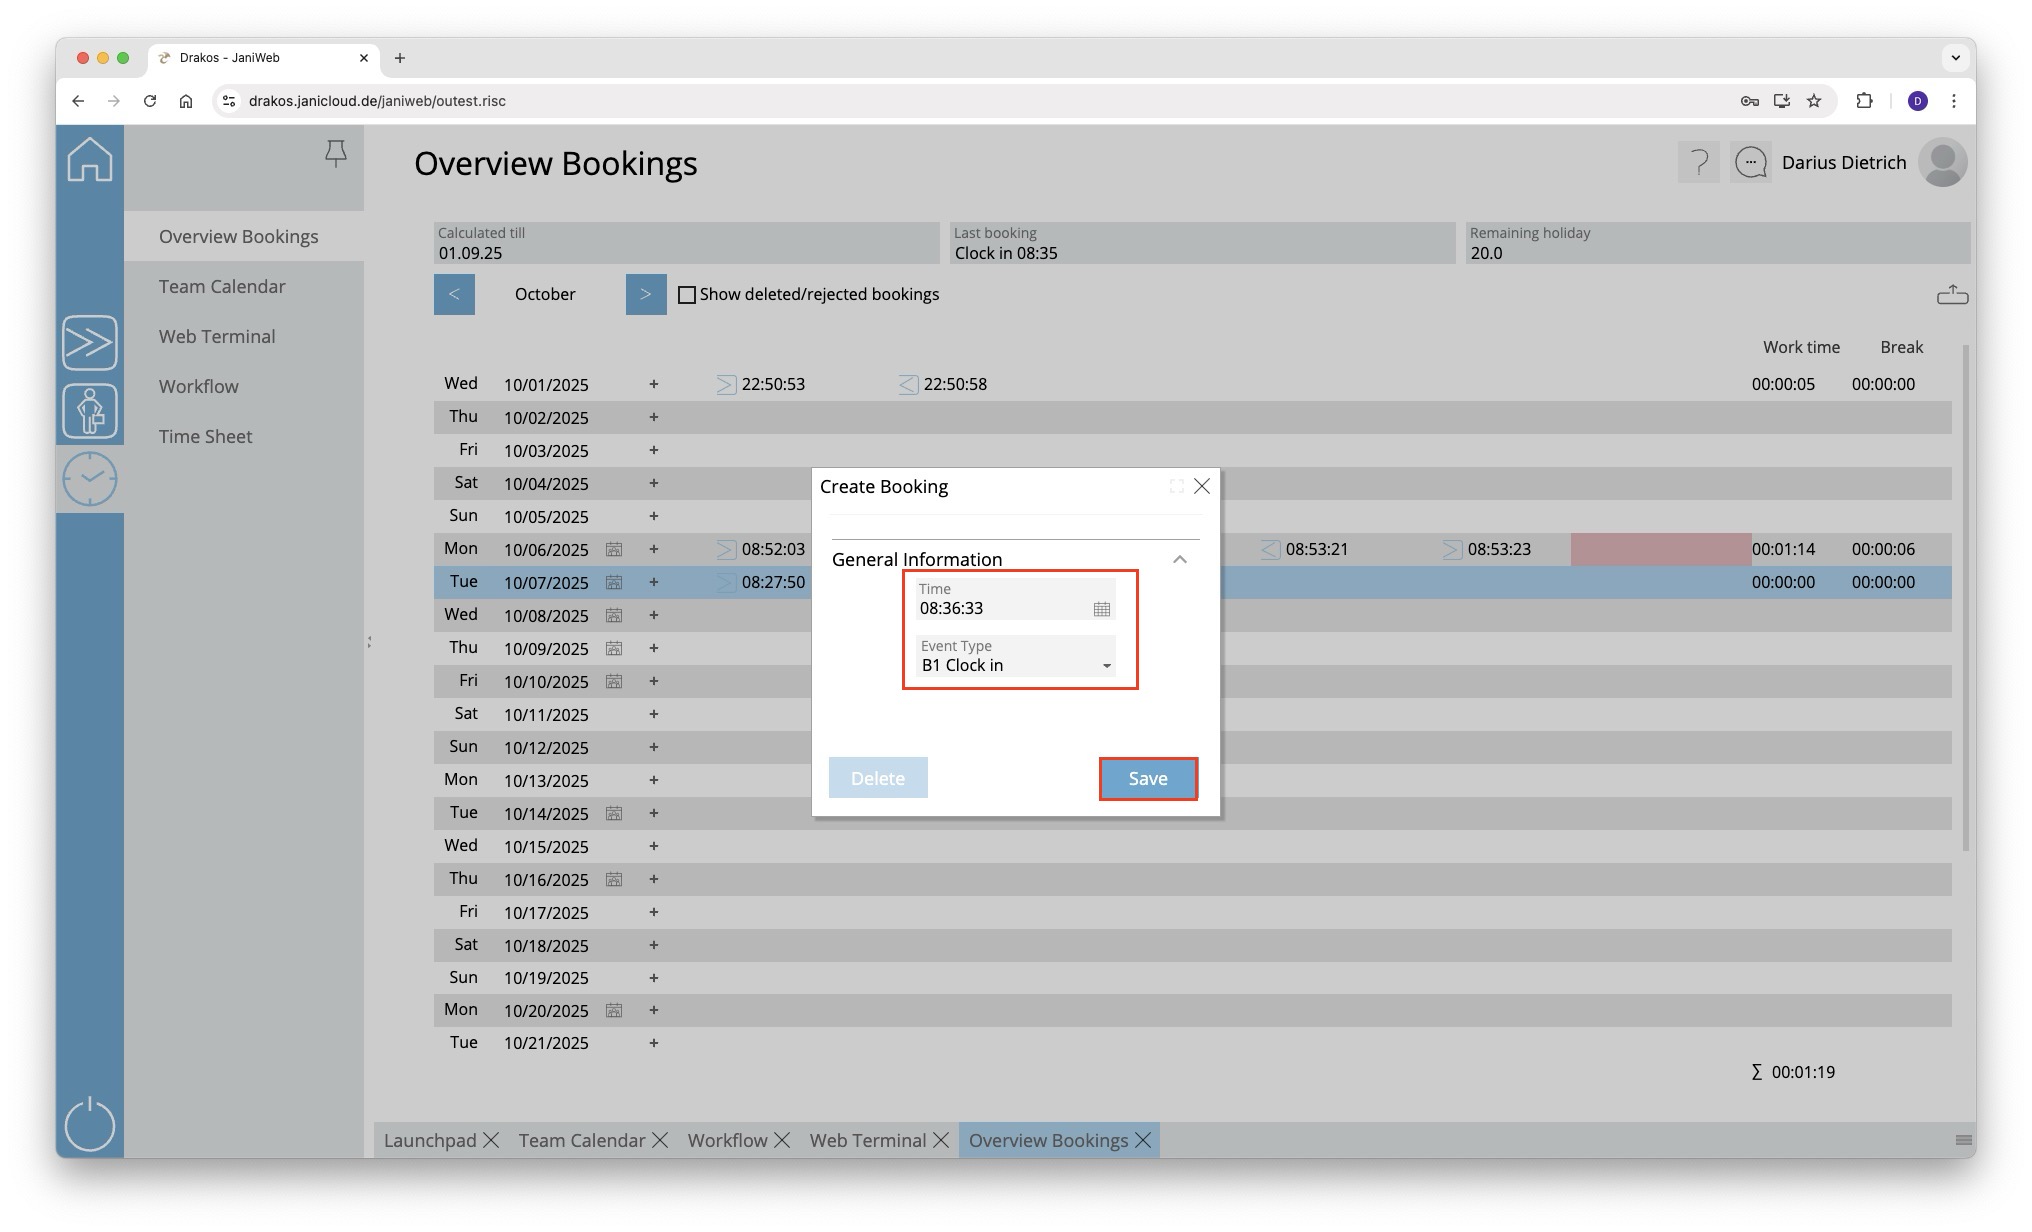
- Double-click on the line of the day for which the booking is to be added
- Now select the desired time in the Time field and the desired booking type in the Event Type field (e.g. Clock in or Clock out) and confirm with the Save button

- If a workflow has been set up for adding bookings, the supervisor must confirm the request

JaniAccess – Access Control Basics
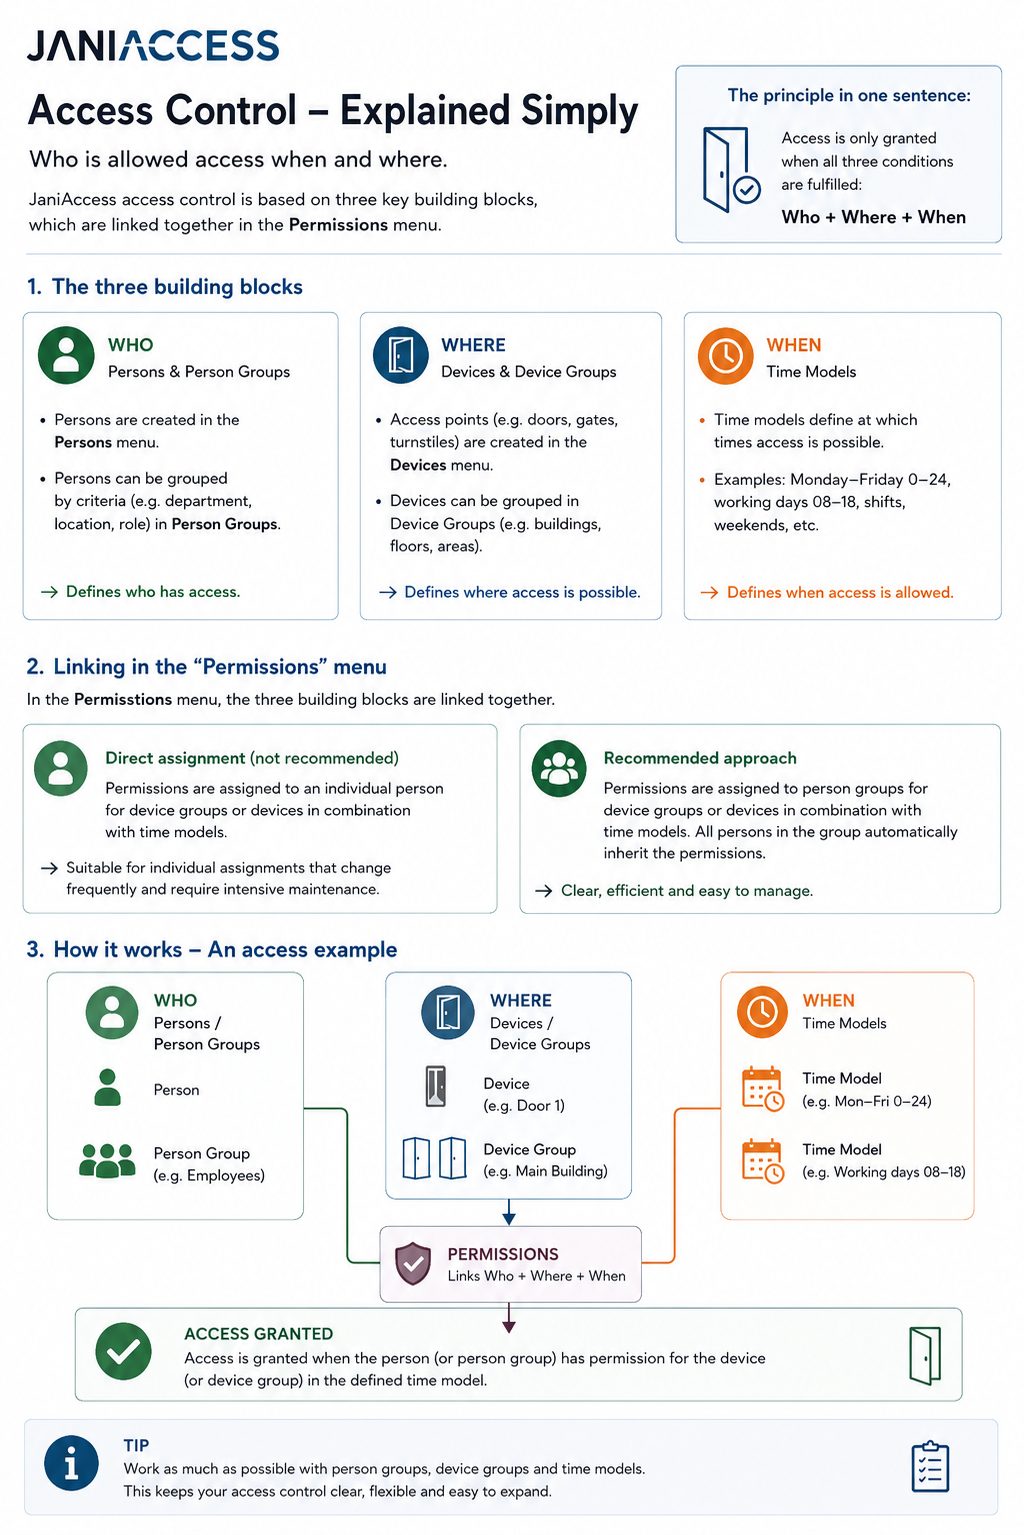
JaniAccess access control is based on a simple principle:
Who is allowed to access which areas and when?
Every access permission consists of these three components, which are linked together to determine whether access is granted.
1. Who? – Persons and Person Groups
Individual users are created and managed in the Persons menu. To simplify administration, persons can be organized into Person Groups based on common characteristics such as department, location, role, or employment type.
Examples of person groups:
- Production Employees
- Office Staff
- External Contractors
- Cleaning Staff
Using person groups significantly reduces the effort required to manage access permissions.
2. Where? – Devices and Device Groups
Each controlled access point (e.g. doors, gates or turnstiles) is configured as a device. Multiple devices can be combined into Device Groups to simplify permission management.
Examples of device groups:
- Main Building
- Production Area
- Administration
- Warehouse
- Outdoor Areas
Assigning permissions to device groups allows multiple access points to be managed with a single configuration.
3. When? – Time Models
A time model specifies the days and times during which access is allowed.
Examples:
- Monday – Friday: 00:00 – 24:00
- Monday – Friday: 08:00 – 17:00
- Weekends
- Night Shift
- Holiday Schedule
Time models can be combined with any person, person group, device, or device group.
4. Assigning Permissions
Permissions can be assigned in two different ways.
Option 1: Assign Permissions to Individual Persons (Not Recommended)
Permissions can be assigned directly to a single person by linking a device or device group with a time model.
Example:
John Smith → Main Entrance → Monday–Friday 08:00–17:00
This approach is suitable only for exceptional cases. As the number of individually assigned permissions grows, administration becomes increasingly complex and difficult to maintain.
Option 2: Assign Permissions to Person Groups (Recommended)
The recommended approach is to assign permissions to Person Groups.
In this case, a person group is linked to a device or device group together with a time model.
Every person who belongs to that group automatically inherits the assigned permissions.
Example:
Person Group Office Staff
→ Device Group Administration Building
→ Time Model Monday–Friday 08:00–17:00
All members of the Office Staff group automatically receive these access rights.
This approach keeps the access control system structured, scalable, and easy to maintain.
Summary
Every access permission is created using the same principle:
Best Practice: Whenever possible, assign permissions to Person Groups instead of individual persons and use Device Groups together with Time Models. This approach keeps the access control configuration organized, scalable, and easy to manage, even in large installations.