# Instructions
# Create Visits
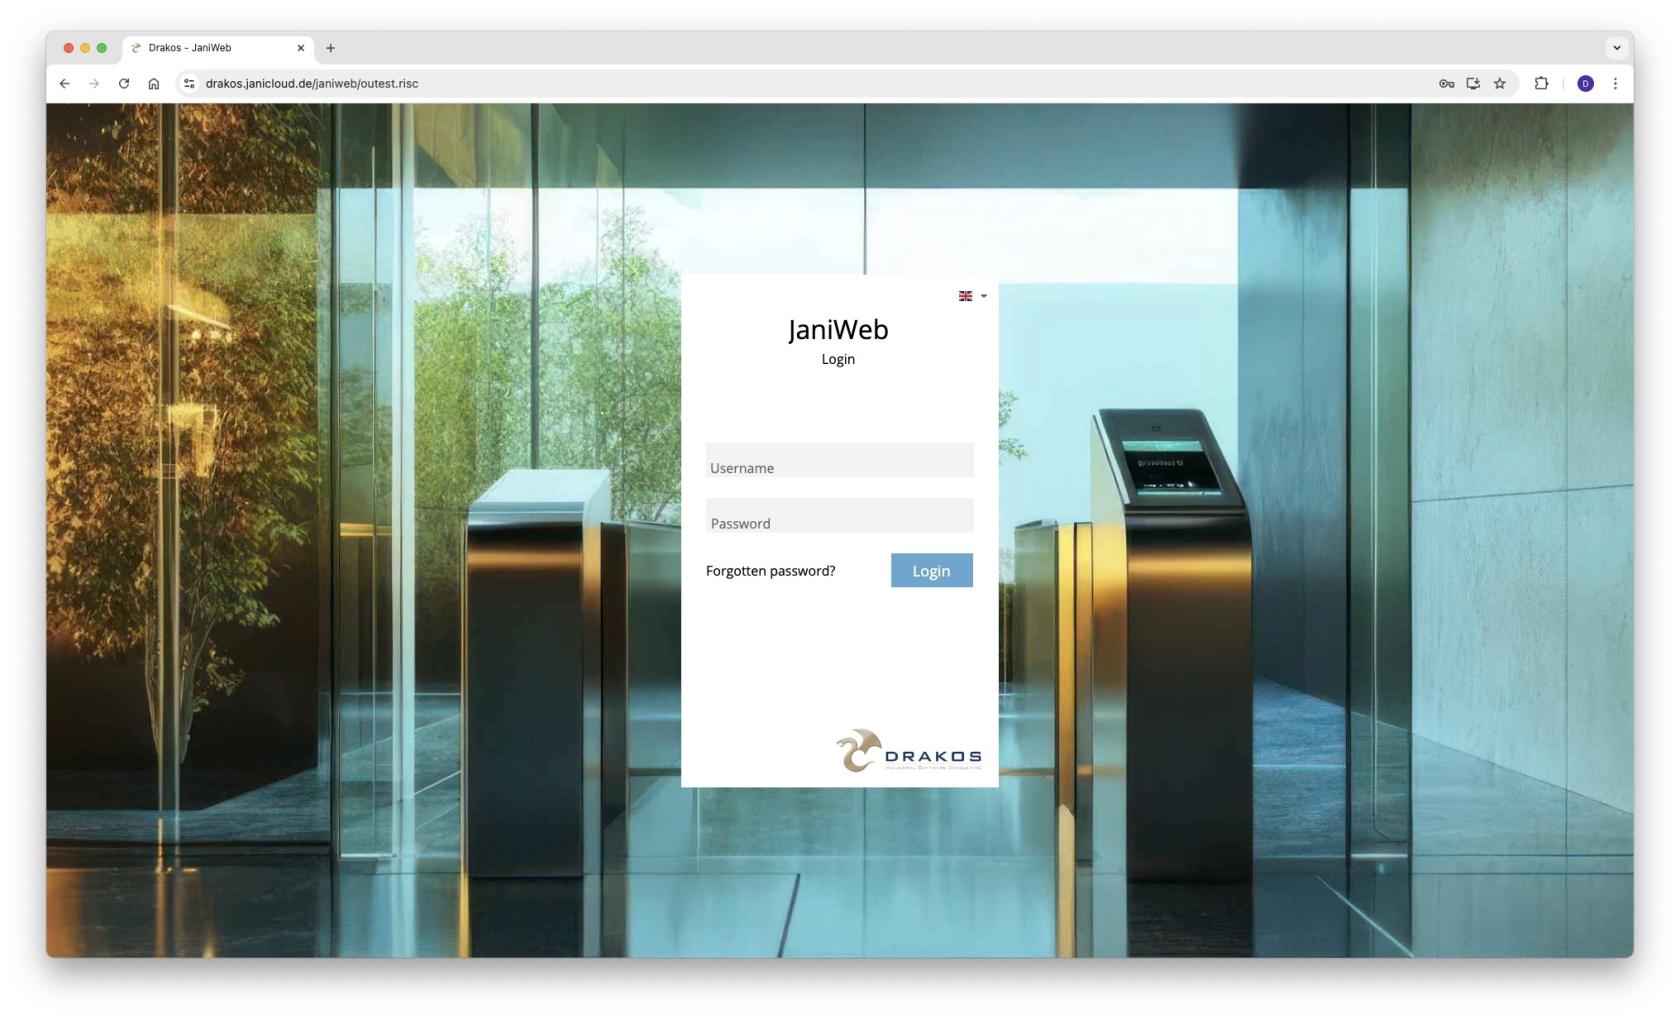
1. Log in to the application
[](https://manual.drakos.de/uploads/images/gallery/2025-10/Zo5bildschirmfoto-2025-10-07-um-08-31-19.jpg)
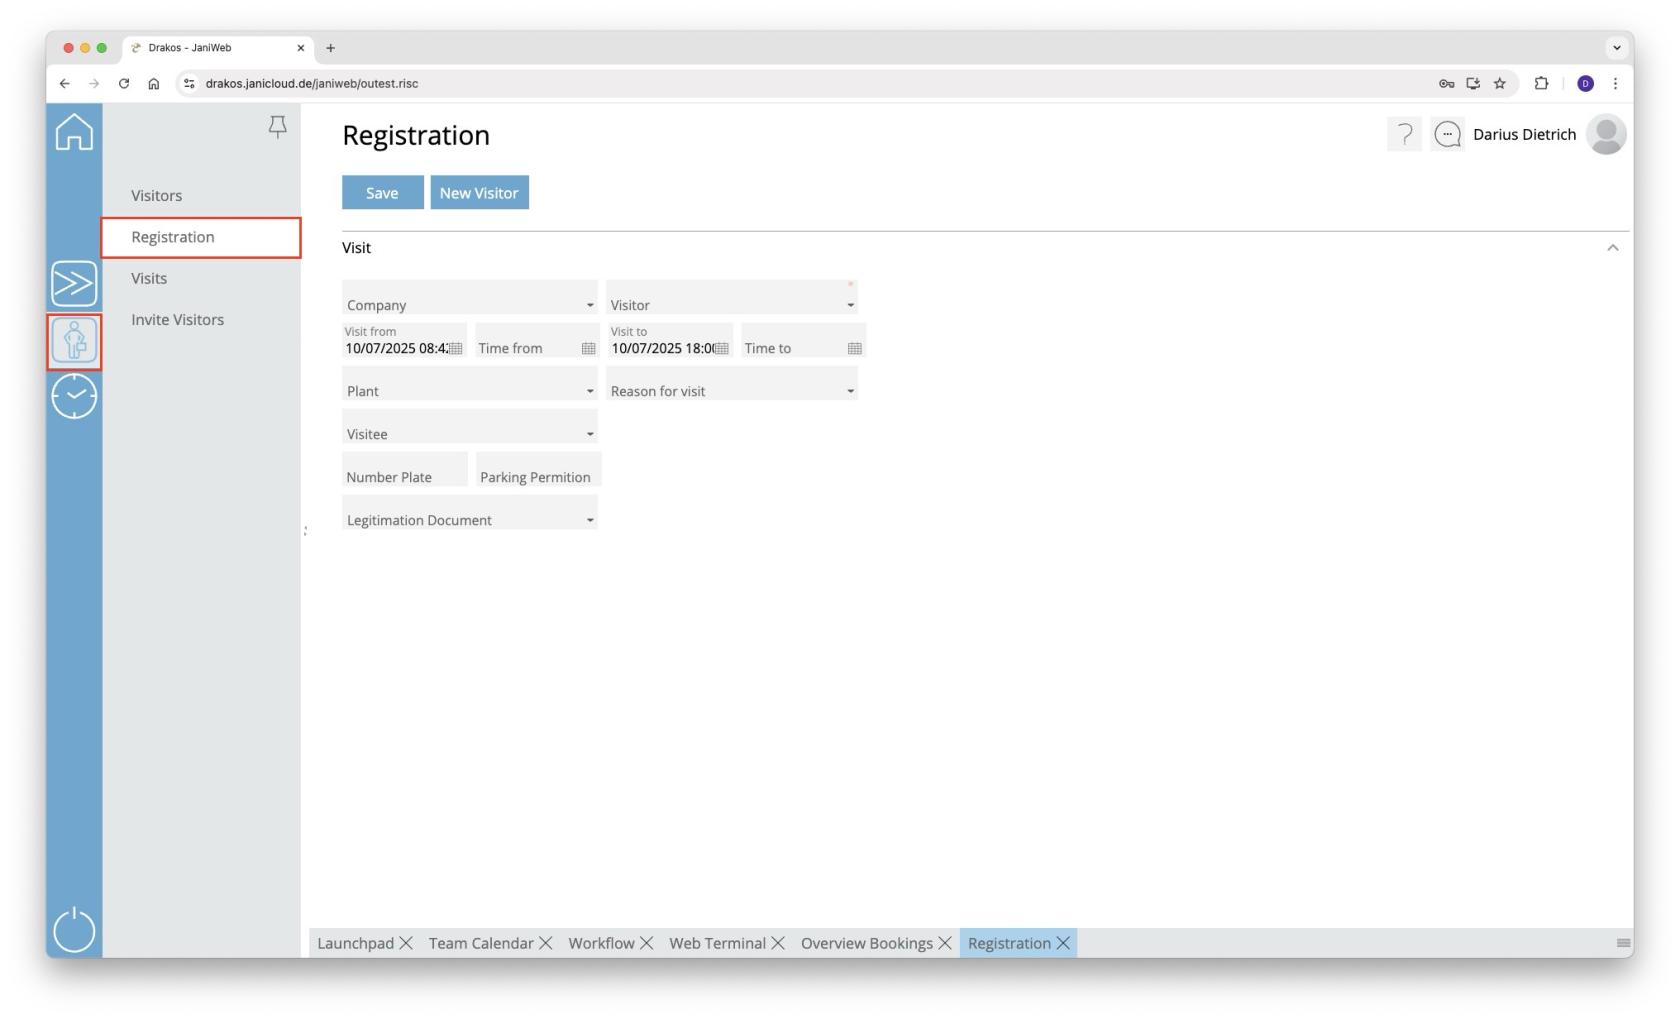
2. Navigate to *Registration* in the menu
[](https://manual.drakos.de/uploads/images/gallery/2025-10/bildschirmfoto-2025-10-07-um-08-37-58.jpg)
3. Fill in the fields and confirm with *Save* [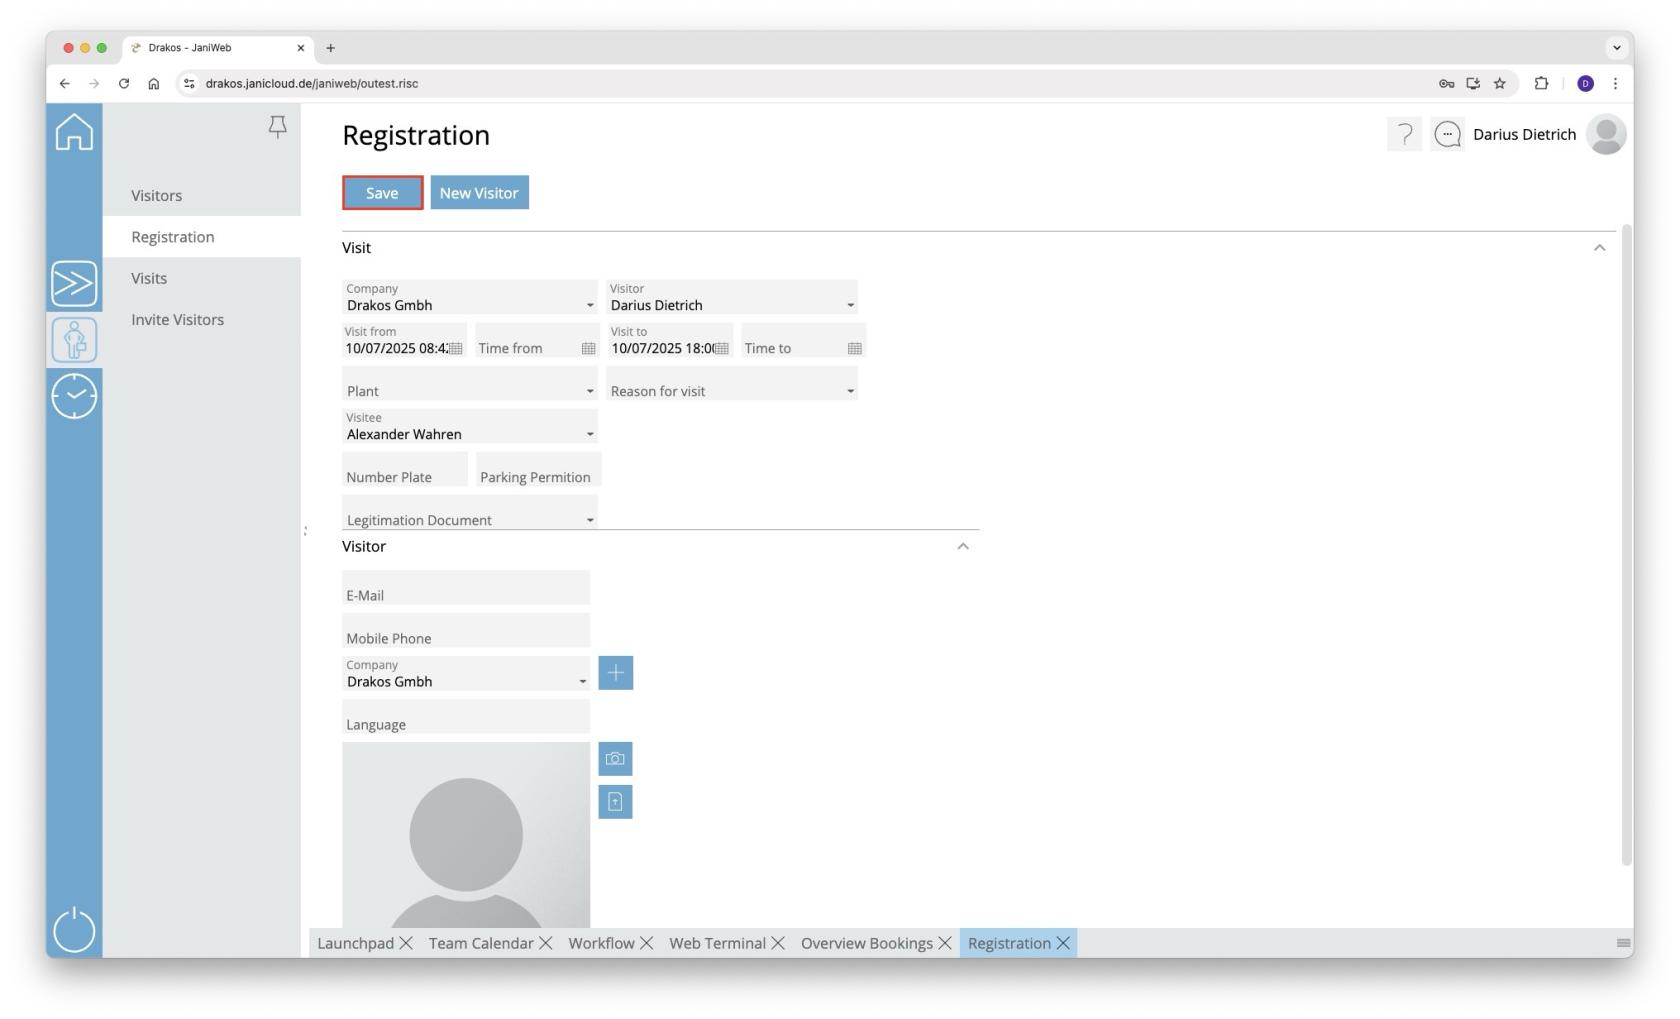](https://manual.drakos.de/uploads/images/gallery/2025-10/bildschirmfoto-2025-10-07-um-08-38-48.jpg)
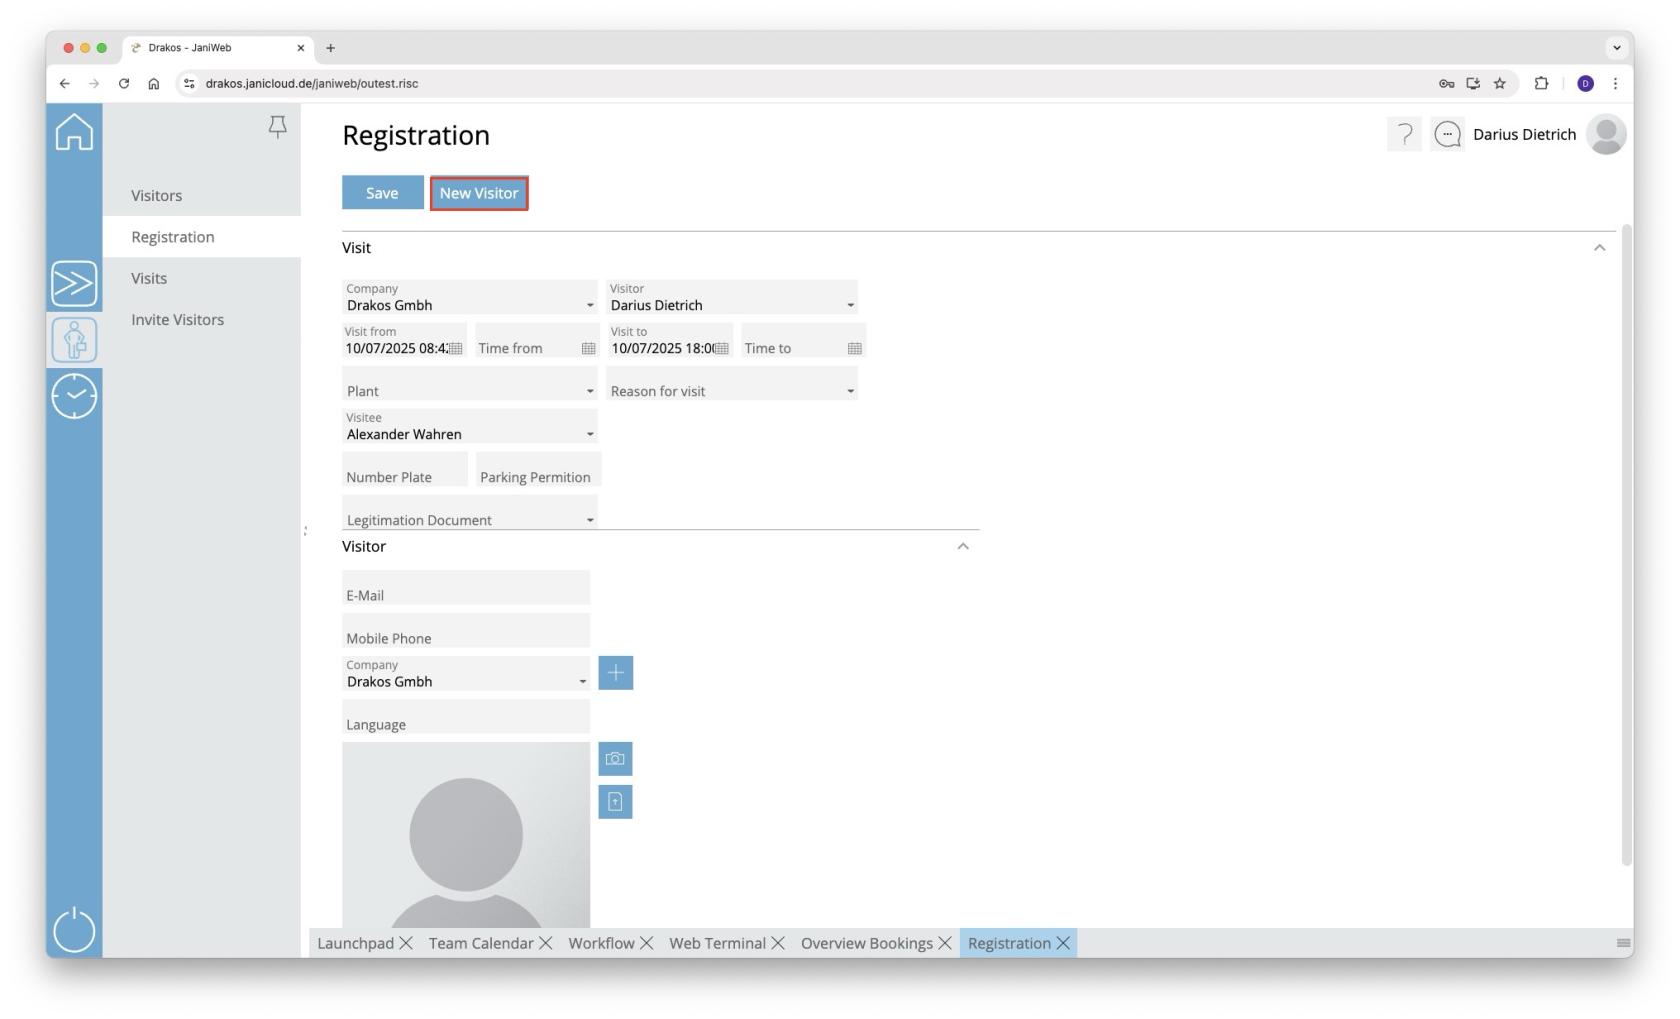
1. If the visitor does not yet exist in the system, they can be created using the *New Visitor* button
[](https://manual.drakos.de/uploads/images/gallery/2025-10/bildschirmfoto-2025-10-07-um-08-39-15.jpg)
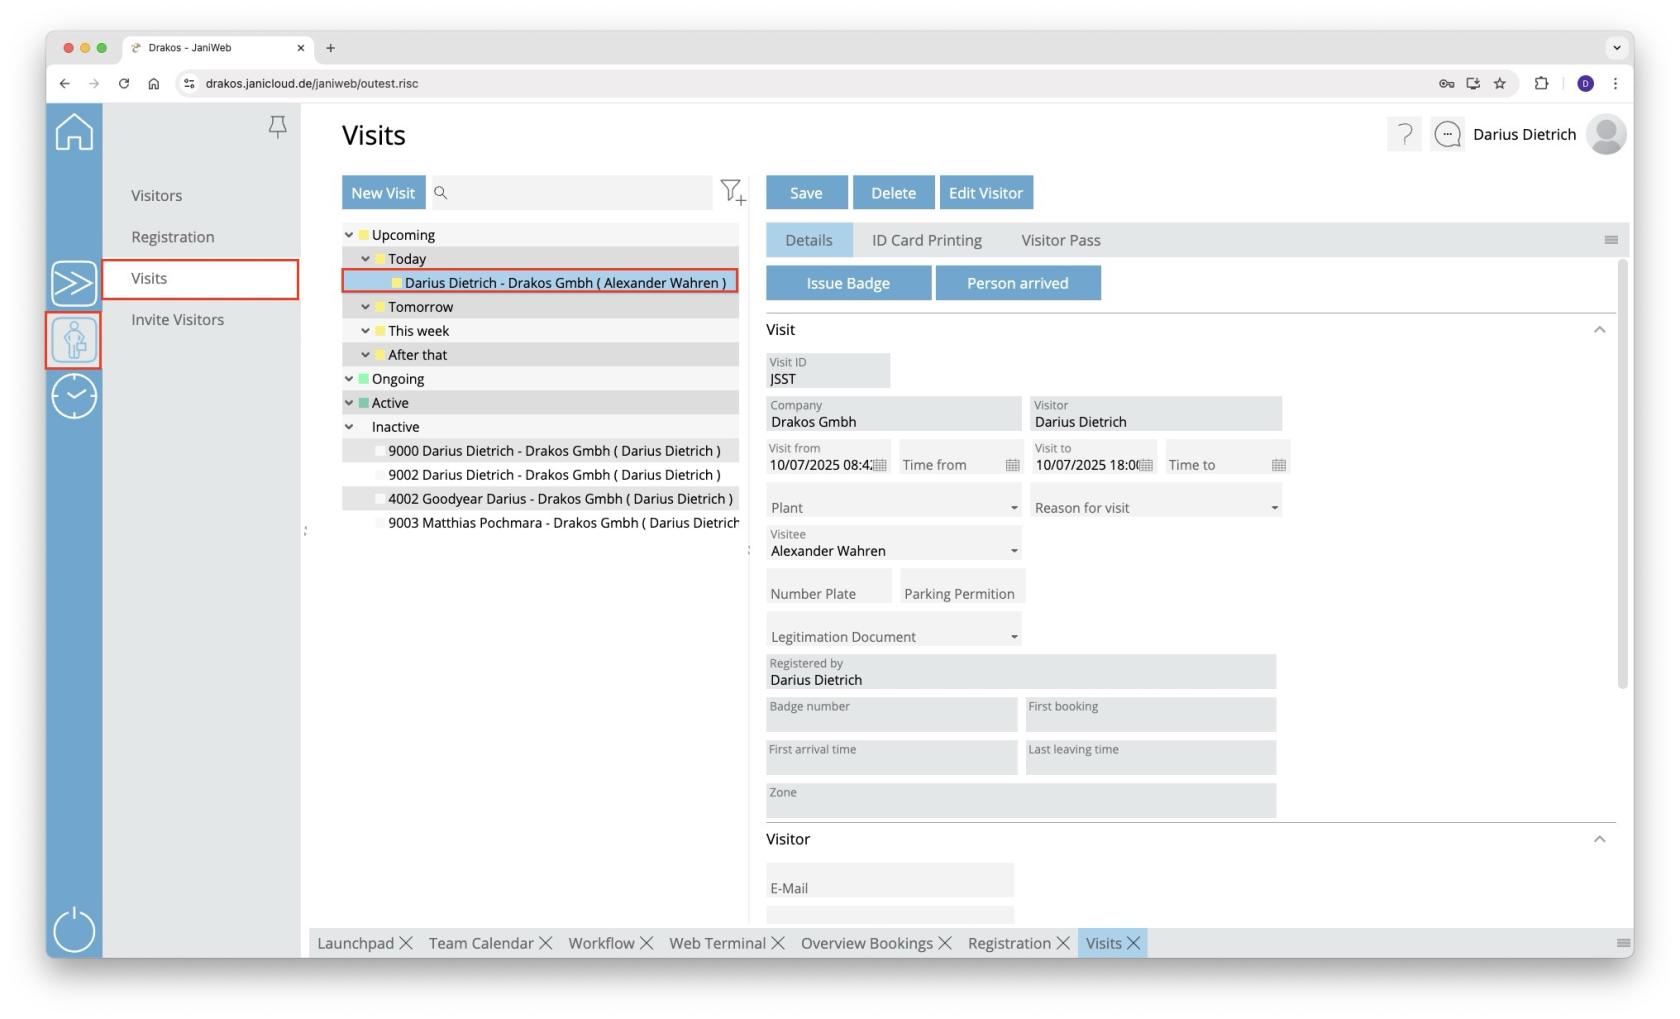
4. The visit now appears under the menu item *Visits* below the *Upcoming* section
[](https://manual.drakos.de/uploads/images/gallery/2025-10/bildschirmfoto-2025-10-07-um-08-39-57.jpg)
1. A badge can now be issued here via the *Issue Badge* button
2. or the visit can be marked as present via the *Person arrived* button
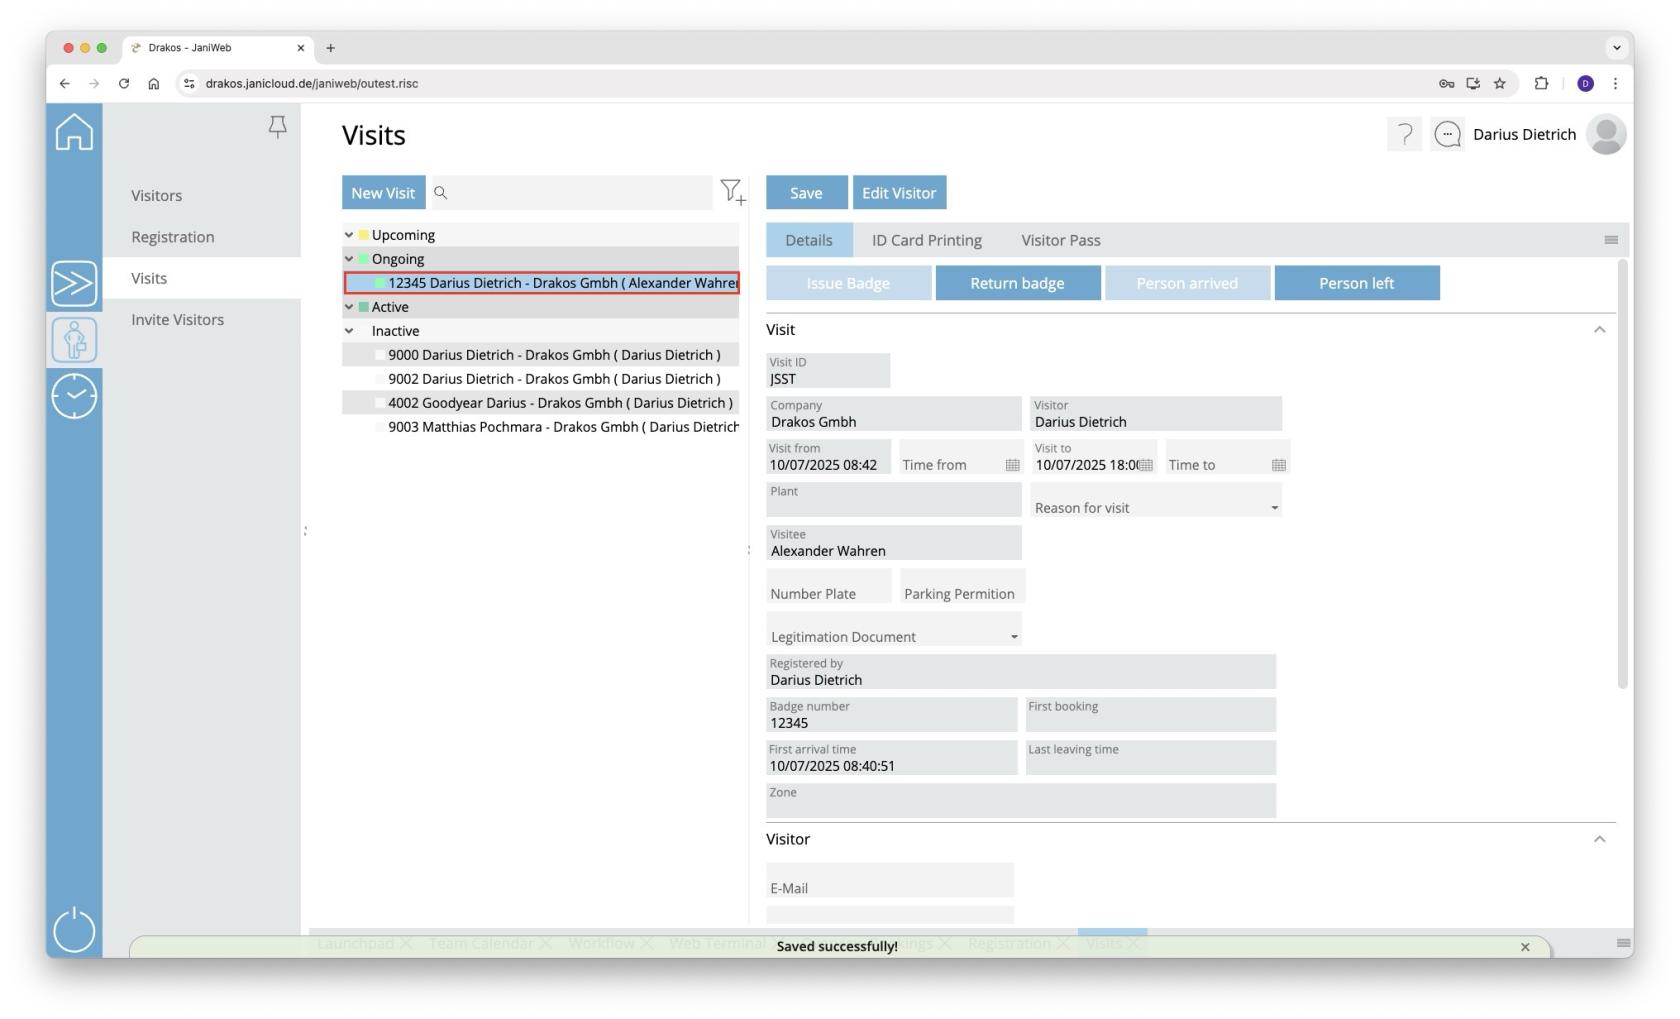
5. The visit now appears in the *Ongoing* section
[](https://manual.drakos.de/uploads/images/gallery/2025-10/bildschirmfoto-2025-10-07-um-08-40-55.jpg)
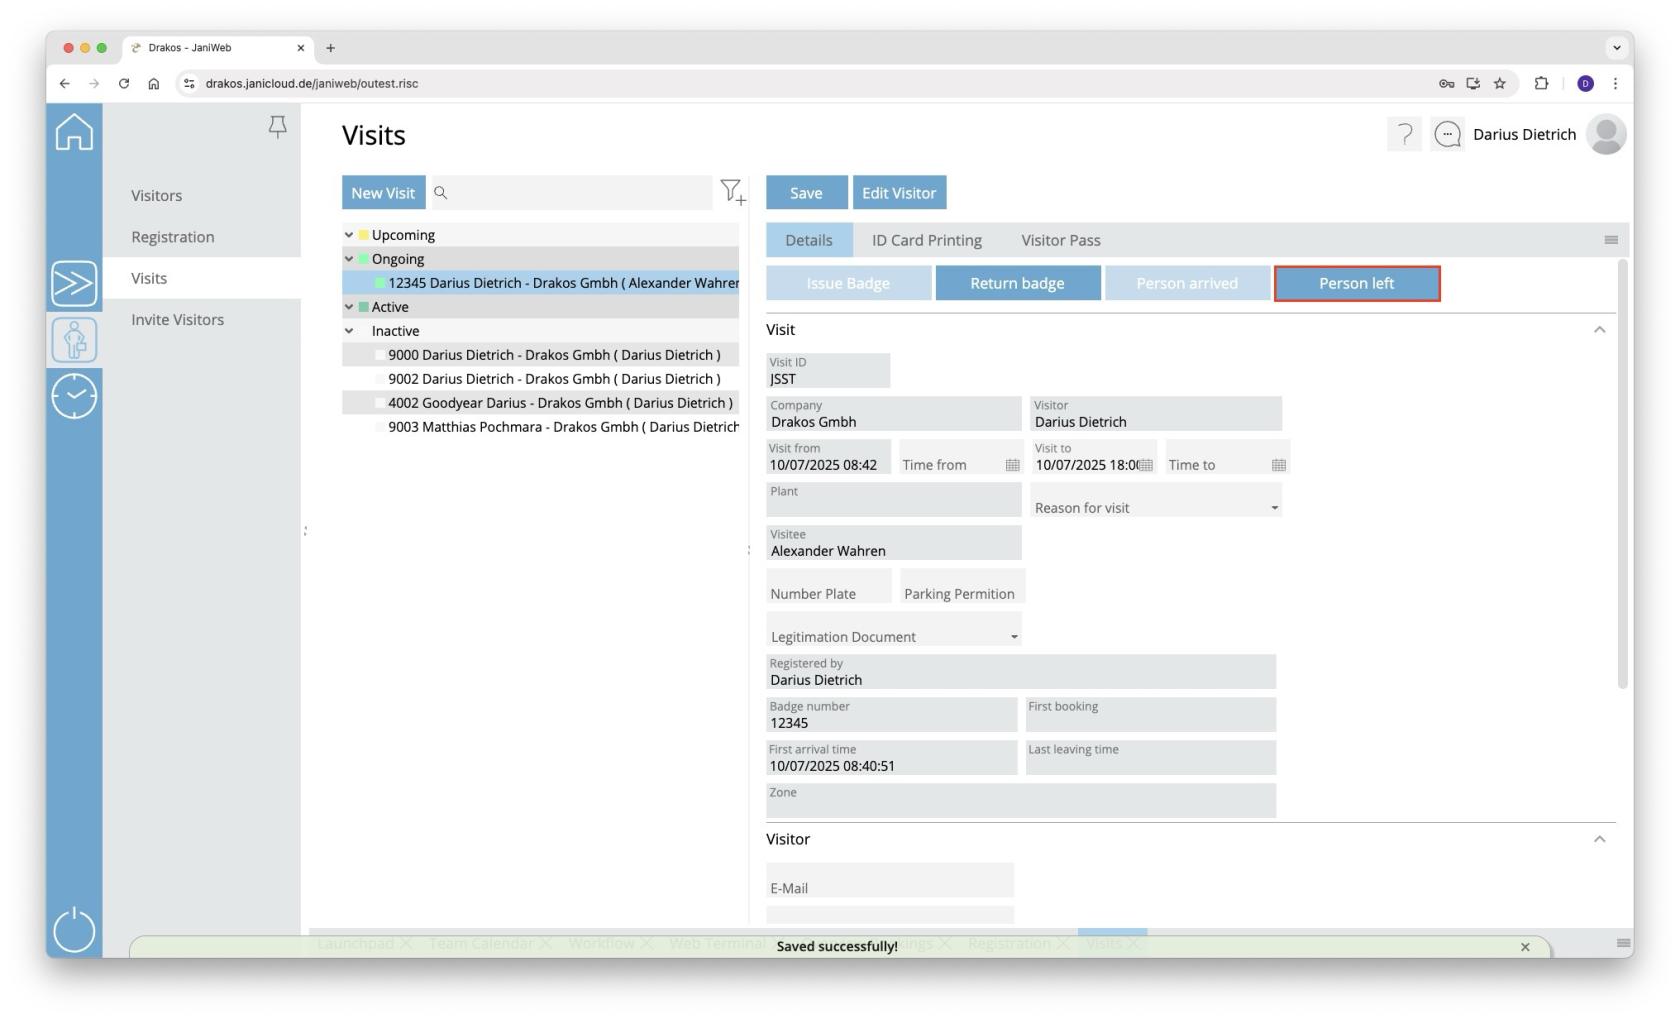
6. The visitor can be logged out via the *Person left* button
[](https://manual.drakos.de/uploads/images/gallery/2025-10/bildschirmfoto-2025-10-07-um-08-41-24.jpg)
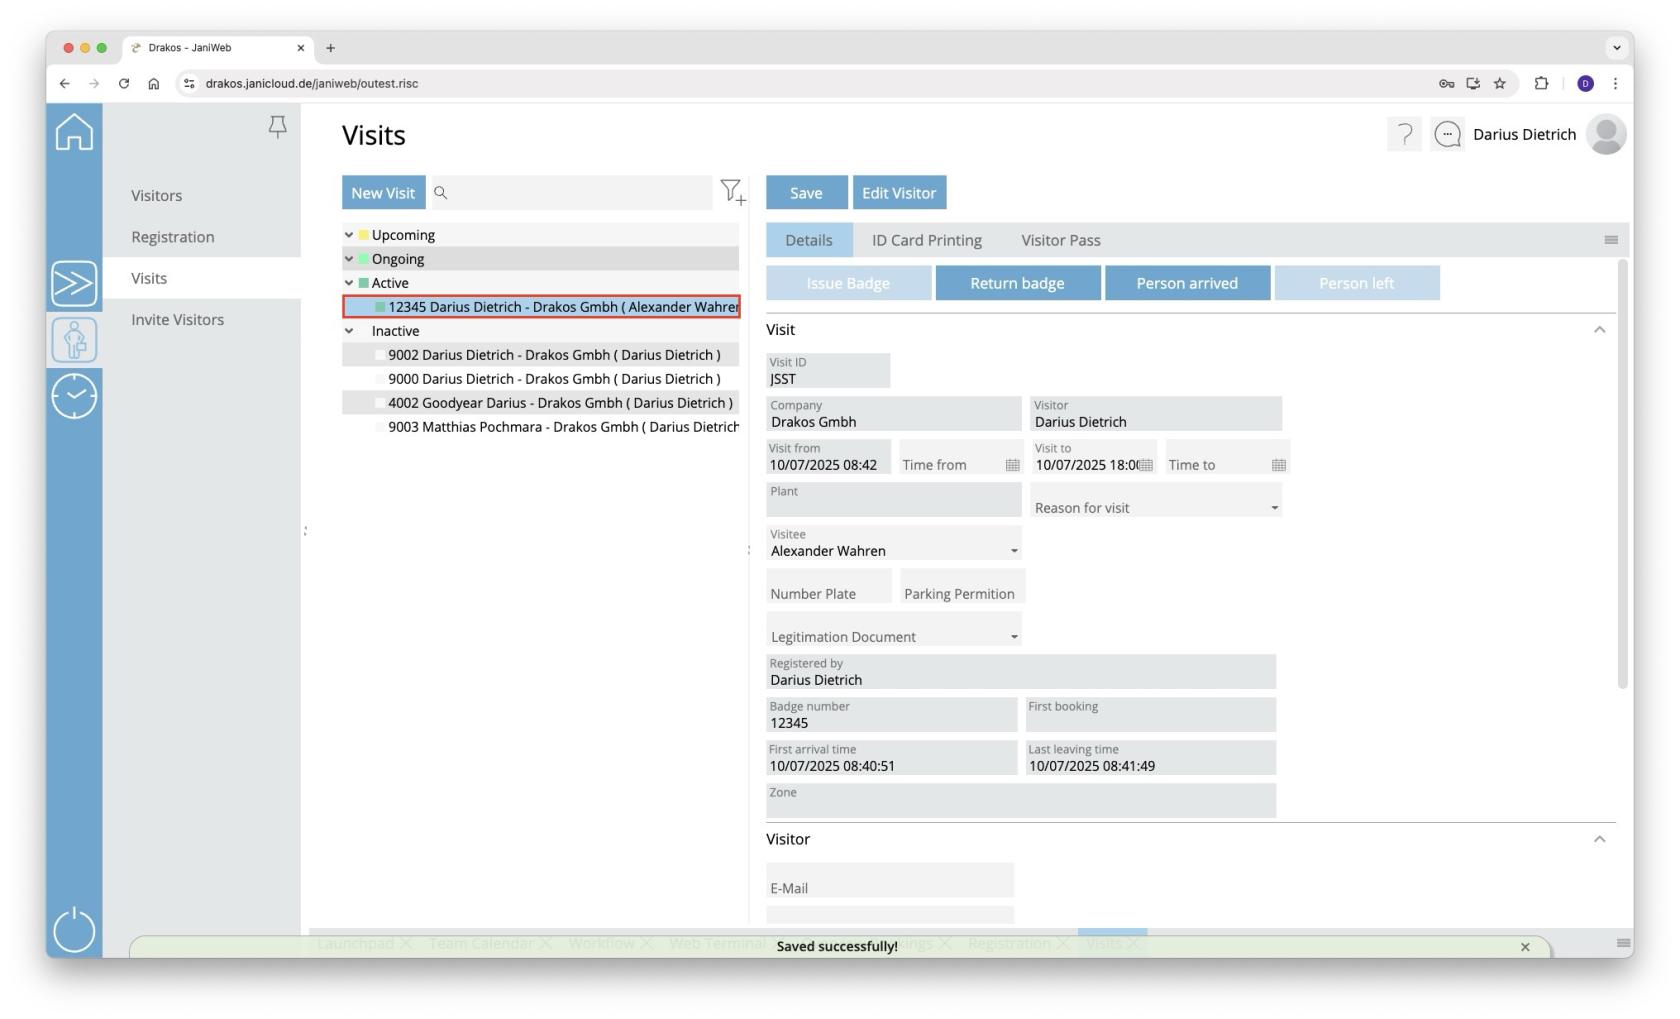
7. As long as the visit period has not yet expired, the visit appears below the *Active* section
[](https://manual.drakos.de/uploads/images/gallery/2025-10/bildschirmfoto-2025-10-07-um-08-41-52.jpg)
# Create Absences
1. Log in to the application.
[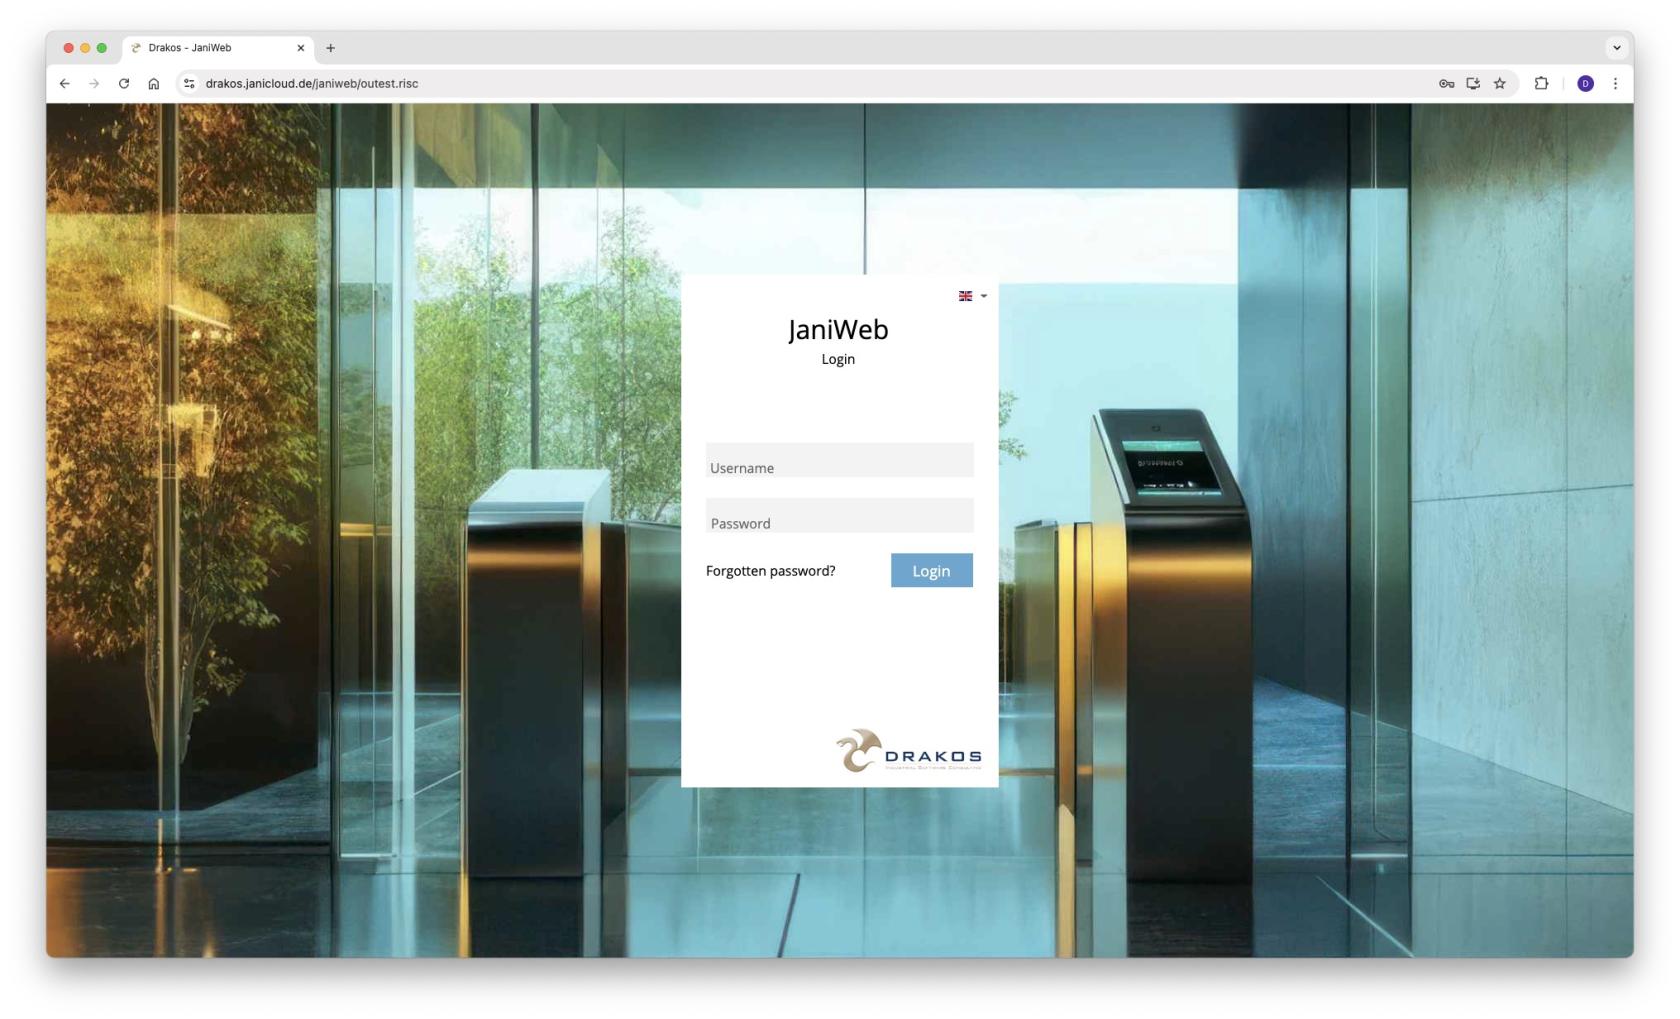](https://manual.drakos.de/uploads/images/gallery/2025-10/bildschirmfoto-2025-10-07-um-08-31-19.jpg)
2. Navigate to the *Team Calendar* item in the menu.
[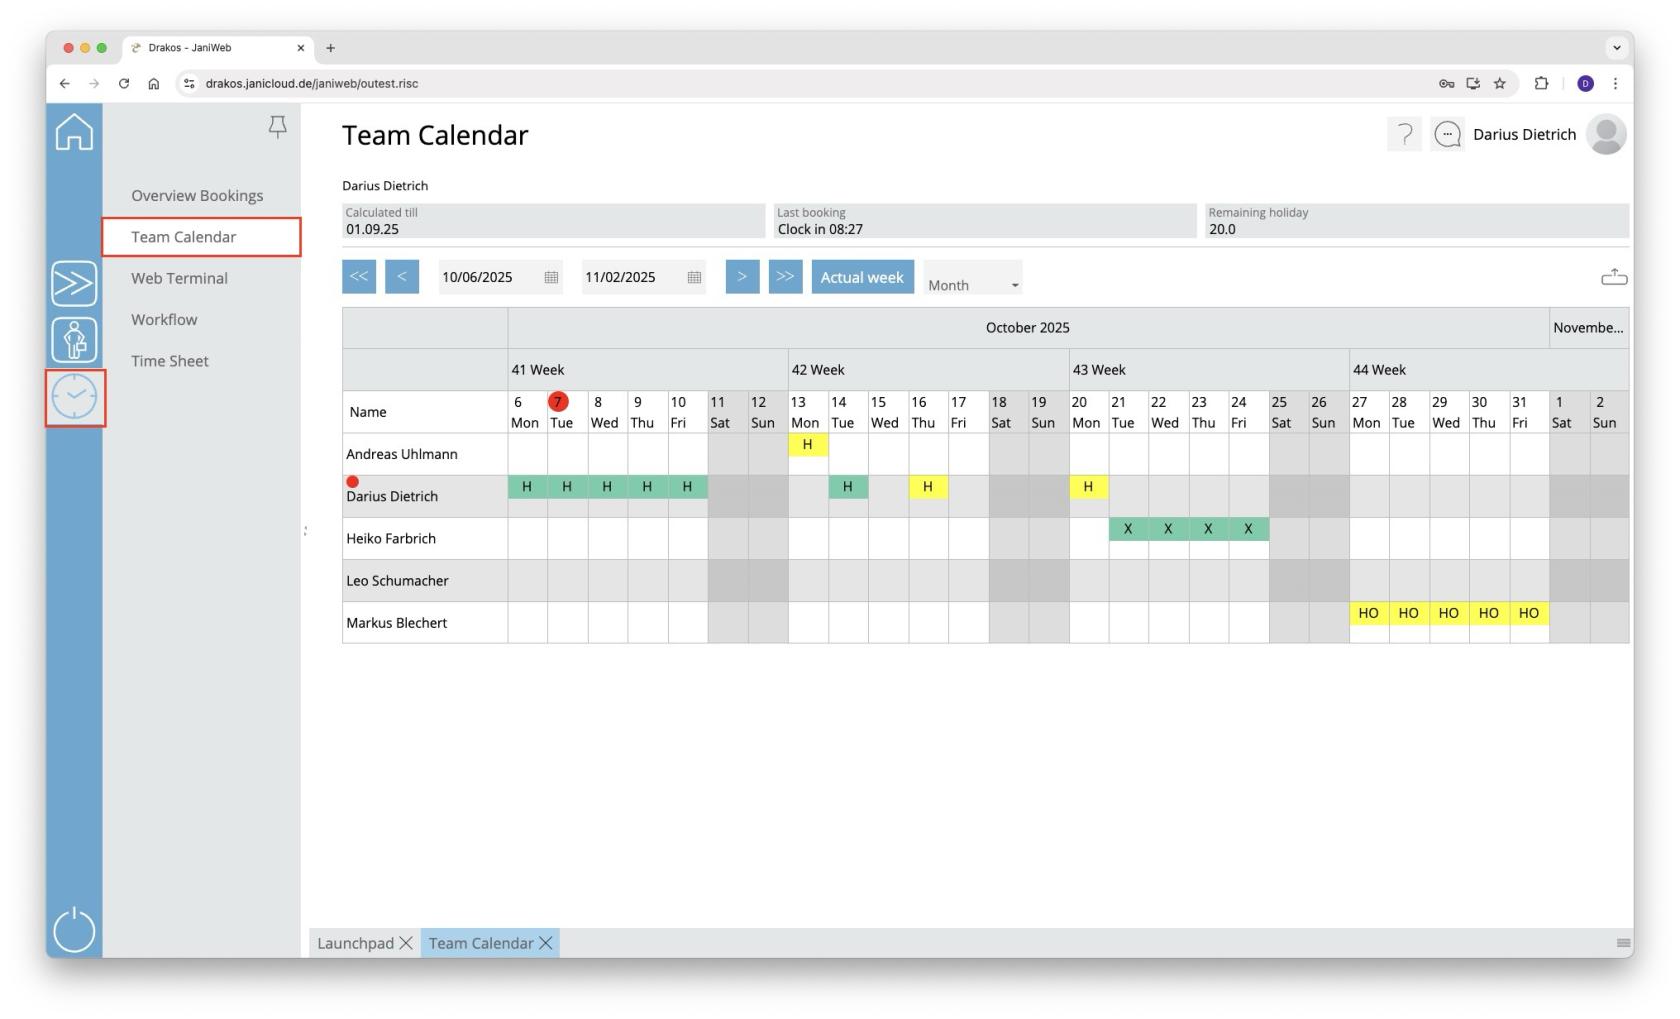](https://manual.drakos.de/uploads/images/gallery/2025-10/bildschirmfoto-2025-10-07-um-08-31-59.jpg)
3. Right-click in the field for the desired date of absence > Select *Create new absence* [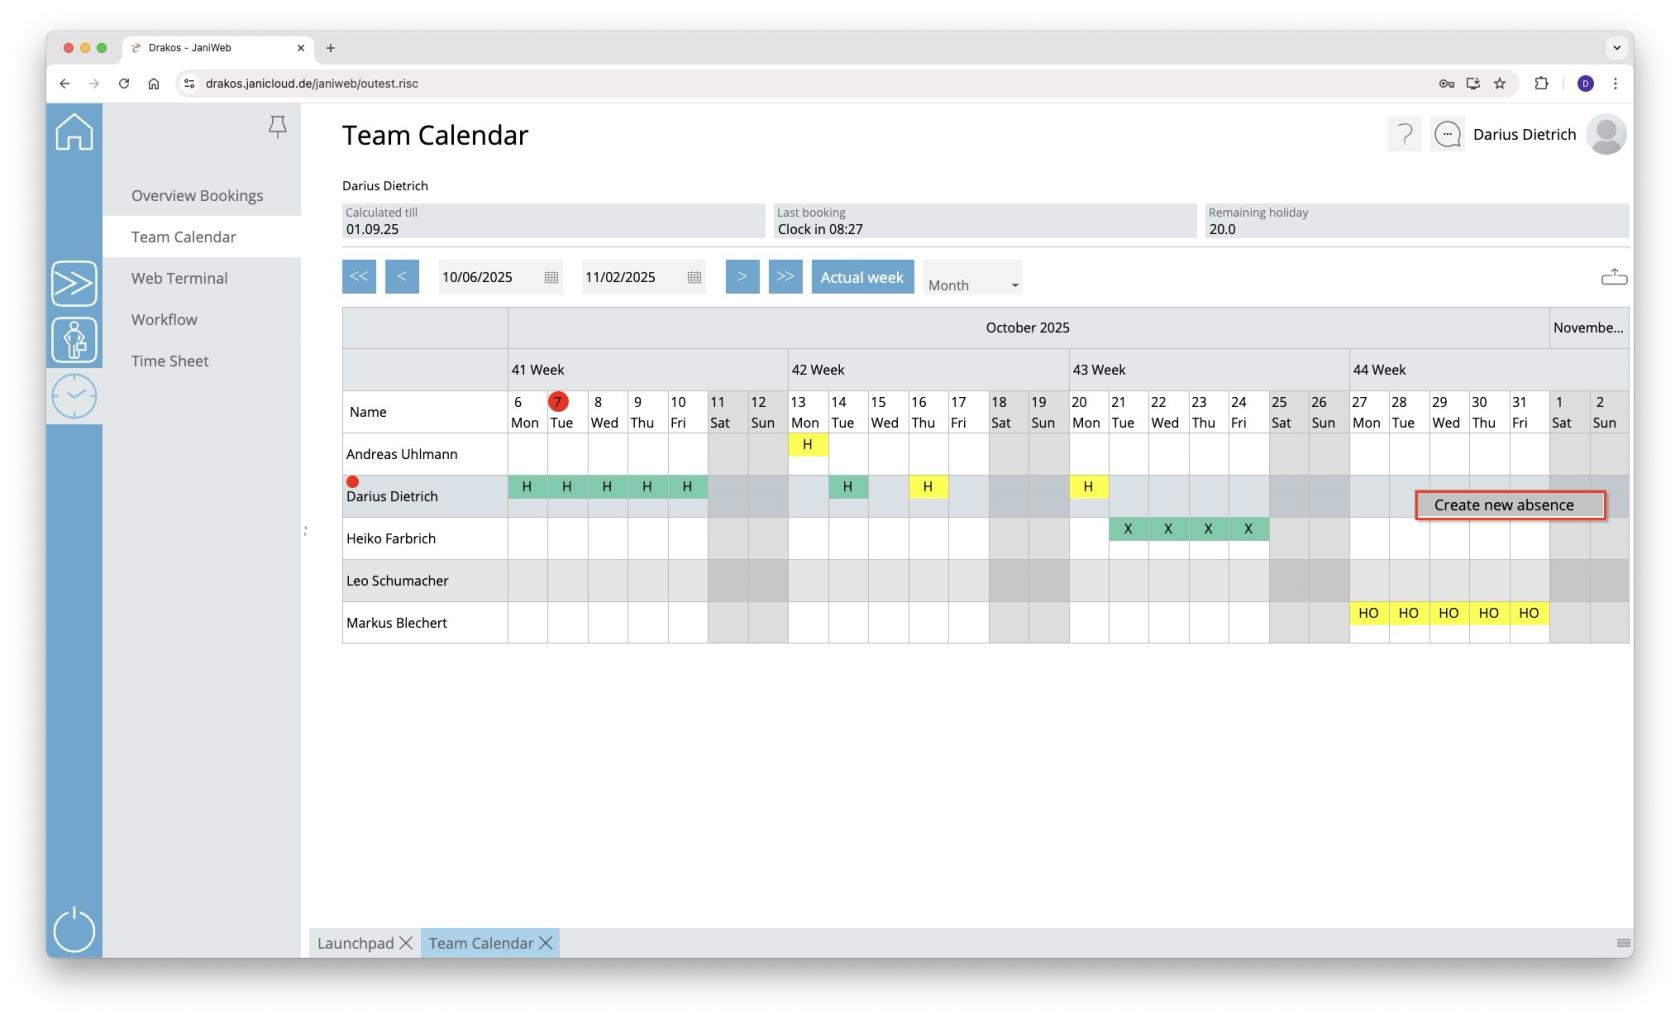](https://manual.drakos.de/uploads/images/gallery/2025-10/bildschirmfoto-2025-10-07-um-08-32-40.jpg)
4. Enter dates for *From* and *To*. Set comment for supervisor if necessary. Confirm with *Save*.
[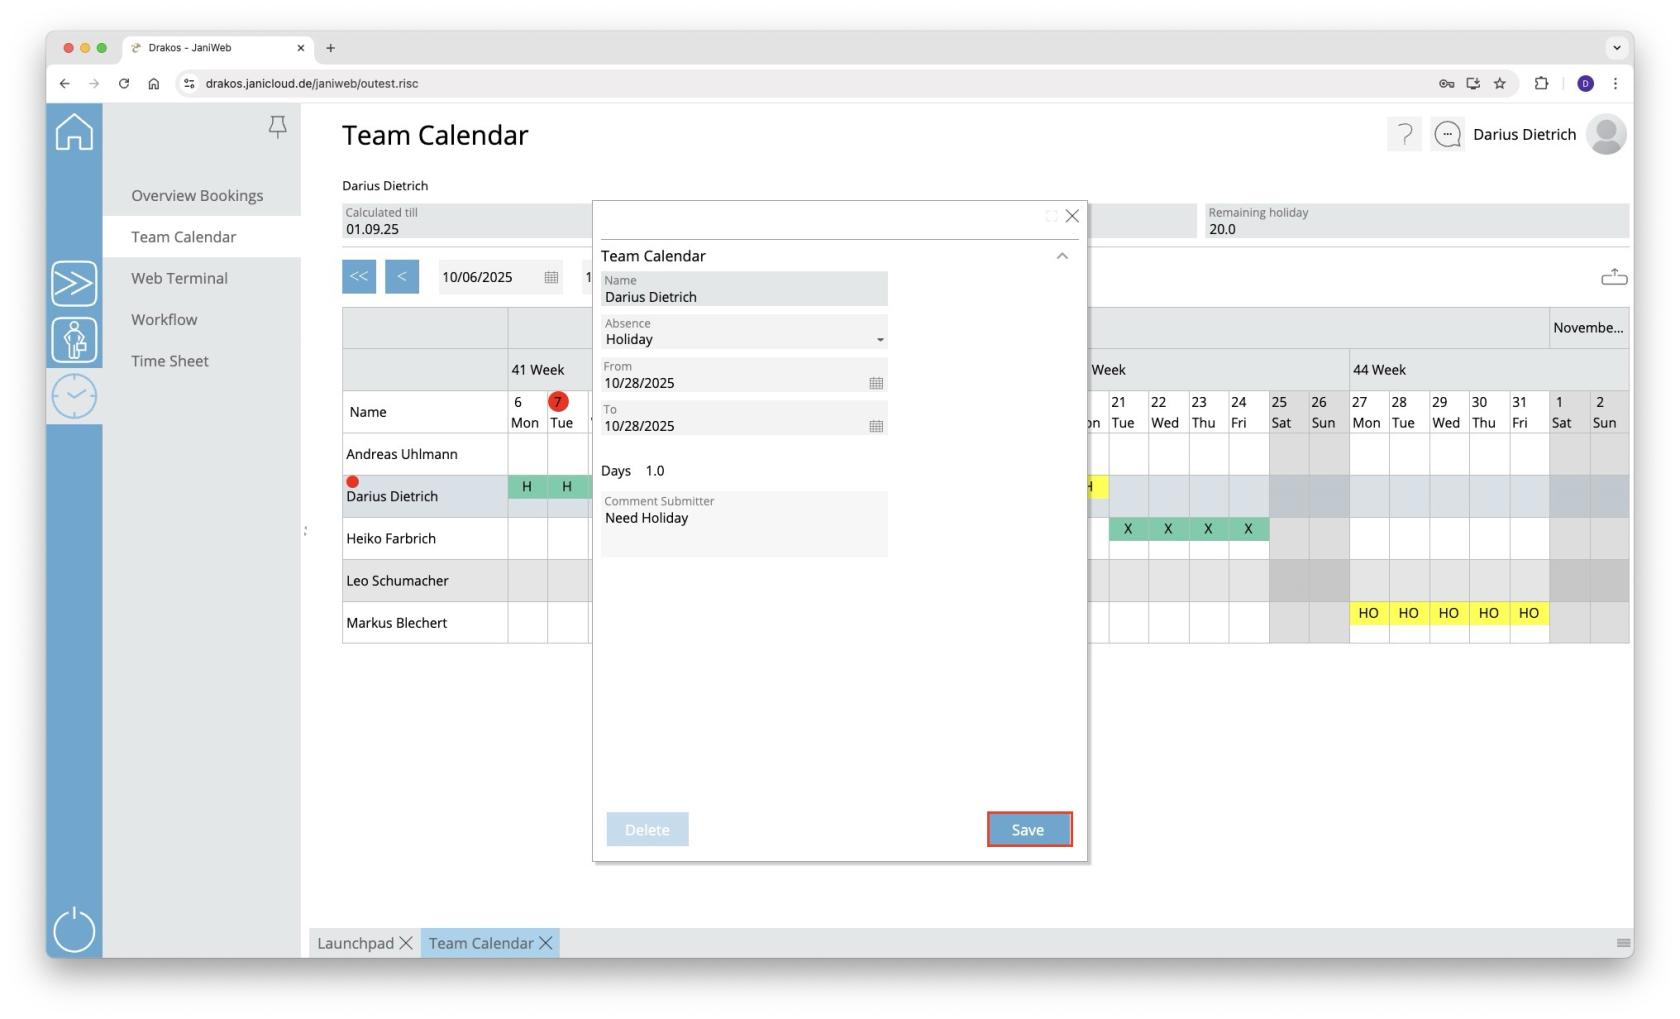](https://manual.drakos.de/uploads/images/gallery/2025-10/bildschirmfoto-2025-10-07-um-08-33-19.jpg)
5. Legend colored representation of absences
[](https://manual.drakos.de/uploads/images/gallery/2025-04/sU0image.png)
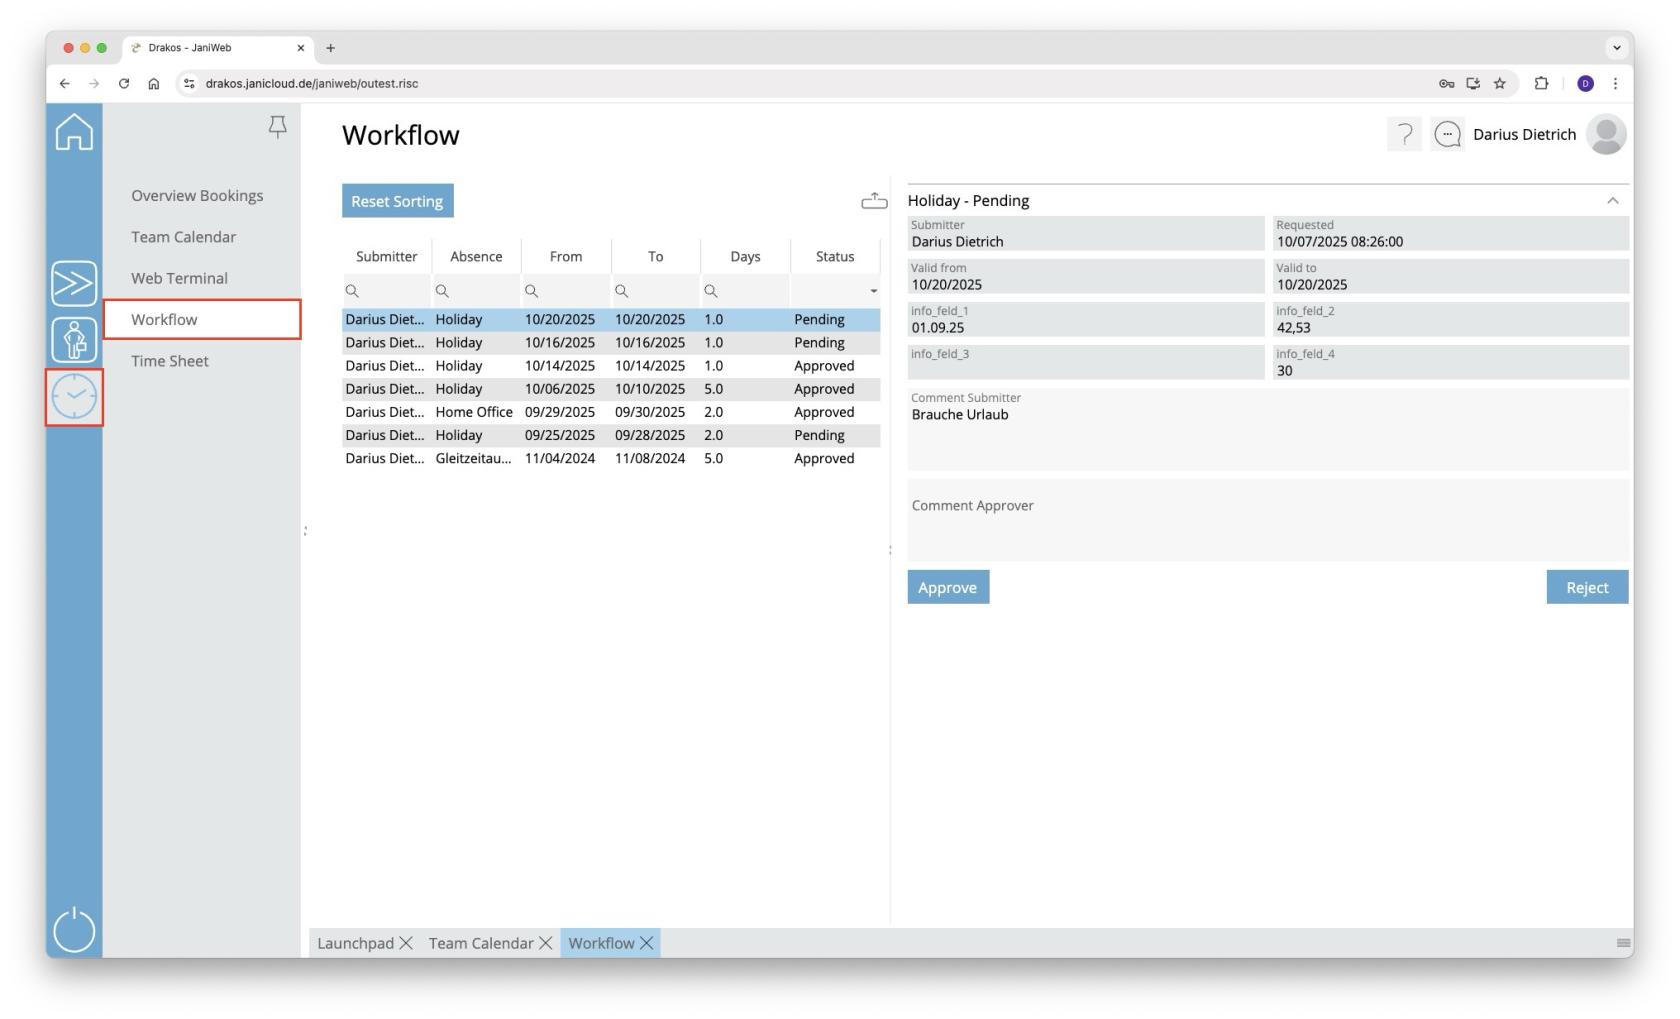
6. In the *Workflow* menu, you will find past absence requests and their status.
[](https://manual.drakos.de/uploads/images/gallery/2025-10/bildschirmfoto-2025-10-07-um-08-33-52.jpg)
# Create bookings via Web Terminal
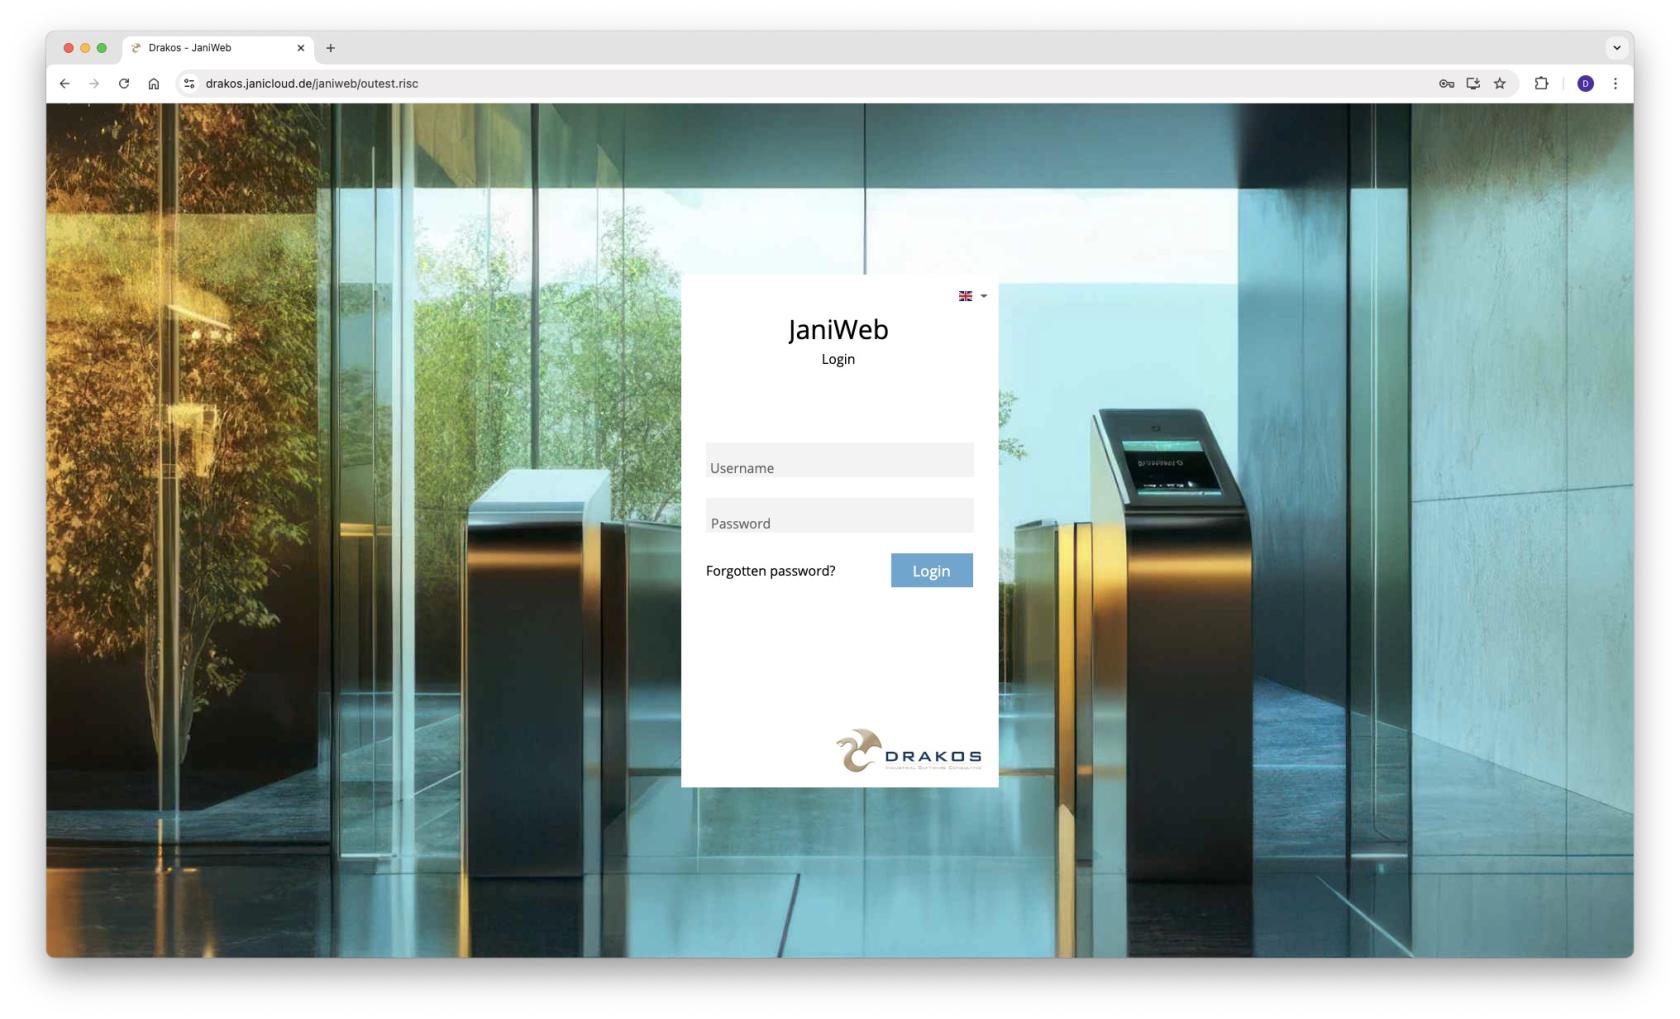
1. Log in to the application.
[](https://manual.drakos.de/uploads/images/gallery/2025-10/7fLbildschirmfoto-2025-10-07-um-08-31-19.jpg)
2. Navigate to *Web Terminal* in the menu [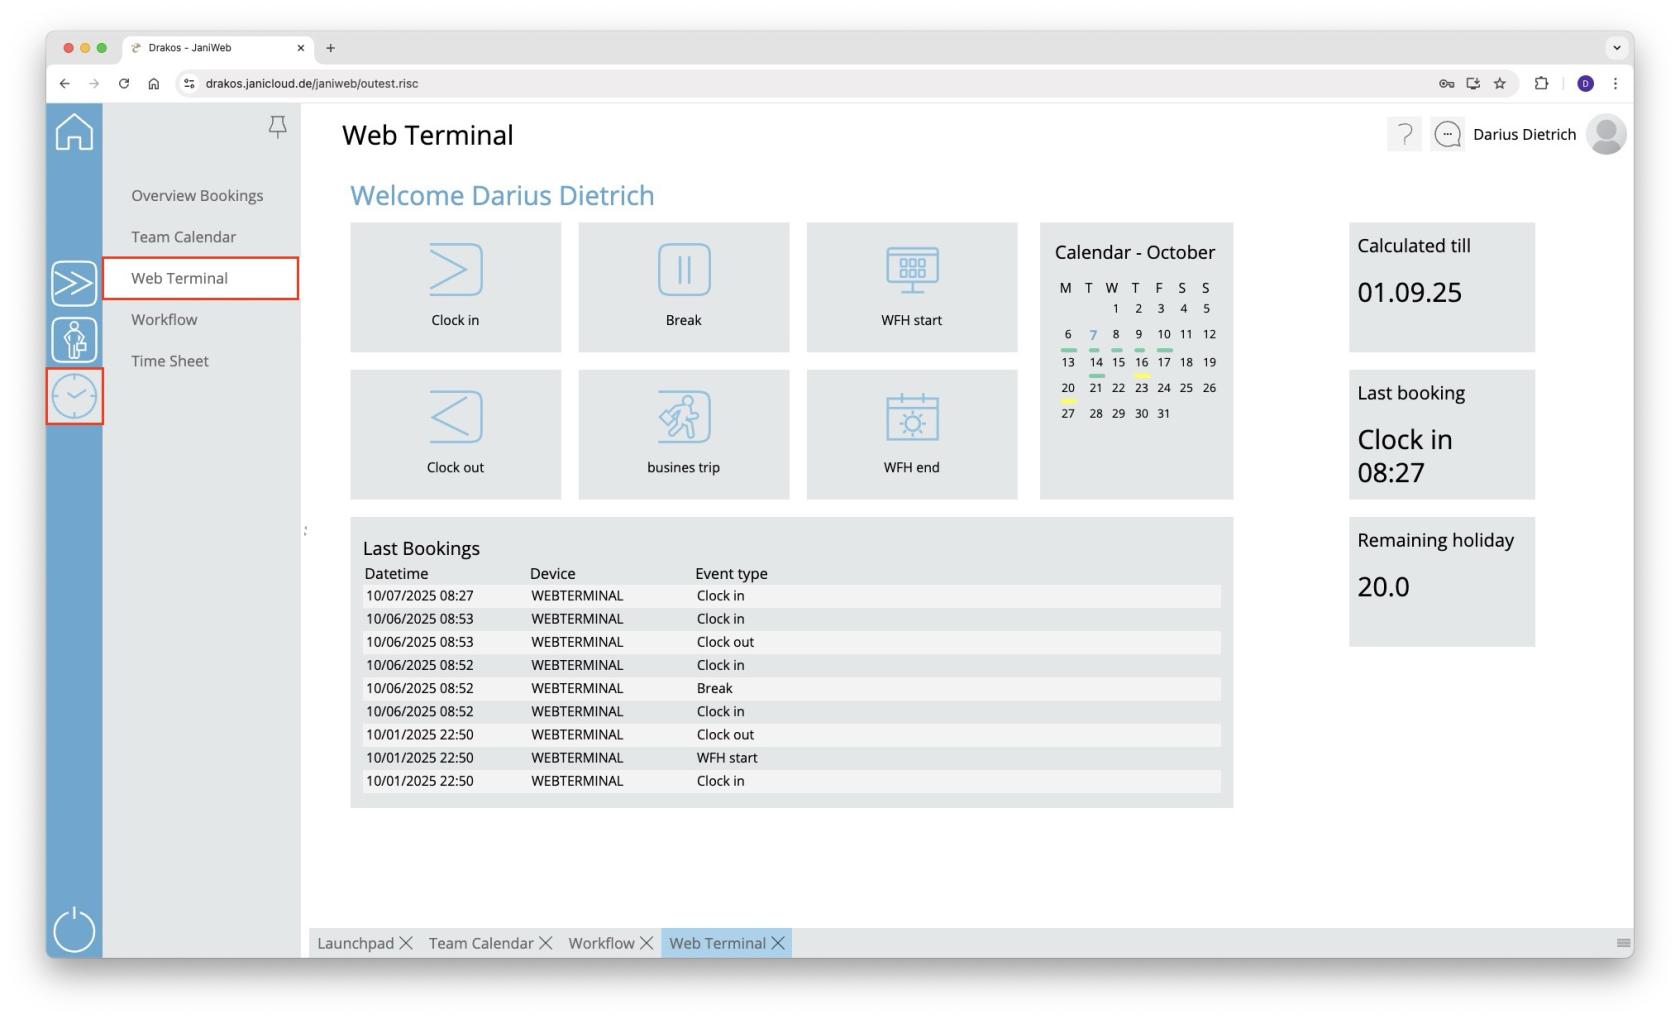](https://manual.drakos.de/uploads/images/gallery/2025-10/bildschirmfoto-2025-10-07-um-08-34-43.jpg)
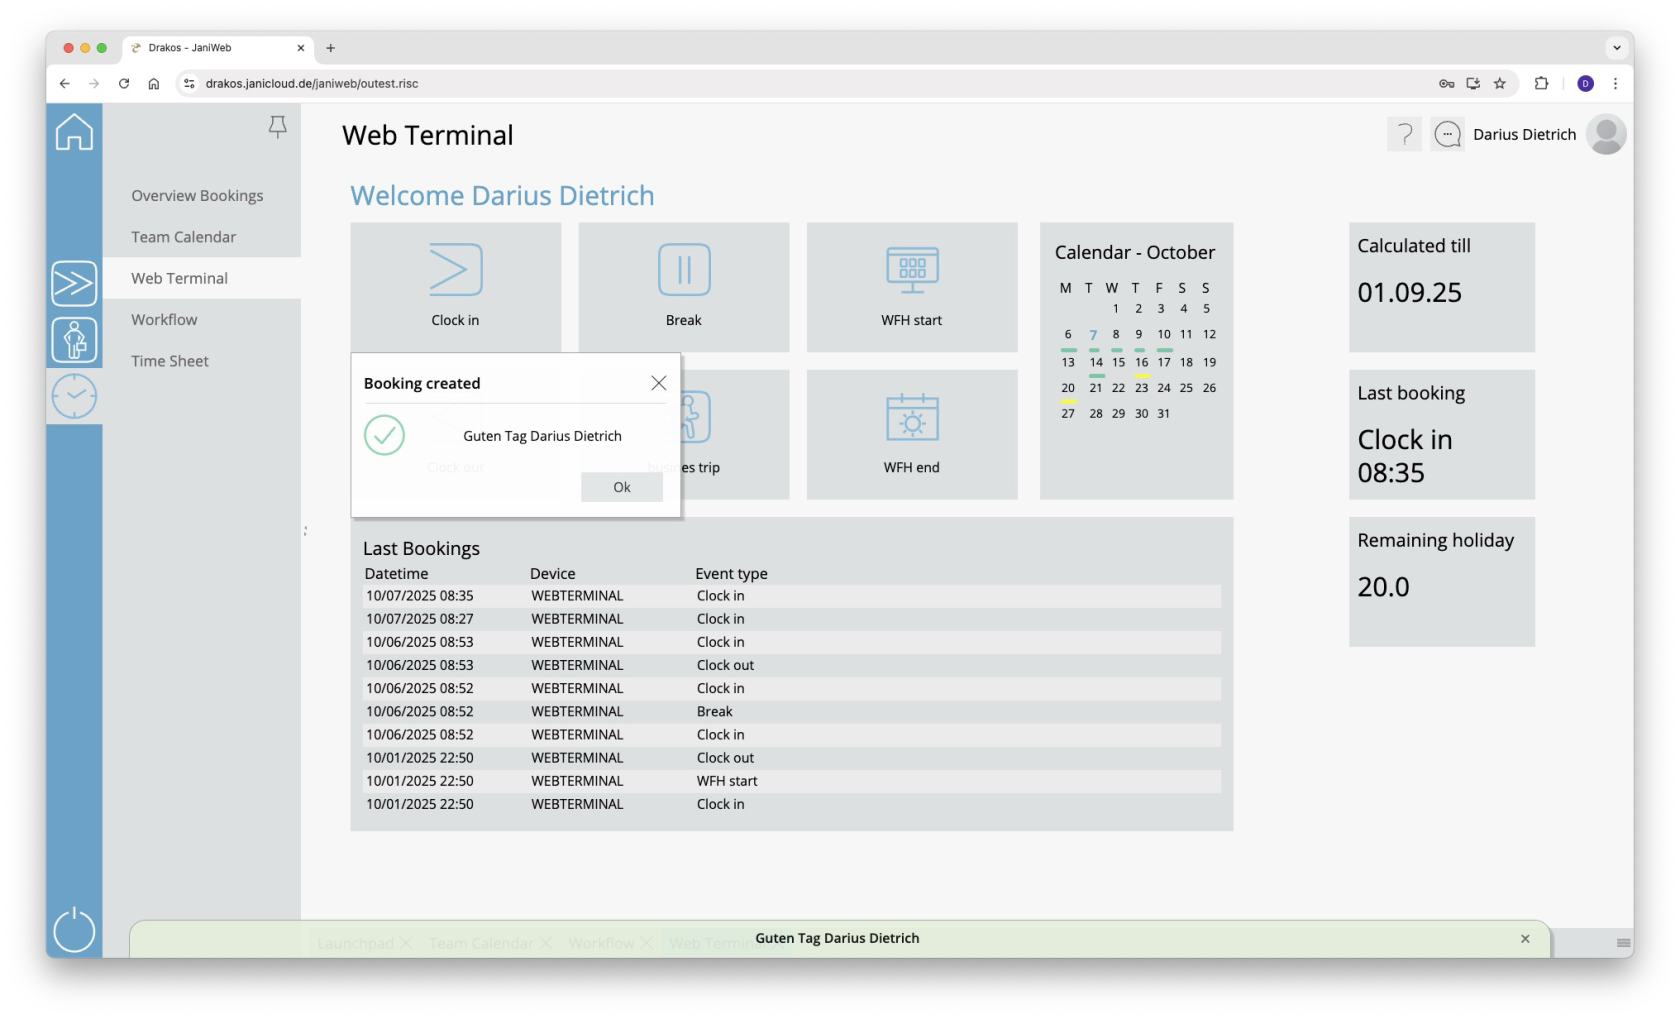
3. Submit the desired booking by pressing the corresponding button
[](https://manual.drakos.de/uploads/images/gallery/2025-10/IqIimage.png)
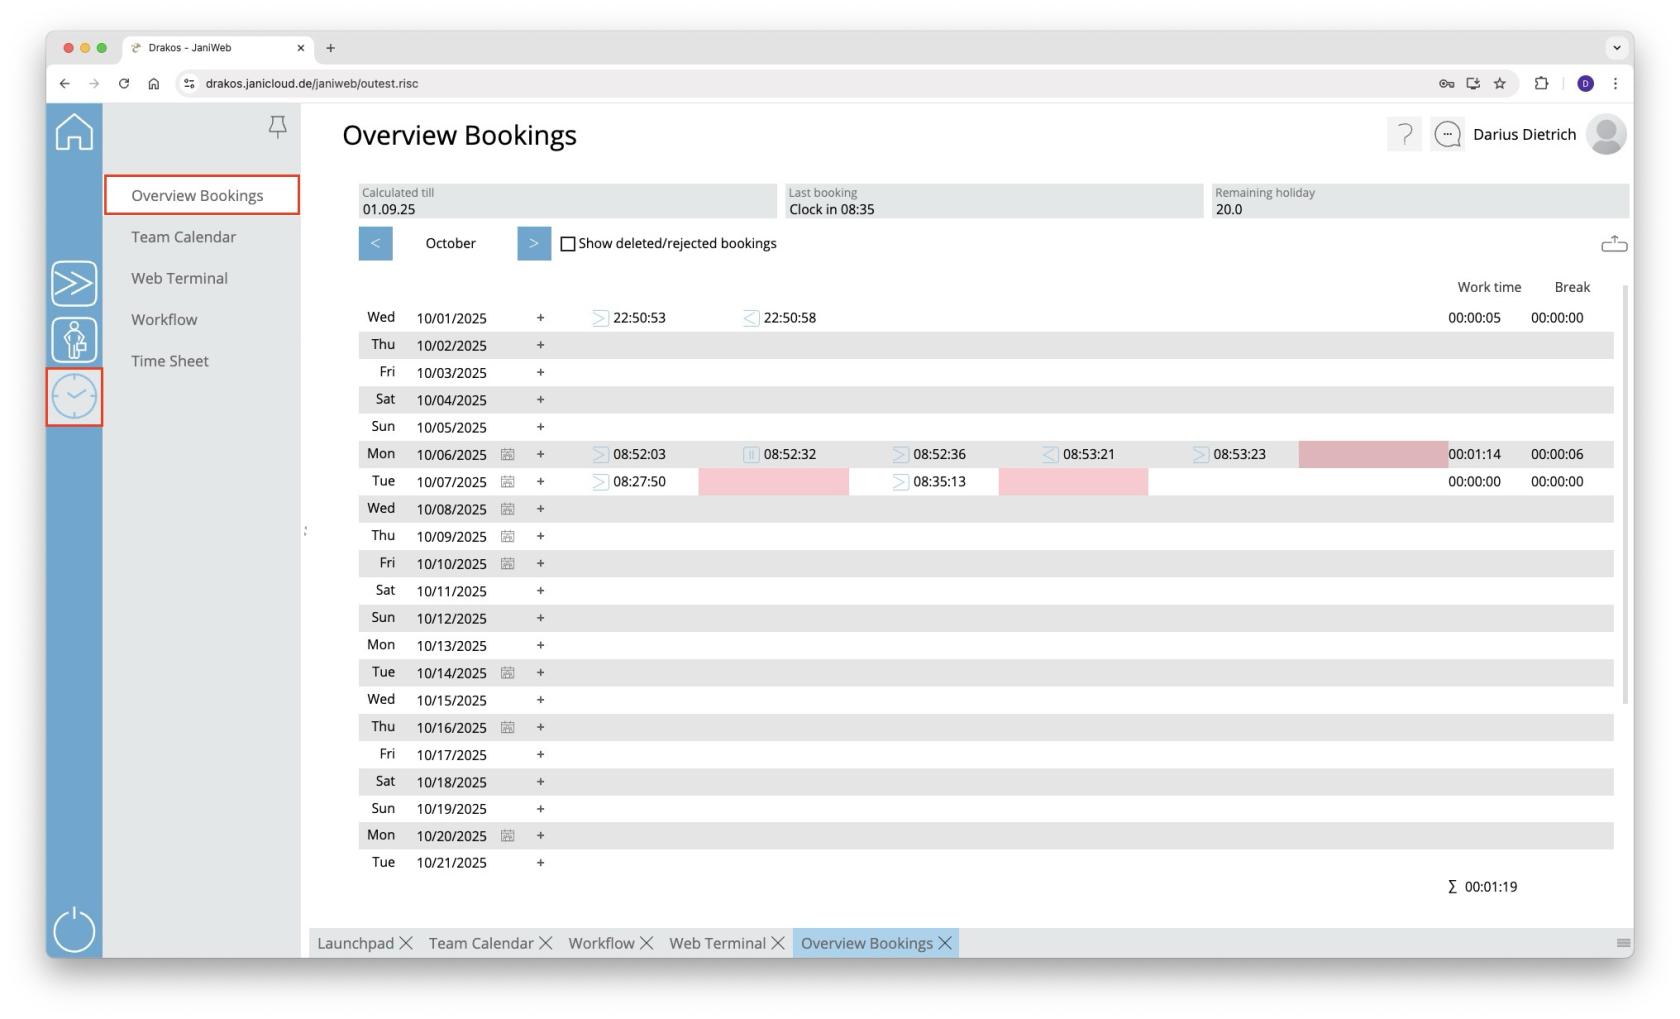
4. Bookings can be viewed via the *Overview Bookings* menu
[](https://manual.drakos.de/uploads/images/gallery/2025-10/bildschirmfoto-2025-10-07-um-08-35-32.jpg)
# Add bookings via the Overview Bookings
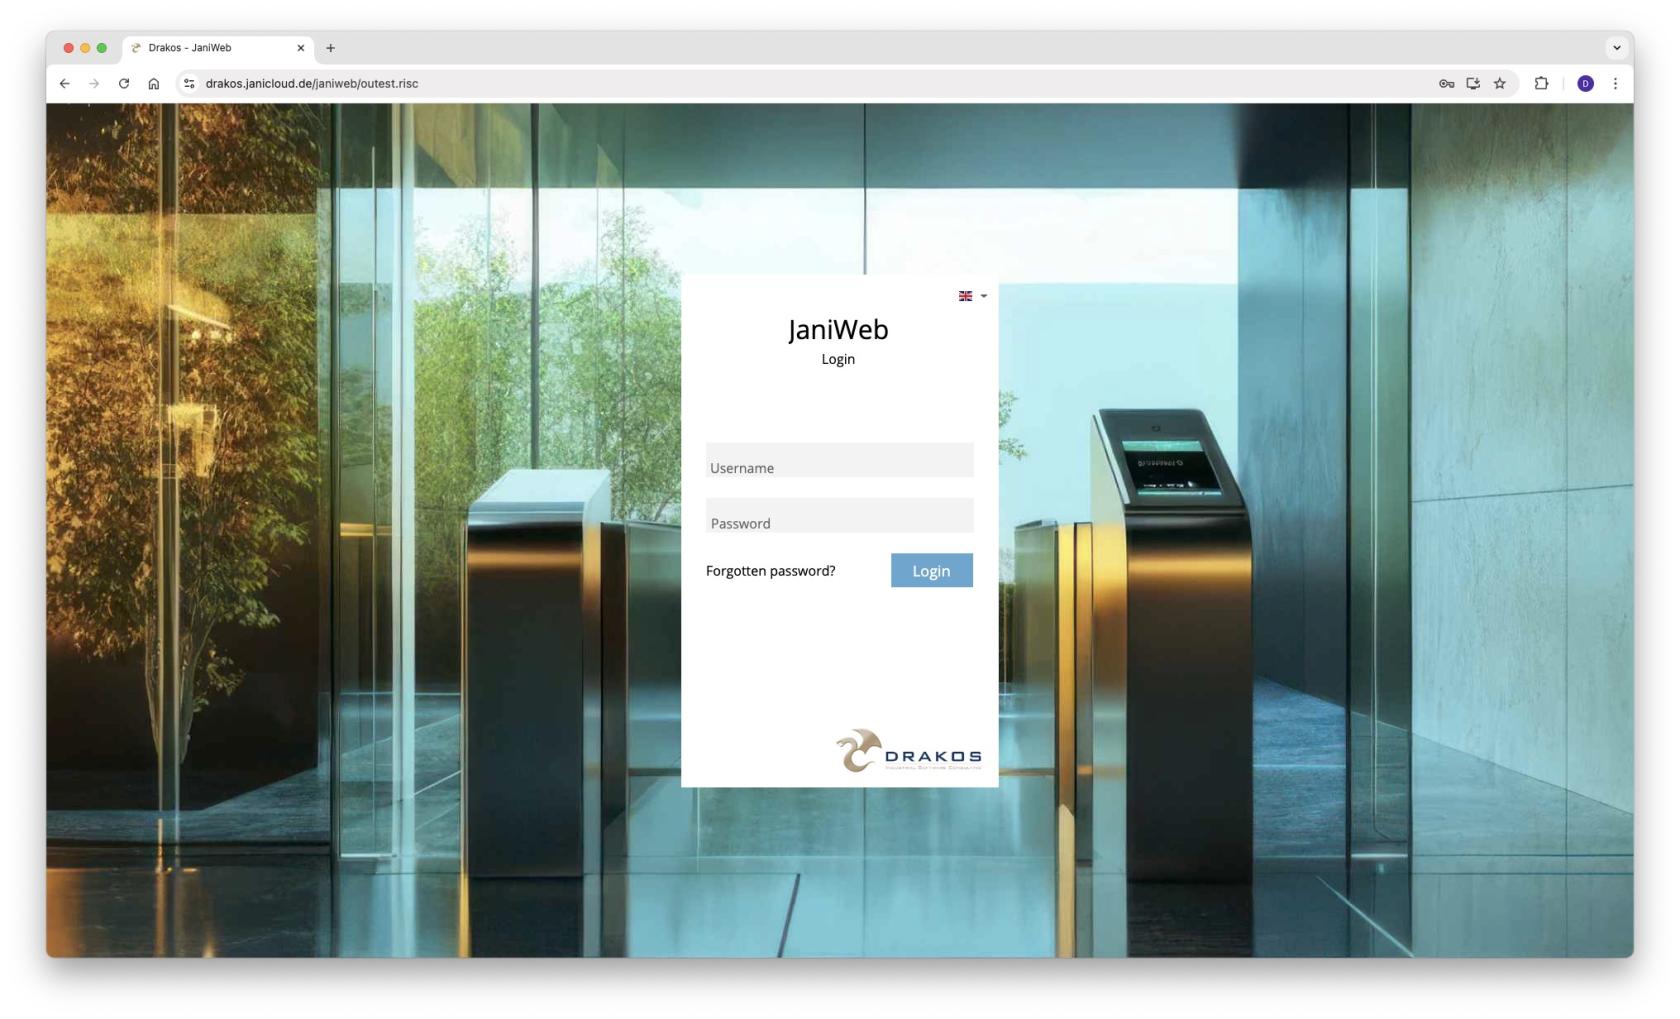
1. Log in to the application.
[](https://manual.drakos.de/uploads/images/gallery/2025-10/gVmbildschirmfoto-2025-10-07-um-08-31-19.jpg)
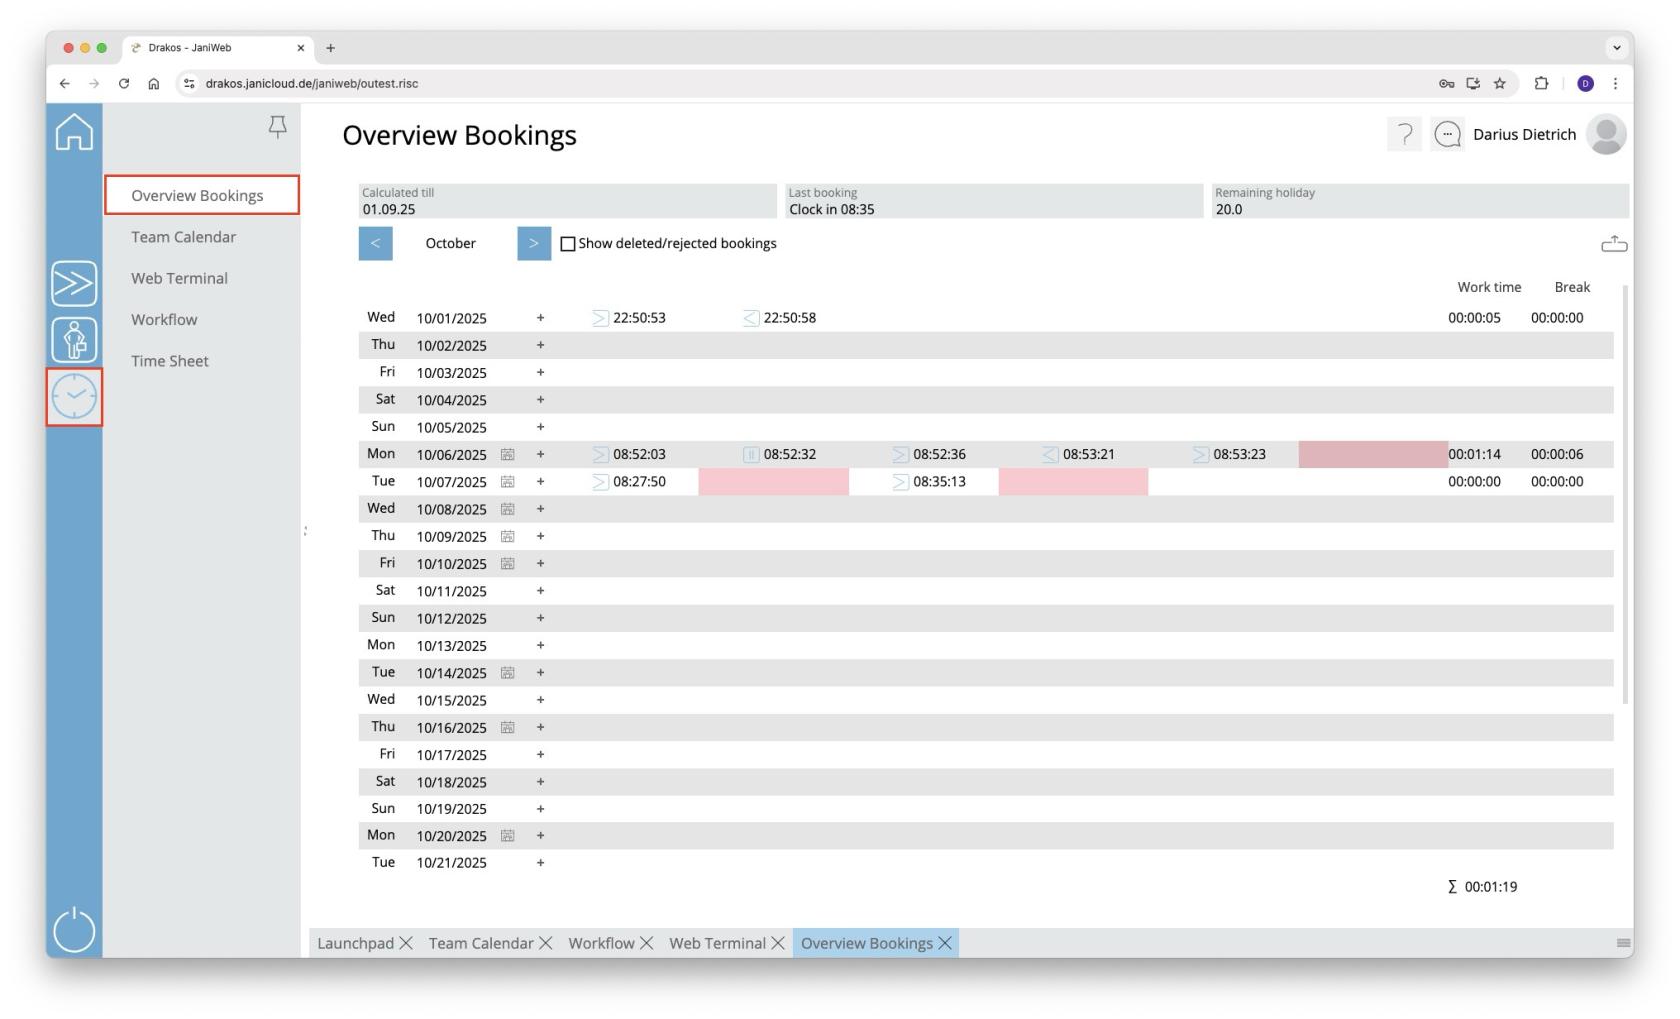
2. Navigate to Overview *Bookings* in the menu
[](https://manual.drakos.de/uploads/images/gallery/2025-10/S4lbildschirmfoto-2025-10-07-um-08-35-32.jpg)
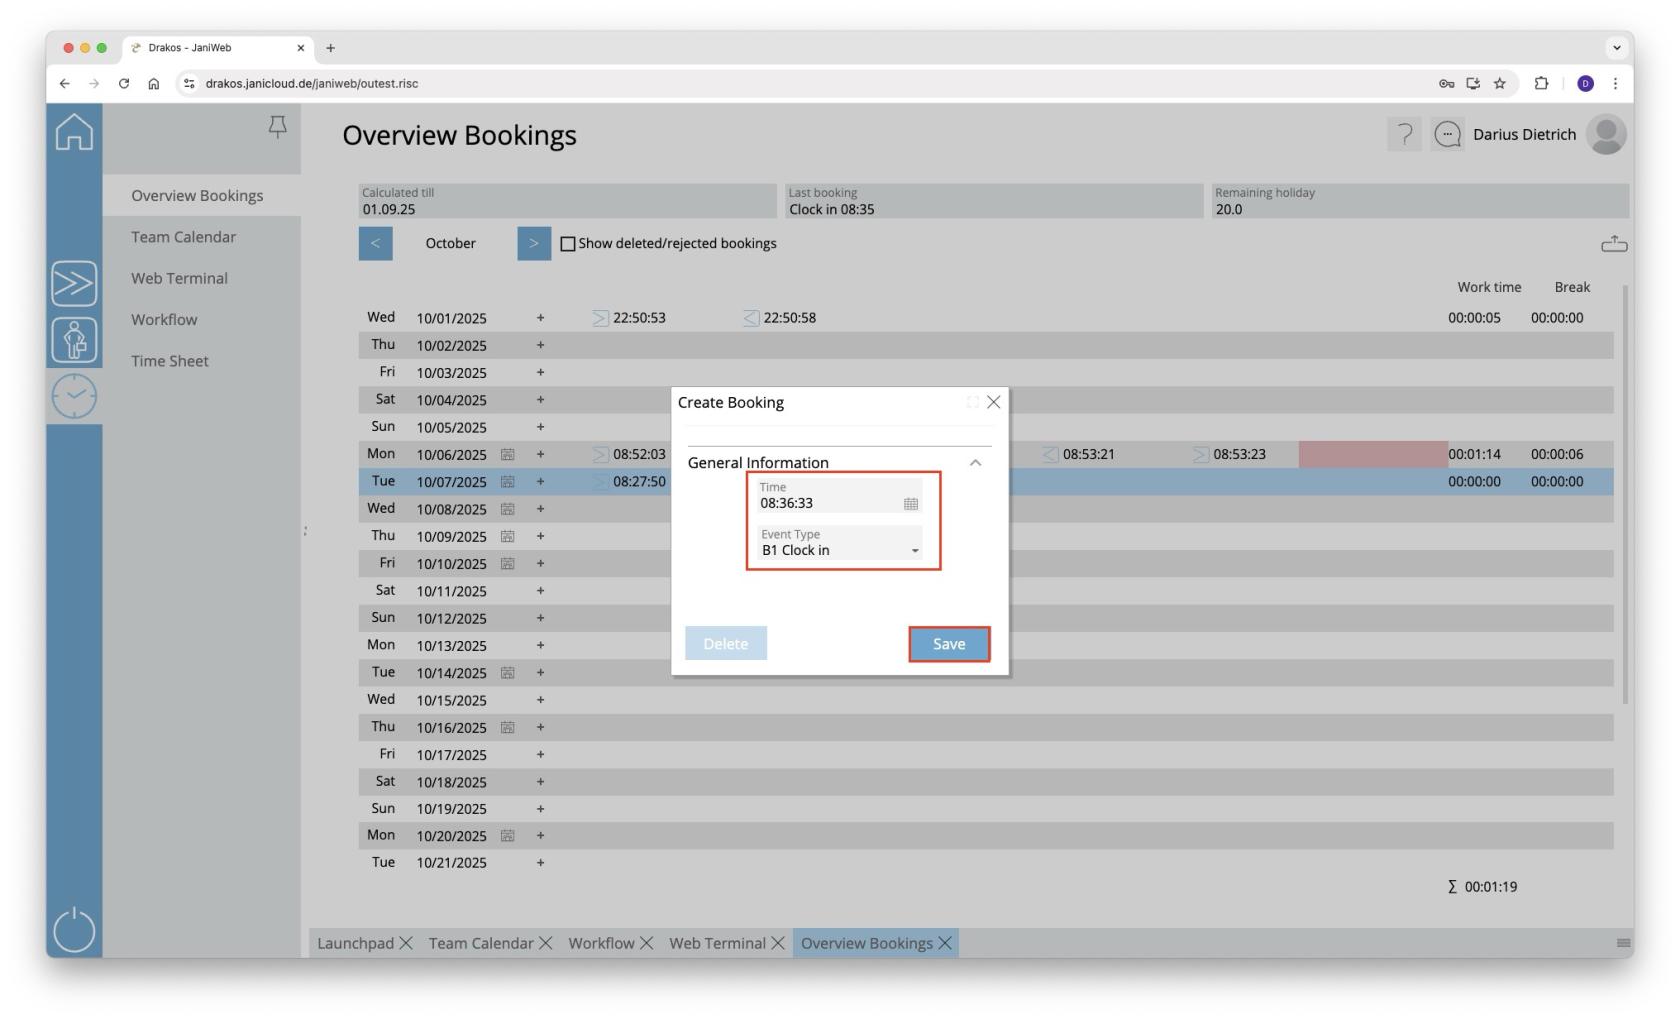
3. Double-click on the line of the day for which the booking is to be added
4. Now select the desired time in the *Time* field and the desired booking type in the *Event Type* field (e.g. Clock in or Clock out) and confirm with the *Save* button
[](https://manual.drakos.de/uploads/images/gallery/2025-10/bildschirmfoto-2025-10-07-um-08-36-39.jpg)
5. If a workflow has been set up for adding bookings, the supervisor must confirm the request
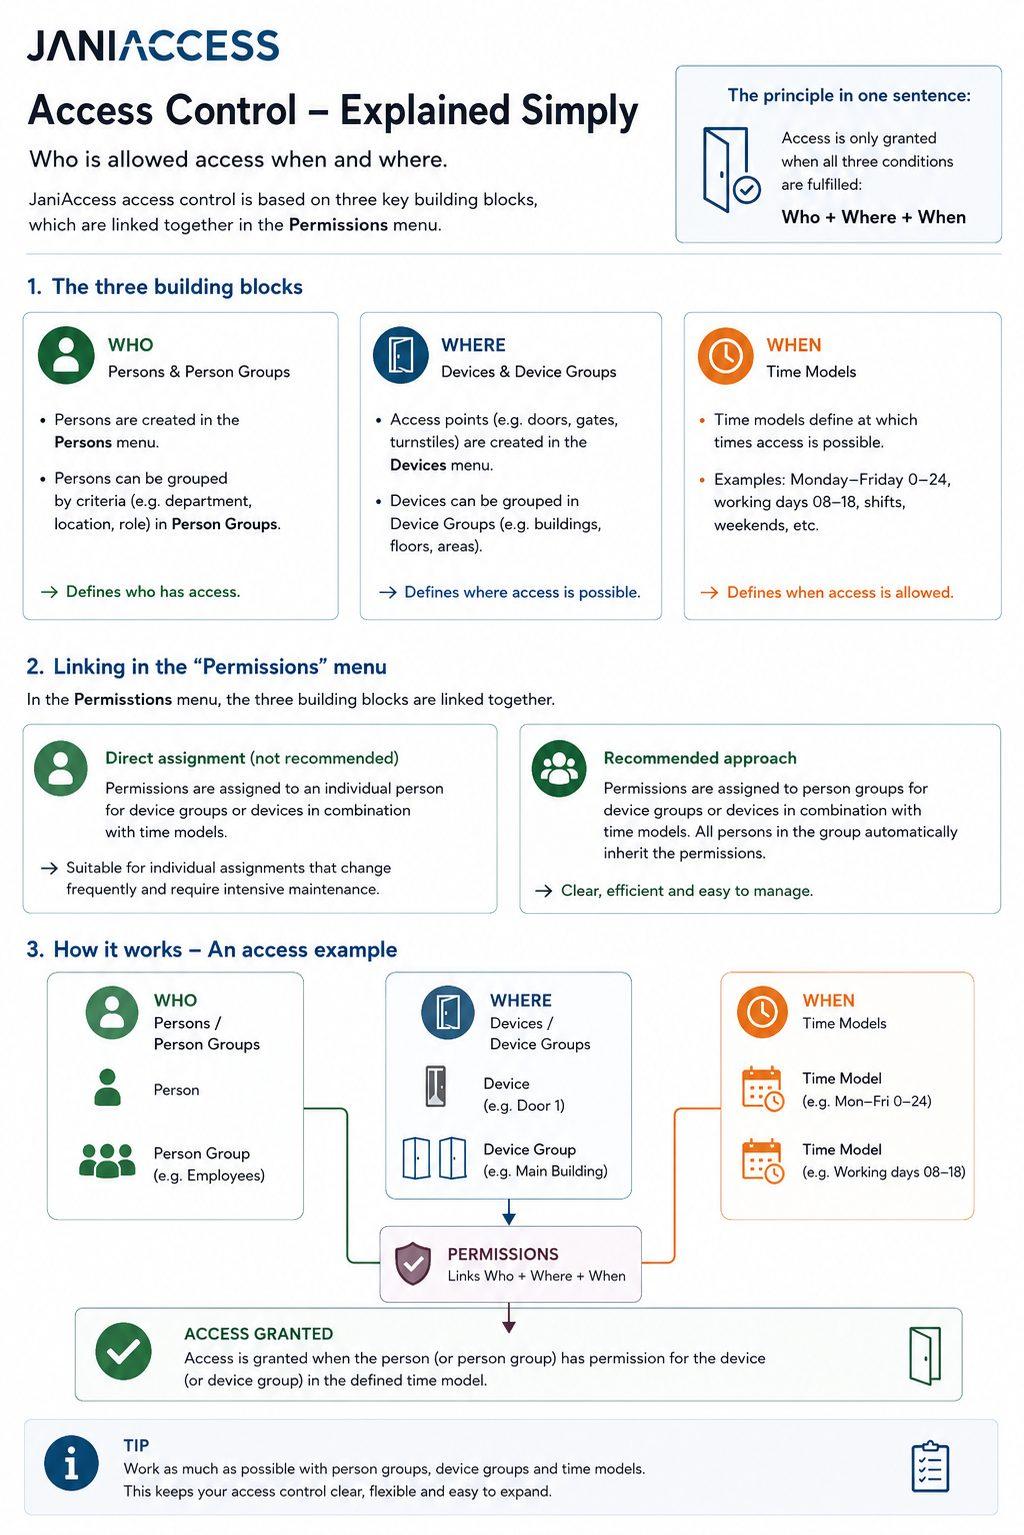
# JaniAccess – Access Control Basics
[](https://manual.drakos.de/uploads/images/gallery/2026-07/janiaccess-access-control-explained-simply-compressed.jpg)
JaniAccess access control is based on a simple principle:
> **Who is allowed to access which areas and when?**
Every access permission consists of these three components, which are linked together to determine whether access is granted.
---
# 1. Who? – Persons and Person Groups
The **Persons** menu defines **who** is allowed to access the system.
Individual users are created and managed in the **Persons** menu. To simplify administration, persons can be organized into **Person Groups** based on common characteristics such as department, location, role, or employment type.
**Examples of person groups:**
- Production Employees
- Office Staff
- External Contractors
- Cleaning Staff
Using person groups significantly reduces the effort required to manage access permissions.
---
# 2. Where? – Devices and Device Groups
The **Devices** menu defines **where** access is granted.
Each controlled access point (e.g. doors, gates or turnstiles) is configured as a device. Multiple devices can be combined into **Device Groups** to simplify permission management.
**Examples of device groups:**
- Main Building
- Production Area
- Administration
- Warehouse
- Outdoor Areas
Assigning permissions to device groups allows multiple access points to be managed with a single configuration.
---
# 3. When? – Time Models
The **Time Models** menu defines **when** access is permitted.
A time model specifies the days and times during which access is allowed.
**Examples:**
- Monday – Friday: 00:00 – 24:00
- Monday – Friday: 08:00 – 17:00
- Weekends
- Night Shift
- Holiday Schedule
Time models can be combined with any person, person group, device, or device group.
---
# 4. Assigning Permissions
The **Permissions** menu links the three building blocks **Who**, **Where**, and **When**.
Permissions can be assigned in two different ways.
## Option 1: Assign Permissions to Individual Persons *(Not Recommended)*
Permissions can be assigned directly to a single person by linking a device or device group with a time model.
**Example:**
John Smith → Main Entrance → Monday–Friday 08:00–17:00
This approach is suitable only for exceptional cases. As the number of individually assigned permissions grows, administration becomes increasingly complex and difficult to maintain.
---
## Option 2: Assign Permissions to Person Groups *(Recommended)*
The recommended approach is to assign permissions to **Person Groups**.
In this case, a person group is linked to a device or device group together with a time model.
Every person who belongs to that group automatically inherits the assigned permissions.
**Example:**
Person Group **Office Staff**
→ Device Group **Administration Building**
→ Time Model **Monday–Friday 08:00–17:00**
All members of the *Office Staff* group automatically receive these access rights.
This approach keeps the access control system structured, scalable, and easy to maintain.
---
# Summary
Every access permission is created using the same principle:
> **Best Practice:** Whenever possible, assign permissions to **Person Groups** instead of individual persons and use **Device Groups** together with **Time Models**. This approach keeps the access control configuration organized, scalable, and easy to manage, even in large installations.