Alarm Management
- Zone List
- Person Search
- Evacuation Manager
- Monitoring
- Image Comparison
- Alarm Scenarios
- Site Map
- Settings
Zone List
In the Zone List you can see which persons are in the respective zone.

List of zones
The list contains all existing zones. Safe Zones are highlighted in blue. The right-hand column shows the Alarm Status of the zone and the number of persons in the zone. If a zone has sub-zones, the number in brackets indicates how many persons are in the main zone only.
Buttons for display format
Use the icons to the left of the zone list to choose between a tree structure and the site plan display.
Tree structure
- Select a zone to display a list of the persons in this zone.
- Right-click on a zone to change its Alarm Status manually. Site plan
Site plan
The site plan shows the devices contained in the zone with their spatial position. The name of the zone is also displayed together with its Alarm Status.
- Right-click on the name of the zone to change its Alarm Status manually.
- Right-click on a device to display or change its settings.
List of persons
Use the icons to the right of the list of persons to choose between a list view, a view with pictures of the persons and a tile view. You also have the following options:
- Select columns to display: Press the gear icon. Select which columns you want to display and in which order. Arrange the columns using the mouse or the arrow icons. Press Apply to adopt the changes.
- Search in columns: Enter text or numbers in the search field (magnifying glass icon) of a column to search for names, personnel numbers, or other criteria.
- Export the entire list: Press the download icon. Select the format in which you want to export the list. The export files are downloaded or displayed depending on the browser/operating system settings.For details on the available export formats, see the General > Export Formats chapter of this manual.
- Update list: Use the Refresh button to update the zone list. This also happens automatically every 15 seconds.
Person Search
The menu item Person Search gives you an overview of which persons are in which zone.
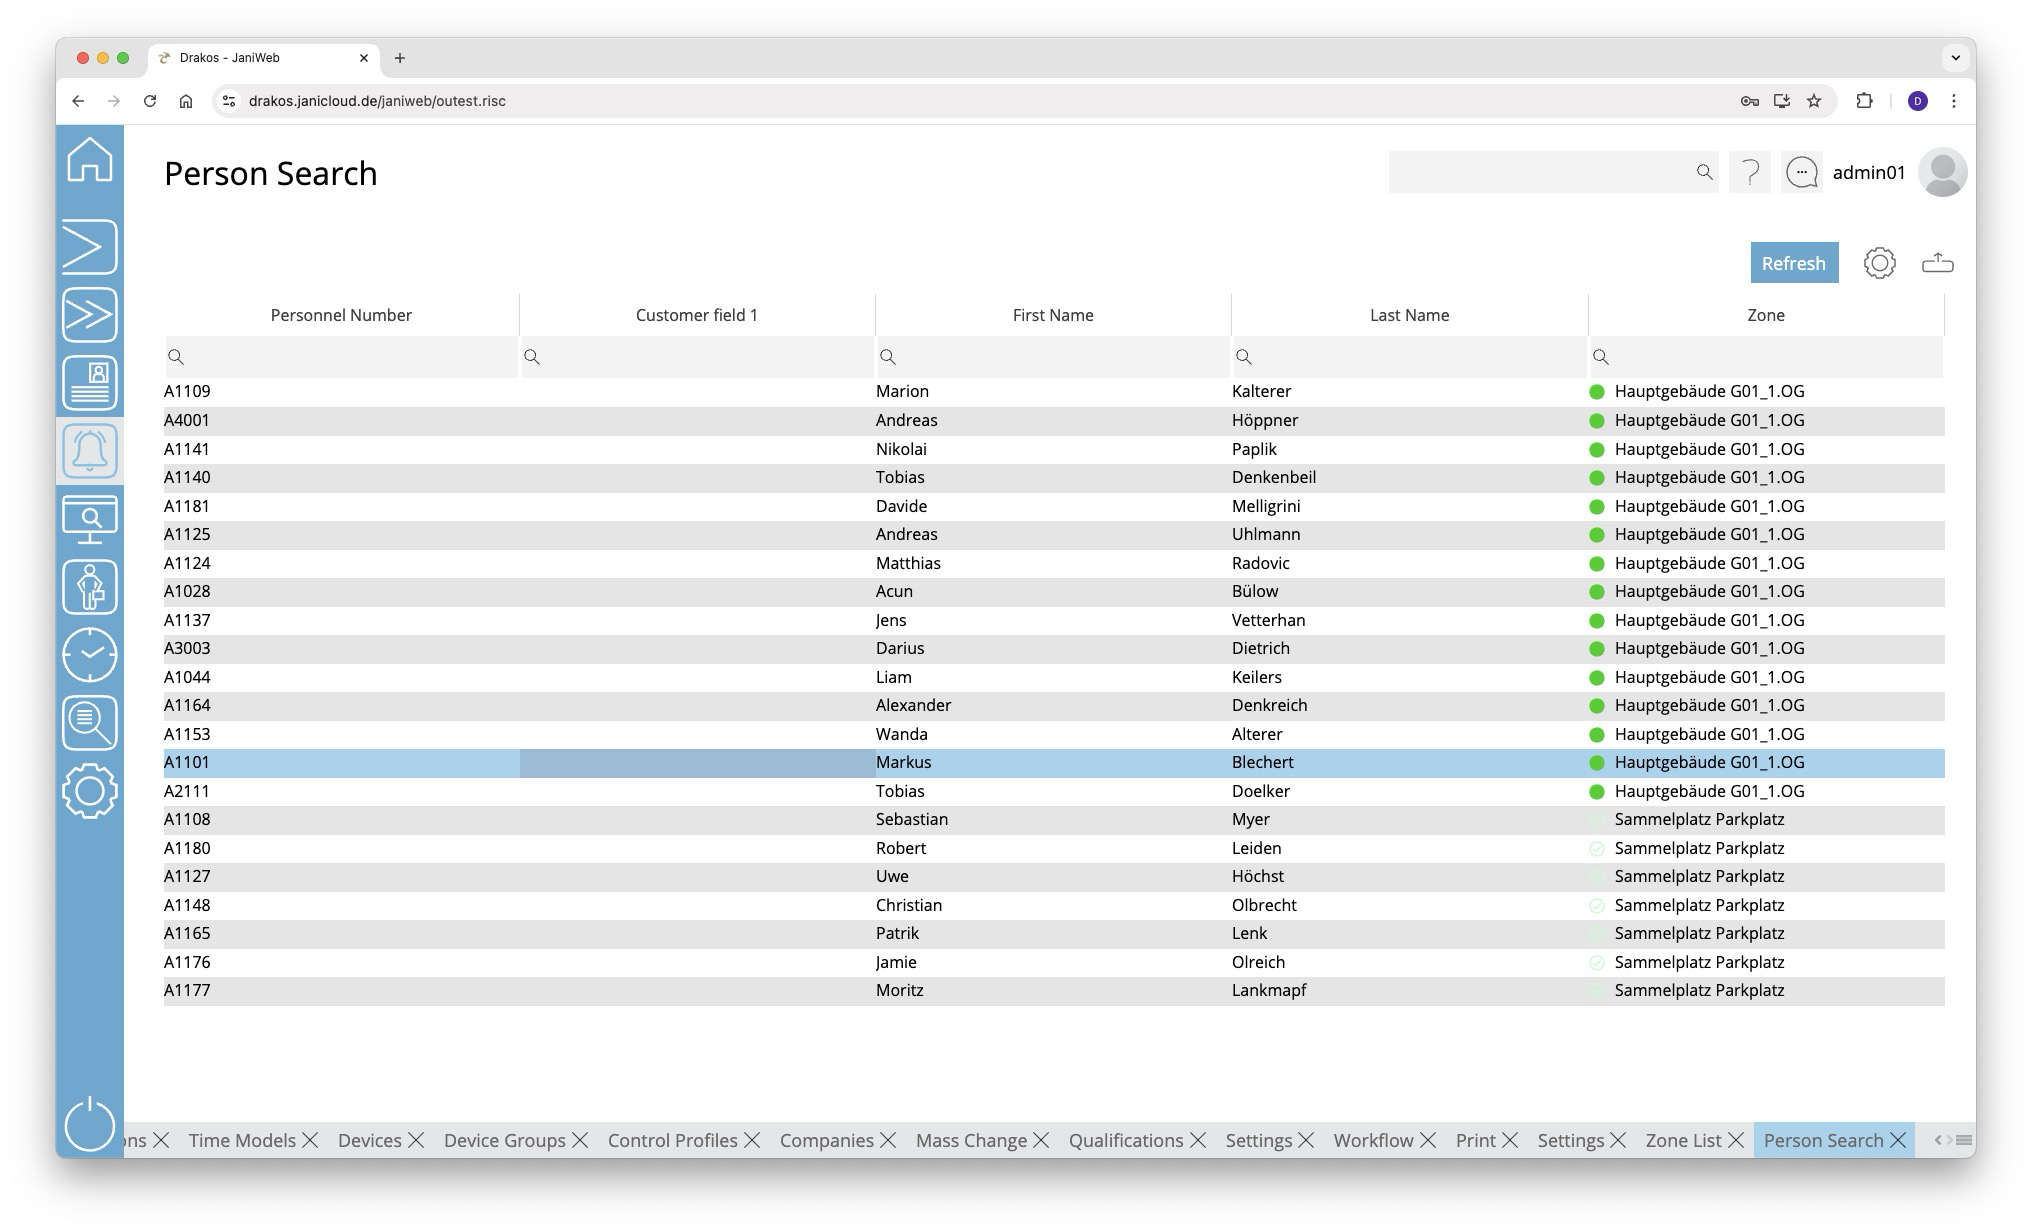
List of persons
The list contains all persons present together with the zone in which they are located. The Zone column shows the name of the zone as well as its alarm status.
You have the following options:
- Show details: Double-click in any column of the person. A pop-up window appears.
- Select columns to display: Press the gear icon. Select which columns you want to display and in which order. Arrange the columns using the mouse or the arrow icons. Press Apply to adopt the changes.
- Search in columns: Enter text or numbers in the search field (magnifying glass icon) of a column to search for names, personnel numbers, or other criteria. The entries take effect immediately: the list only displays hits.
Tip: Search for substrings. You can find “Spencer-Churchill” with “spe”, “chur” or “hill”. The search is not case sensitive. - Export the entire list: Press the download icon. Select the format in which you want to export the list. The export files are downloaded or displayed depending on the browser/operating system settings.For details on the available export formats, see the General > Export Formats chapter of this manual.
- Update list: Use the Refresh button to update the zone list. This also happens automatically every 15 seconds.
Evacuation Manager
The Evacuation Manager gives you an overview of persons who are currently logged into an unsafe zone. In the event of an alarm, employees may no longer be able to log out of their zone properly (no time, devices no longer working). You can use the evacuation manager to manually transfer persons from unsafe zones to a safe zone after you have checked their presence.
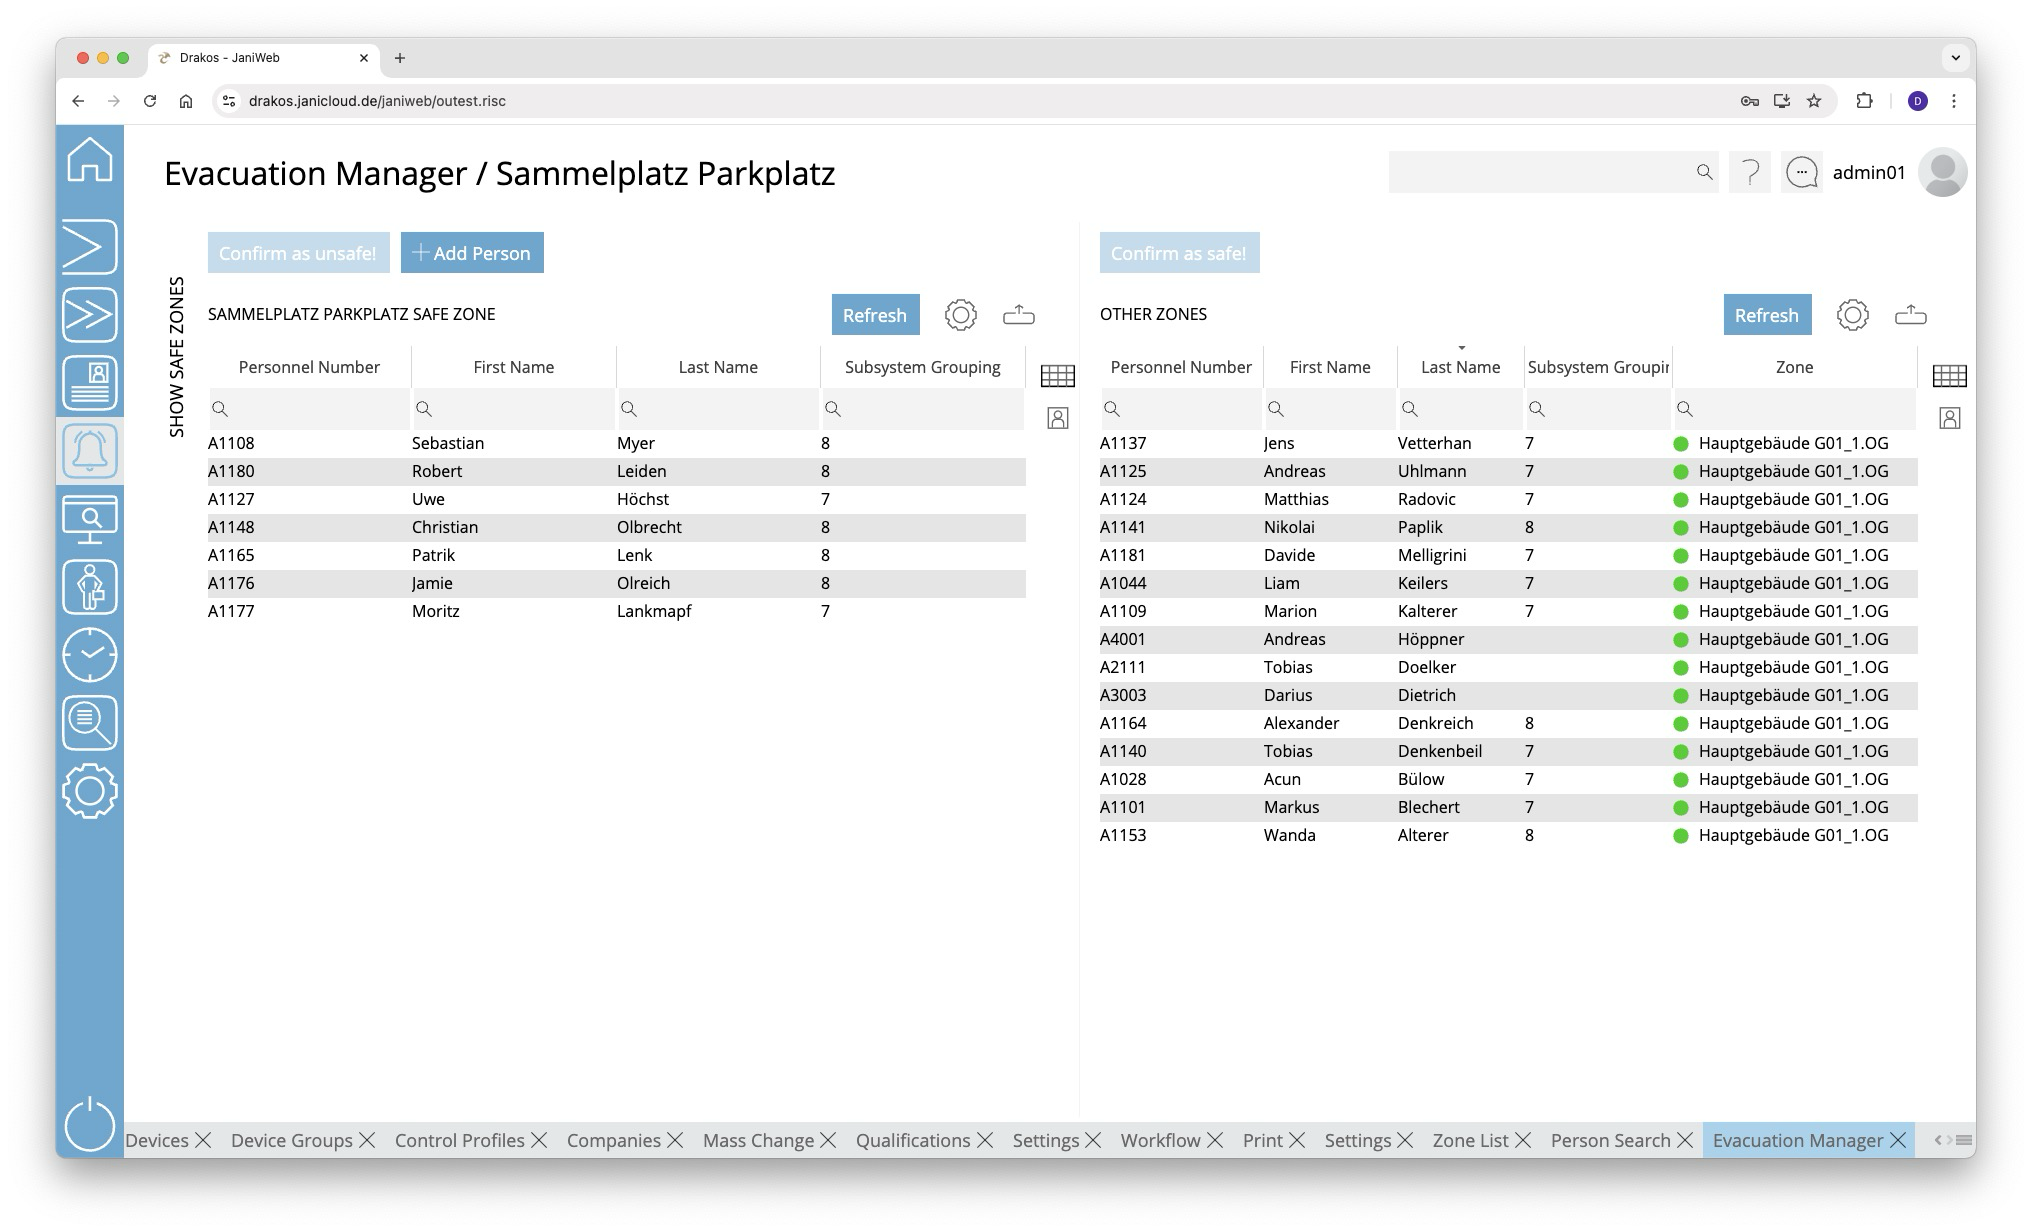
Lists Safe Zone / Other Zones
The list on the right contains all persons in unsafe zones. To book a person into a safe zone:
- Select the person(s) in the list of unsafe zones (multiple selection with CTRL or SHIFT).
- Press Confirm as safe!.
The persons now appear in the list on the left-hand side and are booked into the safe zone.
In the opposite case (e.g. due to an incorrect rebooking), proceed in the same way: Book people from the safe zone into the unsafe zone by selecting them in the left-hand list and then pressing the button Confirm as unsafe!. The persons will then reappear in the list of unsafe zones.
Buttons for display format
Use the icons to the right of the lists to select whether the persons are displayed in text form or with their photo.
Button Add Person
You can use the Add Person button to add persons who are not currently in a zone to the safe zone. To do this, click the button and then select the desired person(s) (multiple selection is possible). Confirm your selection with the Save button.
Further options with the lists
- Show details: Double-click in any column of the person. A pop-up window appears.
- Select columns to display: Press the gear icon. Select which columns you want to display and in which order. Arrange the columns using the mouse or the arrow icons. Press Apply to adopt the changes.
- Search in columns: Enter text or numbers in the search field (magnifying glass icon) of a column to search for names, personnel numbers, or other criteria. The entries take effect immediately: the list only displays hits.
- Export the entire list: Press the download icon. Select the format in which you want to export the list. The export files are downloaded or displayed depending on the browser/operating system settings.For details on the available export formats, see the General > Export Formats chapter of this manual.
- Update list: Use the Refresh button to update the zone list. This also happens automatically every 15 seconds.
Monitoring
You can use the menu item Monitoring to create modules that contain different types of switches. Switches can display the status of a device or control it at the touch of a screen button.
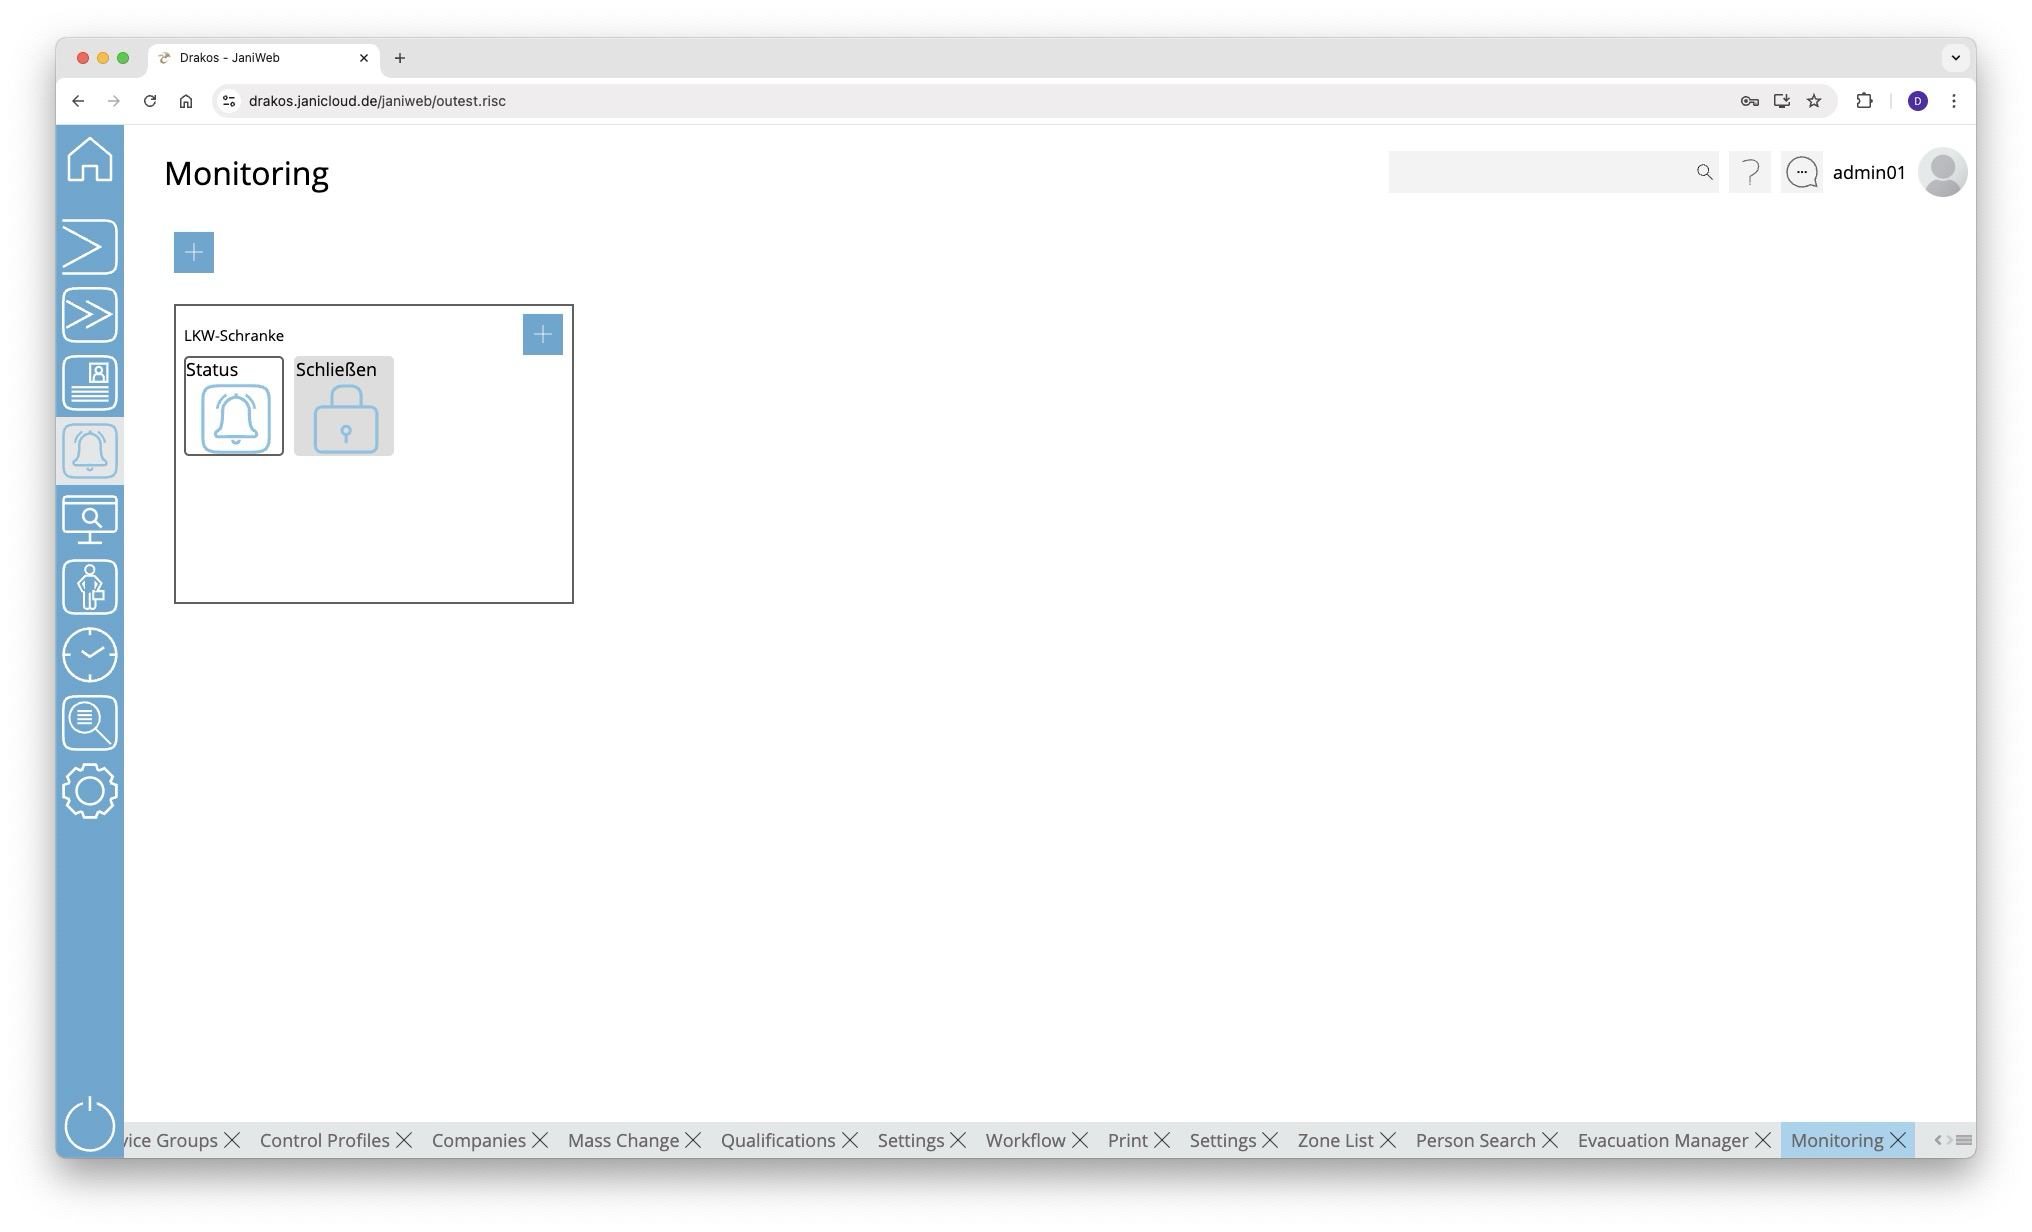
Plus icon for modules
To create a new module:
- Press the plus icon.
- Then select a Site for the module. Modules are only visible for the current site.
- Enter a meaningful Name.
- Press Save.
Plus icon for switches
To create a new switch for a module:
- Press the plus icon within the module.
- Select the type of switch you want to create (Status, Control, Hybrid).
- Enter a meaningful name.
- Select the device that is to be mapped by the switch and define the required settings.
Switch types
Status
A switch of the type Status can represent up to four different states of the device in question.
- Offset: Select the position in the booking record that is to be checked for the status.
- Event Type: Select the booking type that is to define the status.
- StatusA to StatusD: Enter the required value for each status. You can use the Upload buttons to store a separate image for each status.
Press Save to apply the changes.
Control
A Control switch allows you to control a device.
- BPA9: Enter the data that should be sent to the device when the switch is pressed.
- Buttons Upload: Upload a suitable image for the switch.
Press Save to apply the changes.
Hybrid
A Hybrid switch can both control and display up to four statuses.
- BPA9: Enter the data that should be sent to the device when the switch is pressed.
- Offset: Select the position in the booking record that is to be checked for the status.
- Event Type: Select the booking type that is to define the status.
- StatusA to StatusD: Enter the required value for each status. You can use the Upload buttons to store a separate image for each status.
Press Save to apply the changes.
Delete or change a module/switch
Right-click on a switch or in a module and select Remove or Edit.
Image Comparison
The menu item Image Comparison shows the images of the persons who last made a booking at a specific terminal. In this way, you can ensure that the person making the booking matches the stored image.
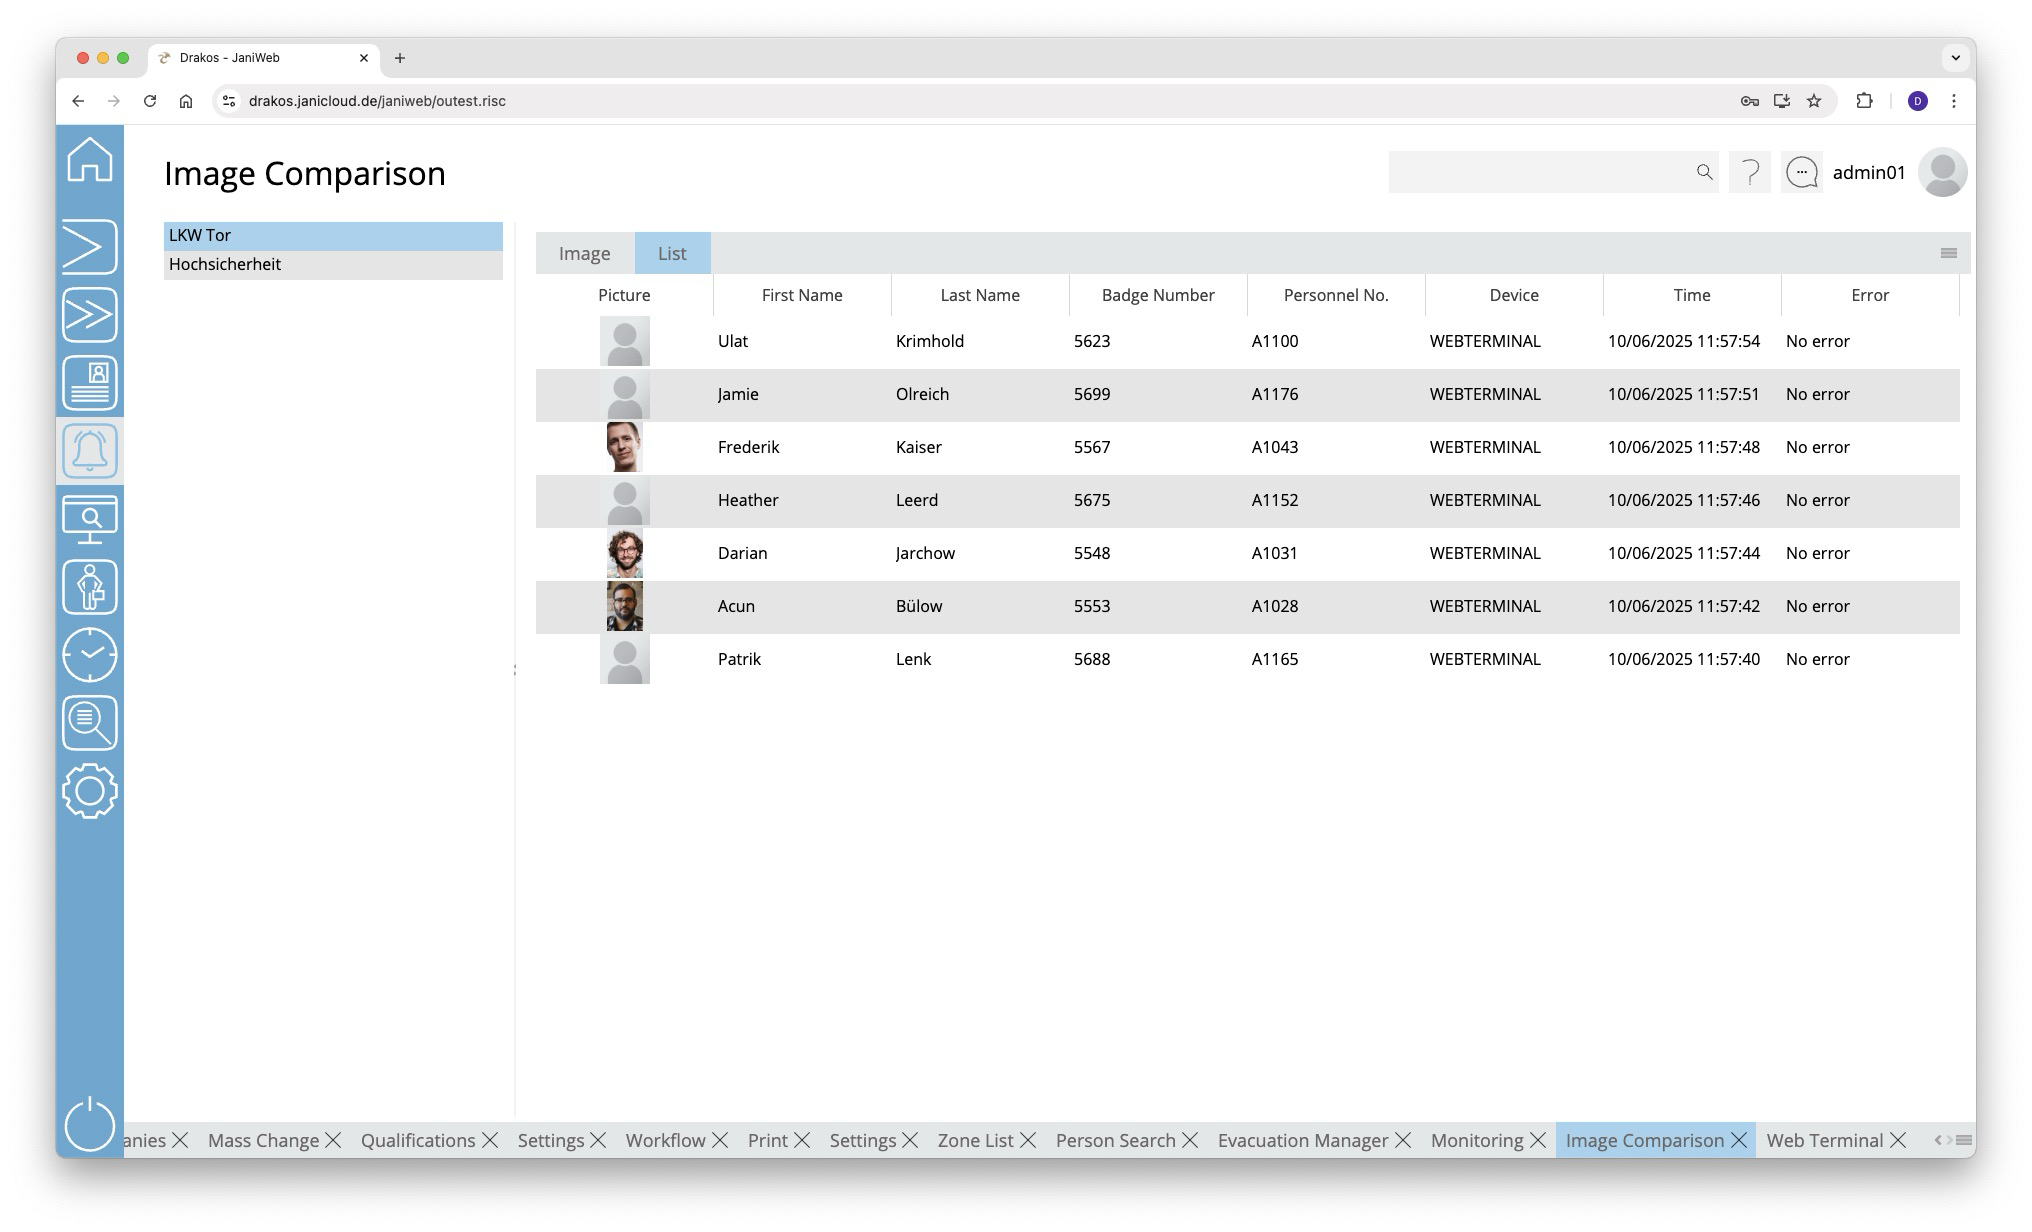
List of configurations
The list on the left-hand side contains the configurations created for image comparison. Select the entry for which you want to display images. Which configurations appear here is determined in the settings for alarm management.
Tab Image
Select this tab to display only the image for the last booking.
Tab List
Select this tab to display a continuous list of images for the bookings of the last hour.
Alarm Scenarios
Use the menu item Alarm Scenarios to define various events and the subsequent actions.
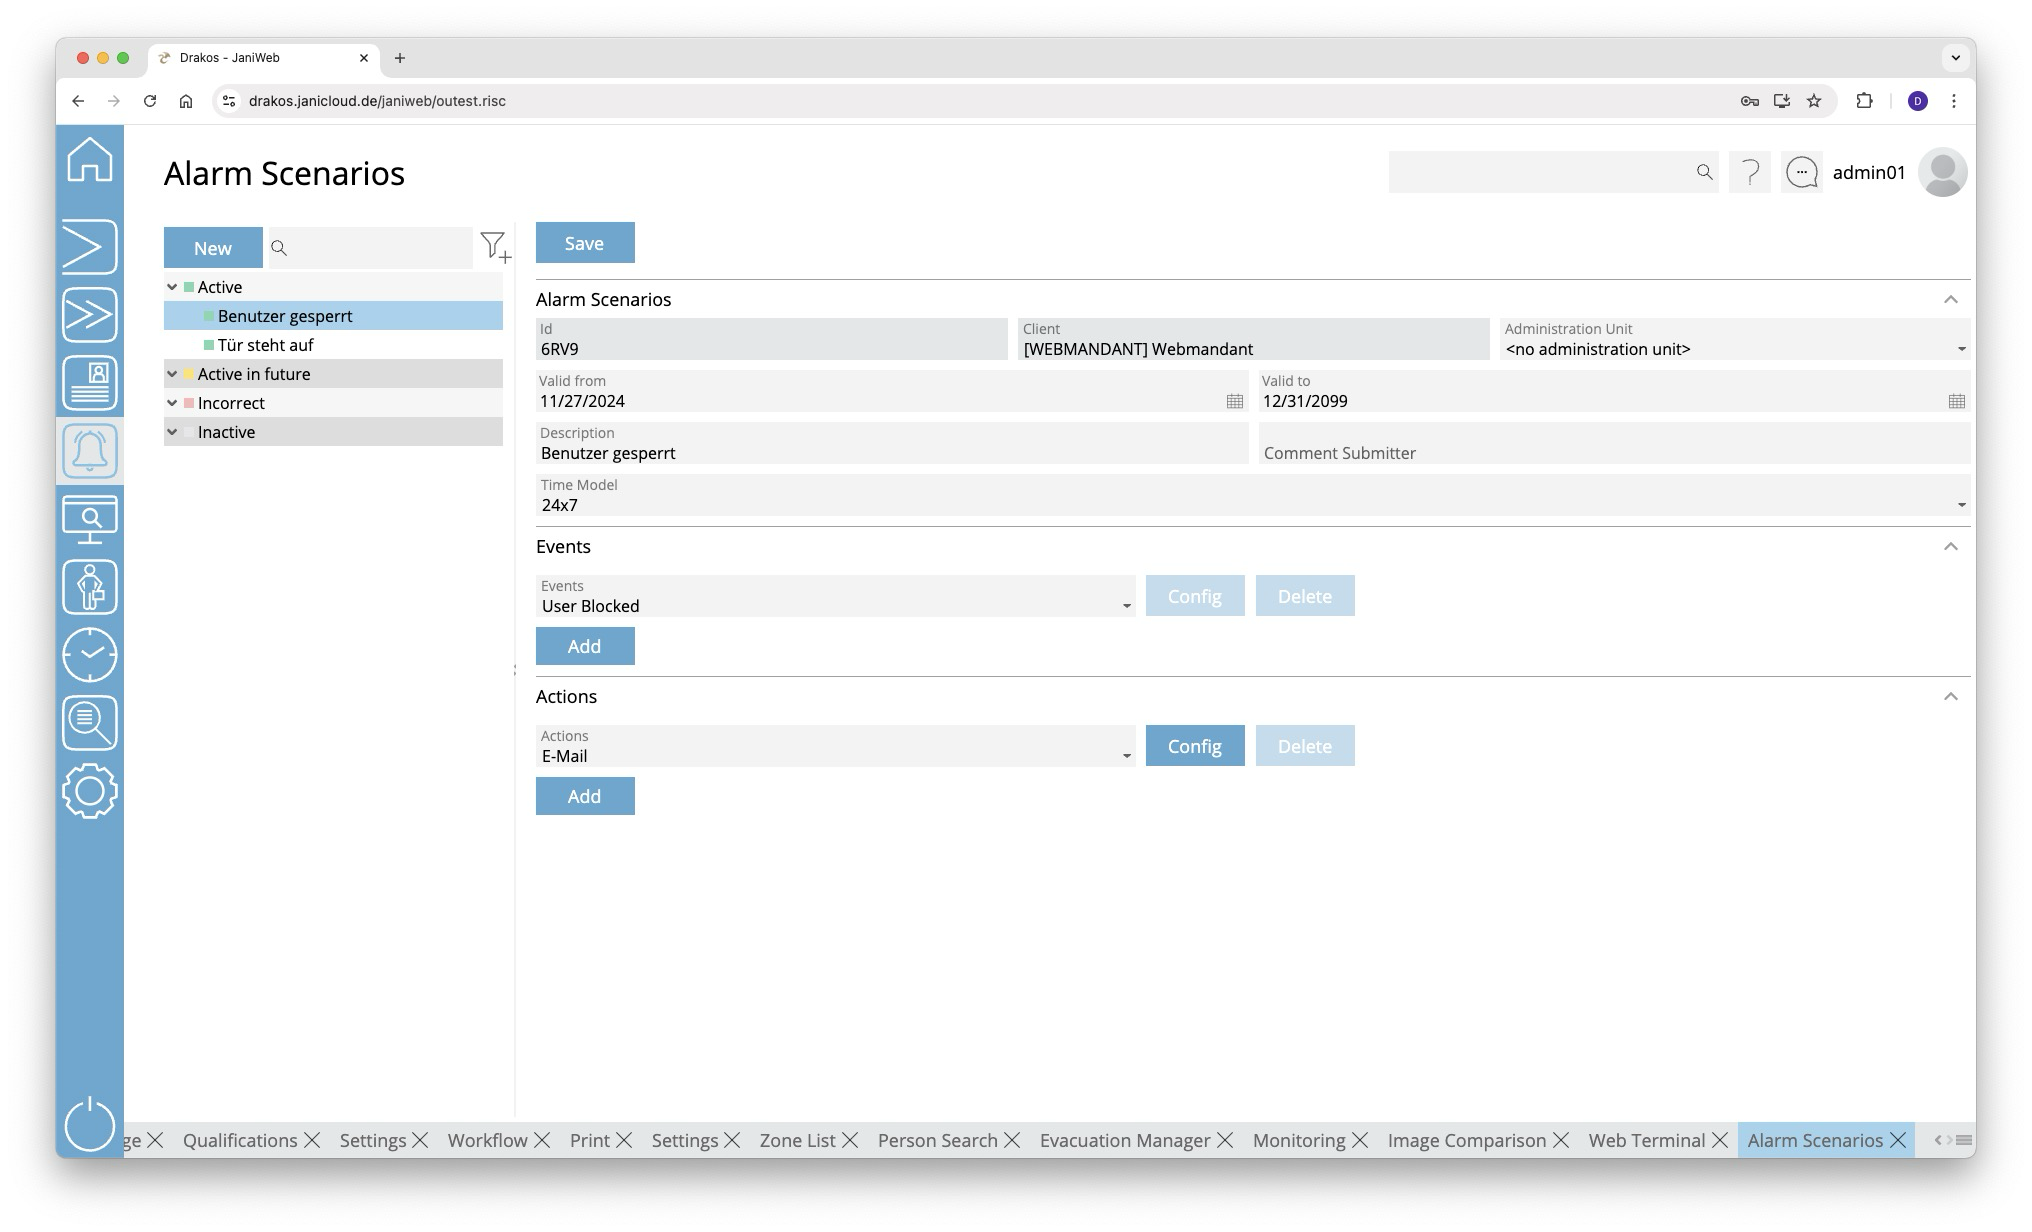
List of scenarios
The list contains all the alarm scenarios that have already been created. Select a scenario to view details.
The list offers the following options:
- Search: Enter text or numbers in the search field (magnifying glass icon) at the top to search for groups. The entries take effect immediately: the list only displays hits. The search is not case sensitive.
- Filter: Press the filter icon. Select the criteria for which you want to display groups. Changes are visible immediately.
Button New
- Press New to create a new alarm scenario.
- Enter a meaningful Description, select a Client and define a validity period (Valid from – Valid to).
- Select a Time Model during which the scenario should be active.
- Select the Events that should trigger actions. A scenario can include several events and actions.
- Select the Actions to be triggered when the events occur.
Button Save
Press Save to apply your changes.
Area Events
Define one or several events that trigger an action. Multiple events are linked logically by OR (one match is sufficient).
Button Add
Press Add to add another event.
Button Config
Press Config to set the details for the event.
The following events are available:
- User Blocked: A user is blocked.
- Block due to inactivity: A person is blocked because they have not been active for a longer period of time (e.g. no booking for a certain number of days).
- Block due to duplicate badge number: A duplicate badge number exists in the system (e.g. due to duplicate allocation via the web application and an ERP system).
- Failed login: A certain number of failed login attempts for the same user have been detected (unknown users can be excluded).
- Offline Component Battery Status: The battery level of an offline component is too low.
- OSS Configuration Error: OSS has not been configured correctly.
- OSS Event: An OSS event has occurred.
- OSS Block List Error: An error has occurred in the configuration of the OSS blocklist.
- Server Log: A specific system message has occurred.
Area Actions
Define one or more Actions here that are to be triggered when the defined events occur.
Button Add
Press Add to add another action.
Button Config
Press Config to specify details for the action.
You can configure automatically sent E-Mails (Mail action) as follows:
- Recipient: Enter the recipient’s E-Mail address. Press the plus icon to add further recipients.
- Subject, Body: Enter the desired text. Use the predefined variables by dragging them to the desired position in the body text or subject.
Press Save to save the E-Mail configuration.
Site Map
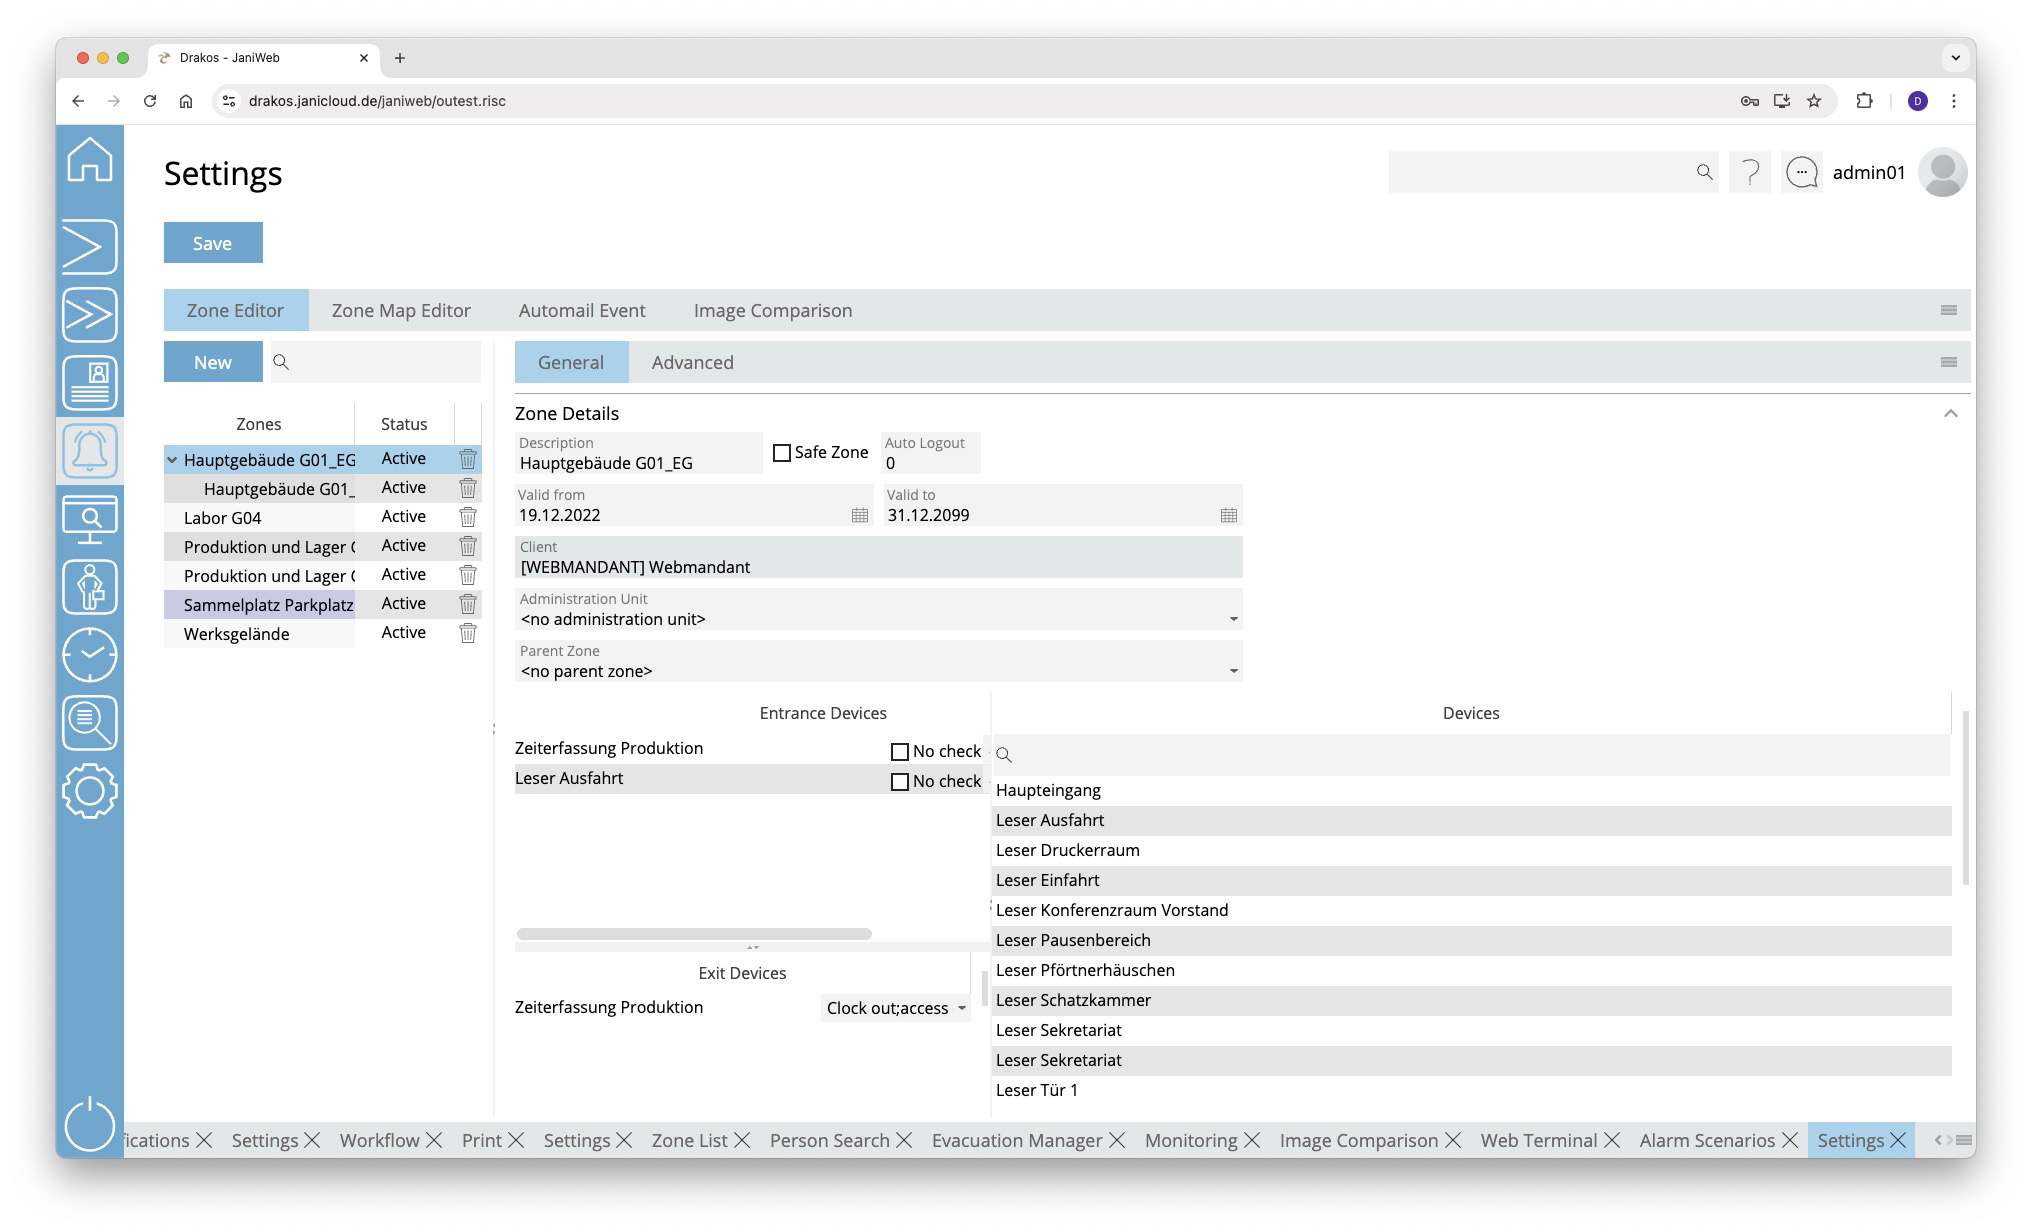
Settings
Use the menu item Settings to make various settings (zones, site plans, image comparison) for alarm management.
Button Save
Press Save to apply your changes.
Tab Zone Editor
This is where you manage the zones for alarm management.
List of zones
The list contains all zones that have already been created. Select an entry to view details.
Button New
Press New to create a new zone. Enter the required information.
Tab General
Define the general settings for the zone here.
- Description: Enter a meaningful name.
- Safe Zone: Select this option if it is a safe zone. Safe zones are highlighted in blue in the zone list and are relevant for evacuation (e.g. an outdoor assembly point).
- Auto Logout: Enter the number of minutes after which people should be automatically logged out of the zone. Leave the field empty if you do not want to use the auto-logout.
- Parent Zone: If it is a sub-zone, select the parent zone here.
- Show Link: Click this button to view the URL that allows you to access the zone list without logging in first. To do this, the client must be added to the whitelist in the Basic Settings menu.
- https://{janiweb-server}/janiweb/publiczone.risc?zoneId=1&view=list - displays the zone list as a list (default)
- https://{janiweb-server}/janiweb/publiczone.risc?zoneId=1&view=images - displays the list of zones with the photos of the persons
- https://{janiweb-server}/janiweb/publiczone.risc?zoneId=1&view=tiles - displays the zone list in tile view
Spatial definition of the zone
Select input and output devices to define a zone.
- Drag the desired devices from the list of all devices to the Entrance Devices or Exit Devices list.
- For each device, specify which booking types trigger the entry and exit of the zone.
- (Optional) Select No check if the device is to be excluded from the zone change control.
- Press Save to apply the changes.
Tab Advanced
Here you can define advanced settings for the zone.
Area Min/Max Number Persons
Here you can specify whether the zone should be designed for a certain number of persons. Specify one or more time models and enter the desired number of persons for Max and/or Min.
Area Anti-Passback
Select here how repeated access to the zone is to be managed.
Area Zone Change Control
Select here whether the change from one zone to another should be monitored. Drag the desired zone(s) from the Available list to the Selected list.
Tab Zone Map Editor
This is where you define the graphical representation of the zones. You can upload floor plans (or site plans) and place devices and zones on them.
Button Upload
Press Upload to upload a new floor plan. Select the desired file on your computer.
Button Delete
Press Delete to remove the selected floor plan.
List field Select plan
If you have uploaded several files (e.g. for different buildings or floors), select the floor plan you want to edit here.
Available zones / Devices
Select an available zone or an available device and drag the element to the desired position on the floor plan. Right-click the element for a device and select the corresponding device.
Zoom slider
Use this to select the zoom factor (20 to 140 percent) to reduce or enlarge the display.
Tab Automail Event
Here you can define booking events about which you are automatically informed by E-Mail.
Create one or more combinations of Event type, Error, Device / Device Group and Mail address, which will send a message to the specified E-Mail address when they occur. Press Add to create further events.
Tab Image Comparison
Here you can define settings for Image Comparison.
List of configurations
The list on the left-hand side contains the configurations created for image comparison. Select a configuration to show details.
Button New
Press New to create a new configuration for the image comparison. Enter the required information.
Detail area
- Description: Enter a descriptive label for the layout.
- Site: Select the site. The visibility of the configuration is determined by the site.
- Device: Select one or more devices for which the image comparison is to be enabled.
- Event type: Select the booking type(s) to be monitored.
- Display Duration: Enter how long images should be displayed (seconds).
- Additional Fields: Select here which database fields should appear in addition to the image.
- To define the name for a field, press Translate. Enter the names for the respective languages and press Save.