
Settings
Use the menu item Settings to make various settings (zones, site plans, image comparison) for alarm management.
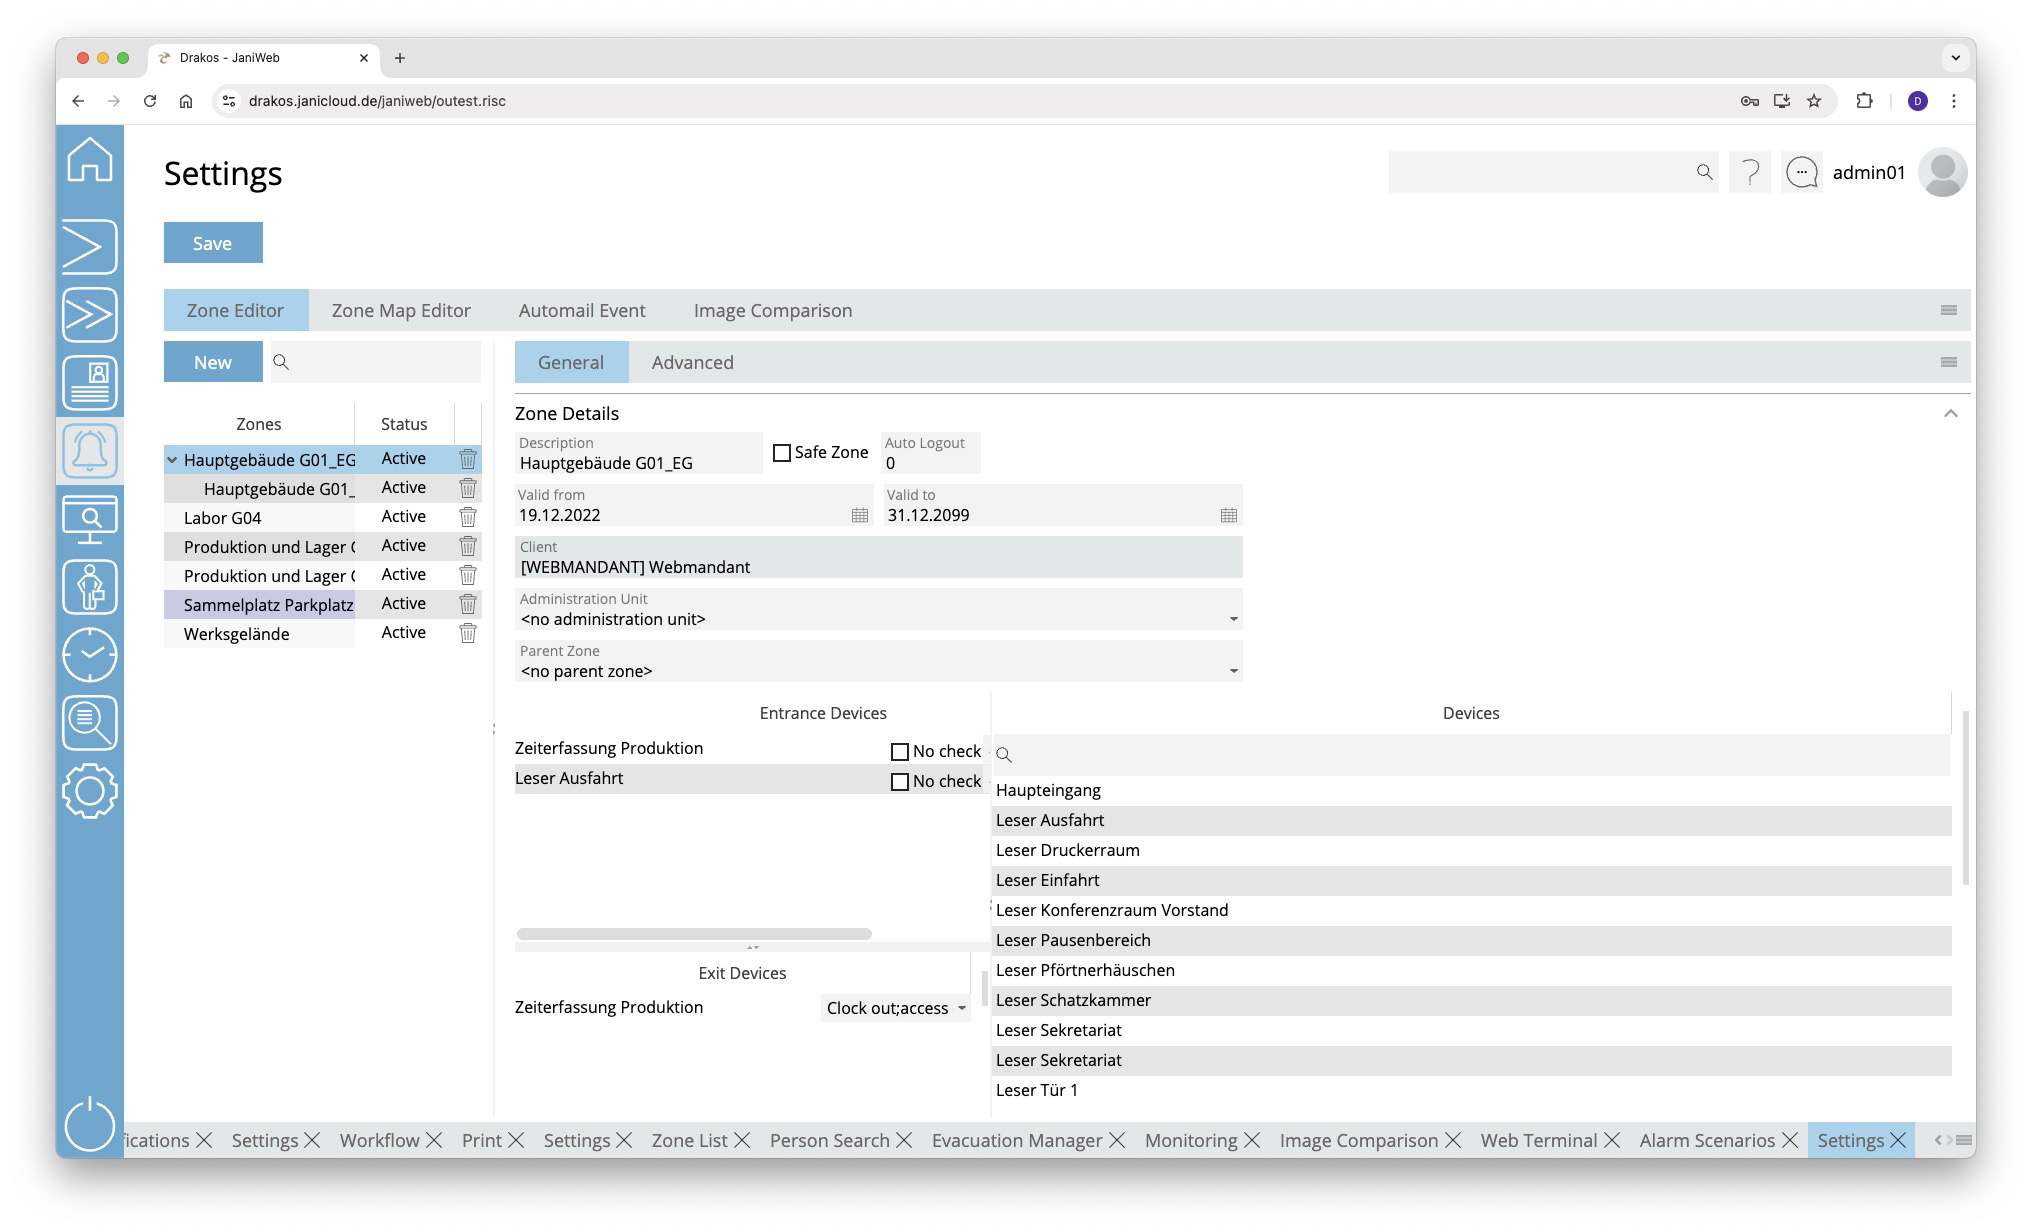
Button Save
Press Save to apply your changes.
Tab Zone Editor
This is where you manage the zones for alarm management.
List of zones
The list contains all zones that have already been created. Select an entry to view details.
Button New
Press New to create a new zone. Enter the required information.
Tab General
Define the general settings for the zone here.
- Description: Enter a meaningful name.
- Safe Zone: Select this option if it is a safe zone. Safe zones are highlighted in blue in the zone list and are relevant for evacuation (e.g. an outdoor assembly point).
- Auto Logout: Enter the number of minutes after which people should be automatically logged out of the zone. Leave the field empty if you do not want to use the auto-logout.
- Parent Zone: If it is a sub-zone, select the parent zone here.
- Show Link: Click this button to view the URL that allows you to access the zone list without logging in first. To do this, the client must be added to the whitelist in the Basic Settings menu.
- https://{janiweb-server}/janiweb/publiczone.risc?zoneId=1&view=list - displays the zone list as a list (default)
- https://{janiweb-server}/janiweb/publiczone.risc?zoneId=1&view=images - displays the list of zones with the photos of the persons
- https://{janiweb-server}/janiweb/publiczone.risc?zoneId=1&view=tiles - displays the zone list in tile view
Spatial definition of the zone
Select input and output devices to define a zone.
- Drag the desired devices from the list of all devices to the Entrance Devices or Exit Devices list.
- For each device, specify which booking types trigger the entry and exit of the zone.
- (Optional) Select No check if the device is to be excluded from the zone change control.
- Press Save to apply the changes.
Tab Advanced
Here you can define advanced settings for the zone.
Area Min/Max Number Persons
Here you can specify whether the zone should be designed for a certain number of persons. Specify one or more time models and enter the desired number of persons for Max and/or Min.
Area Anti-Passback
Select here how repeated access to the zone is to be managed.
Area Zone Change Control
Select here whether the change from one zone to another should be monitored. Drag the desired zone(s) from the Available list to the Selected list.
Tab Zone Map Editor
This is where you define the graphical representation of the zones. You can upload floor plans (or site plans) and place devices and zones on them.
Button Upload
Press Upload to upload a new floor plan. Select the desired file on your computer.
Button Delete
Press Delete to remove the selected floor plan.
List field Select plan
If you have uploaded several files (e.g. for different buildings or floors), select the floor plan you want to edit here.
Available zones / Devices
Select an available zone or an available device and drag the element to the desired position on the floor plan. Right-click the element for a device and select the corresponding device.
Zoom slider
Use this to select the zoom factor (20 to 140 percent) to reduce or enlarge the display.
Tab Automail Event
Here you can define booking events about which you are automatically informed by E-Mail.
Create one or more combinations of Event type, Error, Device / Device Group and Mail address, which will send a message to the specified E-Mail address when they occur. Press Add to create further events.
Tab Image Comparison
Here you can define settings for Image Comparison.
List of configurations
The list on the left-hand side contains the configurations created for image comparison. Select a configuration to show details.
Button New
Press New to create a new configuration for the image comparison. Enter the required information.
Detail area
- Description: Enter a descriptive label for the layout.
- Site: Select the site. The visibility of the configuration is determined by the site.
- Device: Select one or more devices for which the image comparison is to be enabled.
- Event type: Select the booking type(s) to be monitored.
- Display Duration: Enter how long images should be displayed (seconds).
- Additional Fields: Select here which database fields should appear in addition to the image.
- To define the name for a field, press Translate. Enter the names for the respective languages and press Save.