
Settings
Use this menu item to specify Settings for the Attendance Board. You can also define various attendance statuses here, which are available as filters.
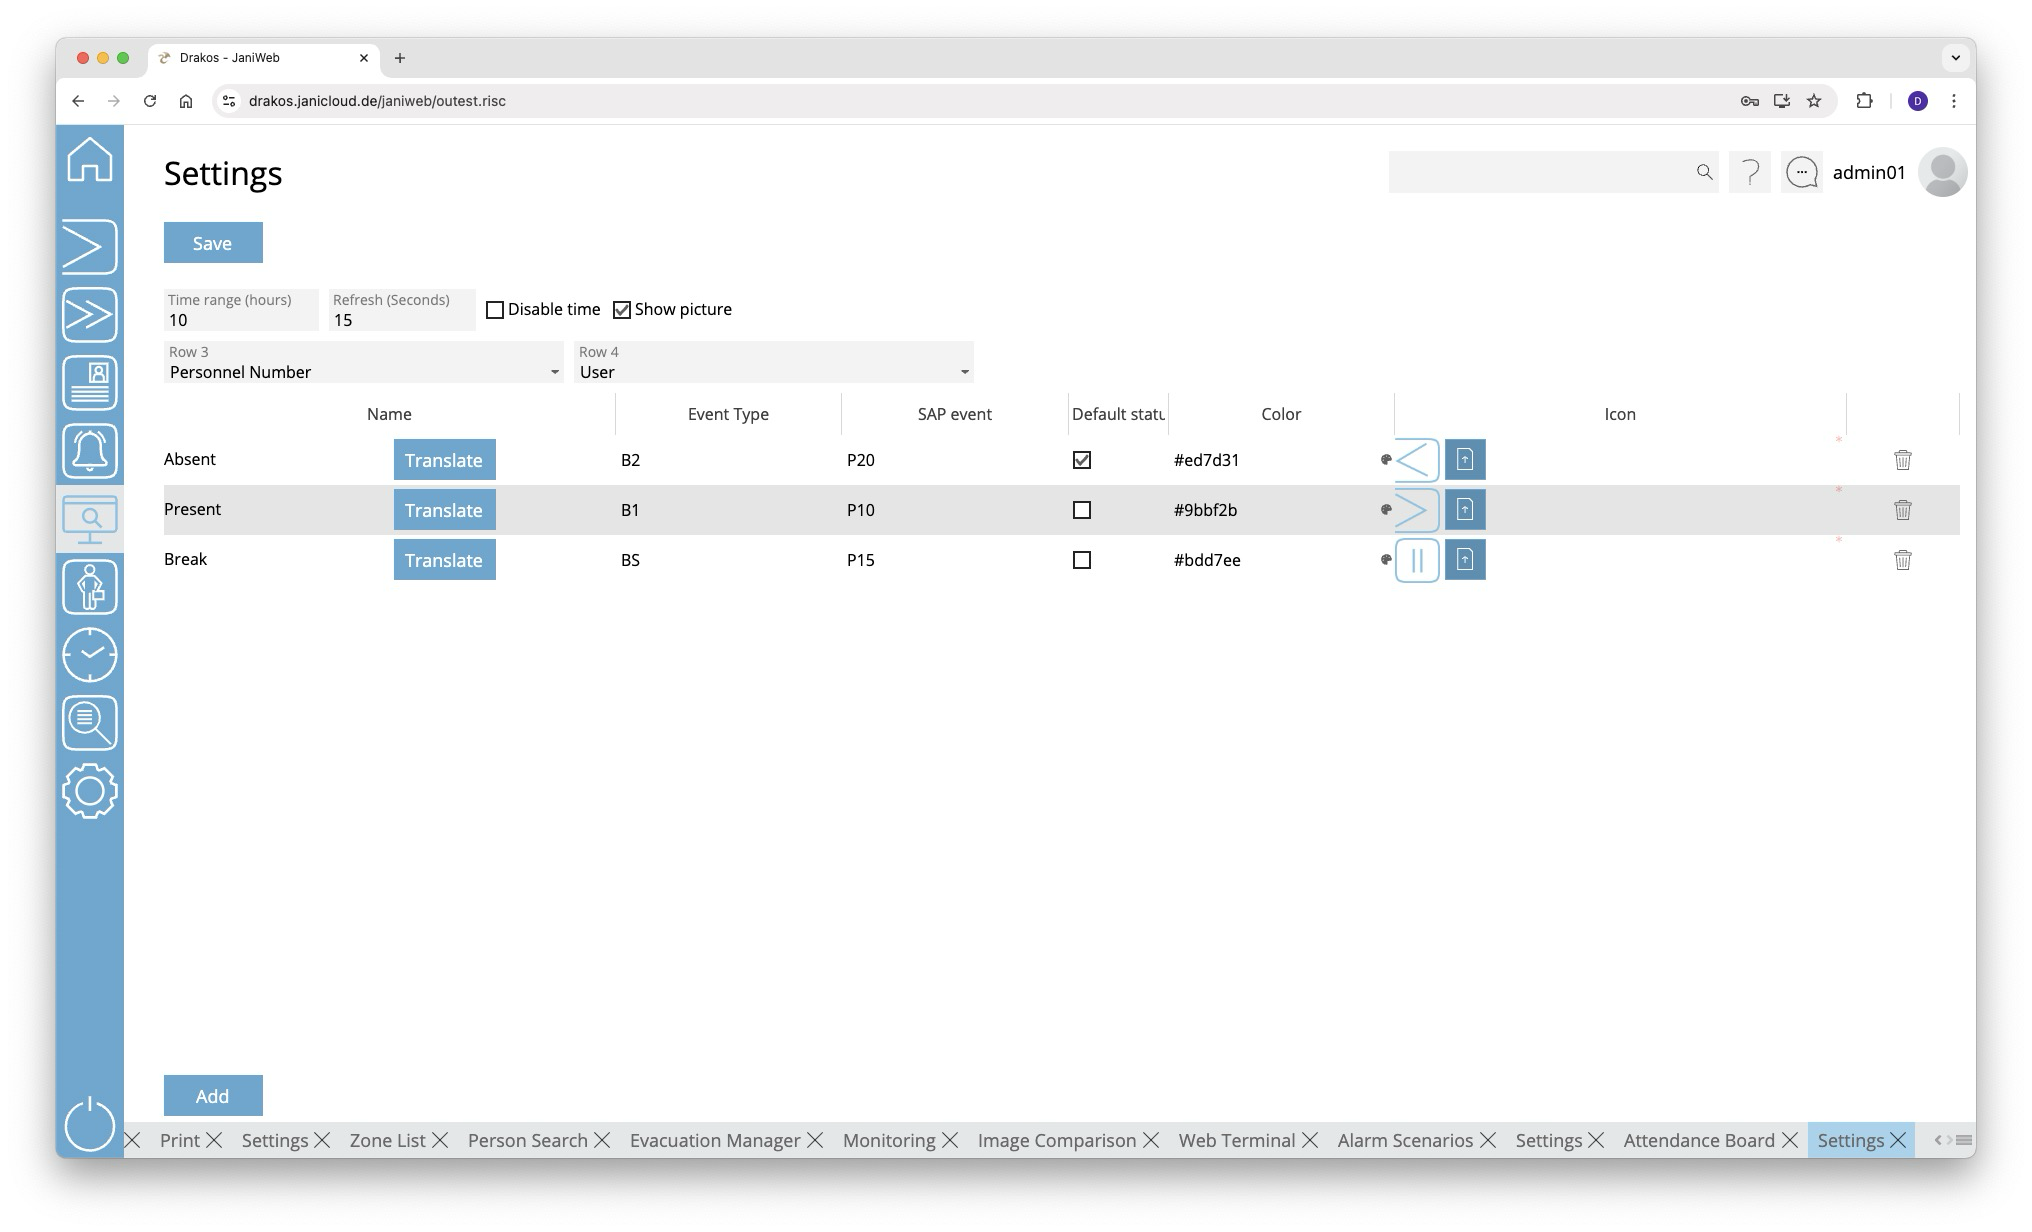
Button Save
Press Save to apply your changes.
General Settings
- Time range (hours): Specify here after how many hours the system should search for new booking events.
- Refresh (seconds): Specify here the time after which the display should refresh automatically.
- Row 3 / Row 4: Select additional information here that should appear on the tiles of the attendance board.
You can display the zone in which the person is currently located. To do this, select the Zone option in the Row 3 or Row 4 field.
List of presence statuses
The list contains the presence statuses that have already been created. To remove a status, press the trash icon. A confirmation dialog will appear.
Button Add
Press Add to create a new presence status. Enter the required data and press Save.
- Column Name: To specify a name, press Translate. Enter the names for the respective languages and press Save.
- Column Event type: Enter the abbreviation for the event (booking) type that leads to the status being displayed.
- Column SAP event: Enter the SAP event that causes the status to be displayed.
- Column Default status: Specify here whether this status should always be displayed if there is currently no booking for the person.
- Column Color: Specify the color in which the status appears in the attendance board. Press the color palette icon to open a color picker. Or enter the color directly as a hexadecimal color code.
- Column Icon: Press Upload to upload an icon for the presence status.