
Quiz
List of Quizzes
The list contains the quizzes that have already been created. Select a quiz to display details.
The list offers the following options:
- Filter by client, site and status: Click on the filter icon. Select the client, site or status (Active, Active in the future, Inactive) for which quizzes should be displayed. Changes are visible immediately.
- Search in columns: Enter text or numbers in the search field (magnifying glass symbol) of a column to search by name or status. The entries have an immediate effect: The list only shows hits.
Button New
Press New to create a new quiz. Enter the required information about the quiz on the General tab and press Save.
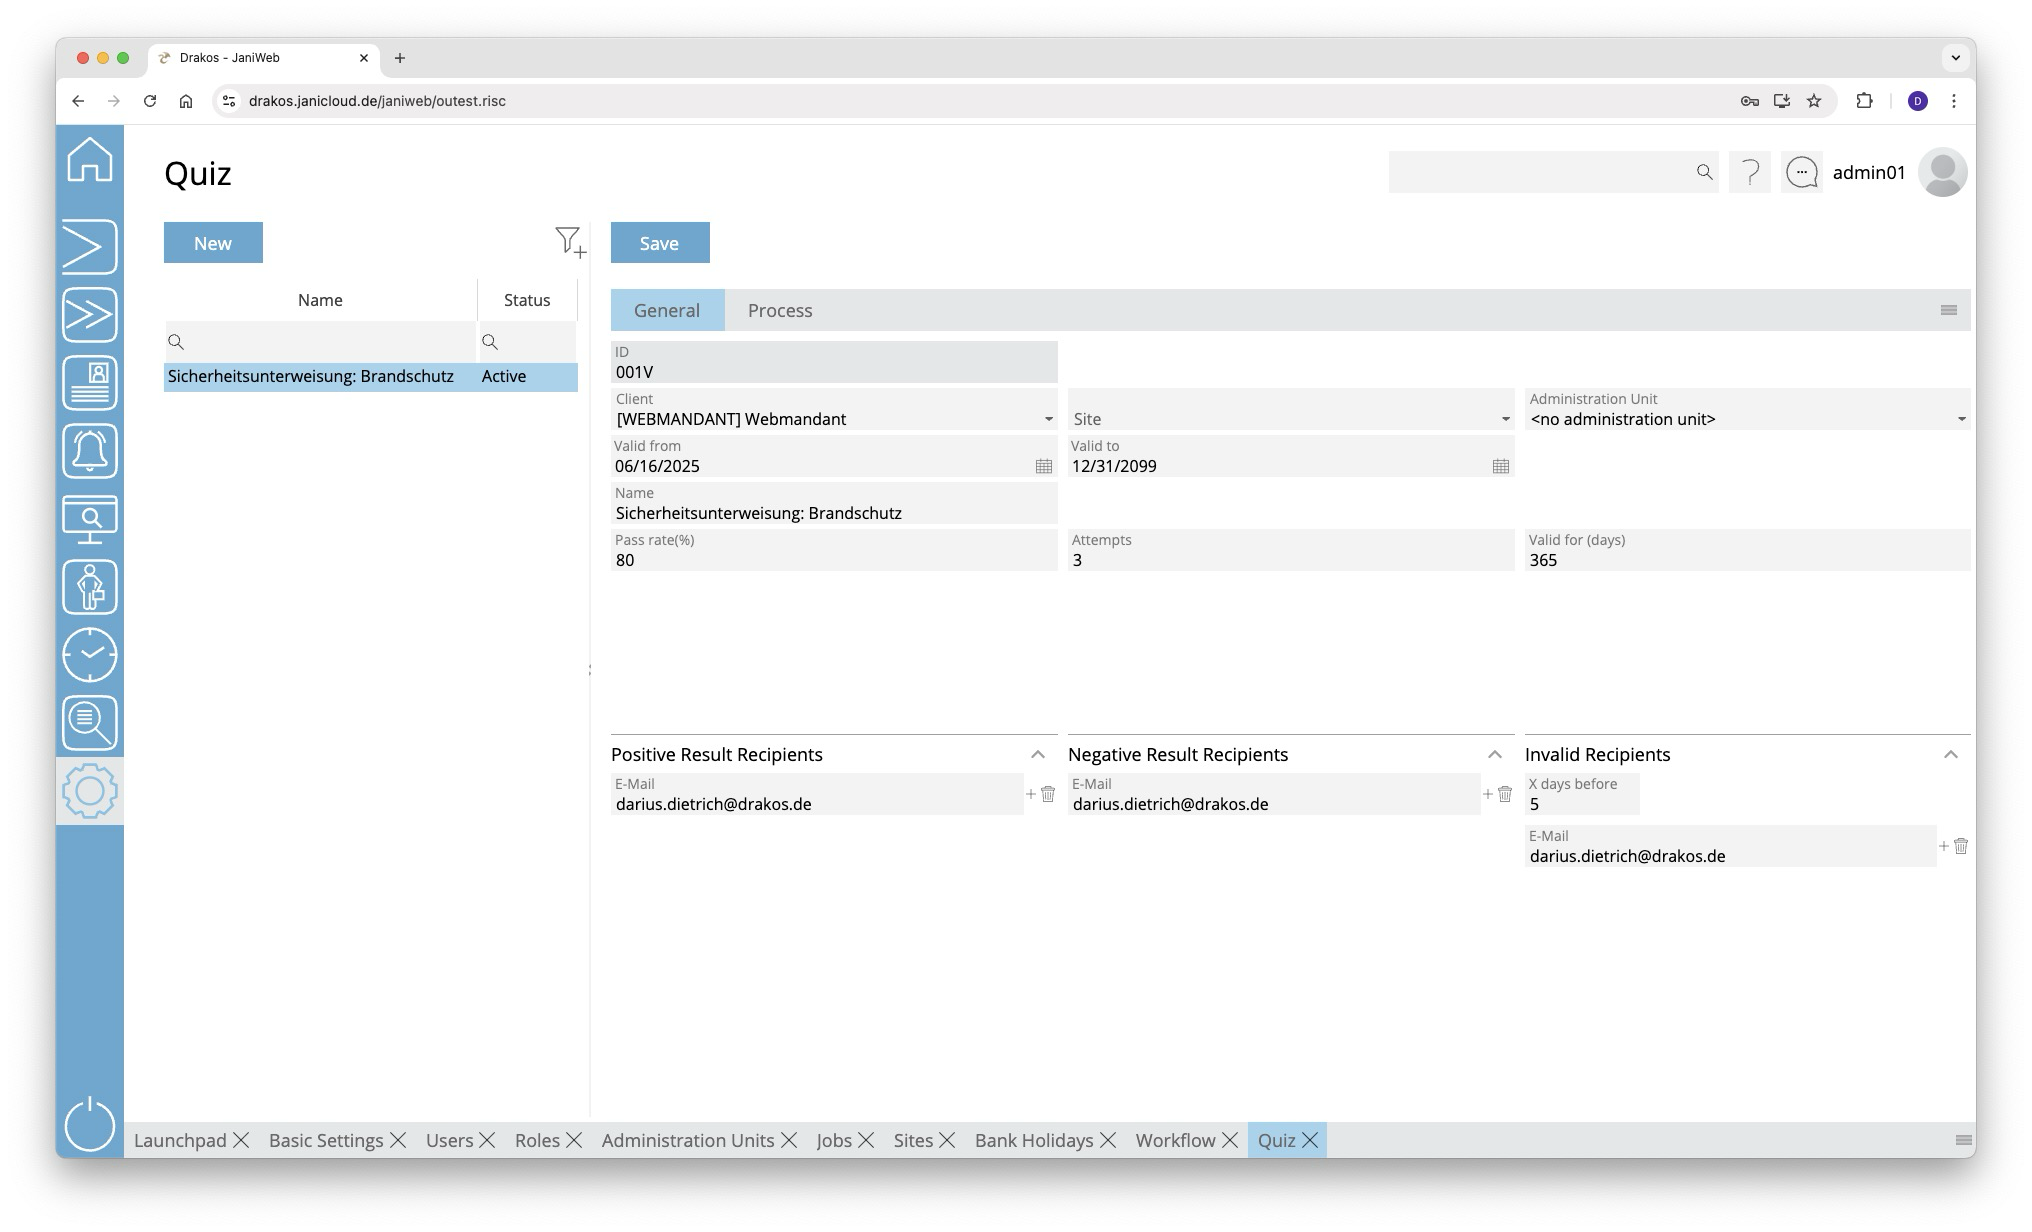
Tab General
This is where you enter and edit data such as name, client and validity for the quiz.
Use the Pass rate (%) field to specify the percentage of questions that must be answered correctly for the quiz to be considered passed.
The Attempts field specifies how often the quiz may be repeated in the event of a failed attempt.
The Validity (days) field specifies how long the quiz remains valid after it has been passed.
In the Positive result recipients area, you can enter e-mail addresses that are automatically notified when the quiz is passed.
In the Negative result recipients area, you can enter e-mail addresses that will be notified if the quiz is not passed.
In the Invalid recipients area, you can define e-mail addresses that will be notified before the quiz expires.
The X days before field determines how many days before expiry the e-mail is sent.
Tab Process
With a quiz, you have the option of creating training courses, such as a safety briefing. These can be integrated into the pre-registration process for visitors, for example. On this tab, you use slides to define the procedure for such a training course.
- Insert slide: Drag the required modules in the desired order into the area of the respective location or press the button with the + to select the corresponding slide in the following dialog.
- Reorder slides: Drag the slides to the desired location.
- Edit slides: Use the edit icon to specify details for the respective slide.
- Remove slides: Use the recycle bin icon to remove a slide from the sequence.
The slides at a glance
Introduction slide
- Define title and text:
Enter a title and text to be displayed on the slide.
Use the Translate button to enter the title and text in the desired languages. - Insert image:
- Use the Upload image button to add an image that will appear on the slide.
Save your entries using the Save button.
Preparatory slide
The preparatory slides are intended to convey the knowledge that will be tested in the subsequent questions and answers slides.
- Define title and text:
Enter a title and text to be displayed on the slide.
Use the Translate button to enter the title and text in the desired languages. - Insert image or video:
- Use the Upload image button to add an image that will appear on the slide.
- Alternatively, you can embed a YouTube video: Click on Set link and enter the YouTube link in the respective language field.
Save your entries using the Save button.
Question and Answer
Use this slide to define a question with the corresponding answer options.
- Define title and question:
Enter a title and a question that will be displayed on the slide.
Use the Translate button to enter the title and question in the desired languages. - Insert image or video:
- Use the Upload image button to add an image that will appear on the slide.
- Alternatively, you can embed a YouTube video: Click on Set link and enter the YouTube link in the respective language field.
- Define answers:
- Define the answer options from which users should choose.
- Mark which answer(s) are correct in the Correct column. Multiple selection is possible.
- Use Add to add further answer options.
- Use the recycle bin icon to delete individual answers.
- Each answer can be designed as text, image or a combination of both.
→ Add images with Add image, texts with Translate.
- Display options:
- Random order answers: The answer options are sorted randomly each time the quiz is called up.
- Horizontal order: Determines whether the answers are displayed horizontally or vertically.
Save your entries using the Save button.
End slide
- Define title and text:
Enter a title and text to be displayed on the slide.
Use the Translate button to enter the title and text in the desired languages. - Insert image:
- Use the Upload image button to add an image that will appear on the slide.
Save your entries using the Save button.