
Team Calendar
The menu item Team calendar provides an overview of absences in your team and the option to edit them.
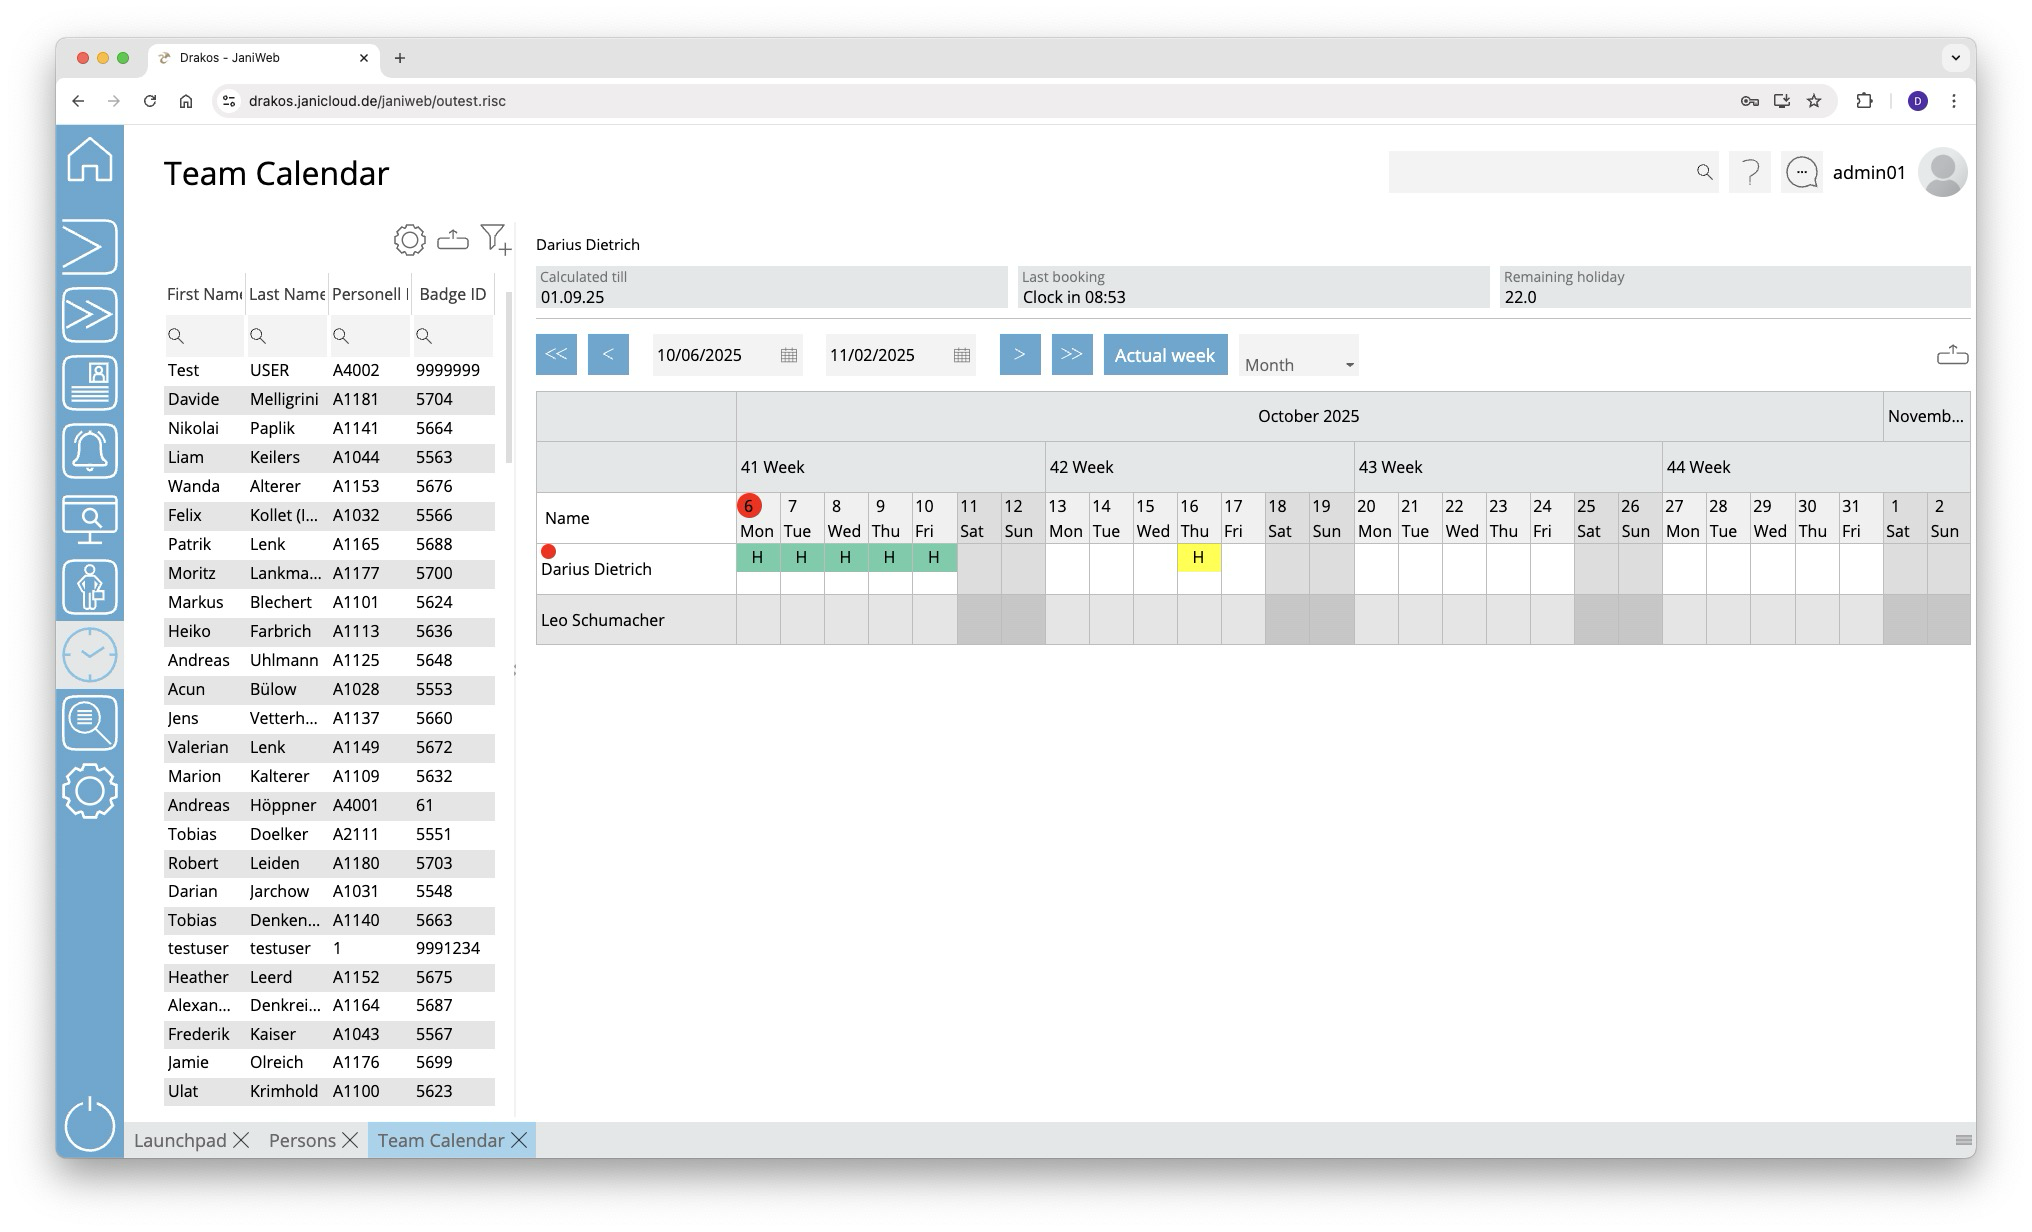
List of persons
The list contains the persons that have already been created. Select a person to view details.
The list offers the following options:
- Select columns to display: Press the gear icon. Select which columns you want to display and in which order. Arrange the columns using the mouse or the arrow icons. Press Apply to adopt the changes.
- Filter by client and status: Press the filter icon. Select the clients and the status (Active, Active in future, Inactive) for which persons should be displayed. Changes are visible immediately.
- Search in columns: Enter text or numbers in the search field (magnifying glass icon) of a column to search for names, personnel numbers, or other criteria. The entries take effect immediately: the list only displays hits.
Tip: Search for substrings. You can find “Spencer-Churchill” with “spe”, “chur” or “hill”. The search is not case sensitive. - Export the entire list: Press the download icon. Select the format in which you want to export the list. The export files are downloaded or displayed depending on the browser/operating system settings.For details on the available export formats, see the General > Export Formats chapter of this manual.
The list of persons is only visible when you log in as an administrator. When you log in as an employee, only your own team calendar is visible.
Calendar view
Use the arrow icons and selection fields to select a period. Within the calendar, you have the following options:
Create new absence
- Right-click in the field of the desired day and select Create new absence.
- Select a type under Absence.
- Enter the desired period using the From and To fields.
- Press Save.
The absence appears in the team calendar together with an abbreviation for the type (e.g. “FLT” for flextime).
Remove an absence
- Double-click on the absence. The details are displayed.
- Press Delete. A confirmation dialog appears.
Absences are marked by a colored background as follows:
- Green: absence approved
- Yellow: approval pending
- Red: absence rejected
- Blue: approval to delete pending
You can manage requests for absences in the menu item Workflow.
How the Team Calendar Overview Is Structured
The Team Calendar overview is based on the supervisor relationships maintained in JaniWeb. A team generally consists of all employees who are assigned to the same direct supervisor.
The following rules apply:
- Employees can see all colleagues who have the same supervisor.
- Managers can see all employees for whom they are registered as the direct supervisor.
- Managers can also see their own team, meaning colleagues who have the same supervisor as they do.
For example, Employee 1, Employee 2 and Employee 3 all have Anna as their supervisor. They therefore form one team and can see each other in the Team Calendar.
Anna can see these three employees because she is their supervisor. At the same time, Anna belongs to the Department Manager’s team. She can therefore also see Ben, who reports to the same Department Manager.
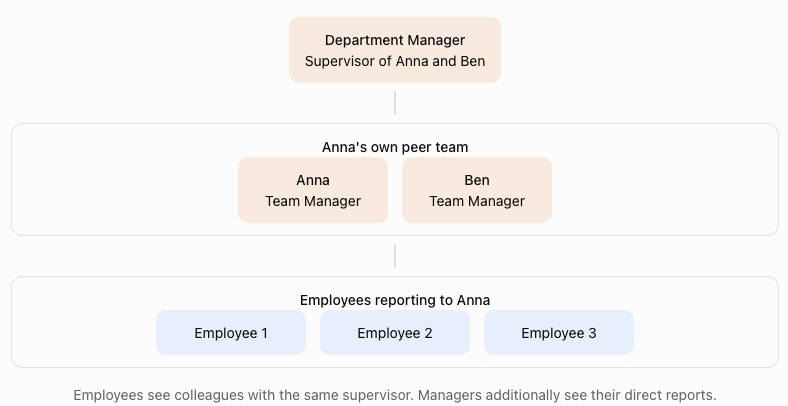
The correct assignment of supervisors in the employee master data is therefore essential for determining which employees are displayed in each user’s Team Calendar.
Exporting the team calendar
You can export the team calendar. To do so, press the Download icon above the team calendar and select the desired export format (Excel or PDF).