
Overview Bookings
The menu item Overview Bookings allows you to view time bookings (clock-in/out events). You can also edit bookings, add new bookings and display the working times resulting from the bookings.
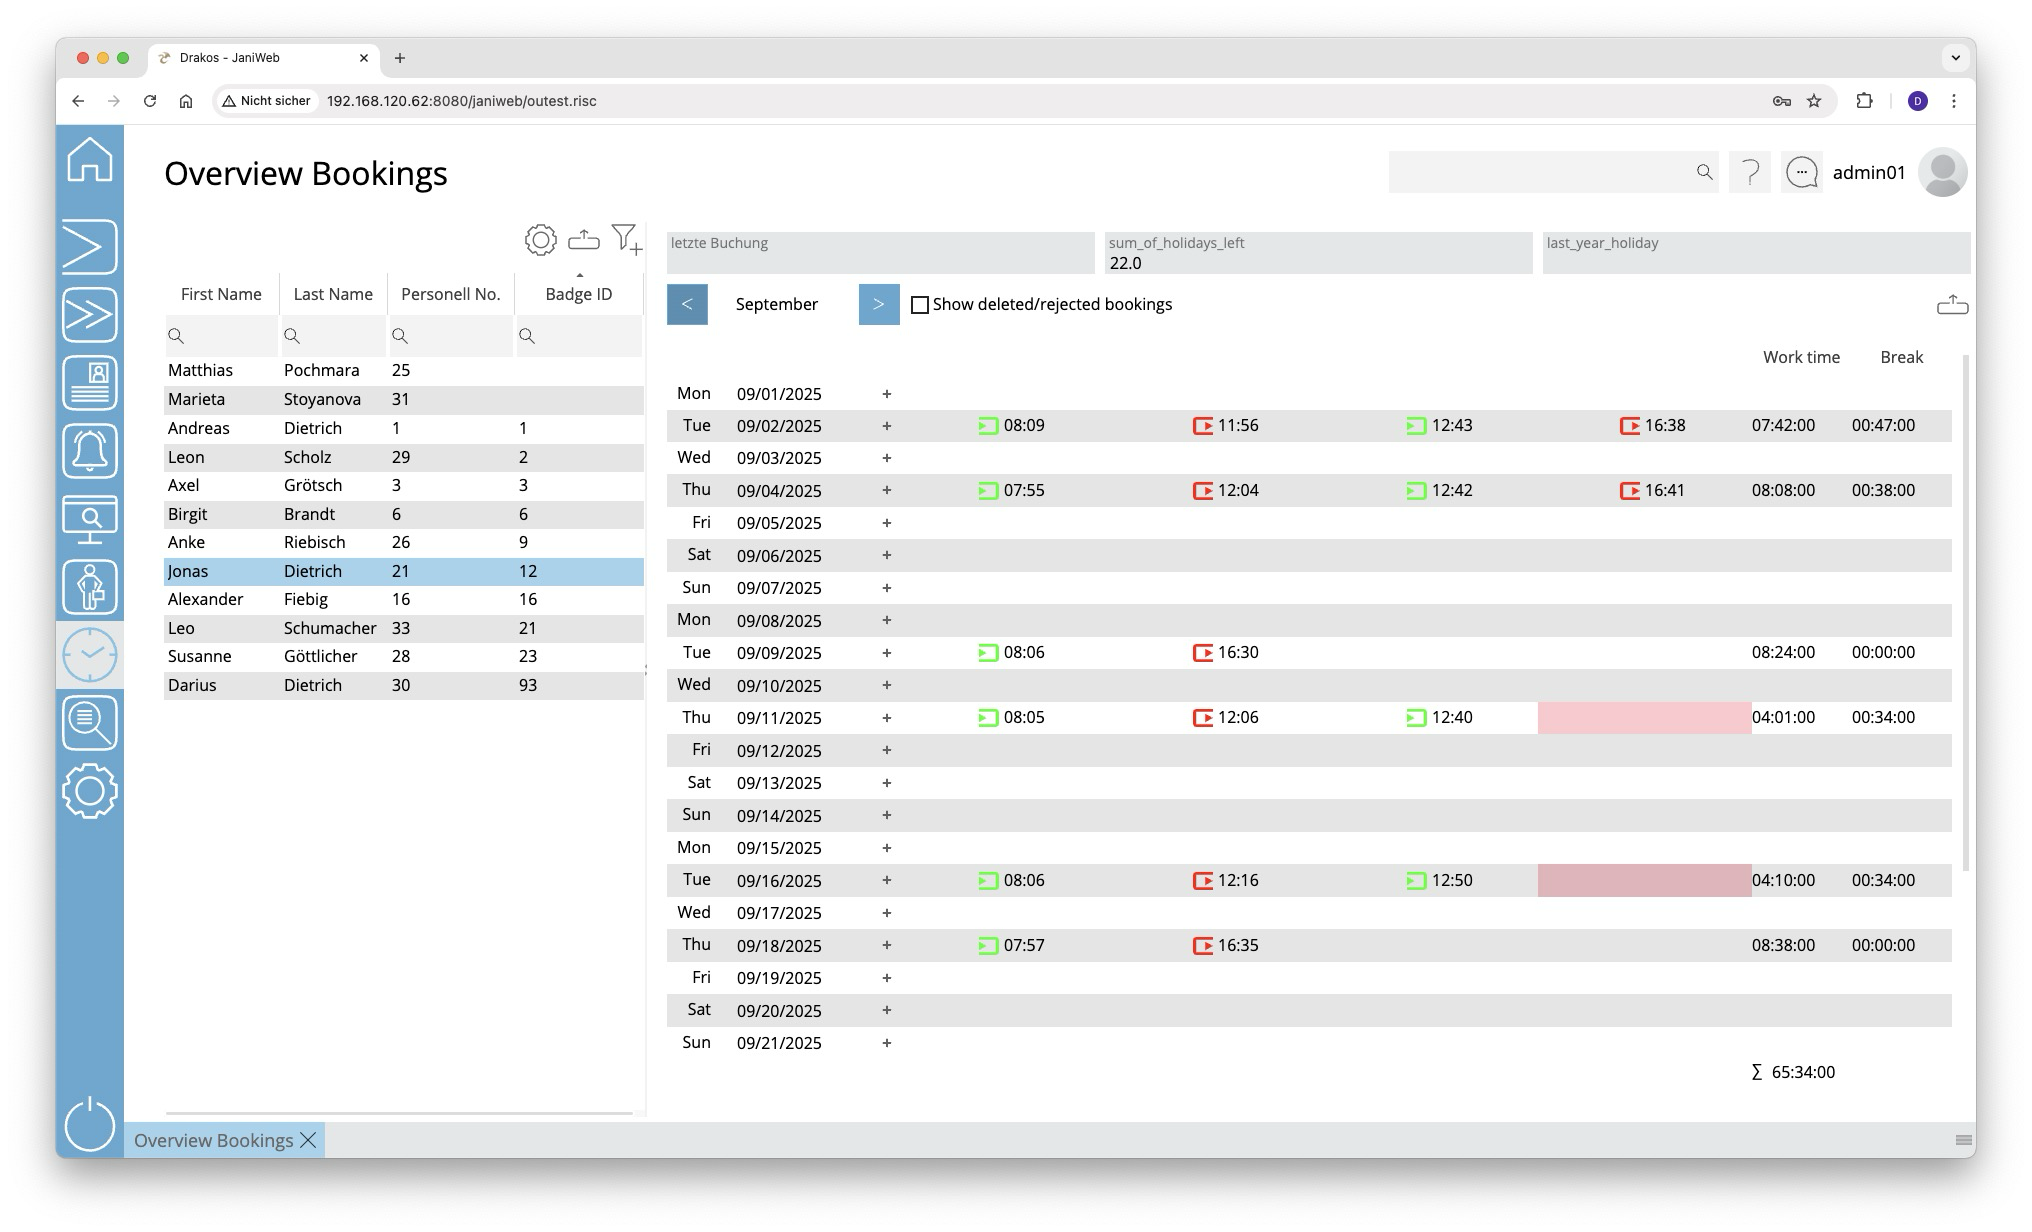
List of persons
The list contains all persons for whom time bookings are available. Select a person to view details.
The list offers the following options:
- Select columns to display: Press the gear icon. Select which columns you want to display and in which order. Arrange the columns using the mouse or the arrow icons. Press Apply to adopt the changes.
- Filter by client and status: Press the filter icon. Select the clients and the status (Active, Active in future, Inactive) for which persons should be displayed. Changes are visible immediately.
- Search in columns: Enter text or numbers in the search field (magnifying glass icon) of a column to search for names, personnel numbers, or other criteria. The entries take effect immediately: the list only displays hits.
Tip: Search for substrings. You can find “Spencer-Churchill” with “spe”, “chur” or “hill”. The search is not case sensitive. - Export the entire list: Press the download icon. Select the format in which you want to export the list. The export files are downloaded or displayed depending on the browser/operating system settings.For details on the available export formats, see the General > Export Formats chapter of this manual.
Detail area
This is where the time bookings for the selected month appear. You have the following options:
- Change period: Use the arrow icons at the top to jump to the previous/next month.
- Include deleted bookings: Select Show deleted/rejected bookings to also display such bookings.
- Add time bookings: To create a new time event, double-click in an empty field or press the plus icon and select New booking. Then select the desired booking type, enter the time and press Save to confirm.
- Add absences: To create a new absence, double-click in an empty field or click the plus icon and select New absence. Enter a period and press Save to confirm. You can recognize absence bookings by the calendar icon next to the date. Double-click the icon to display details of the absence.
If a workflow is set up for creating a booking, the status of the request is indicated by a colored background:
- Yellow: The request has not yet been approved.
- Green: The request has been approved.
Empty fields with a red background indicate an error in the sequence of bookings. This can occur, for example, if there is an incorrect sequence of attendance and absence bookings.
Column Working Time
The working time resulting from the time bookings for the day in question appears here. The total monthly working time is shown at the end of the list.
Column Break deduction
The break time appears here, which is either calculated from the break bookings or from defined working time rules. If the booked times fall short of the required break time, the break time of the working time rule(s) automatically appears here together with a clock icon.
Working time rules are specified in Settings > Working Time Report.
Exporting the booking overview
You can export the booking overview. To do so, follow these steps:
- Press the Download icon above the booking overview.
- Select a period:
- Enter the start and end date in the From and To fields, or
- select a calendar week in the Week field, or
- select a calendar month in the Month field.
- Press Show Results to load the overview.
- Press the Download icon again and select the desired export format (Excel or PDF).