
Time Models
Use this menu item to manage time models for access permissions. By linking a time model to a device group or a single device, you determine the times at which they may be used.
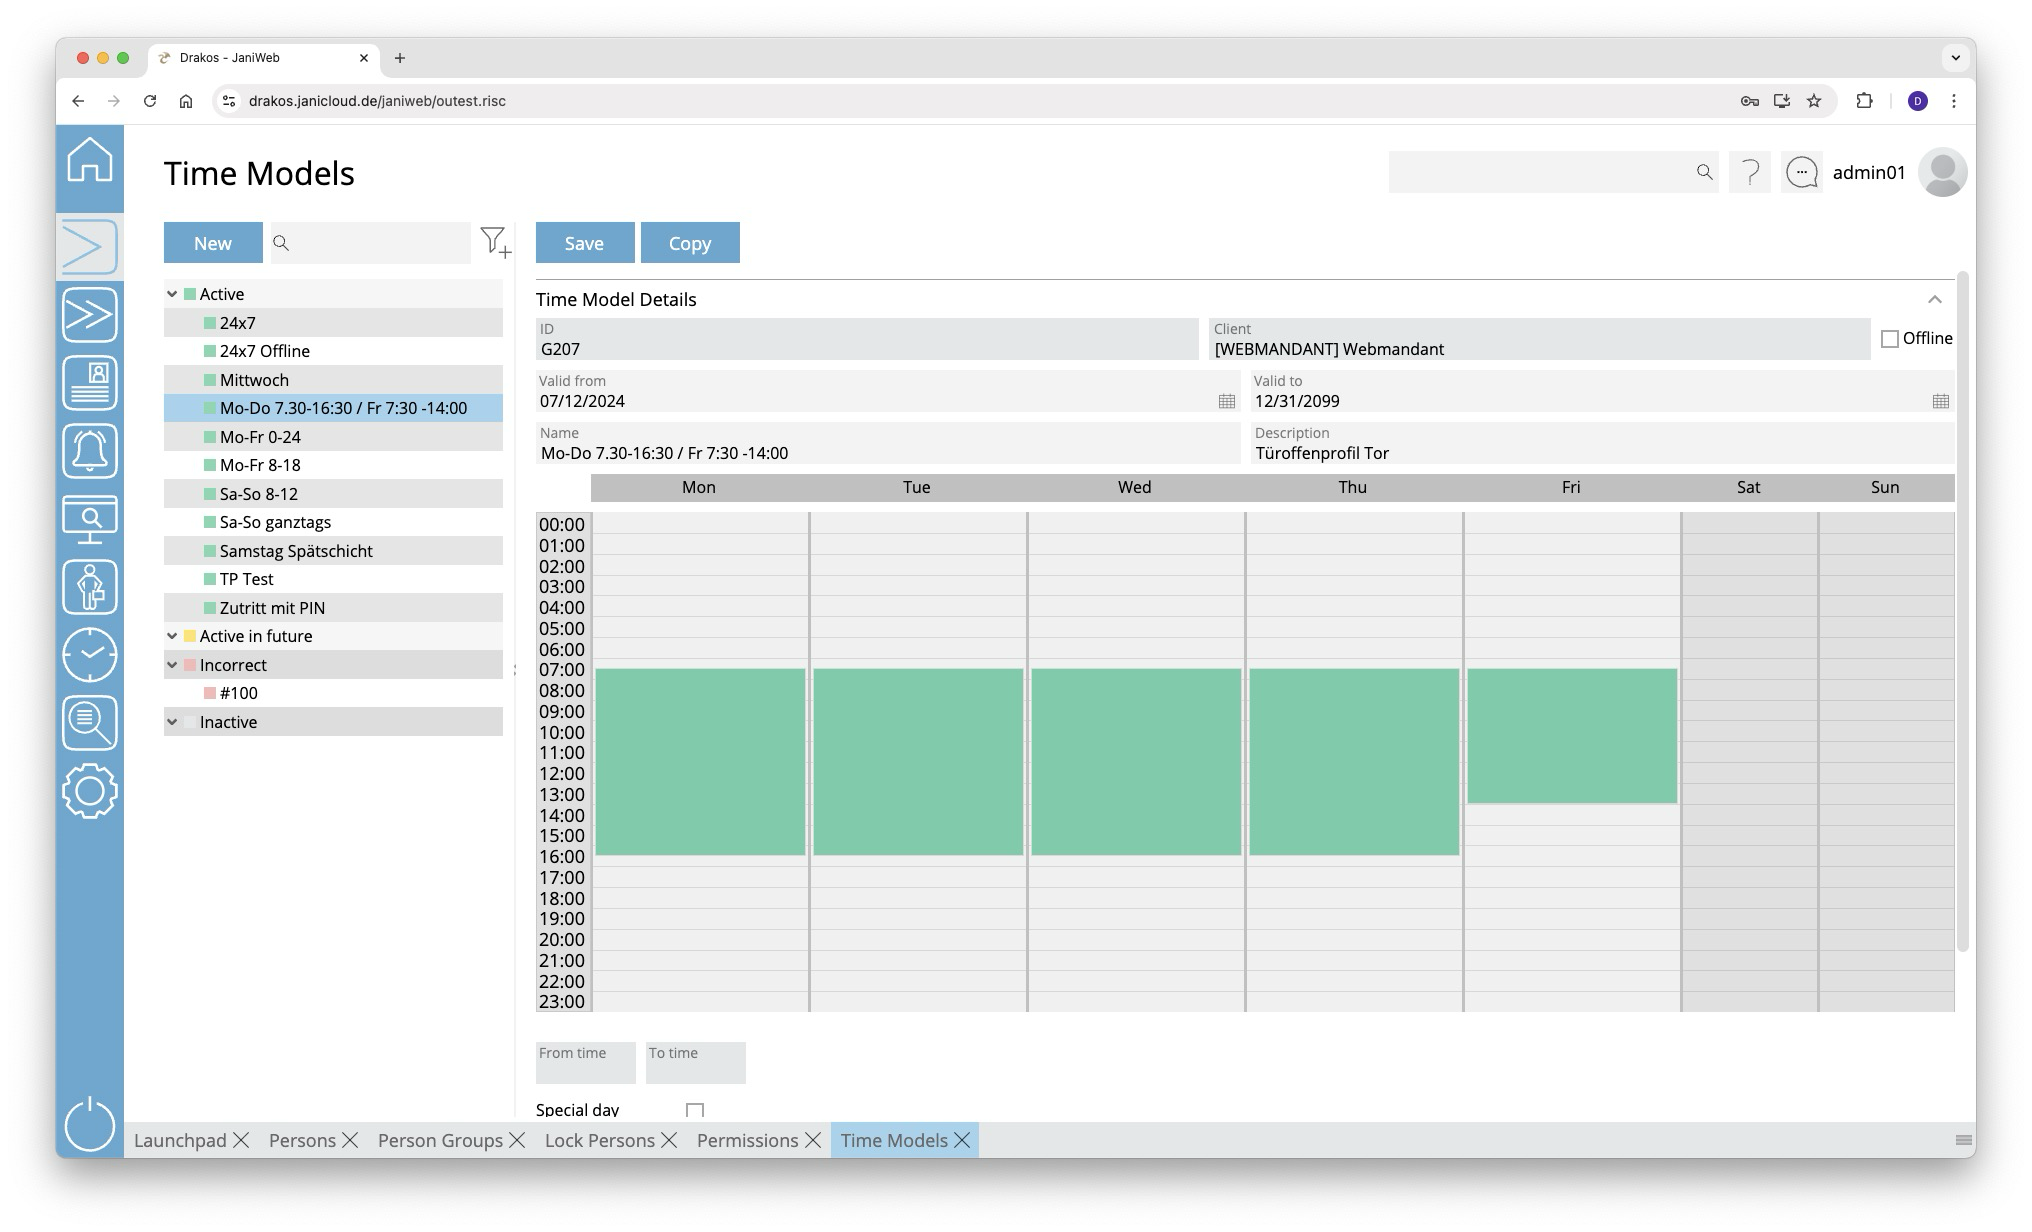
List of time models
The list contains the time models that have already been created. Select a time model to display its properties.
Button New
Press New to create a new time model.
- Entering basic data: Enter a description, select the client and define the validity period.
-
Editing the weekly overview: To define the periods during the week when access should be allowed, proceed as follows:
-
Right-click on the desired day and select New time period. A green marker appears.
-
Drag the marker with the mouse or enter the start and end times in the From time and To time fields.
-
Repeat the steps for all other periods and days that should be included in this time model.
-
- Specify access options:
- Holiday Classes: This is where you determine the bank holidays on which access should be allowed. If a check mark is set, this time model applies to holidays that belong to the holiday class. If no check mark is set, this time model does not apply to any holidays.
- PIN required: Select whether access should only be possible with a PIN.
- PIN in master record: Select whether the PIN should be transmitted together with the master record.
- Save: Press Save to save your entries.
Button Copy
You can copy an existing time model to use as a basis for a new time model. Click Copy at the top to make the desired changes. Then click Save.
Option Offline
If the Offline option is set, the ID must be selected from the list. Also you can choose the Validation duration. Offline time models can only be assigned to offline components or offline device groups.
TIPS
It is possible to create multiple time periods per day.
- Delete a time period: To remove a time period, right-click it and select Delete.
- Copying a period: To copy a period to the clipboard, right-click on it and select Copy.
- Inserting a period: To insert a copied period on a different day of the week, right-click on the desired day and select Paste.