Visitor Management
Companies
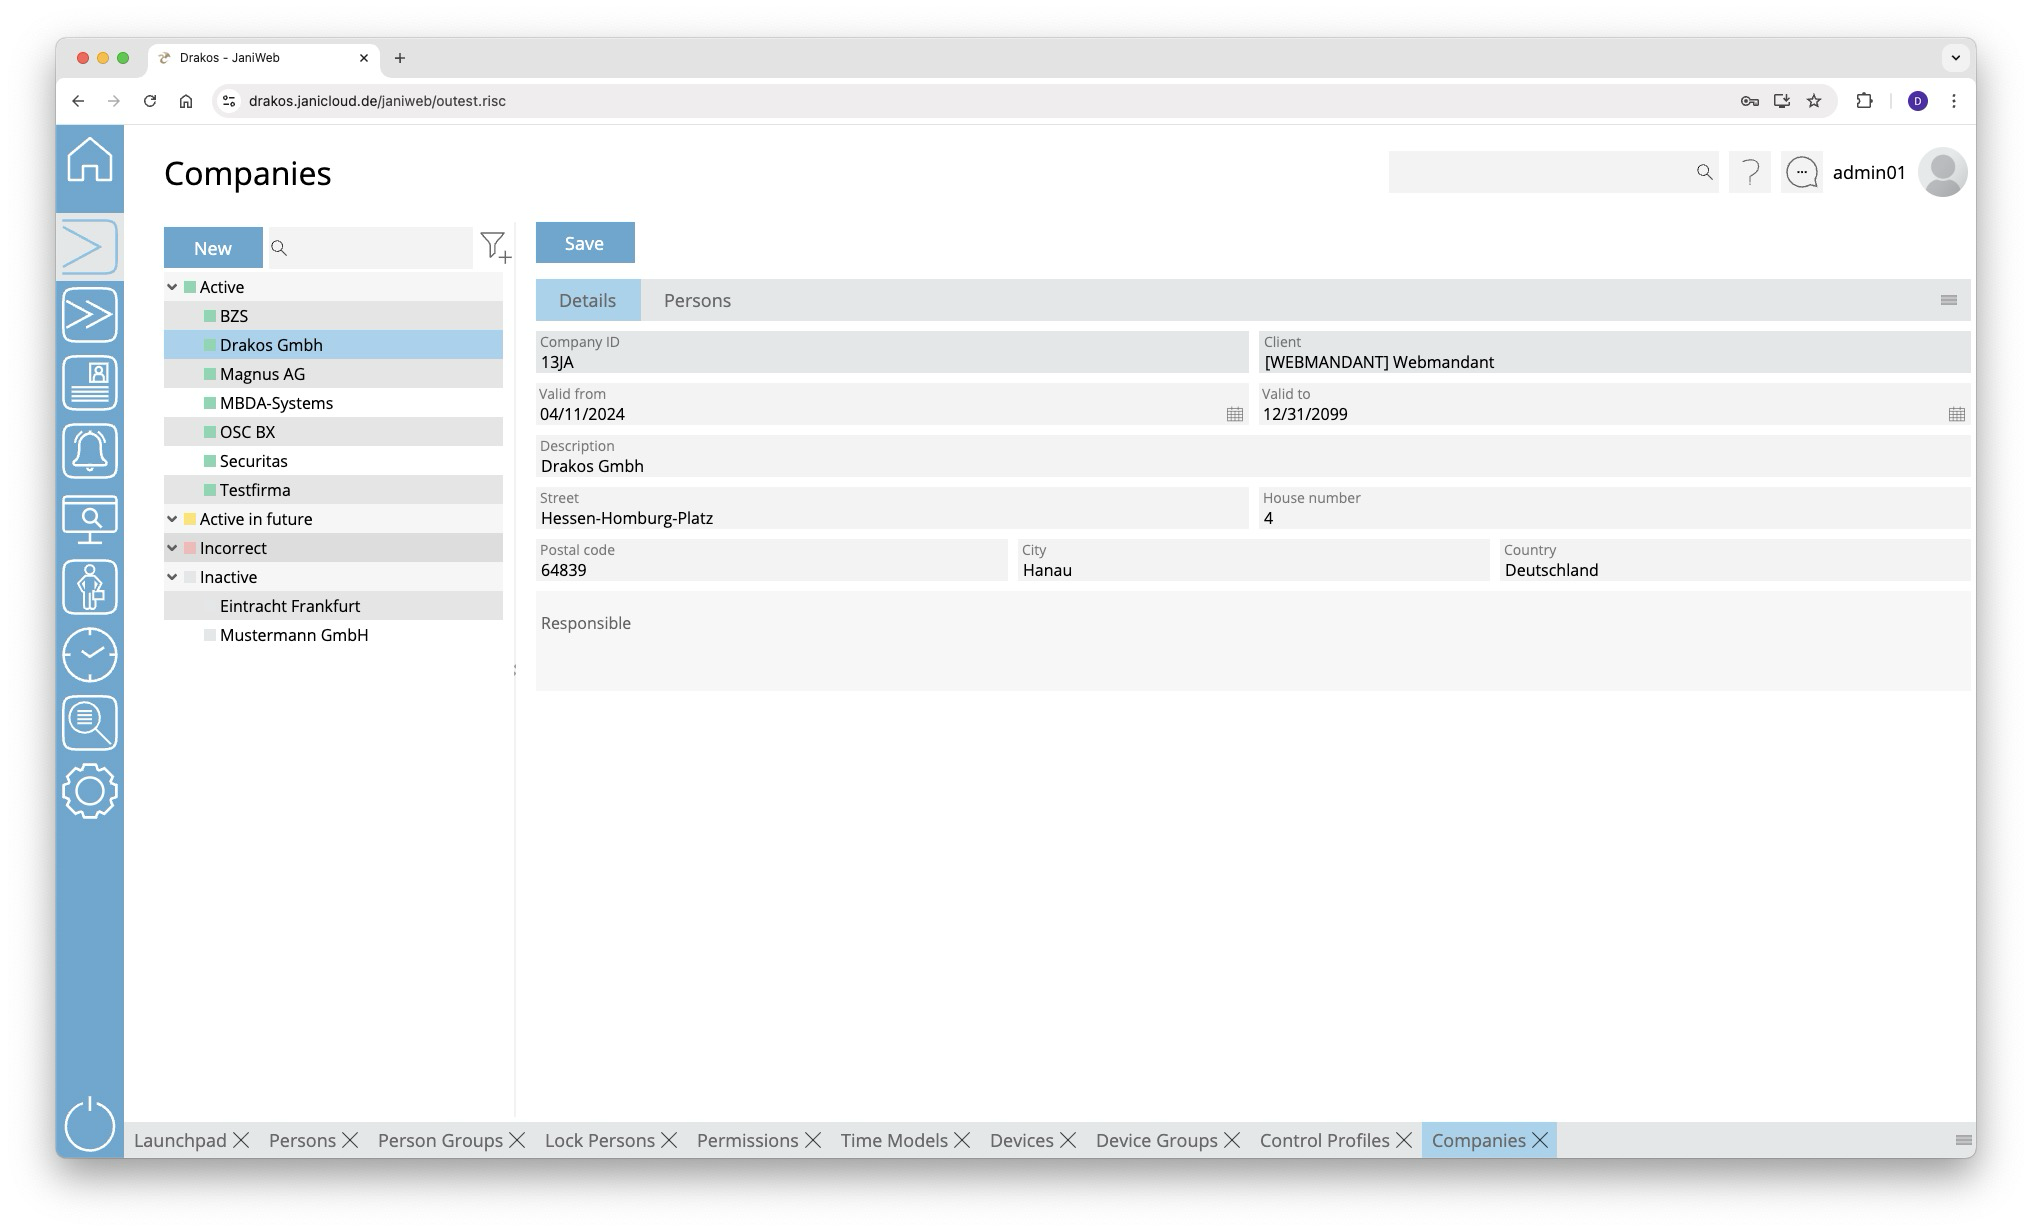
Use the menu item Companies to manage companies. Companies created here can be assigned to persons or visitors via the menu items Persons or Visitors.
List of companies
The list contains the companies already created, sorted by their current status (Active, Active in future, Incorrect, Inactive). Select a company to view details.
The list offers the following options:
- Search: Enter text or numbers in the search field (magnifying glass icon) at the top to search for companies. The entries take effect immediately: the list only displays hits. The search is not case sensitive.
- Filter: Press the filter icon. Select the criteria for which you want to display companies. Changes are visible immediately.
- Export the entire list: Press the download icon. Select the format in which you want to export the list. For details on the available export formats, see the General > Export Formats chapter of this manual.
Button Save
You can change the details of the selected company. Press Save to save the changes.
Button New
Press New to create a new company. Enter the required information for the company on the tab Details and press Save.
Tab Persons
The tab Persons provides an overview of which persons are assigned to the respective company.
TIPS
- Filter: Use the filter icon to filter by status (active, inactive, etc.).
- Export: Use the export icon to export the list of assigned persons.
Visitors
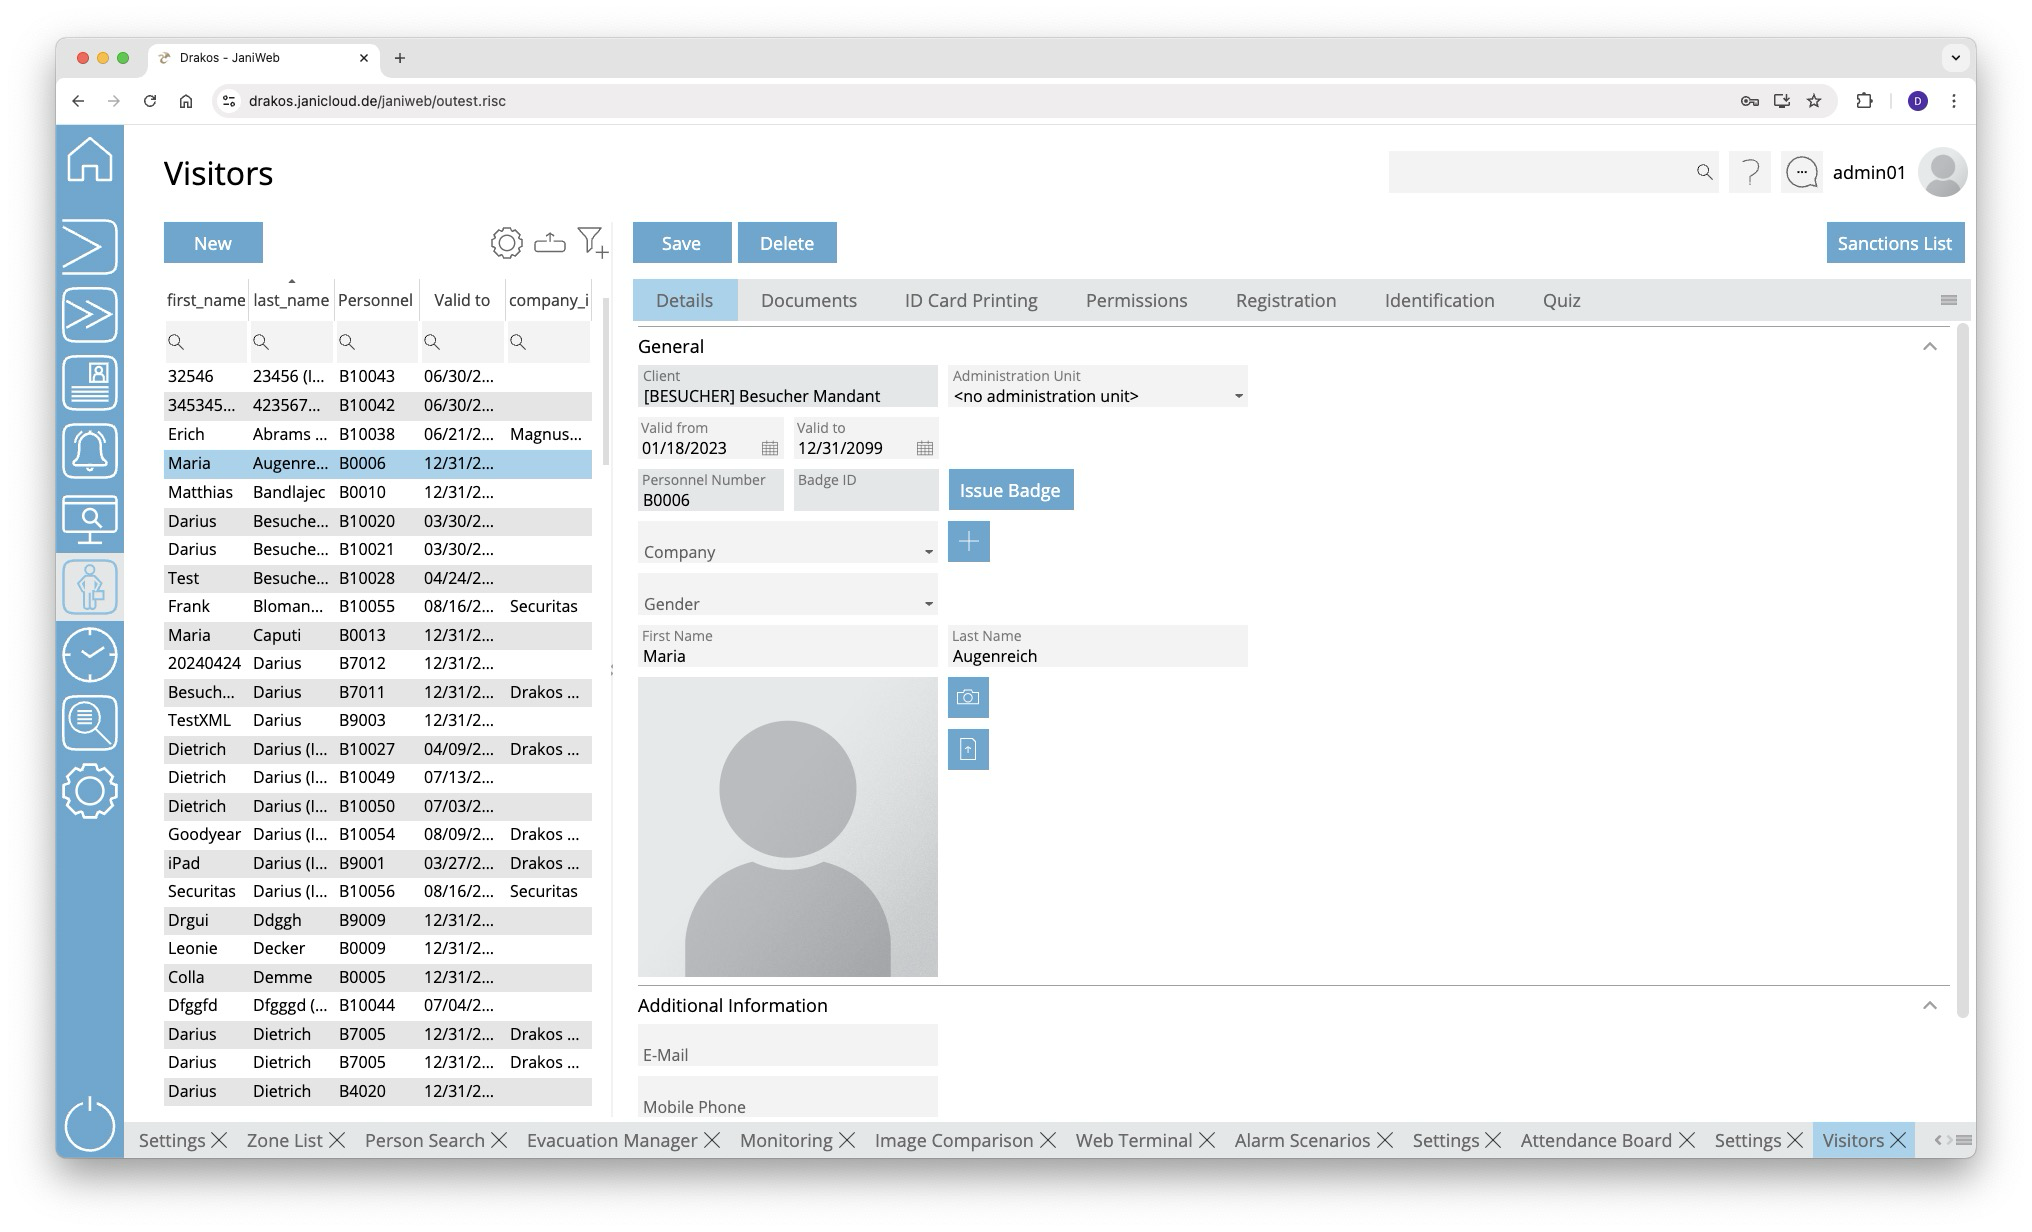
You can manage visitors in the system via the menu item Visitors. Here you can create new visitors and assign them to a company that has been created under the menu item Companies.
List of visitors
The list contains the visitors already created. Select a visitor to display details. The list offers the following options:
- Select columns to display: Press the gear icon. Select which columns you want to display and in which order. Arrange the columns using the mouse or the arrow icons. Press Apply to adopt the changes.
- Filter by client and status: Press the filter icon. Select the clients and the status (Active, Active in future, Inactive) for which visitors should be displayed. Changes are visible immediately.
- Search in columns: Enter text or numbers in the search field (magnifying glass icon) of a column to search for names, personnel numbers, or other criteria. The entries take effect immediately: the list only displays hits.
Tip: Search for substrings. You can find “Spencer-Churchill” with “spe”, “chur” or “hill”. The search is not case sensitive. - Export the entire list: Press the download icon. Select the format in which you want to export the list. The export files are downloaded or displayed depending on the browser/operating system settings.For details on the available export formats, see the General > Export Formats chapter of this manual.
Button New
Press New to create a new visitor. Enter the required information for the visitor on the tab Data and press Save.
Button Save
You can change the details of the selected visitor. Press Save to save the changes.
Button Delete
Press Delete to delete the selected visitor. A confirmation dialog will appear.
Tab Details
This is where you store and edit visitor-related data. You can individually define which fields and areas are available here via Settings > tab General.
Tab Documents
Here you can link documents to the personnel master record. This tab also contains the documents that the visitor is required to view and sign when self-registering.
Tab Badge Printing
This feature is optional and not available in every installation. Depending on the version, it may also be available in the main menu.
This tab allows you to print badges with the visitor’s information. You can define the layouts for printing badges via the menu item Badge Printing > Settings.
Tab Permission
Here you can grant (Add Group / Add Device) or revoke (Remove Device Group / Remove Device) permissions for the visitor. This tab also provides an overview of the access events linked to the visitor.
If the tabs Delete Device or Delete Group contain a device or device group, access via this device or device group is not possible. This also applies if a permission for the device or device group has been granted on the tabs Add Device or Add Group.
A tick after the title of a tab indicates that there is data within the tab.
Workflow Permissions
This feature is optional and not available in every installation.
If assigning a device or device group is associated with a workflow, the permission becomes active only after the decision-maker approves the workflow request.
If you select a device or device group that has a workflow, a dialog box appears. This prompts you to enter values for the time model and the validity of the permission. You also have the option of leaving a comment for the decision-maker.
You can create multiple workflow requests at once. To send them, press Save.
Workflow requests are indicated by different colors:
You can extend the validity of approved permissions. To do this, press Extend. Then select a new validity period and create another workflow request.
Tab Registration
Here you can directly register the selected visitor for a visit. To do this, enter all the required information and press Save. The visitor now appears in the Visits menu item under Upcoming.
Tab Identification
Here you can manage the various media that a person can use to identify themselves on a device. To add a new identification medium, press Add.
- Identification: Enter a value for the medium in this column (e.g. “F DD 193E” for a license plate).
- Type: Select the type of identification in this column (e.g. license plate).
- Valid from / Valid to: Define a validity period for the medium.
- Prohibition: In this column, you can block individual identification media.
- To remove an identification medium, use the trash icon.
Press Save to save the entries.
Tab Quiz
Here you can see which quizzes the selected visitor has passed or failed and how long the quiz remains valid if passed. If the visitor has failed the quiz and used up the maximum number of attempts, the Reset Attempts button allows you to reset the number in order to give the visitor another chance to take the quiz.
You can manually add a quiz using the Add button. This is indicated in the Passed/Not passed column by the addition of Manually added.
TIPS
You can specify which fields are displayed on the tab Registration via the menu item Settings for visitor management.
Registration
Use the menu item Registration to register the selected visitor directly for a visit.
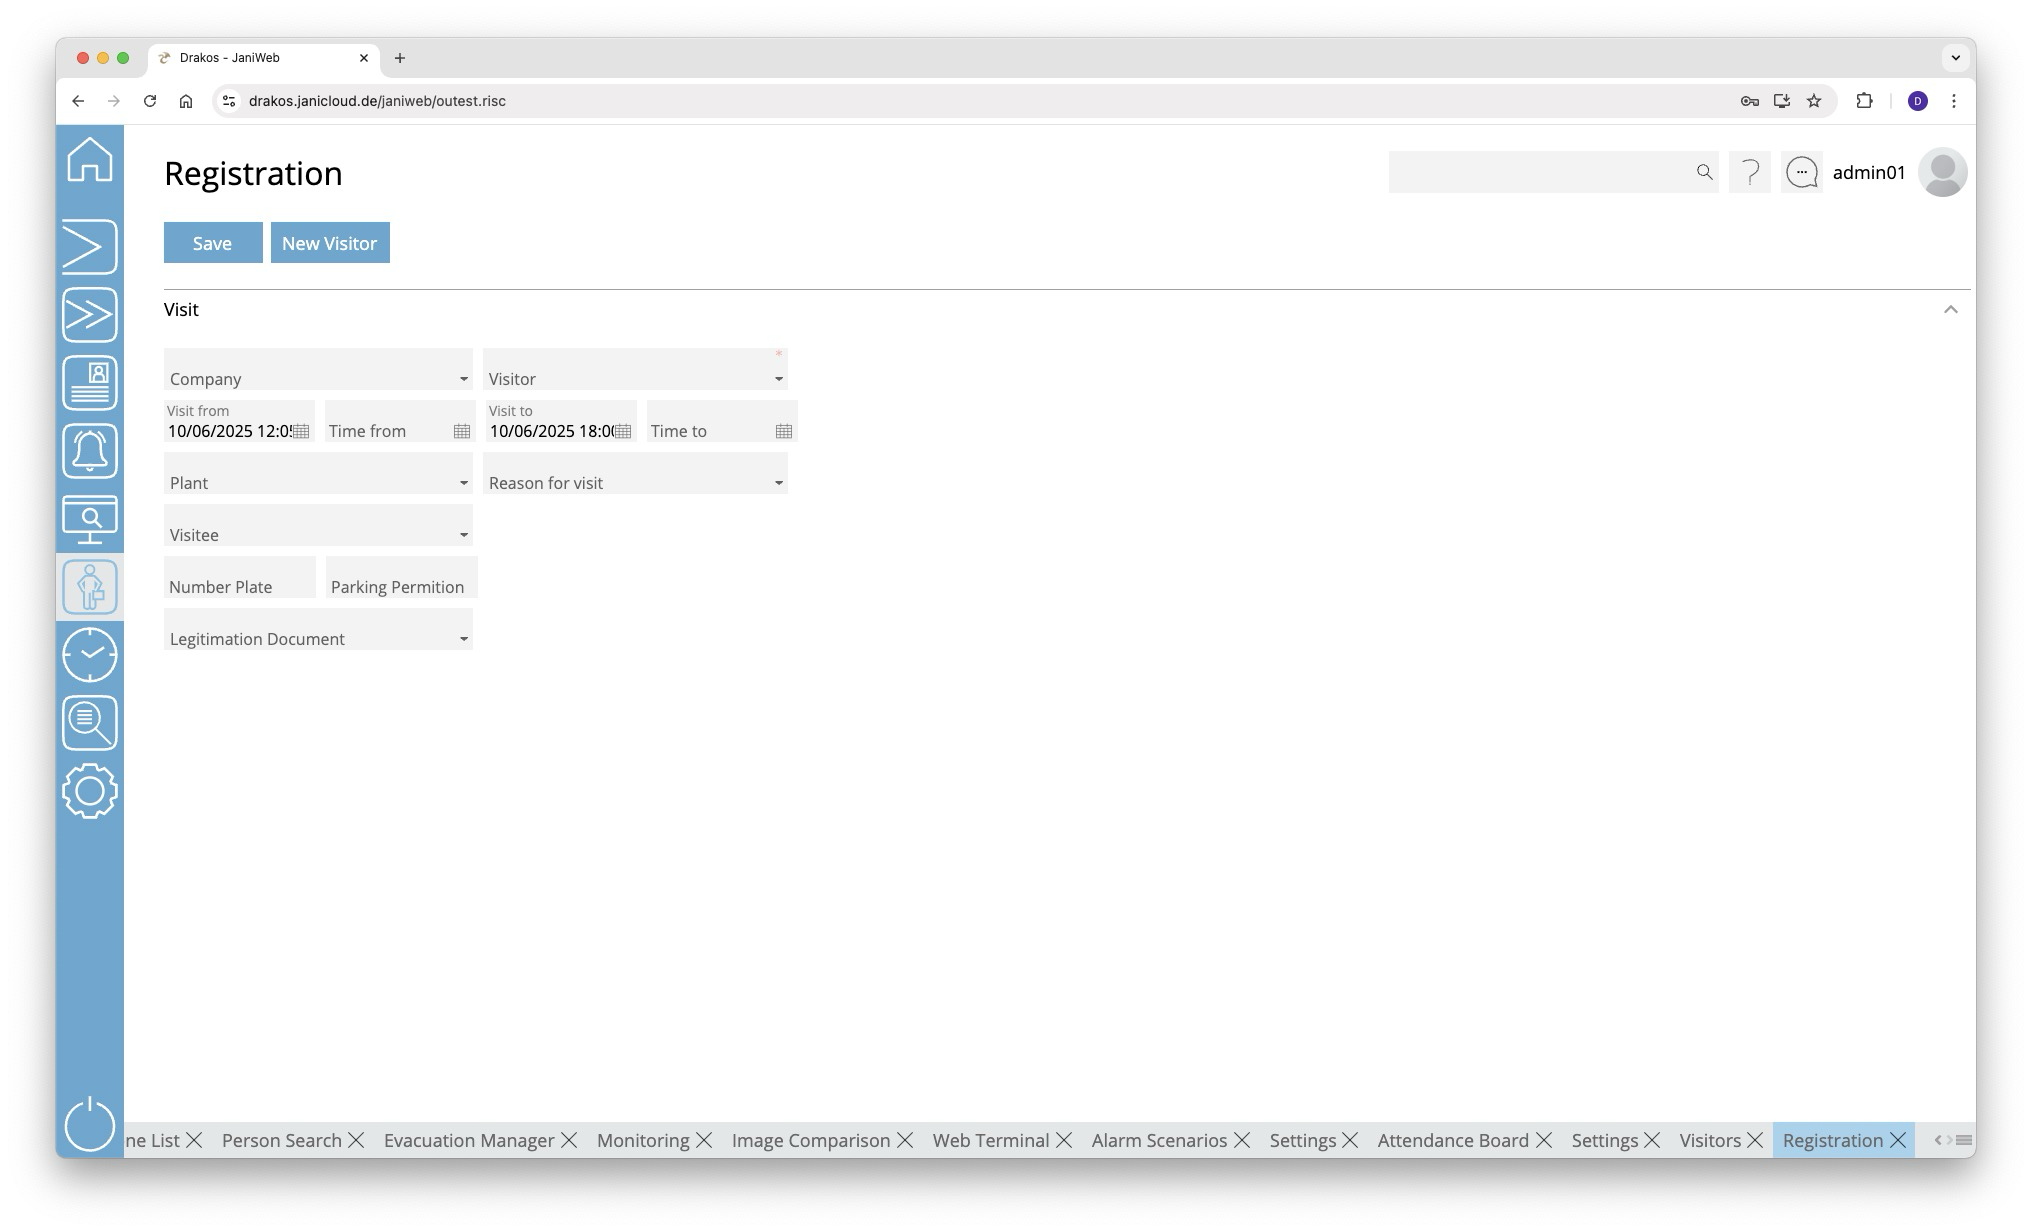
Enter all the required information and press Save. The registered visitor then appears in the Visits menu item under Upcoming.
If the visitor does not exist in the system, you can create them here. To do this, press New Visitor. Enter the required details and then press Save.
Register Visitor Groups
The Add Visitor Group button allows you to register a visitor group for a visit. After clicking the button, a window opens for creating the visitor group.

You can add existing visitors to the visitor group using the drop-down menu in the Choose Existing Visitor column. Alternatively, you can enter information for a new visitor in the First Name, Last Name, E-Mail and Company columns.
Use the Import as CSV button to import a visitor group from a CSV file. The structure of this CSV file can be found here.
Using the Download Example CSV button, you can download a sample CSV file. You can use it to understand the required structure of the CSV file.
You can remove existing entries from the visitor group using the Bin-Button.
Finish editing the visitor group by clicking the Save button.
TIPS
You can specify which fields are displayed on the tab Registration via the menu item Settings for visitor management.
Visits
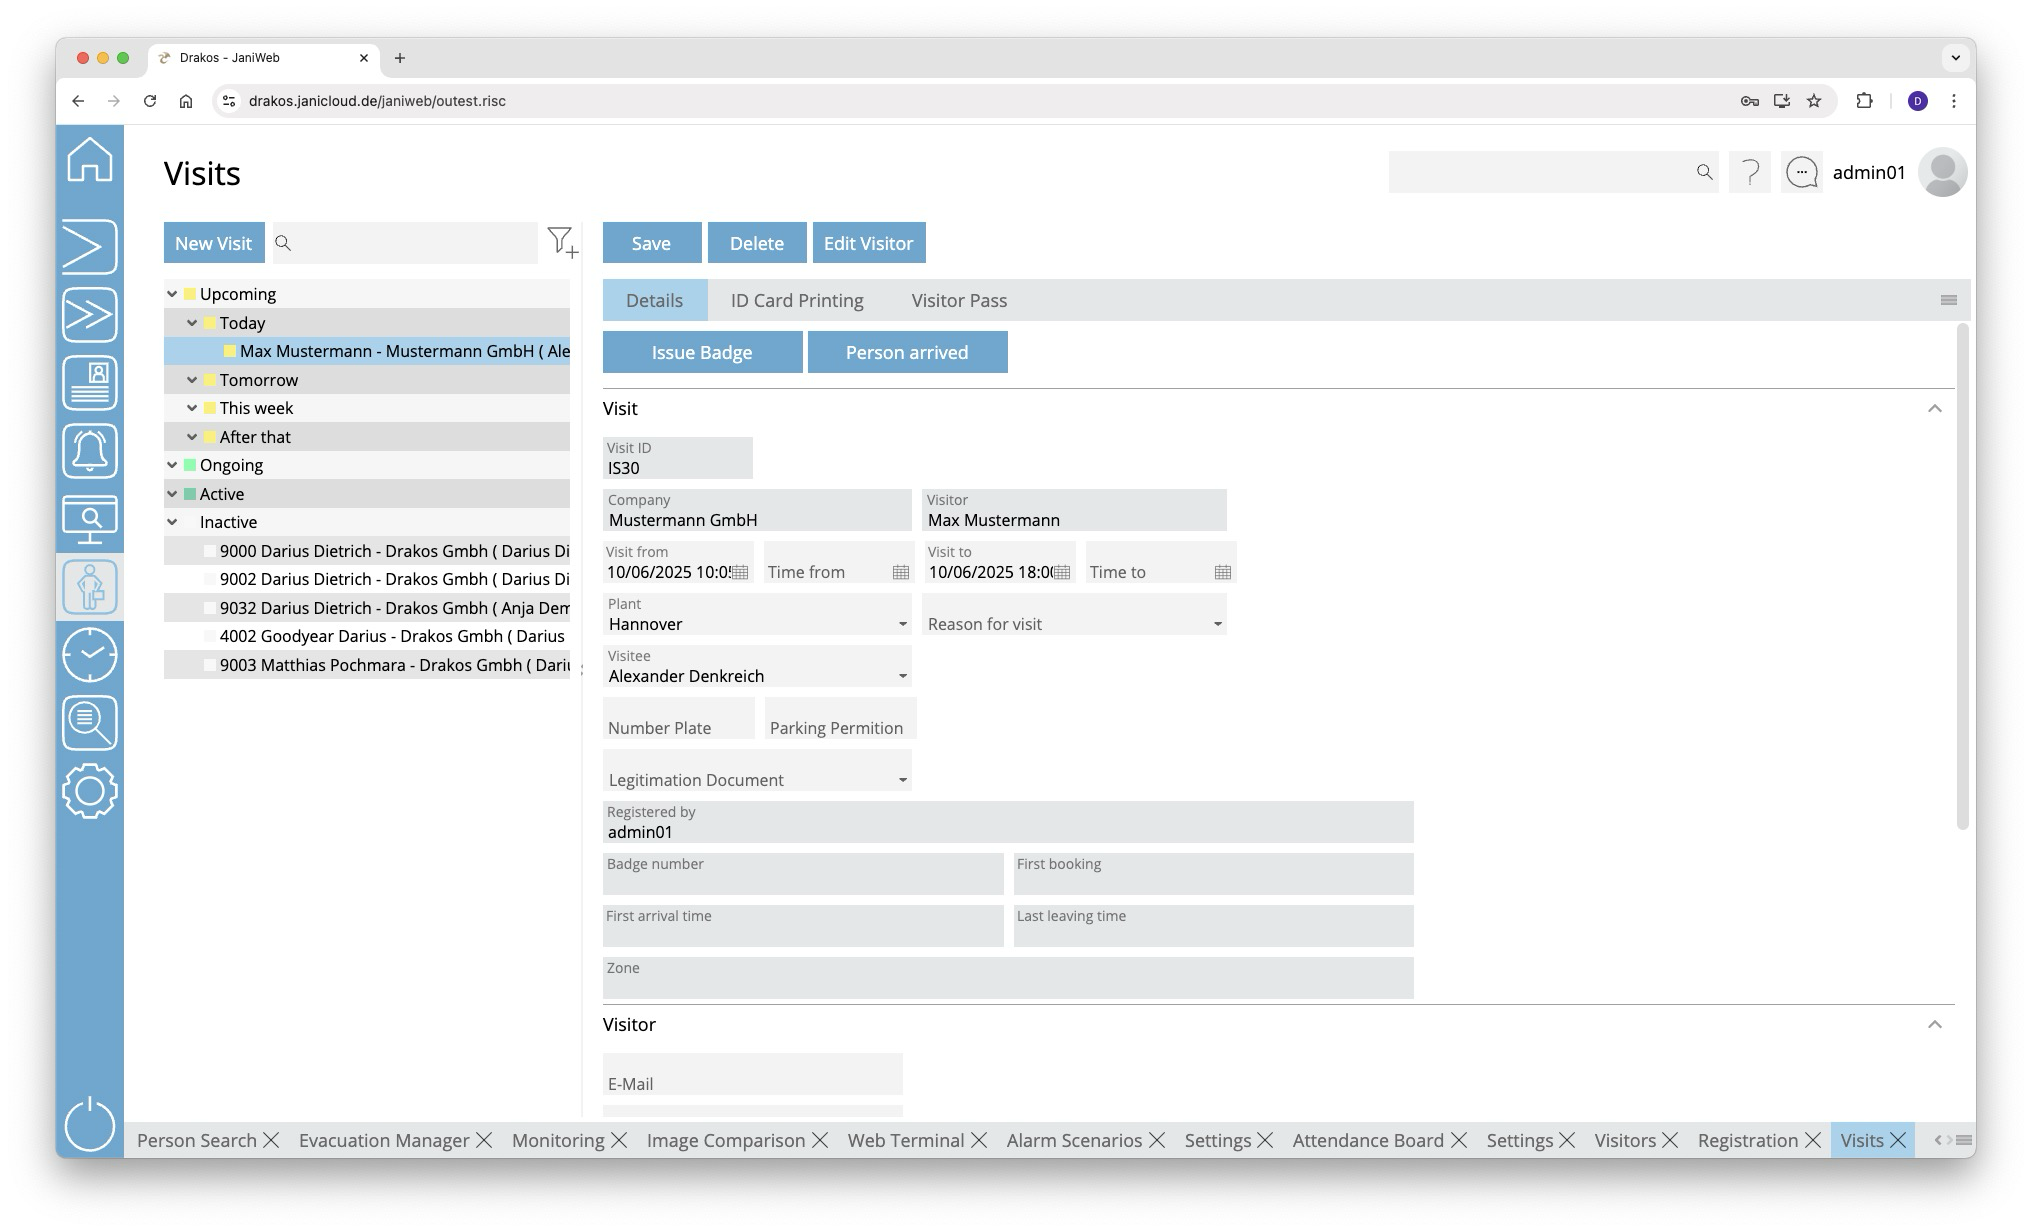
The menu item Visits provides you with a list of all registered visits, sorted by Upcoming, Ongoing, Active and Inactive. Here you can create, edit, start or end visits.
List of visits
Select a visit to display details. The list of visits can be filtered by the status and site of the visit. To do this, use the filter icon above the list.
Button New Visit
Press New Visit to create a new visit. Enter all the required information and press Save. The visit then appears under Upcoming.
Create visitor: If the person expected for the visit does not yet exist in the system, you can create them as a visitor here. To do this, press New Visitor.
Button Save
You can change the details of the selected visit. Press Save to save the changes.
Button Delete
You can delete visits listed under Upcoming at any time. To do this, press Delete. A confirmation dialog will appear.
Buttons Issue Badge and Person arrived
When the expected visit arrives, select it under Upcoming. Then carry out one of the following steps:
- Press Issue Badge to assign the visitor an Badge from a list. Badges highlighted in red are still in use, badges highlighted in green are ready to be issued.
- Press Person arrived to mark the visit as active without issuing an badge.
The visitor is now marked as Present.
Buttons Return Badge and Person left
To mark a visit as finished or absent, select it under Present. Then carry out one of the following steps:
- If an badge has been issued, press Return Badge.
- If no badge has been issued, press Person left.
The visit is now marked as Active. If necessary, you can mark active visits as Present again by pressing Person arrived/Issue Badge again. Visits remain Active until the day entered as the end of the visit has passed.
Inactive visits
Visits whose end date has already passed, but for which a badge has not yet been returned, appear as Inactive. Inactive visits can either be terminated or reactivated.
You can print a badge or visitor’s pass with the stored information at any time using the tabs Badge Printing or Visitor Pass.
Button Edit Visitor
TIPS
You can specify which fields are displayed for a visit via the menu item Settings for visitor management.
QR-Code
The menu item QR-Code allows you to create QR-Codes for use with FAAC barrier systems.
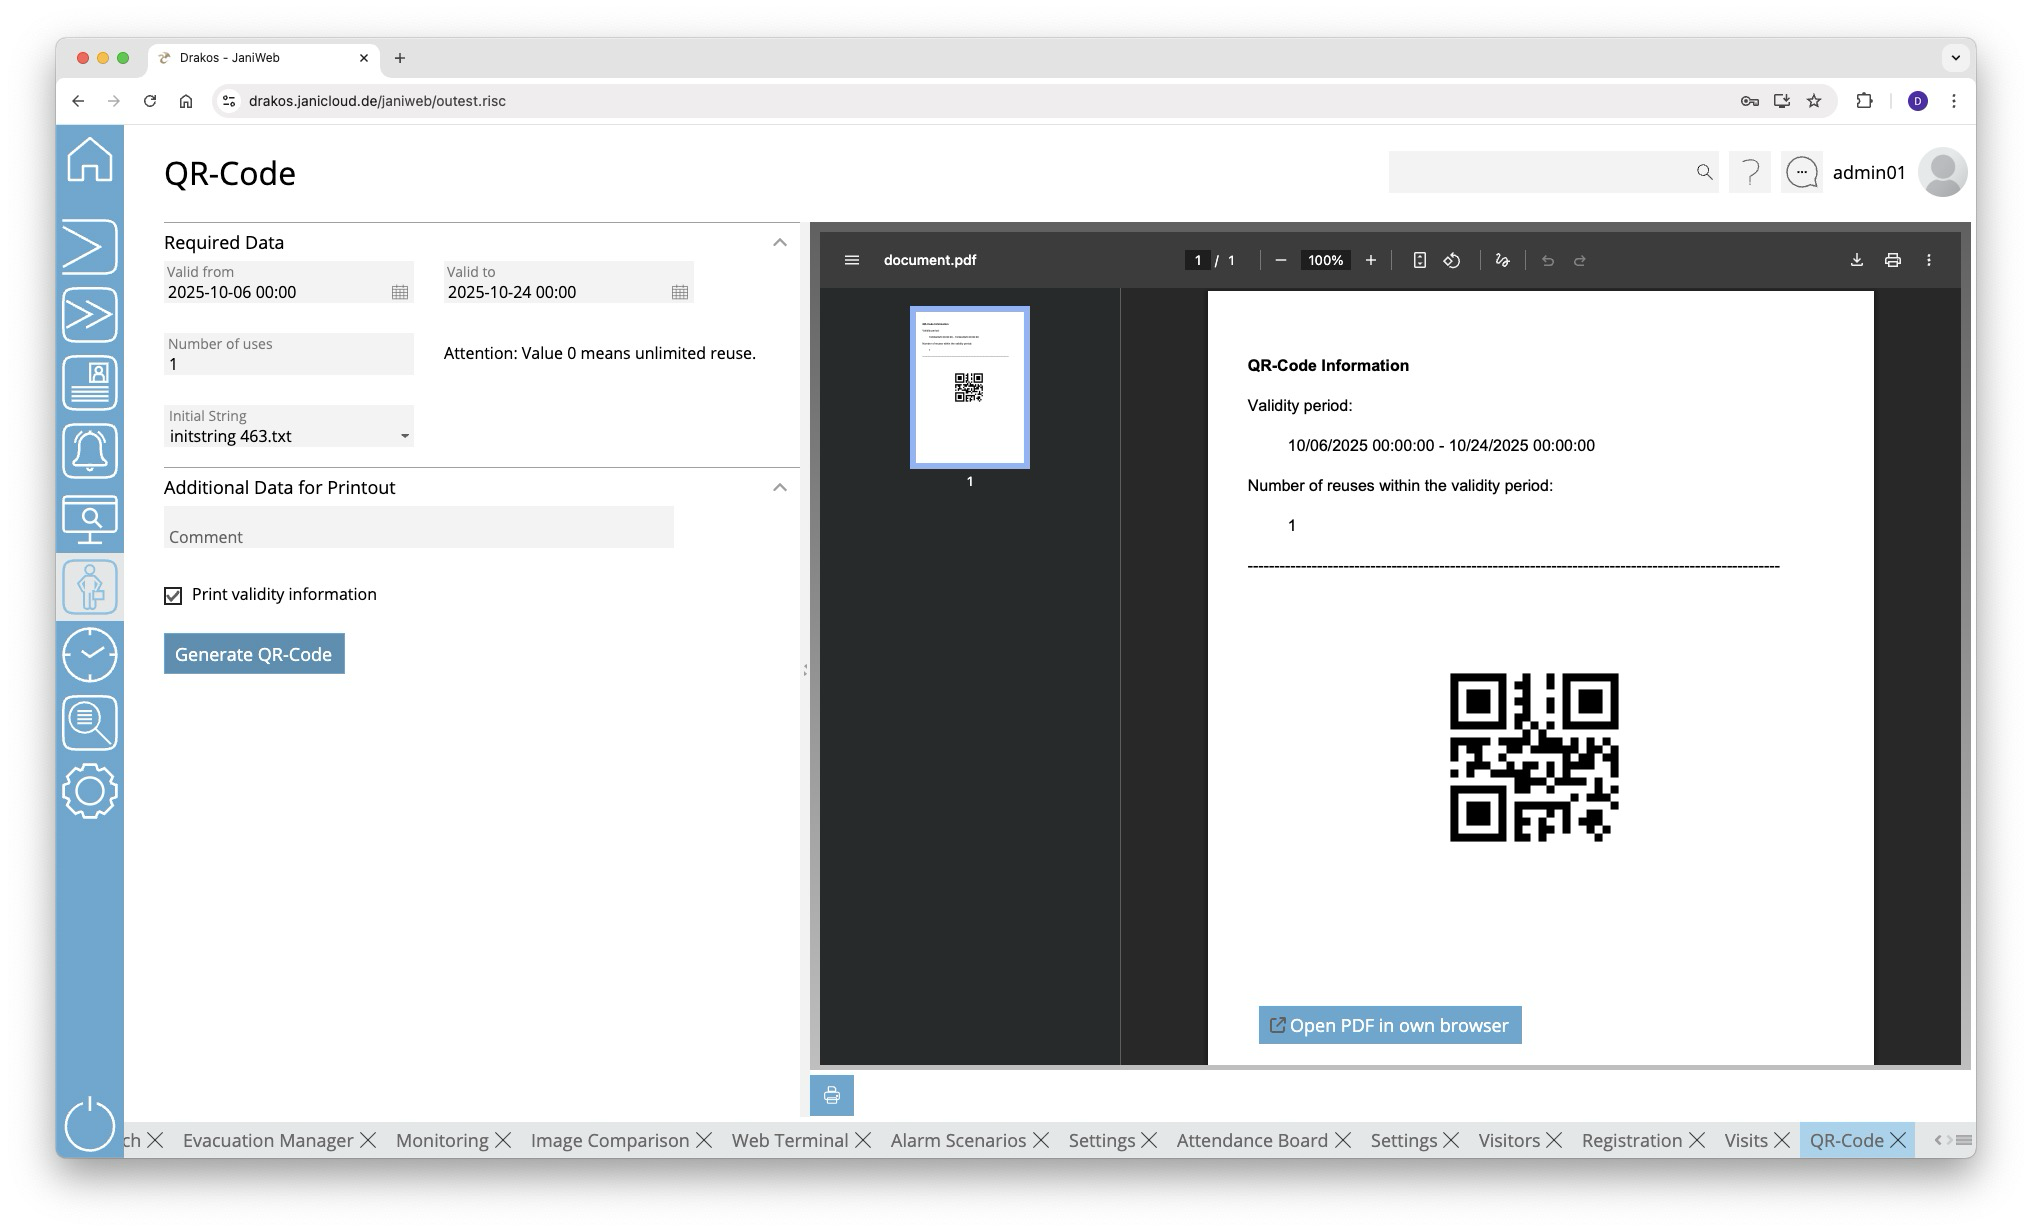
To create a QR-Code, follow these steps:
- Enter a period in the fields Valid from and Valid to during which the QR-Code should be valid.
- In the field Number of uses, enter the number of times the QR-Code can be used within the validity period.
- The field Initial String indicates for which barrier system the QR-Code is created. If there are several barrier systems, select the desired system.
- (Optional) In the area Additional Data for Printout, enter a comment to appear on the printout. Select Print validity information if you want the number of uses and the validity period to appear on the printout as well.
- Press Generate QR-Code to generate the document.
- Press Print to print the document.
TIPS
You can create additional barrier systems via the menu item Settings in the visitor management.
Settings
Use the menu item Settings to define the basic settings for visitor management. These include number ranges, visitor ID layouts and the fields to be displayed.
Button Save
Press Save to apply your changes.
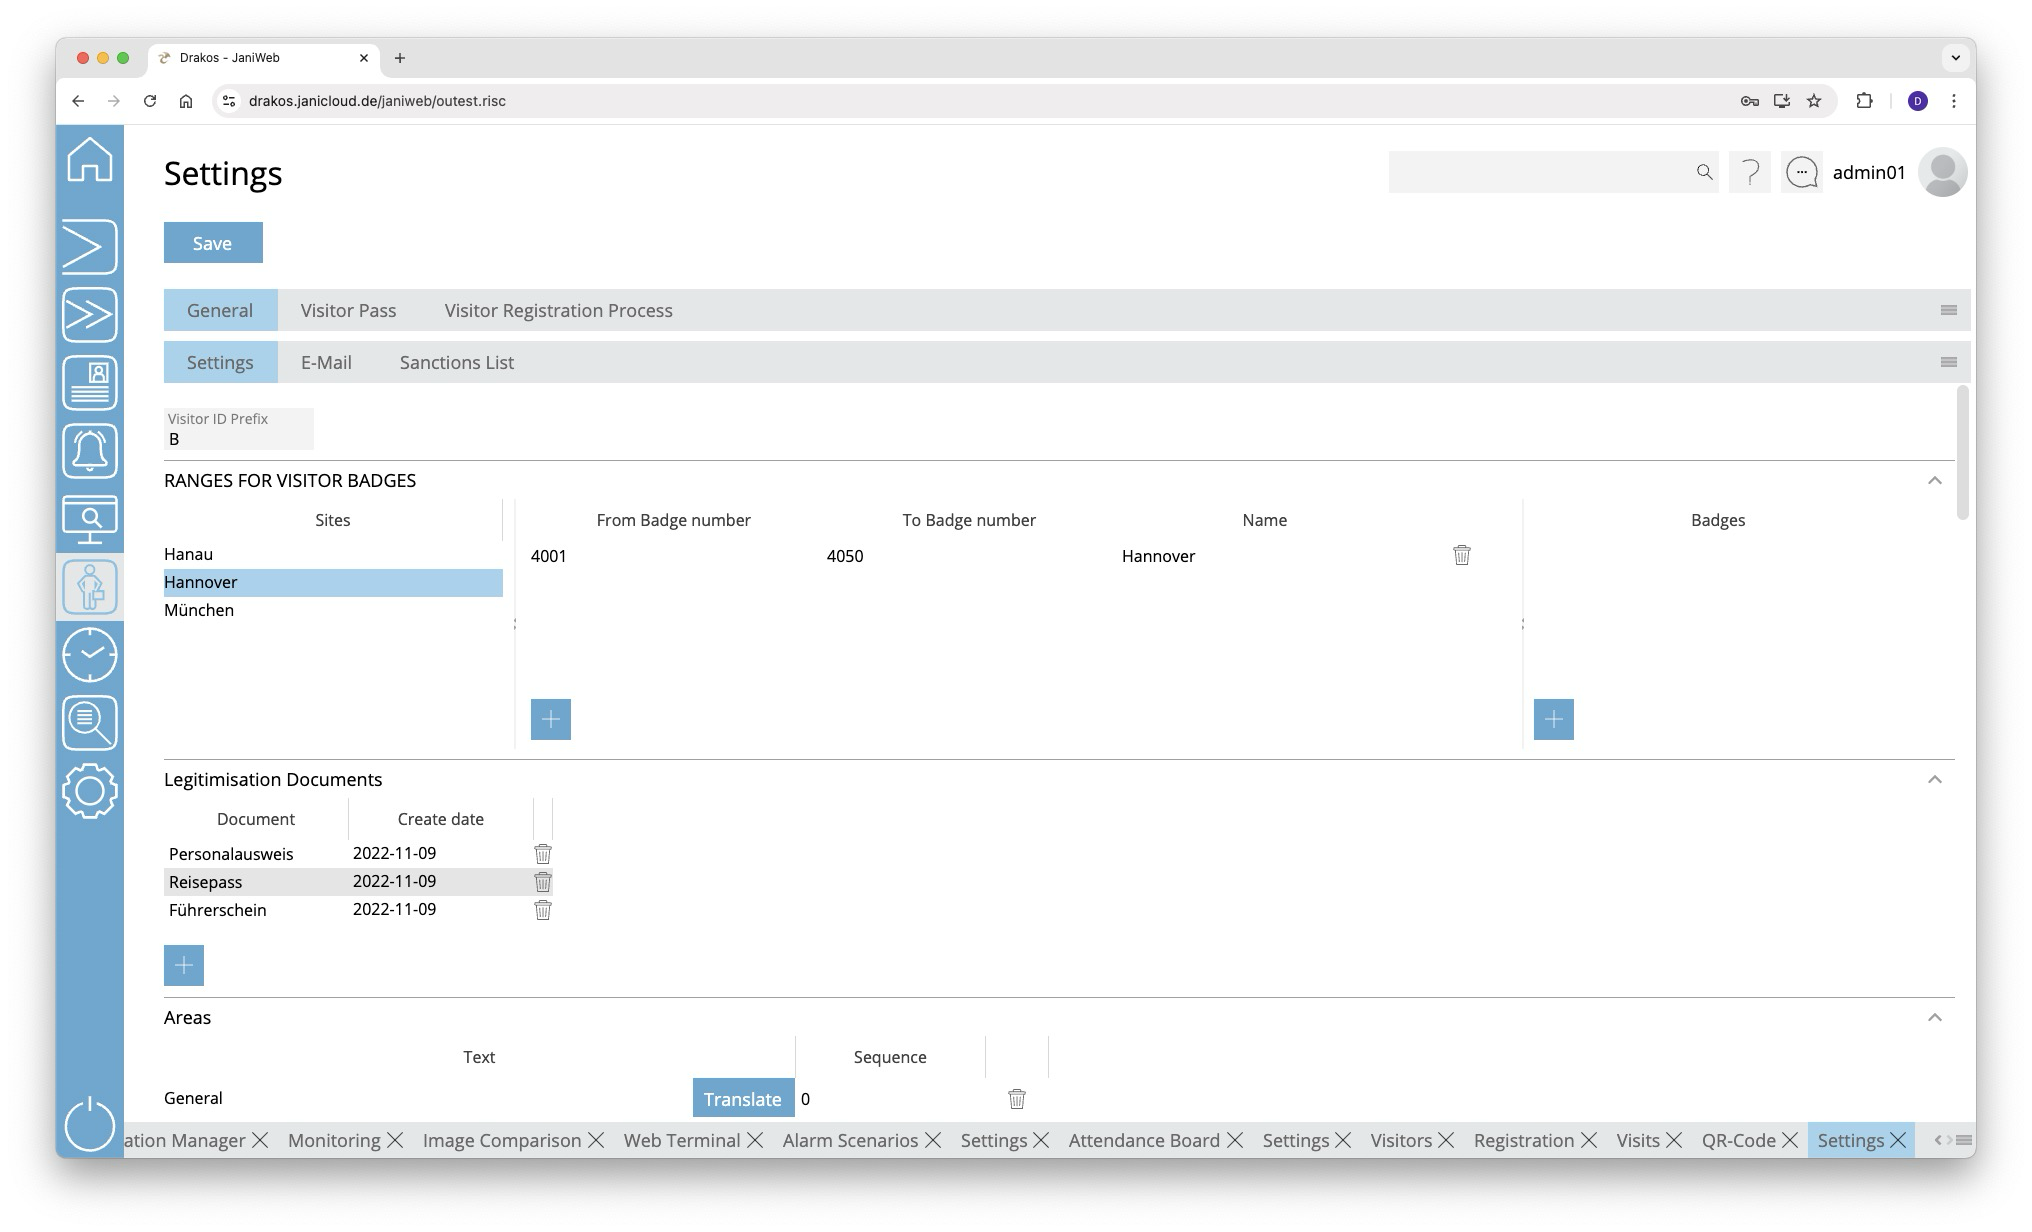
Tab General > Settings
In the field Visitor ID Prefix, define the prefix for visitor personnel numbers.
Area Ranges for Visitor Badges
Define the number ranges for visitor badges. Create a separate definition for each site. You can either specify a range (From badge number / To badges number) for all visitor badges or create individual numbers under Badges.
Area Legitimisation Documents
Define the documents that should be available for selection in the field Legitimisation Document for Visits.
Area Areas
Here you determine which areas appear in the menu item Visitors. When you select the visible fields for visitors (Fields Visitor), specify where the corresponding field is displayed by selecting one of the areas defined here.
To create a new area, perform the following steps:
- Press the plus icon (Add) to add a new entry.
- Press Translate.
- Enter the area description for the respective languages.
- Press Save.
Enter a number in the Order column to determine the order in which the areas are displayed.
When creating a new area, you must first save it before you can assign a field to it.
Area Fields Visitor
This is where you manage the fields for the menu item Visitors.
List field Site
You can define the visibility and positioning of the fields separately for each site. Select the site for which the settings in this area should apply.
The fields displayed to the user depend on the site assigned to the user. If no site is assigned to a user, the settings for the Default site are used. To assign sites to a user, use the Settings in the main menu, menu item Users.
Tab Static Fields
Specify which fields are visible (check box in the second column) and where they are positioned (Row, Column, Width).
To define the name for a field, press Translate. Enter the names for the respective languages and press Save.
In the column Registration, you can define whether the respective field also appears in the visitor Registration.
Tab Dynamic Fields
Here you can define up to 20 dynamic fields. For each dynamic field, specify whether it should be a list field (drop-down), a date field, a checkbox or a free text field.
To define the name for a field, press Translate. Enter the names for the respective languages and press Save.
Area Fields Visits/Registration
Here you manage the fields for the menu items Registration and Visits.
List field Site
You can define the visibility and positioning of the fields separately for each site. Select the site for which the settings in this area should apply.
The fields displayed to the user depend on the site assigned to the user. If no site is assigned to a user, the settings for the Default site are used. To assign sites to a user, use the Settings in the main menu, menu item Users.
Tab Static Fields
Specify which fields are visible (check box in the second column) and where they are positioned (Row, Column, Width).
To define the name for a field, press Translate. Enter the names for the respective languages and press Save.
In the column Mandatory, you can specify whether the entry in the respective field is mandatory.
Tab Dynamic Fields
Here you can define up to 20 dynamic fields. For each dynamic field, specify whether it should be a list field (drop-down), a date field, a checkbox or a free text field.
To define the name for a field, press Translate. Enter the names for the respective languages and press Save.
In the column Mandatory, you can specify whether the entry in the respective field is mandatory.
Button Copy Field Configuration
You can use this button to copy the field configuration from the currently selected site to another site. To do this, click the button and then select the site for which you want to copy the field configuration from the site drop-down menu. Confirm your selection with the Ok button.
Area Visible Buttons Visits
Use these options to specify which buttons should be visible in the Visits menu item.
- Signature: Activates/deactivates the button that starts the process of capturing a visitor’s signature on the signature pad.
- Issue Badge / Return Badge: Activates/deactivates the buttons for issuing and returning a badge. The issuing/returning of an badge also marks the visit as active/completed.
- Person arrived/Person left: Activates/deactivates the buttons for manually activating/ending a visit.
Area Fields Invite Visitors
This is where you manage the fields for the menu item Invite Visitors (only visible to users with employee login).
Tab Visitor
Tab Static Fields
Specify which fields are visible in the area Visitor (checkbox in the second column) and where they are positioned (Row, Column, Width).
Tab Dynamic Fields
Here you can define up to 20 dynamic fields. For each dynamic field, specify whether it should be a list field (drop-down), a date field, a checkbox or a free text field.
To define the name for a field, press Translate. Enter the names for the respective languages and press Save.
Tab Visit
Tab Static Fields
Specify which fields are visible in the area Visit (checkbox in the second column) and where they are positioned (Row, Column, Width).
Tab Dynamic Fields
Here you can define up to 20 dynamic fields. For each dynamic field, specify whether it should be a list field (drop-down), a date field, a checkbox or a free text field.
To define the name for a field, press Translate. Enter the names for the respective languages and press Save.
Button Copy Field Configuration
You can use this button to copy the field configuration from the currently selected site to another site. To do this, click the button and then select the site for which you want to copy the field configuration from the site drop-down menu. Confirm your selection with the Ok button.
Area QR-Code
This is where you manage the FAAC barrier systems that should be available for selection in the menu item QR-Code. To create a new barrier system, upload the corresponding init string into the system using the button Upload the initial string.
Area Additional Settings
This is where you define further settings for visitors.
- Enable sanctions list: Enables the sanctions list check.
- Enable badge number in Visits screen: Enables the badge number in the list of visits in the menu item Visits.
- Enable Visits by the hour: Enables to create visits by the hour.
- Sort option for visits: Choose whether to sort visits by first name or surname.
- Visitee additional Information: Select the additional information that should be available for the visitee.
- Validity Visitors (Days): Enter the standard validity in days for visitors that were created via registration or the menu item Invite Visitors.
- Validity Invitation Link (Days): Defines how long an invitation link is valid in days.
- Invitation Link: If the server running JaniWeb for external users is different from the one sending the invitations, the URL of the external server must be specified here.
- Enable Invitation: This setting activates the function that allows employees to send invitation links to visitors.
- Enable Visitor Groups: If this option is selected, it is possible to create visits for visitor groups.
- Search delay Visits (in milliseconds): Configures the delay with which the application will start the search after the last input into search field of Visits menu.
-
Visitor self-registration inactivity timeout (in seconds): Configures the timeout in seconds after which if the user does not interact with the visitor self-registration the application will lead to the language selection screen.
- Allow parallel visits: Allows the creation of a parallel visit for the same visitor.
Area Automatic Visit Status
Here, devices can be assigned to a specific event type. If a visitor makes a booking on such a device, the status of the associated visit is automatically set to Ongoing or Active.
The configuration can be made on a site-specific basis.
Tab General > E-Mail
This is where you manage the settings for sending E-Mails in visitor management.
List field Site
You can define the E-Mail settings separately for each site. Select the site for which the settings in this area should apply.
List of documents
The documents stored in this list are attached to the confirmation E-Mail when visitors register.
- Download icon: Downloads the corresponding document to your computer.
- Trash icon: Deletes the corresponding document from the system. A confirmation dialog will appear.
Button Upload Documents
Select one or more PDF or image files on your computer to add them to the list.
Button Remove All
Deletes all documents. A confirmation dialog will appear.
Checkbox Dynamic sender E-Mail
If this setting is activated, the visitor's e-mail address is used as the sender in the visitor management. Conversely, the visitor also receives the visitee's matching sender address.
Area E-Mail: Visitor Registration
- Inform visitor about registration: The visitor will receive a notification as soon as they have been registered for a visit.
- Inform visitee about registration: The person being visited will receive a notification as soon as a visit has been registered for them.
- Send ICS to Visitor. The visitor also receives the appointment as an E-Mail attachment in ICS format.
- Send ICS to Visitee. The visitee also receives the appointment as an E-Mail attachment in ICS format.
- E-Mail Layout Visitor / E-Mail Layout Visitee: This is where you define the content of the E-Mails to visitors and visitors using XML layouts. Select a language and use the buttons Upload new layout to upload a layout.
Examples of E-Mail layouts
Sample layouts for E-Mails in XML format:
- Visitor information: email_visitor_registration_visitor.xml
- Visitee information: email_visitor_registration_visitee.xml
Area E-Mail: Delete Visit
- Inform Visitor about Delete: The visitor receives a notification when the visit has been deleted.
- Inform Visitee about Delete: The person being visited receives a notification when the visit has been deleted.
- Visitor E-Mail Layout / Visitee E-Mail Layout: This is where you define the content of the E-Mails to visitors and visitors using XML layouts. Select a language and use the buttons Upload new layout to upload a layout.
Examples of E-Mail layouts
Sample layouts for E-Mails in XML format:
- E-mail about the deletion of the visit to the visitor: email_visitor_registration_visitor_delete.xml
- E-mail about the deletion of the visit to the visited: email_visitor_registration_visitee_delete.xml
Area E-Mail: Arrival Visitor
- Inform Visitor about arrival: The visitor will receive a notification as soon as they have been arrived.
- Inform Visitee about arrival: The person being visited will receive a notification as soon as a visit has been arrived.
- E-Mail Layout Visitor / E-Mail Layout Visitee: This is where you define the content of the E-Mails to visitors and visitors using XML layouts. Select a language and use the buttons Upload new layout to upload a layout.
Examples of E-Mail layouts
Sample layouts for E-Mails in XML format:
- Visitor information: email_visitor_registration_visitor.xml
- Visitee information: email_visitor_registration_visitee.xml
Area E-Mail: Invitation Visitor
- E-Mail Layout Visitor: Here you can define the content of the E-Mails sent to visitors using XML layouts when they are invited via the Invite Visitors menu. Select a language and use the buttons Upload new layout to upload a layout.
Examples of E-Mail layouts
Sample layouts for E-Mails in XML format:
- Visitor information: email_visitor_invitation.xml
Tab General > Sanctions List
You can activate the sanctions list check within visitor registration here. This checks whether the visitor created is on a sanctions list. Different information about the visitor can be checked for an entry on a sanctions list.
- Select the database table and the field containing the sanctions list.
- Select the visitor information to be checked against the sanctions list.
- To check for validity, activate the option Validity and select the table column for the validity check in the next field.
- Use the option Include List to select whether the check should fail if
- the information is on the sanctions list (check mark),
- the information is not on the sanctions list (no check mark).
- the information is on the sanctions list (check mark),
The sanctions list check is displayed in visitor registration if it is activated in the Additional Settings.
Use the Enable sanctions list via API setting to activate sanctions list checking via the dbh interface. Then configure the following values in the API area:
- URL: Endpoint to be called for sanctions list checking.
- Request name: Name of the request.
- Client: Client via which the request is made.
- Username: User name used for authentication at the endpoint.
- Password: Password used for authentication at the endpoint.
- Visitor field: Field of the created visitor master records that is compared with a field in the sanctions lists.
- API field: Field in the sanctions list against which the visitor information is compared.
In the Cyclical Sanctions List Check section, you can define which person groups should be automatically and regularly screened against the sanctions lists. In addition, the results of these checks can be automatically sent to specified recipients via email.
Tab Visitor Pass
Here you can manage different layouts for printing visitor passes. Select an entry in the list to display or change details.
To upload a new layout:
- Press New.
- Enter a description and select the site for which the layout should be used.
(Only layouts for the visit location are displayed in the menu item Visits.) - Press Upload new layout to upload an XML layout.
- Press Upload new logo to upload an image file with a logo.
- Press Save to apply the settings.
- Set Signature Pad Text: If a signature is required for visitor registration, press this button to set the text that appears on the signature pad in the respective language.
- Send PDF to visitee and Send PDF to visitor: Use this to specify whether the issued visitor pass, including signature, is to be sent to the visitor or to the attended in PDF format by E-Mail.
- Save PDF in database: Use this to specify whether issued visitor passes are to be saved in PDF format in the database.
You can find a sample layout for a visitor pass here: SampleVisitorPassLayout.xml
TIPS
To create the layout, get in touch with your contact person.
Tab Visitor Registration Process
Use modules in this area to define the processes for visitor registration and for visitor check-in and check-out, independently for each site.
Tab Registration
Registration allows your visitors to register independently at the reception. A visitor master record and a visit are created. On this tab, modules are used to define the registration process. Different processes can be specified for visitors and external companies.
- Inserting modules: Drag the required modules in the desired order to the area of the relevant location or press the button with the + to select the corresponding module in the following dialog.
- Reordering modules: Drag the modules to the desired position.
- Editing modules: Use the edit icon to specify details such as the fields to be displayed for the respective module.
- Removing modules: Use the trash icon to remove a module from the process.
Once you have configured a process, you can jump directly to the process via the Open process link. This will then open in a new tab.
Overview of the modules
Language selection
This module displays a dialog for the visitor at the start of the registration process, where they can select the language of the user interface. To activate other languages in addition to German and English:
- Press Upload in the Flag column and upload a suitable image.
- Activate the language in the column Active.
- The Welcome text column allows you to display a text to visitors when welcoming them to the self-service.
- Press Save.
Visitor data
This module displays the input fields for visitor information. Select which fields are displayed and where they are positioned (Row, Column, Width). You must also specify the client with which the visitor master records are to be created. Use the Mandatory column to define whether the field must be filled in.
- Tab Dynamic Fields: Here you can define up to 20 dynamic fields. For each dynamic field, specify whether it should be a list field (drop-down), a date field, a checkbox or a free text field.
- Tab Dynamic Fields - Visits: Specify here which fields should be displayed that are directly linked to the visit. To define the name for a field, press Translate. Enter the names for the respective languages and press Save.
PDF View
This module displays a PDF to the visitor. Select a language and press Upload new PDF to upload a PDF for that language.
- Send PDF to visitee / Send PDF to visitor: Use this option to specify whether the PDF should be sent by E-Mail to the visitor and/or to the person visited at the end of the process.
- Save PDF in database: Use this option to specify whether the PDF should be linked directly to the visitor master record.
Signature
This module prompts the visitor to sign. Press Set Signature Pad Text to define the text to be displayed in addition to the signature field for the respective language. Activate the option Use external signature pad if an external signature pad is connected. Leave the option disabled if the visitor is to use the mouse or the touchpad or touchscreen for the signature.
Print visitor pass
This module prints a visitor pass. To upload a PDF layout for the respective language, select the language and press Upload new layout.
- Send PDF to visitee and Send PDF to visitor: Specify whether the issued visitor pass is sent by E-Mail to the visitor or to the person visited in PDF format.
- Save PDF in database: Specify whether the visitor pass is linked to the visitor master record.
You can find a sample layout for a visitor pass here: SampleVisitorPassLayout.xml
XML View
This module displays a PDF with the information that the visitor has entered (e.g. name, E-Mail address). To upload a PDF layout for the respective language, select the language and press Upload new layout.
- Send PDF to visitee and Send PDF to visitor: Use this option to specify whether the PDF should be sent by email to the visitor and/or to the person visited.
- Save PDF in database: Use this option to specify whether the PDF should be linked to the visitor master record.
- Not visible: Specify whether the created PDF is displayed in the registration process.
- Accept: Specify whether the visitor must confirm the information in the displayed PDF.
You can find a sample layout in XML format here: SampleVisitorPassLayout.xml
End
This module displays a final text and sets the visit to either “Upcoming” or “Present”.
- Generate QR-Code: Use this option to specify whether a QR-Code should be generated for the visit.
- Upcoming/ Present: Select the status for the visit.
- Message display duration (seconds): Use this option to specify how long the text should be displayed. Enter a whole number.
- Translate: Press this button to set the text that will be displayed in the respective language at the end of the registration process.
Use this module to specify the subject line and layout for the E-Mails that are to be sent to the attended and visiting party at the end of the registration process.
- Press E-Mail Subject Visitor / E-Mail Subject Visitee, and enter the text that should be used as the subject for the E-Mail in the respective language.
- Press E-Mail Layout Visitor / E-Mail Layout Visitee, select a language and press Upload new layout to upload an E-Mail layout for this language.
Sample layouts for E-Mails in XML format:
- Visitor information: email_visitor_registration_visitor.xml
- Visitee information: email_visitor_registration_visitee.xml
CI
This module allows you to customise the appearance of the visitor self-registration to match your company's CI.
You can use the Upload Logo button to display your own logo within the visitor self-registration. This appears in the process in the top right-hand corner.
The Upload Background Image button allows you to upload a background image, which is displayed in the language selection, registration selection, check-in or check-out steps and at the end of the process.
Use the Background Color field to determine the background color of the pages displayed in the process.
Use the Top Bar Color field to determine the color of the top bar.
Use the Set Title button to define the title that is displayed in the process within the top bar.
Visitor Type
The registration process can be defined separately for visitors or external companies. This module loads the process for a visitor or an external company.
Restriction Visitees
This module restricts the selectable visitees displayed in the module Visitor Data . The restriction is based on person groups.
To create a new person group:
- Press Add.
- Enter a name and a validity period for the person group.
- Press Add criteria.
- Select the required criterion from the list field.
- In the field From, select a single value or use both fields to specify a range. You can also specify multiple values for the same criterion (Add value).
- (Optional) Add another criterion with value(s).
Logic of criteria and values
- The values of a criterion are linked logically by OR (one match is sufficient).
- Criteria are linked logically by AND (all criteria must be met).
Site
This module allows selection of the location for which the visitor registers. Define which sites should be available for selection during registration.
Access visitor registration using the following URL: https://{server}/janiweb/visit
Quiz
This module allows you to integrate a quiz into the process.
Tab Check-in
The check-in is used by visitors who are already registered in the system and for whom a planned visit exists. Upon arrival, the visitor activates their visit by scanning a QR-Code.
Use modules on this tab to define the check-in process. Different processes can be specified for visitors and external companies.
- Inserting modules: Drag the required modules in the desired order to the area of the relevant location or press the button with the + to select the corresponding module in the following dialog.
- Reordering modules: Drag the modules to the desired position.
- Editing modules: Use the edit icon to specify details such as the fields to be displayed for the respective module.
- Removing modules: Use the trash icon to remove a module from the process.
Once you have configured a process, you can jump directly to the process via the Open process link. This will then open in a new tab.
Overview of the modules
Visitor data
This module displays the input fields for visitor information. Select which fields are displayed and where they are positioned (Row, Column, Width). You must also specify the client with which the visitor master records are to be created. Use the Mandatory column to define whether the field must be filled in.
- Tab Dynamic Fields: Here you can define up to 20 dynamic fields. For each dynamic field, specify whether it should be a list field (drop-down), a date field, a checkbox or a free text field.
- Tab Dynamic Fields - Visits: Specify here which fields should be displayed that are directly linked to the visit. To define the name for a field, press Translate. Enter the names for the respective languages and press Save.
Signature
This module prompts the visitor to sign. Press Set Signature Pad Text to define the text to be displayed in addition to the signature field for the respective language.Activate the option Use external signature pad if an external signature pad is connected. Leave the option disabled if the visitor is to use the mouse or the touchpad or touchscreen for the signature.
XML View
This module displays a PDF with the information that the visitor has entered (e.g. name, E-Mail address). To upload a PDF layout for the respective language, select the language and press Upload new layout.
- Send PDF to visitee and Send PDF to visitor: Use this option to specify whether the PDF should be sent by E-Mail to the visitor and/or to the person visited.
- Save PDF in database: Use this option to specify whether the PDF should be linked to the visitor master record.
- Not visible: Specify whether the created PDF is displayed in the registration process.
- Accept: Specify whether the visitor must confirm the information in the displayed PDF.
You can find a sample layout in XML format here: SampleVisitorPassLayout.xml
Use this module to specify the subject line and layout for the E-Mails that are to be sent to the attended and visiting party at the end of the process.
- Press E-Mail Subject Visitor / E-Mail Subject Visitee, and enter the text that should be used as the subject for the E-Mail in the respective language.
- Press E-Mail Layout Visitor / E-Mail Layout Visitee, select a language and press Upload new layout to upload an E-Mail layout for this language.
Sample layouts for E-Mails in XML format:
- Visitor information: email_visitor_registration_visitor.xml
- Visitee information: email_visitor_registration_visitee.xml
PDF View
This module displays a PDF to the visitor. Select a language and press Upload new PDF to upload a PDF for that language.
- Send PDF to visitee and Send PDF to visitor: Use this option to specify whether the PDF should be sent by E-Mail to the visitor and/or to the person visited at the end of the process.
- Save PDF in database: Use this option to specify whether the PDF should be linked directly to the visitor master record.
Print visitor pass
This module prints a visitor pass. To upload a PDF layout for the respective language, select the language and press Upload new layout.
- Send PDF to visitee and Send PDF to visitor: Specify whether the issued visitor pass is sent by E-Mail to the visitor or to the person visited in PDF format.
- Save PDF in database: Specify whether the visitor pass is linked to the visitor master record.
You can find a sample layout for a visitor pass here: SampleVisitorPassLayout.xml
Visitor Type
The registration process can be defined separately for visitors or external companies. This module loads the process for a visitor or an external company.
Quiz
This module allows you to integrate a quiz into the process.
End
This module displays a final text and sets the visit to either “Upcoming” or “Present”.
- Generate QR-Code: Use this option to specify whether a QR-Code should be generated for the visit.
- Upcoming/ Present: Select the status for the visit.
- Message display duration (seconds): Use this option to specify how long the text should be displayed. Enter a whole number.
- Translate: Press this button to set the text that will be displayed in the respective language at the end of the registration process.
Access visitor registration using the following URL: https://{server}/janiweb/visit
Tab Check-out
Check-out is used by visitors who are already registered in the system and who have an active visit. Upon departure, the visitor checks out by scanning their QR-Code.
Drag the module Self-Checkout to the area of the respective site. Use the edit icon to set a farewell text and the display duration in seconds.
Access visitor registration using the following URL: https://{server}/janiweb/visit
Once you have configured a process, you can jump directly to the process via the Open process link. This will then open in a new tab.
Tab Visitor Types
You have the option of creating different visitor types, which you can use to configure different processes for egistration, check-in and check-out for each visitor type. By default, there are the visitor types Visitor and Contractor.
To add a new visitor type, use the Add button. Then set the name for the visitor type using the Translate button. Use the option in the Default column to define the visitor type as which new visitors are created in the standard system. You can delete a visitor type again using the bin icon.
Invite Visitors
You can create a new visitor via the menu item Invite visitor and register directly for a visit.
This menu item is only available if you have logged in as an employee. This menu item is not available if you are logged in as an admin.
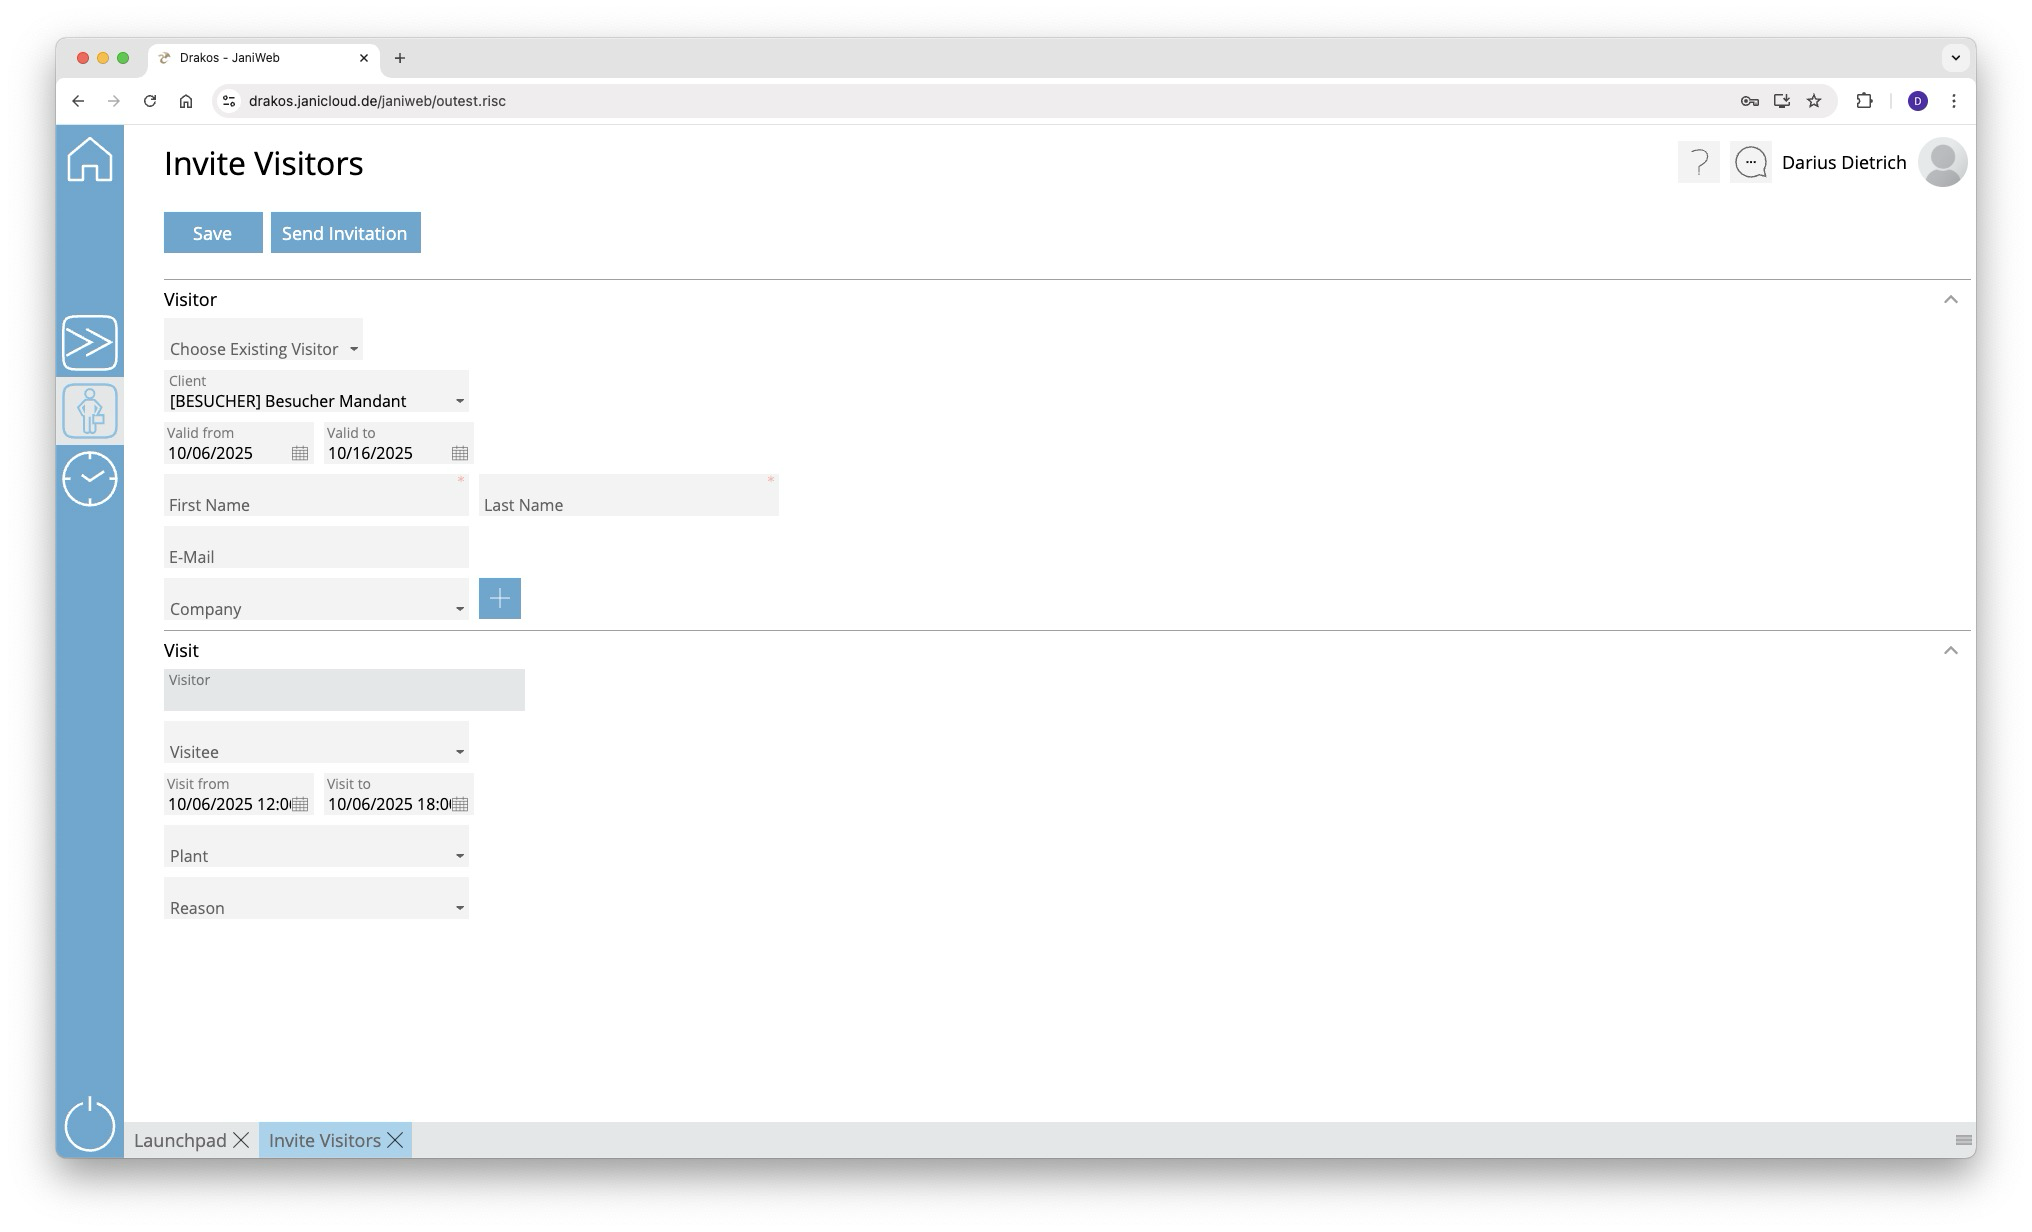
Area Visitor
Here you can create visitors or change information for an existing visitor.
New Visitor
If you would like to create a new visitor, enter the required information for the visitor in the Visitor area and click on Save.
Existing Visitor
If you would like to use an existing visitor, select it in the Choose existing Visitor dropdown. You now have the option to edit the information for the visitor.
Register Visitor Groups
The Add Visitor Group button allows you to register a visitor group for a visit. After clicking the button, a window opens for creating the visitor group.
You can add existing visitors to the visitor group using the drop-down menu in the Choose Existing Visitor column. Alternatively, you can enter information for a new visitor in the First Name, Last Name, E-Mail and Company columns.
Use the Import as CSV button to import a visitor group from a CSV file. The structure of this CSV file can be found here.
You can remove existing entries from the visitor group using the Bin-Button.
Finish editing the visitor group by clicking the Save button.
Area Visit
Enter the information for the visit here. Confirm your entries with Save.
Button Save
You can change the details of the selected visitor and create the information for the visit. Press Save to save the changes.
Button Send Invitation
You have the option of sending the visitor an invitation by E-Mail. This invitation gives the visitor the opportunity to register themselves. The process for visitor self-registration of the respective site is used for this.