
Settings
You can use the Settings menu option to make various settings (number ranges for replacement ID cards, fields for persons) for access management.
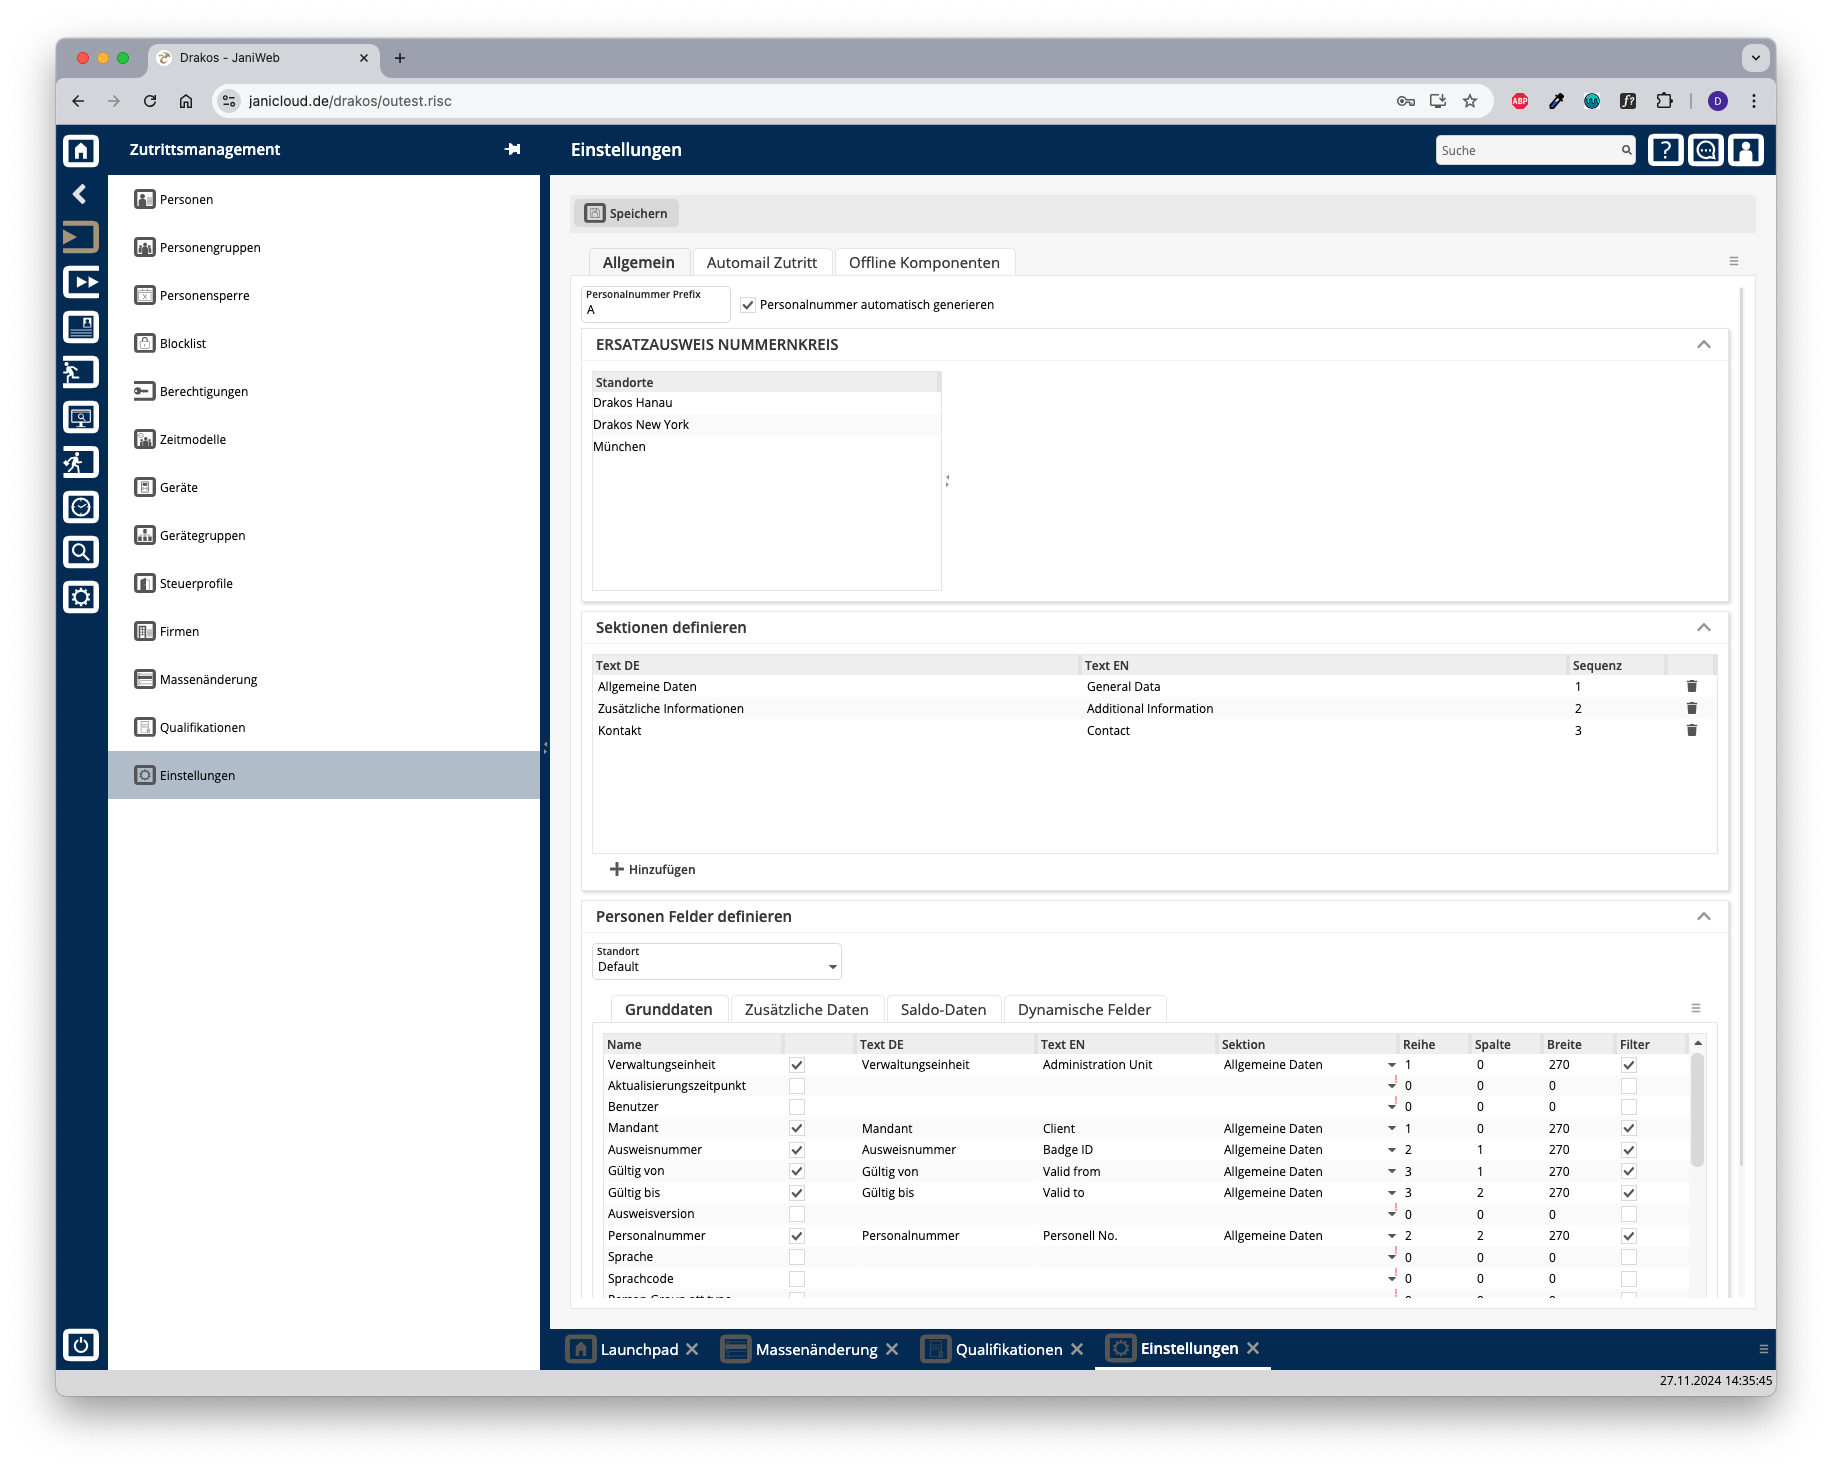
Button Save
Press Save to apply your changes.
Tab General
Here you determine whether personnel numbers should be created manually or automatically assigned by the system.
- Prefix Personnel Number: Enter a letter that is added as a prefix to the personnel number for automatically generated personnel master records.
- Auto generate personnel number: Select this option if you want the system to automatically assign personnel numbers when personnel master records are created.
Area Number Range for Replacement Cards
Here you define number ranges for issuing replacement ID cards. Create a separate definition for each plant.site. You can either specify a range (From card number / To card number) for all replacement cards or create individual numbers under ID Cards.
Area Areas
Here you determine which areas appear in the Persons menu item. When you select the visible fields for persons (Fields for Persons), you determine where the corresponding field is displayed by selecting one of the areas defined here.
To create a new area, perform the following steps:
- Press the plus icon (Add) to add a new entry.
- Press Translate.
- Enter the area description for the respective languages.
- Press Save.
Enter a number in the Order column to determine the order in which the areas are displayed.
When creating a new area, you must first save it before you can assign a field to it.
Area Fields for Persons
This is where you manage the fields for the Persons menu item.
List field PlantSite
You can define the visibility and positioning of the fields separately for each plant.site. Select the plantsite for which the settings in this area should apply.
The fields displayed to the user depend on the plantsite assigned to the user. If no plantsite is assigned to a user, the settings for the Default plantsite are used. To assign plantssites to a user, use the Settings in the main menu, menu item Users.
Tabs General Data / Additional Data / Balances
Specify which fields are visible (check box in the second column) and where they are positioned (Row, Column, Width).
To define the name for a field, press Translate. Enter the names for the respective languages and press Save.
In the Filter column, you can determine whether this field should be searchable in the list of persons.
Tab Dynamic Fields
Here you can define up to 20 dynamic fields. For each dynamic field, specify whether it should be a list field (drop-down), a date field, a checkbox or a free text field.
To define the name for a field, press Translate. Enter the names for the respective languages and press Save.
Area Disable Editing XML Fields
Use the Disabled option to prevent users from changing field contents when printing ID cards, for example. When selected, the information from the master record is always used.
Tab Automail Access
Here you can define combinations of persons/person groups and devices/device groups that you want to be informed about by E-Mail as soon as they are assigned as permission by a user.
- Press Add to create a new entry.
- Select a person group or person.
- Select a device group or device.
- Enter the E-Mail address for the notification.
- Press Save.
Tab Offline Devices
This is where you define all settings for offline sites and their components (Cardlink, Pegasys and OSS).
Tab Offline Sites
Create the offline sites required for your offline components here. To assign components to sites, use the menu item Devices.
List of offline sites
The list contains all the offline sites that have already been created. Select an entry to view details.
Button New
Press New to create a new offline site. Enter the required information and press Save to confirm. You can now assign offline components to the offline site using the menu item Devices.
Button Delete
Click Delete to delete the selected offline site. A confirmation dialog will appear.
Tab General Data
Enter the required information for the selected offline site.
Area Cardlink, Area OSS
Specify the data for the relevant offline type.
Area Update Devices (OSS components only)
Add devices that should serve as update devices for the OSS offline site. People can use these devices to load their current permissions for OSS components on their ID cards.
Area Master Media (Cardlink components only)
Master media are used to configure Cardlink components so that they read cards correctly.
Tab Cardlink Settings
Use the numbered fields to define different validation periods for Cardlink components. Use one of the following formats:
- Days: P[number of days]D (example: P7D for seven days)
- Hours: PT[number of hours]H (example: PT1H for one hour)
- Fixed time: HH:MM:SS (example: 12:00:00 for daily at 12 o’clock)
The validation duration 0 is set to forever and cannot be changed.
Other fields:
- Default validation duration: Define which validation duration should be used by default. Enter the number of the corresponding period (0–7).
- Validation priority: Enter the priority of the validation periods here (from highest to lowest priority, separated by commas).