
Time Models
Use this menu item to manage time models for access permissions. By linking a time model to a device group or a single device, you determine the times at which they may be used.
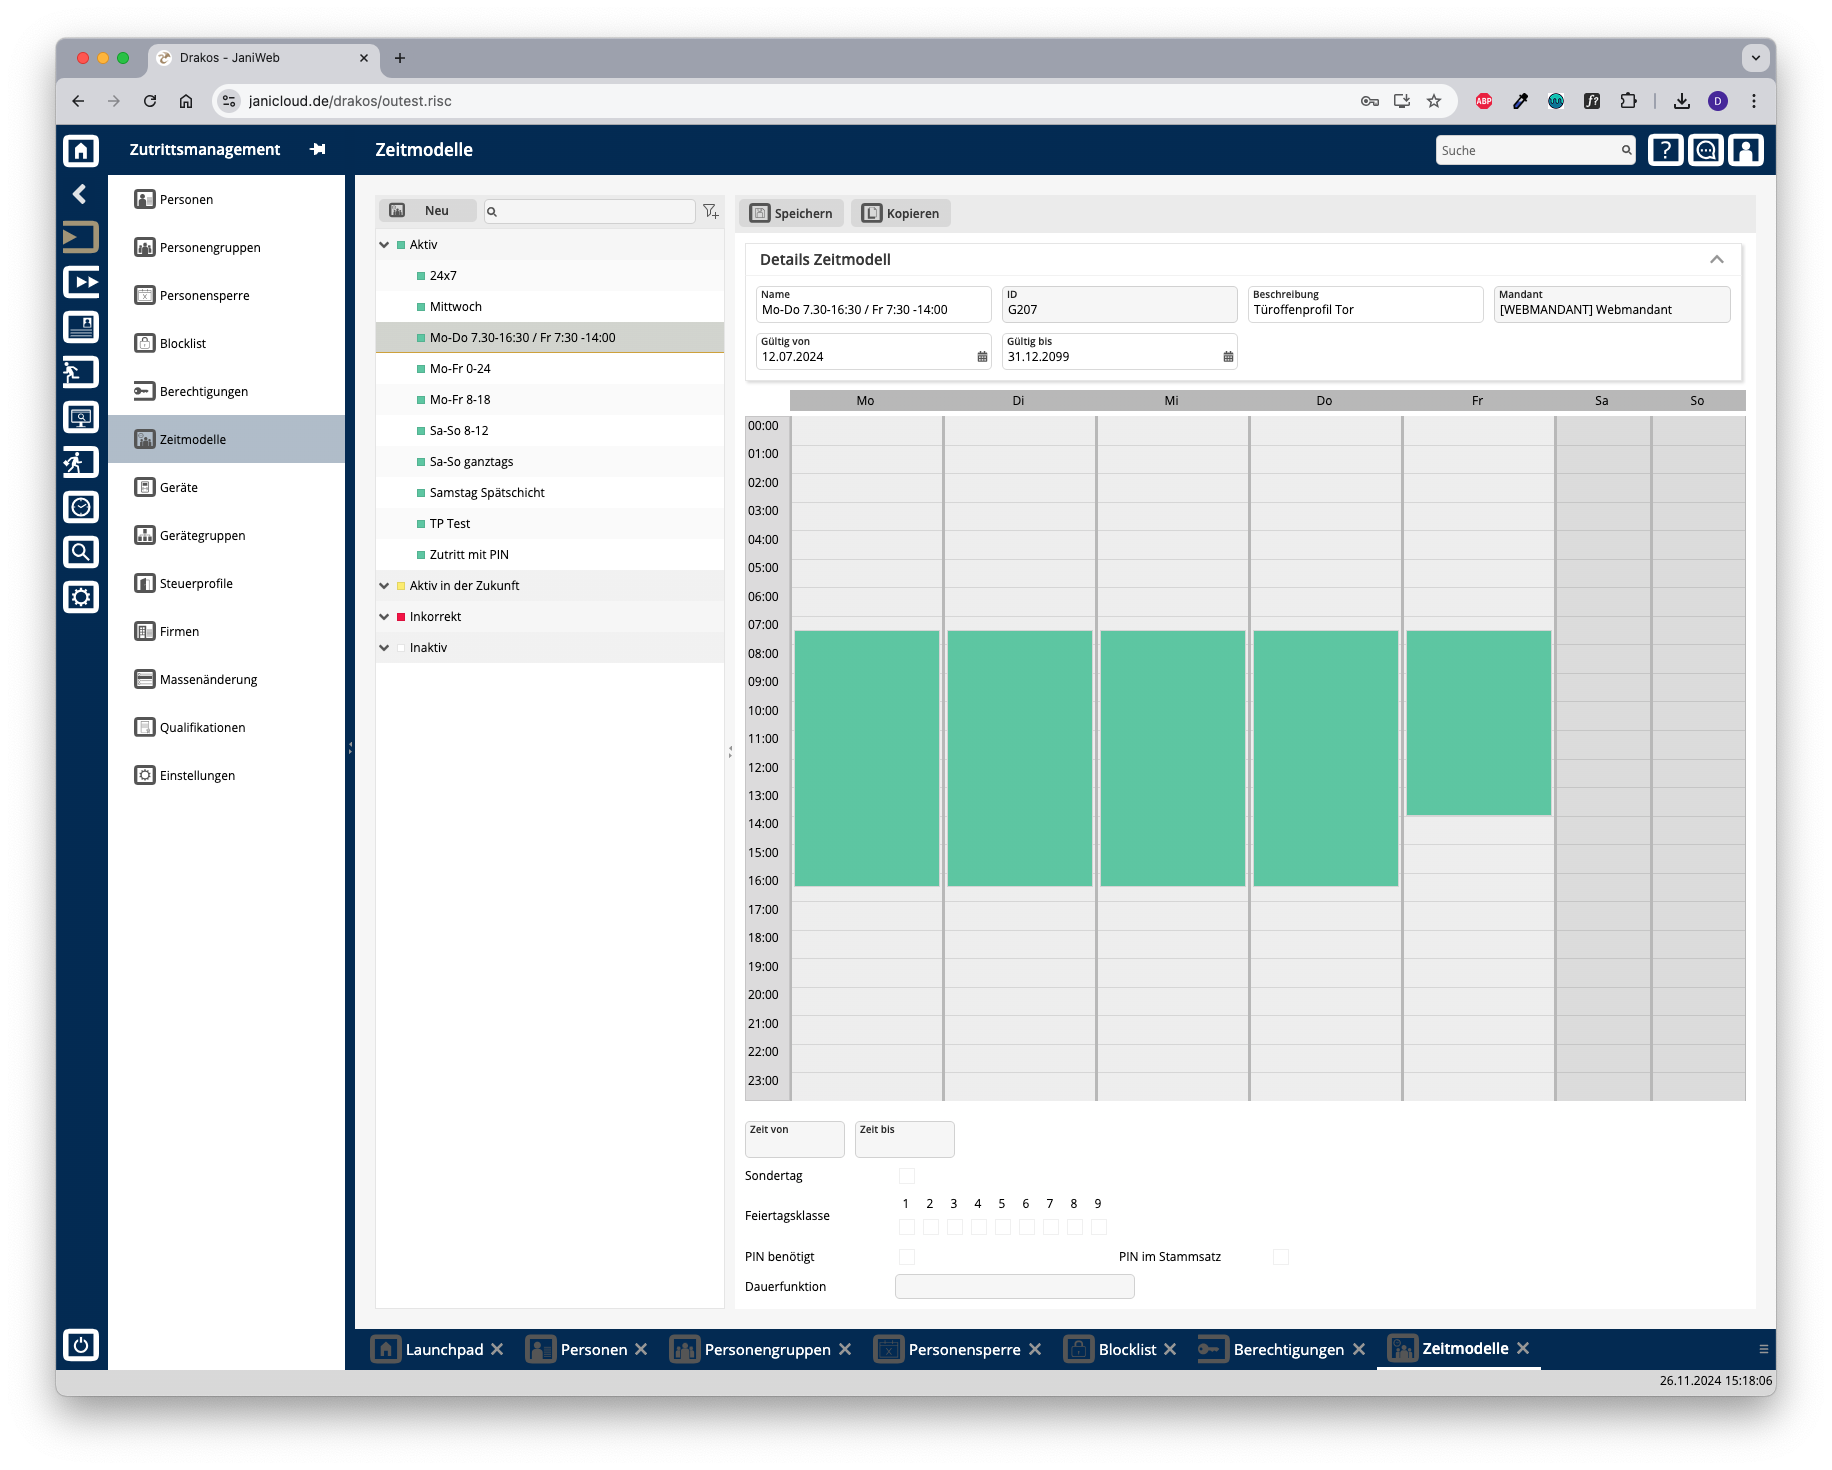
List of time models
The list contains the time models that have already been created. Select a time model to display its properties.
Button New
Press New to create a new time model.
- Entering basic data: Enter a description, select the client and define the validity period.
-
Editing the weekly overview: To define the periods during the week when access should be allowed, proceed as follows:
-
Right-click on the desired day and select New time period. A green marker appears.
-
Drag the marker with the mouse or enter the start and end times in the From time and To time fields.
-
Repeat the steps for all other periods and days that should be included in this time model.
-
- Specify access options:
- Holiday Classes: This is where you determine the bank holidays on which access should be allowed.
- PIN required: Select whether access should only be possible with a PIN.
- PIN in master record: Select whether the PIN should be transmitted together with the master record.
- Save: Press Save to save your entries.
Button Copy
You can copy an existing time model to use as a basis for a new time model. Click Copy at the top to make the desired changes. Then click Save.
TIPS
It is possible to create multiple time periods per day.
- Delete a time period: To remove a time period, right-click it and select Delete.
- Copying a period: To copy a period to the clipboard, right-click on it and select Copy.
- Inserting a period: To insert a copied period on a different day of the week, right-click on the desired day and select Paste.